

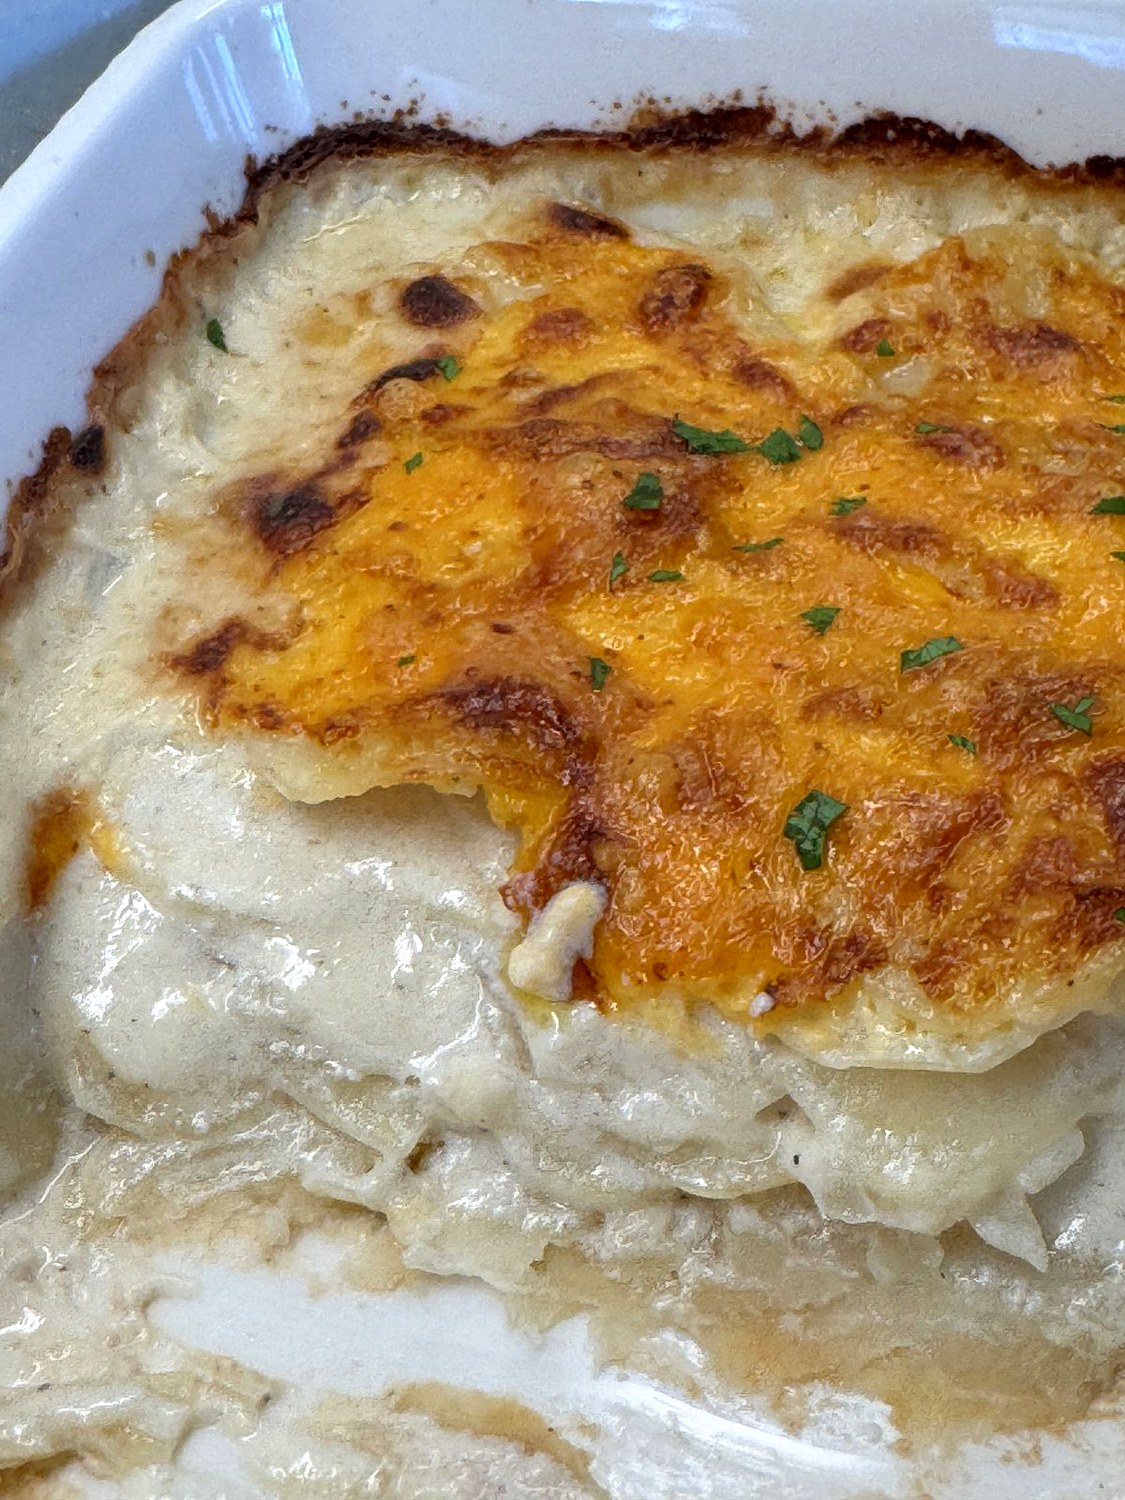
My favorite scalloped potatoes recipe has creamy, cheesy layers underneath and a golden, crispy-edged top that looks as good as it tastes. The slices simmer in the sauce before they ever go in the oven, so you never end up with crunchy, undercooked potatoes. One pot, one baking dish, and you can make it the day before … perfect for a special meal or holiday dinner side!
Scalloped Potatoes At A Glance
Prep
25 min
COOK
45 min
Total
80 min
Serves
10-12
Pan
9×13-inch baking dish
Main ingredients: Russet potatoes, half and half, sharp cheddar cheese, onion, butter
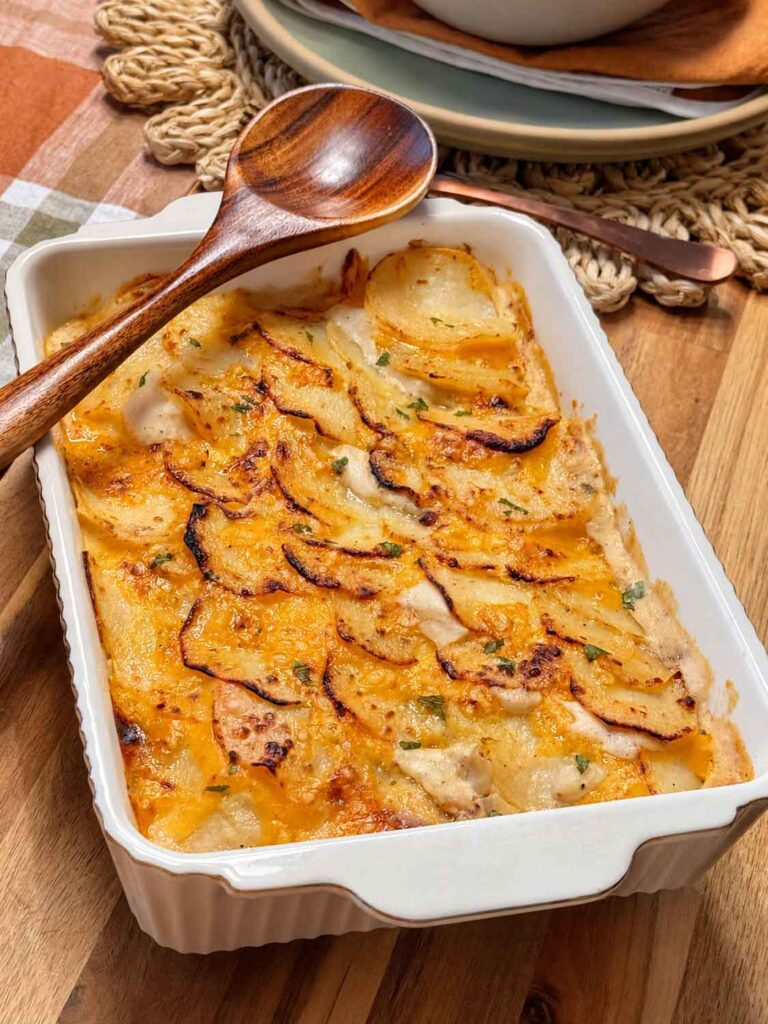
My Secret to a Golden, Layered Top

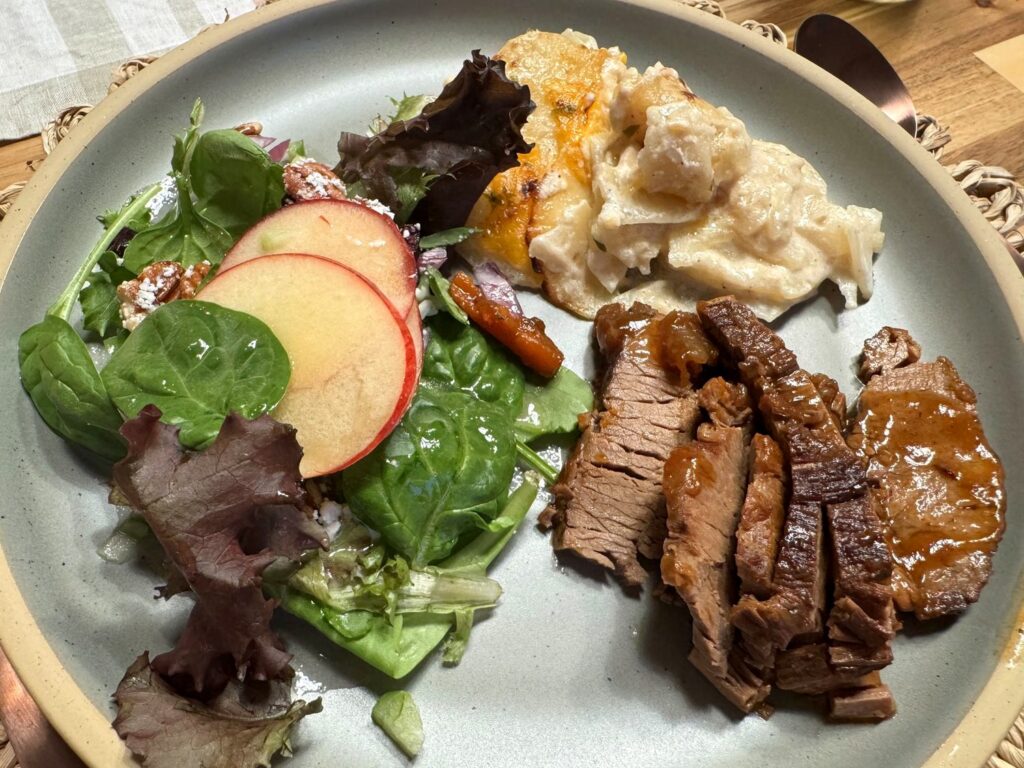
I made these scalloped potatoes as the make-ahead side for a brisket dinner with friends, and they are just so good I had to share them with you. They are creamy, cheesy, and tender all the way through, and there wasn’t a single crunchy slice in the whole pan.
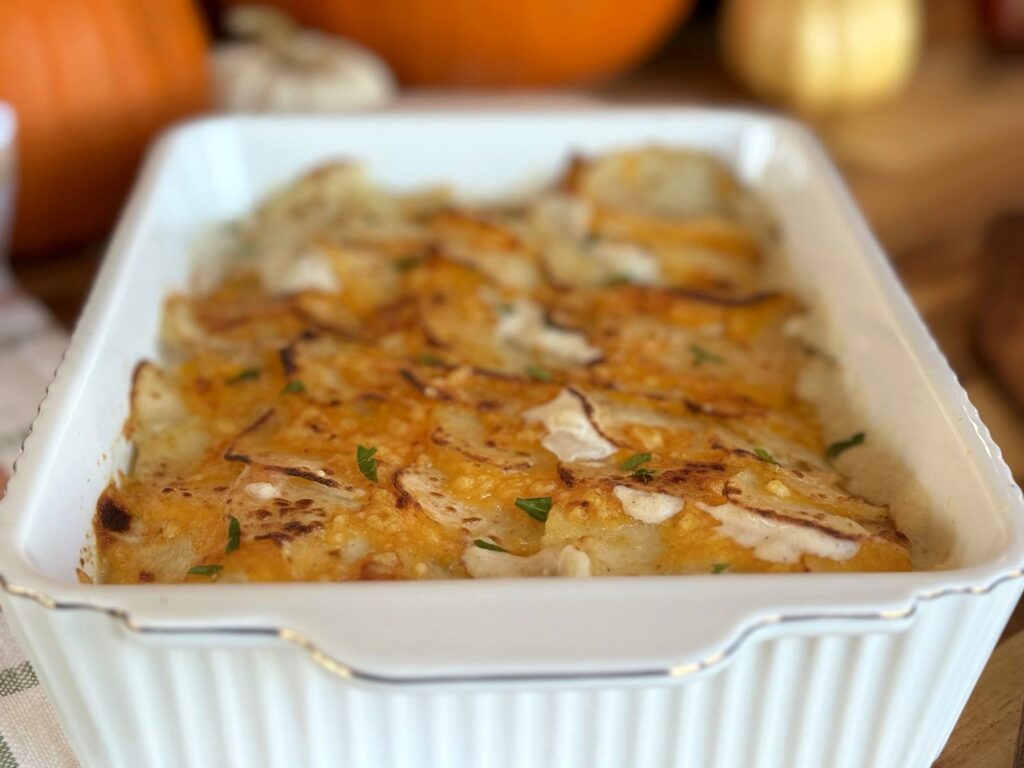
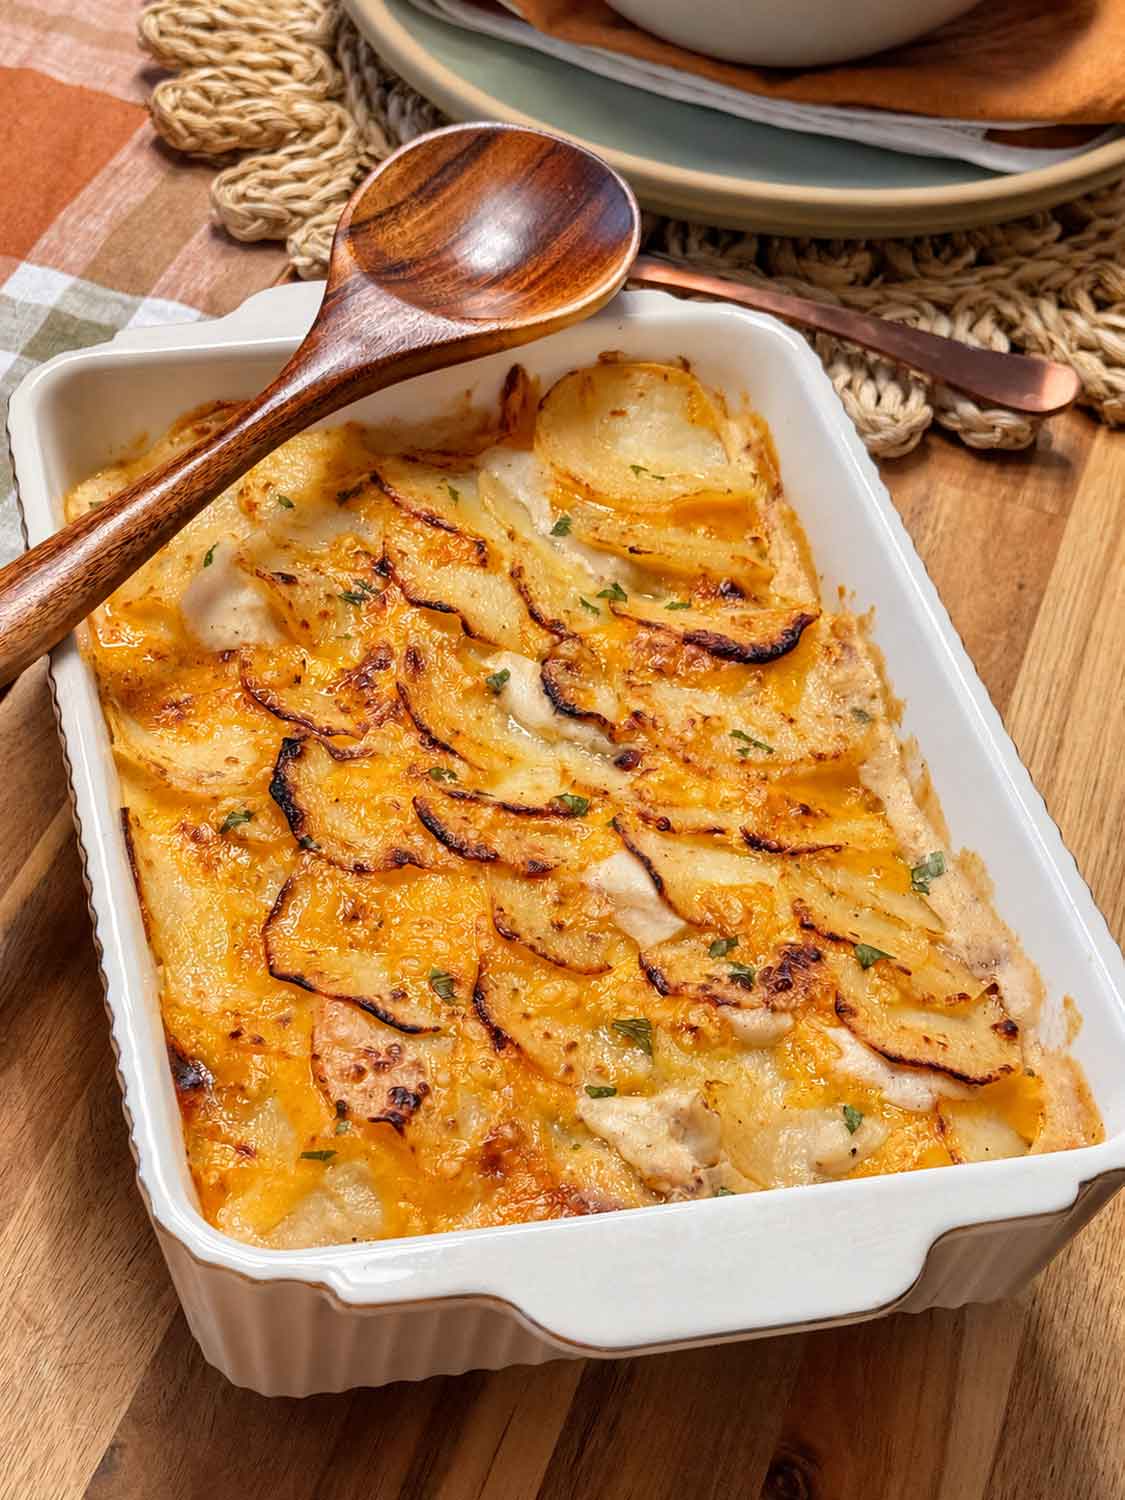
To get this pretty layered top, I spooned some of the potatoes into the baking dish, shingled the slices so they sat up high on just a little sauce, brushed them with butter, and tucked the cheese in between the rows instead of over the top. A few minutes under the broiler, and you get these golden, crispy edges with creamy potatoes underneath. That’s the method I’m sharing here for you!
And if you don’t care about the look and just want the deliciousness? You can skip the shingling, dump everything in the dish, and it’ll still taste AMAZING. I’ll show you that version too.
Let’s dig in!

Tips and Notes Before You Start
- Don’t rinse the potato slices. You don’t want to remove the starch as it thickens the sauce.
- Simmer the potato slices before baking. It’s the easiest way to avoid crunchy potatoes.
- The pretty top is optional. It still tastes amazing without the carefully arranged slices.
- This dish is great made ahead. Make it the day before, or keep it warm in a 200°F oven until dinner.

Want to Save This Recipe?
Enter your email below and we’ll send it straight to your inbox! Plus you’ll get new recipes each week!
What You’ll Need for Scalloped Potatoes
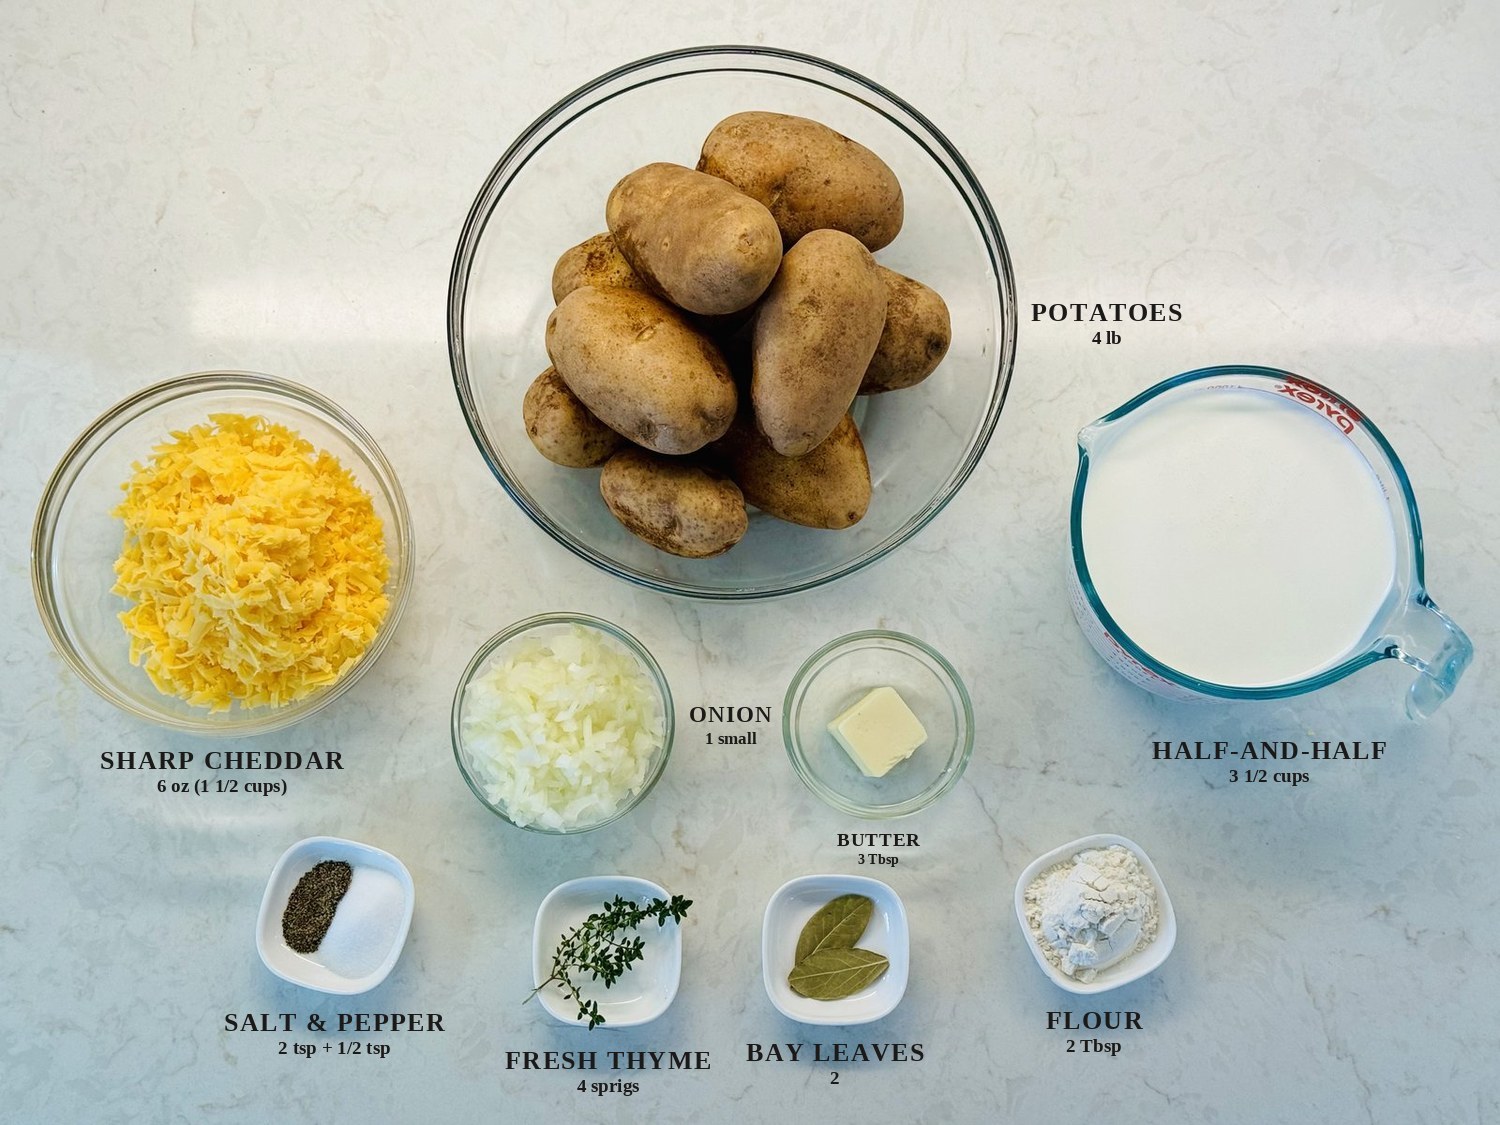
Starchy potatoes. I prefer Russet potatoes because of their high starch content and low moisture level. Plus, they soften completely and make the sauce really velvety. Be sure to wash, peel, and slice your potatoes evenly and thinly, about 1/8 inch thick so they cook at the same rate.
Half-and-half. It’s lighter than heavy cream but still makes a rich, creamy sauce.
Sharp cheddar. Shred it yourself on the large holes of a box grater if you can. Bagged cheese has a coating to keep it from clumping, and it doesn’t melt or brown quite as nicely.
Onion and butter. One small yellow onion, finely chopped and softened in butter, gives the sauce a gentle, savory sweetness. You’ll also brush a little melted butter on top so the potato edges turn golden.
Flour. It thickens the sauce and helps keep the half-and-half from curdling.
Fresh thyme and bay leaves. They simmer in the sauce and come out before baking, so the flavor stays soft and warm in the background. You can use 1/2 teaspoon dried thyme if that’s what you have.
Salt and pepper. I use regular table salt. Potatoes need more salt than you’d think, so taste the sauce before it goes in the oven.
Why No Garlic?

Classic American scalloped potatoes do not usually have any garlic. However, if you love it, feel free to add a clove or two with the onion. Minced, crushed, or roasted … all will work!
Which Potatoes Are Best for Scalloped Potatoes?
Russets or Yukon Golds. Russets hold their shape and give you the thickest sauce. Yukon Golds are a little buttery and soft. I’d skip red potatoes and new potatoes here. They’re waxy, so they don’t release enough starch, and the sauce can come out thin.
Can I Make Scalloped Potatoes With Half-and-Half Instead of Cream?
Yes, and it’s what I did. If you’d like it richer, use 2 1/2 cups heavy cream plus 1 cup whole milk and skip the flour, since cream won’t curdle the way half-and-half can. I haven’t tested that version in this recipe.
Can I Make Scalloped Potatoes Lactose Free?
Yes. I made mine with lactose-free half-and-half, and it was perfect. Aged sharp cheddar is naturally very low in lactose, and so is butter, so most people who avoid lactose do just fine with this one. You can also find lactose-free shredded cheddar if you’d like to be extra careful.
How to Make Scalloped Potatoes
Heat your oven to 400°F and butter a 9×13-inch baking dish.
Step 1: Slice the potatoes thin
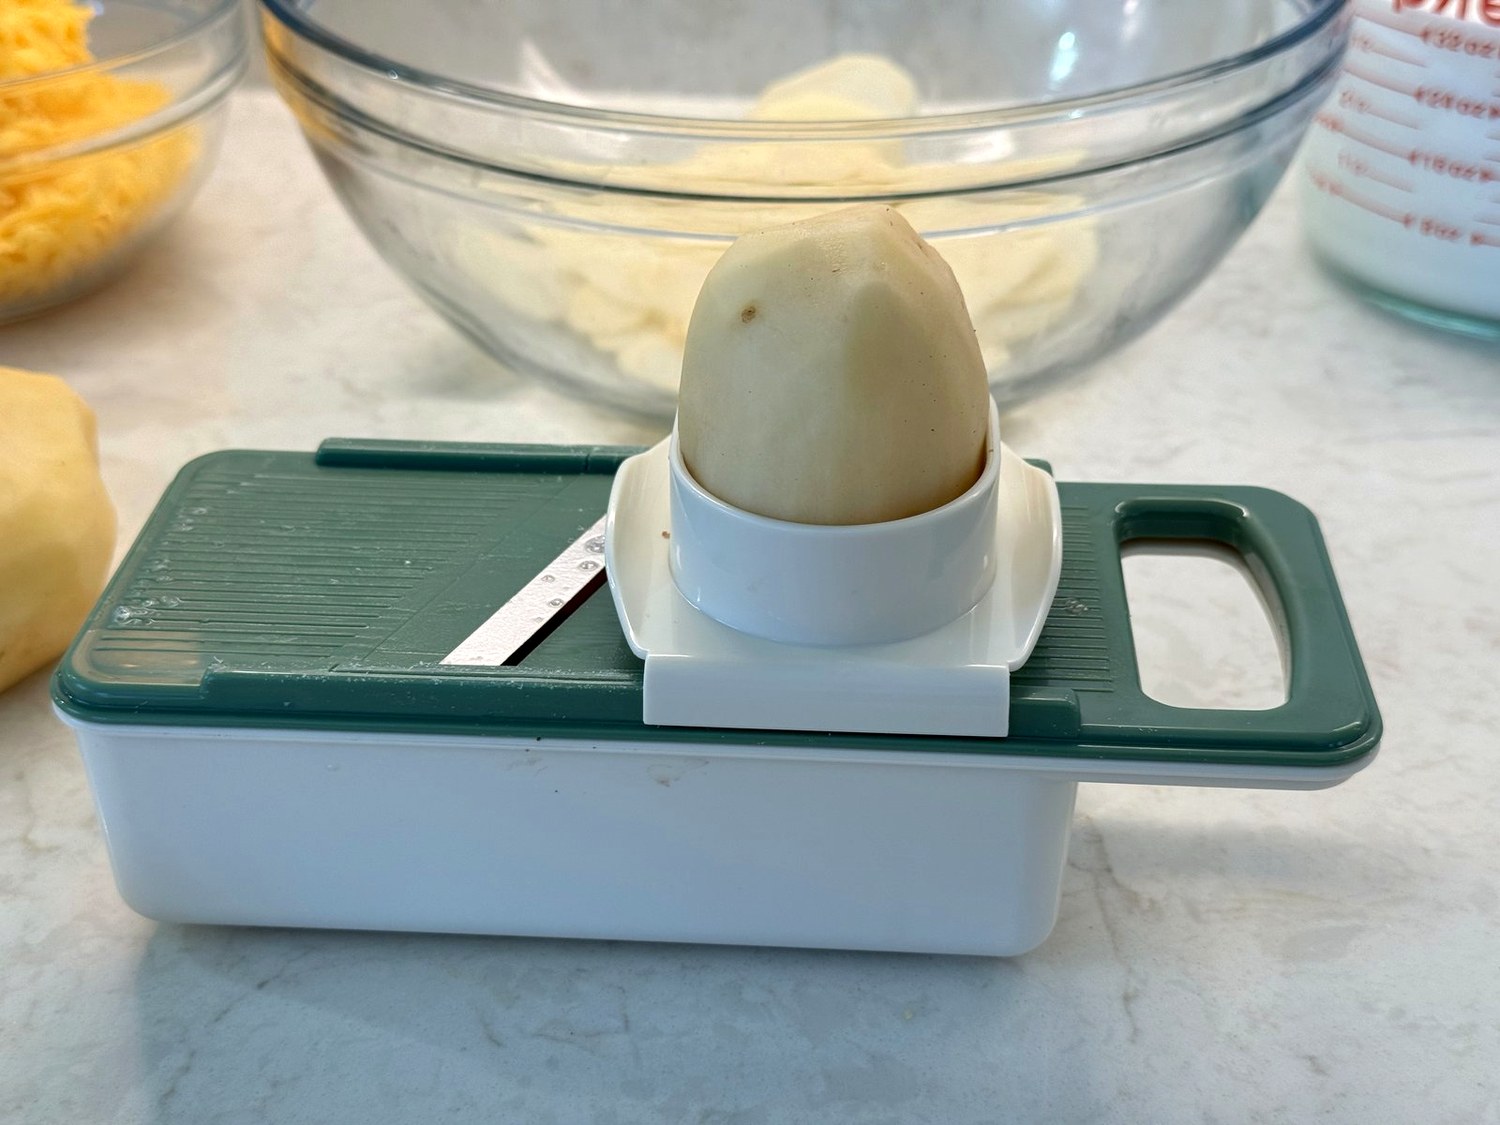
Peel the potatoes and slice them about 1/8 inch thick. A mandoline is the fastest way, and it gives you even slices that cook at the same rate. Use the plain, straight blade (not the one with the little teeth, which cuts sticks), and use the hand guard for the last bit of each potato. If you’re slicing by hand, just go slow and keep them as even as you can.
Safety First

Mandoline slicers are really dangerous. If you use one, handle it with care from the moment you take it out until you put it away. I prefer the type you see in my photo above, as it has a hand guard to help (but not prevent) you from slicing yourself. My daughter Alexa has gotten stitches only once in her life so far, and it was from a mandoline … and I think that says it all. Please be careful!
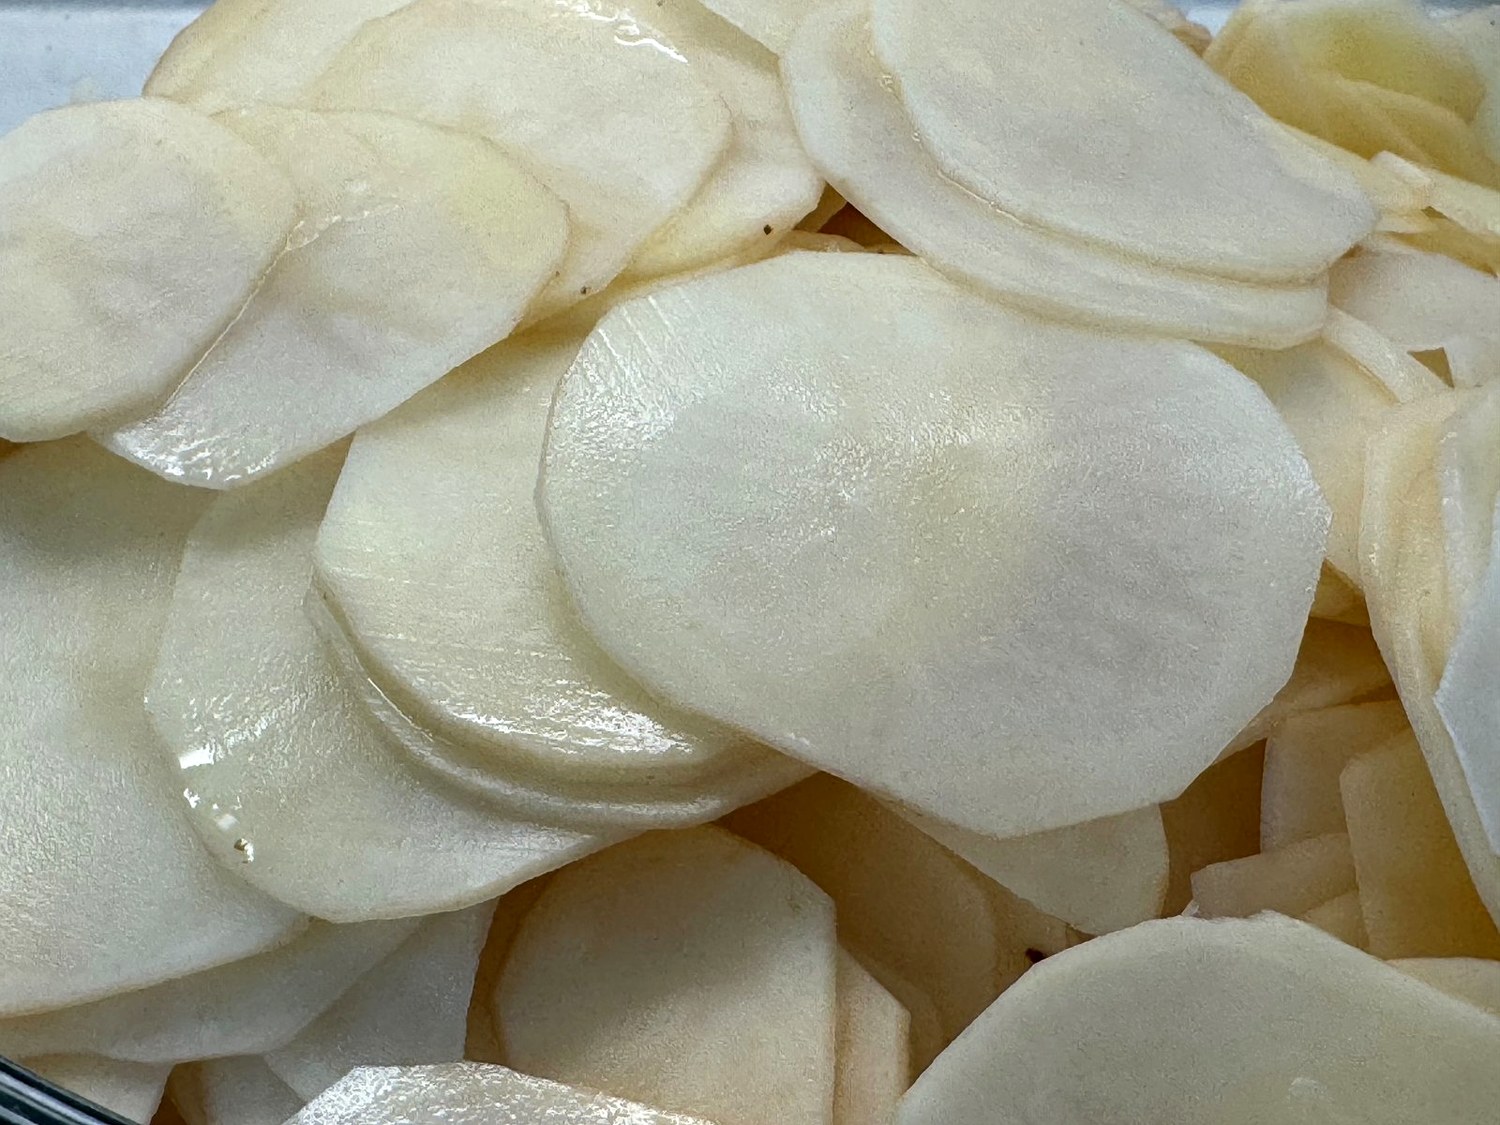
Be careful not to rinse the slices or soak them in water. That starchy coating is what helps thicken your sauce. Don’t worry if a few start to darken while you work… it disappears in the sauce.
Step 2: Soften the onion and stir in the flour
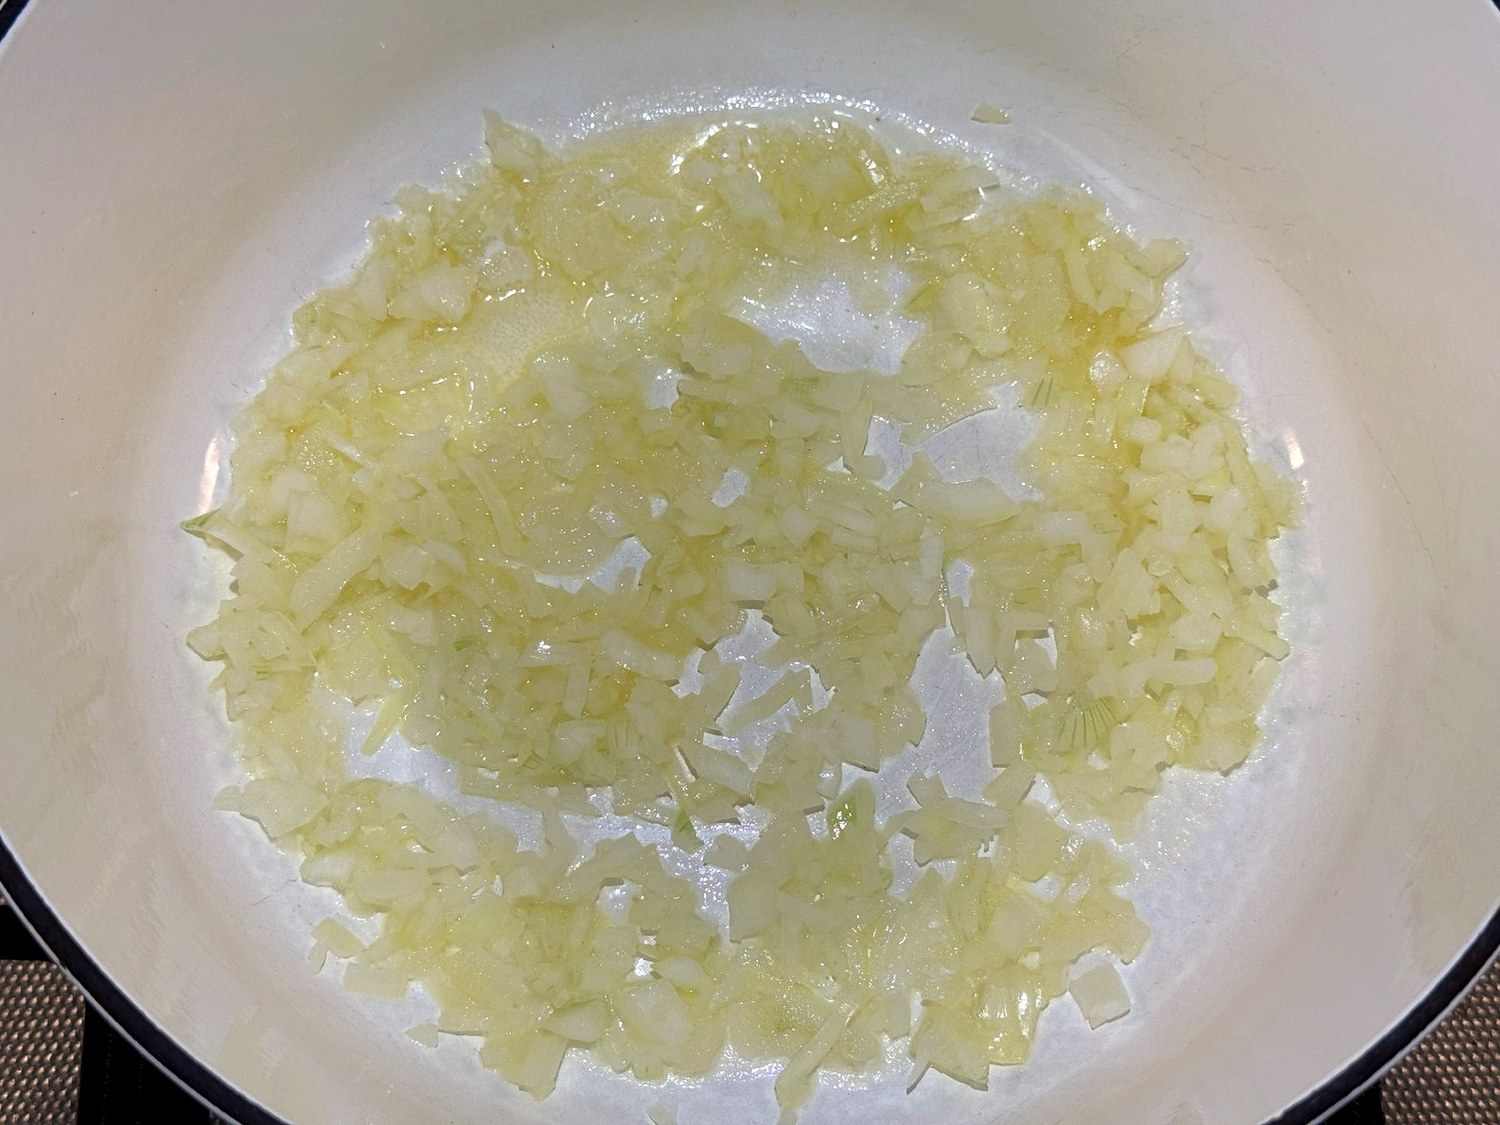
Melt 2 tablespoons of the butter in a large Dutch oven over medium heat. Add the onion and cook for about 5 minutes, until it’s soft and translucent. Then sprinkle in the flour and stir for about a minute.
Step 3: Whisk in the half-and-half
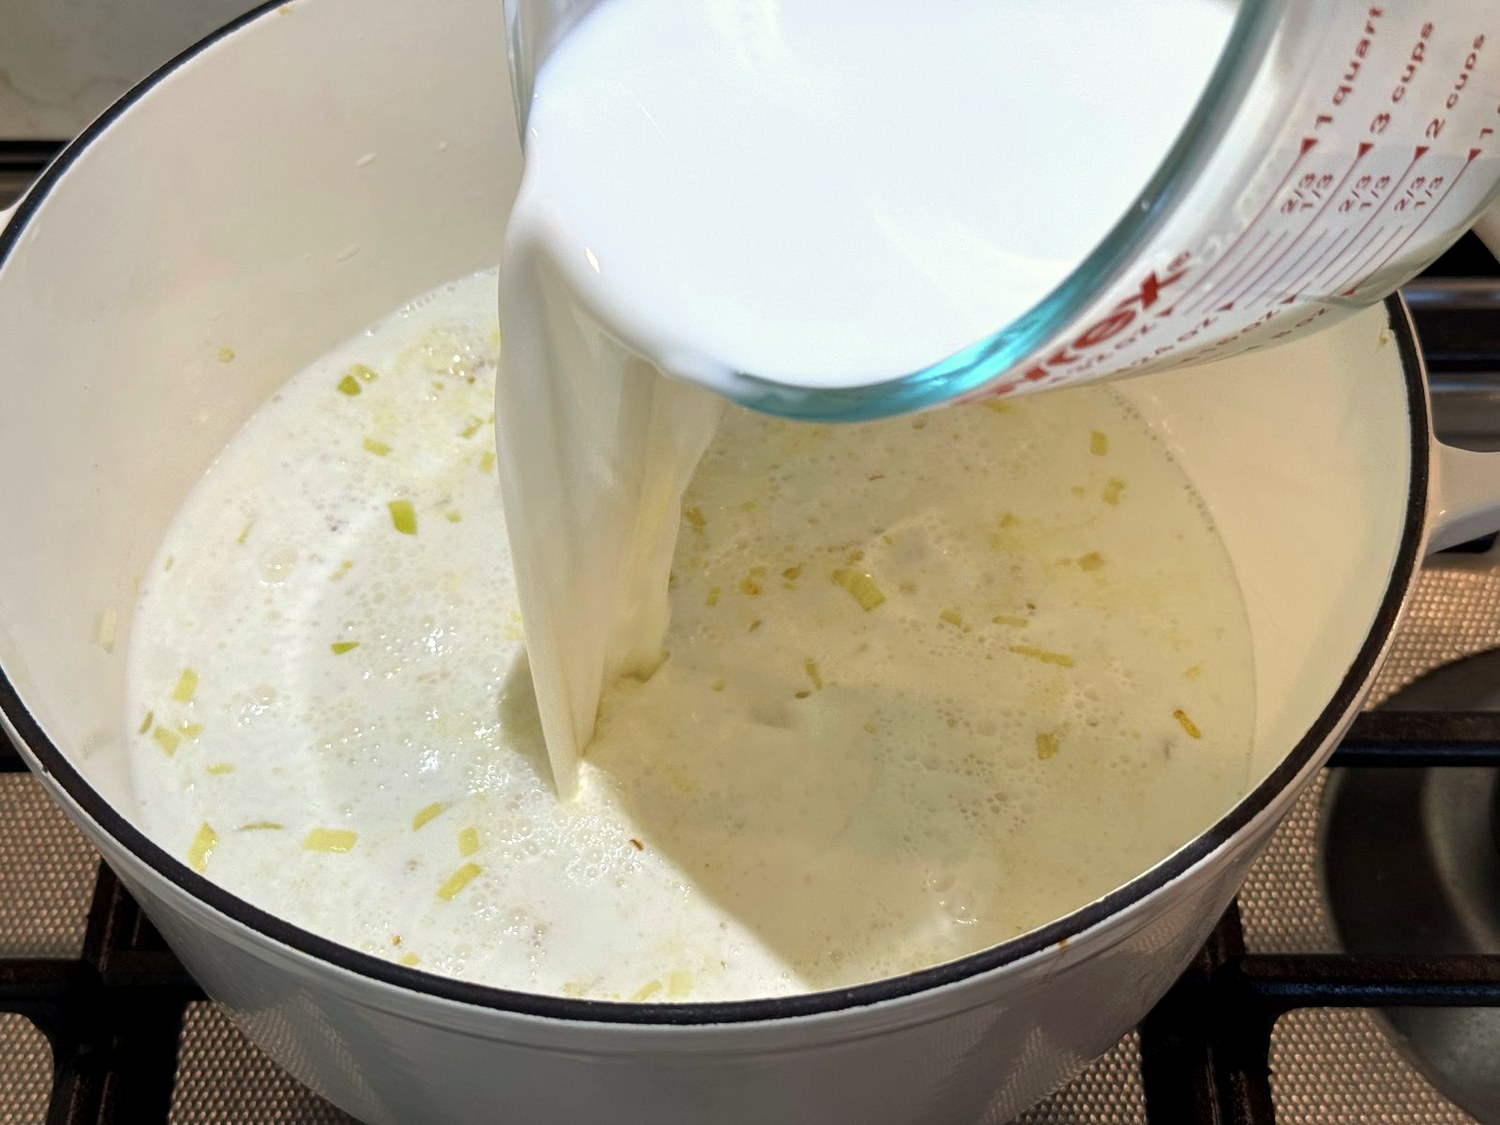
Slowly pour in the half-and-half, whisking as you go so the flour doesn’t clump. Add the salt, pepper, thyme sprigs, bay leaves, and the sliced potatoes.
Step 4: Simmer the potatoes in the sauce
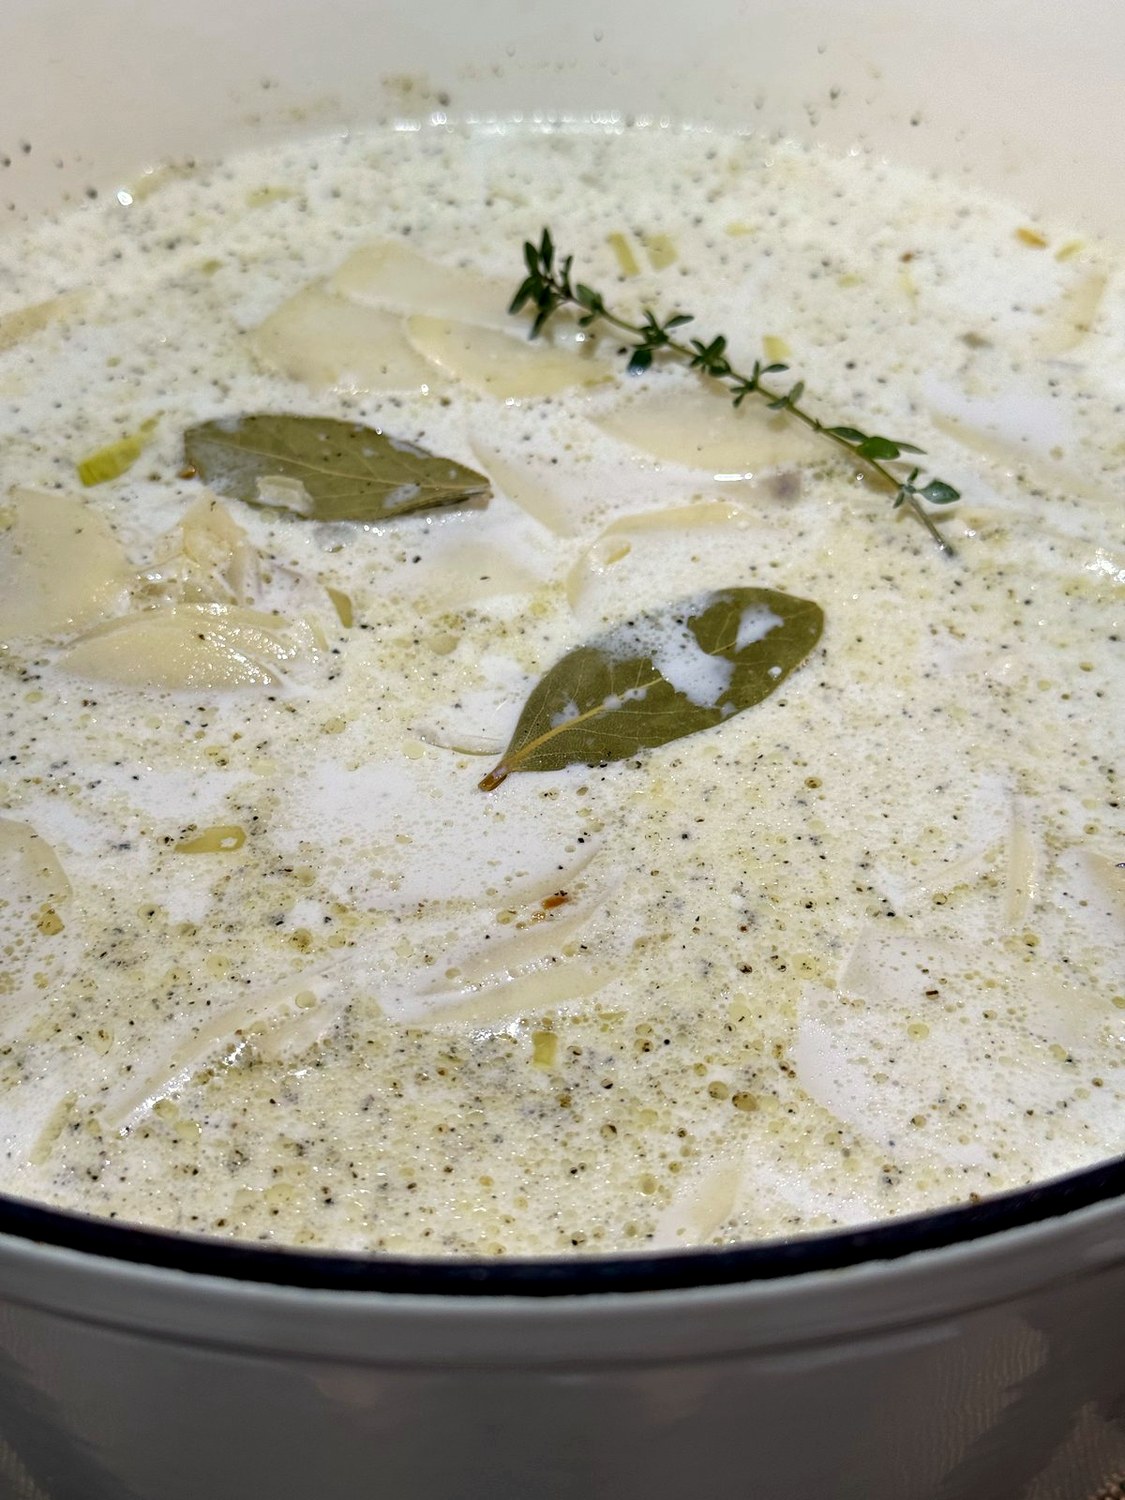
Bring it to a gentle simmer, with small bubbles around the edges, then turn the heat down, cover, and cook for about 10 to 15 minutes. Every few minutes, gently lift and turn the potatoes from the bottom with a flat spatula or wooden spoon so nothing sticks. Keep it low and slow. Half-and-half can curdle or scorch if it boils hard.
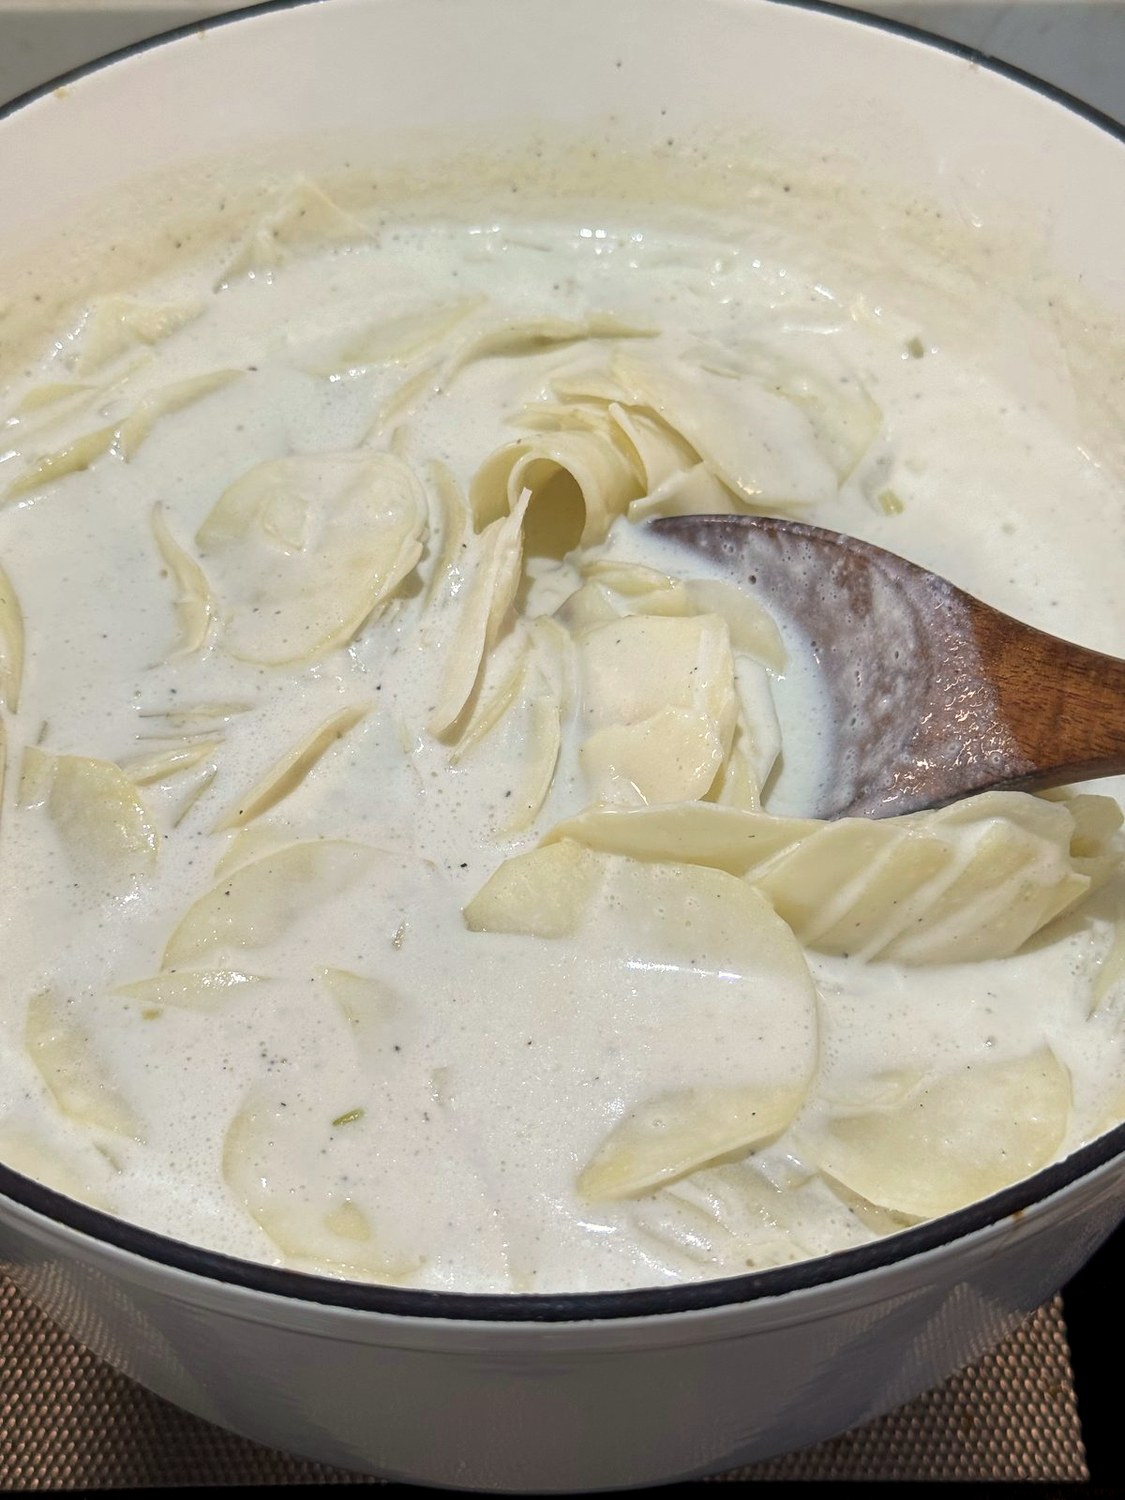
They’re ready when a paring knife slides into a slice with just a little resistance. They’ll finish cooking in the oven. Thin mandoline slices go quickly, so start checking at about 10 minutes. The sauce will still look thin right now, and that’s totally normal. It thickens a lot in the oven and as it rests.
Fish out the thyme stems and bay leaves, then taste the sauce and add a pinch more salt if it needs it.
Step 5: Spread the potatoes and shingle the top
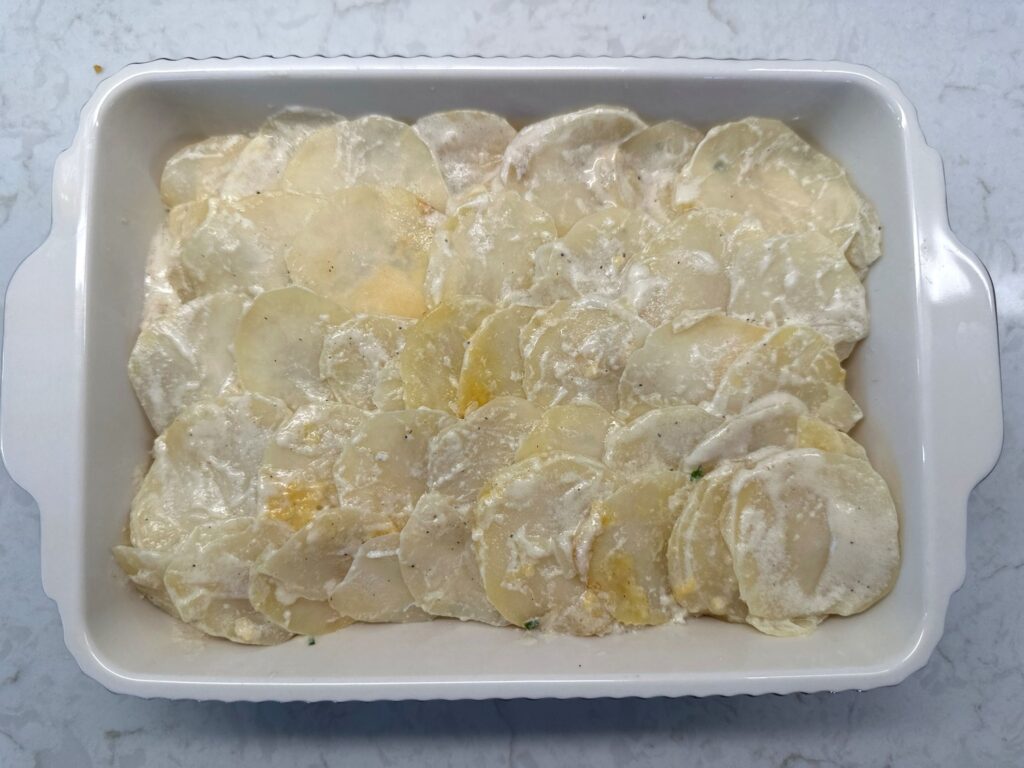
Spoon most of the potatoes and sauce into your baking dish and spread them out evenly. Sprinkle 1 cup of the cheddar over this layer. Now pick out your prettiest whole slices and lay them across the top in overlapping rows, like shingles on a roof.
Press the bottom layer down gently to let the sauce settle first, then lay the top rows on top of the sauce. If they’re swimming in it, the sauce bubbles right over them in the oven. A little sauce peeking between the rows is perfect.
Step 6: Brush with butter and add the rest of the cheese
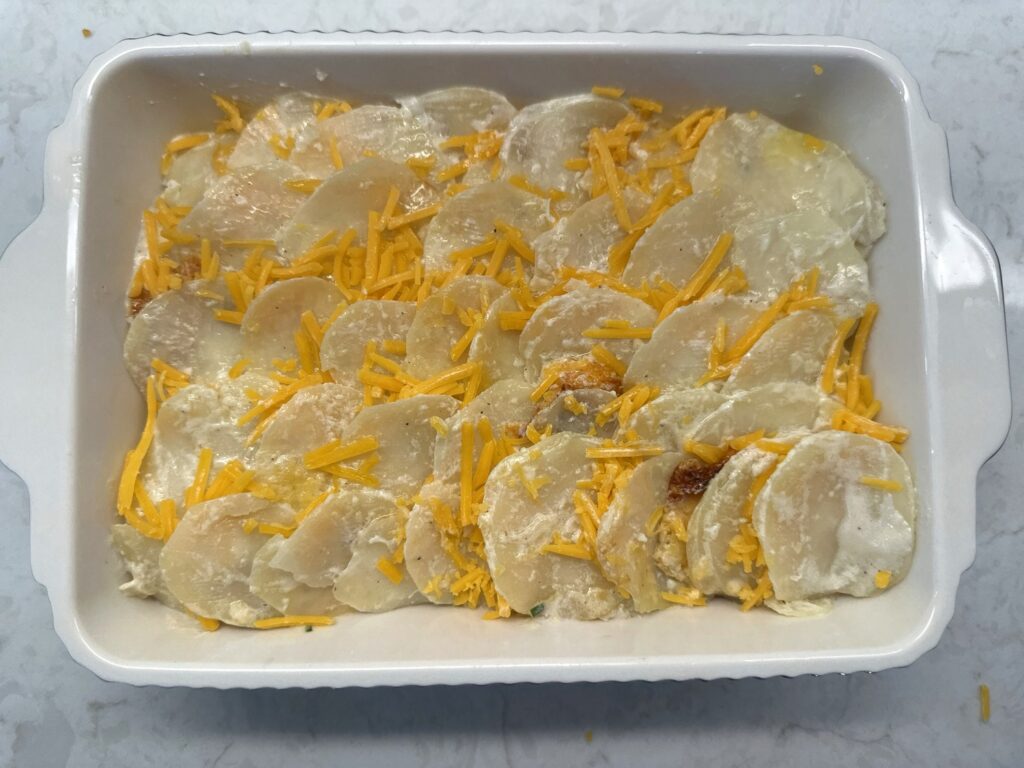
Melt the last tablespoon of butter and brush it over the top slices so the edges turn golden and crispy. Then scatter the remaining cheddar along the seams between the rows instead of over the middle of the slices. That way the cheese peeks through and the golden potato slices still show.
Step 7: Bake, then broil
Bake uncovered for about 25 to 30 minutes, until the sauce is bubbling around the edges and the cheese has melted. Then turn on the broiler and broil for 2 to 4 minutes, until the potato edges are golden and the cheese is browned in spots. Stay right there and watch it, because it can go from golden to too dark fast. If one side browns faster, turn the dish around for the last minute.
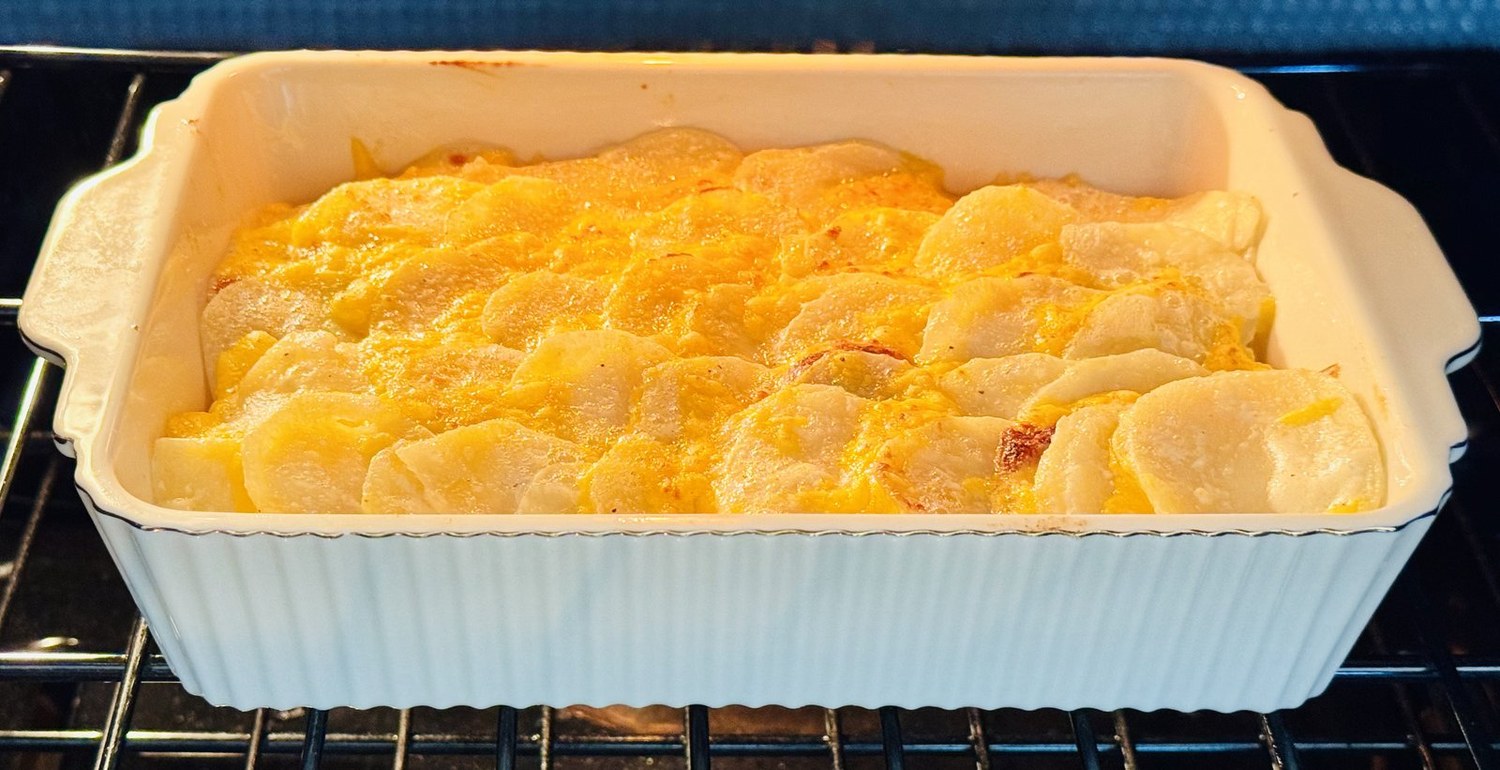
Set the dish on a sheet pan if it’s very full. Mine bubbled over a little and baked onto the rim.
Step 8: Let it rest
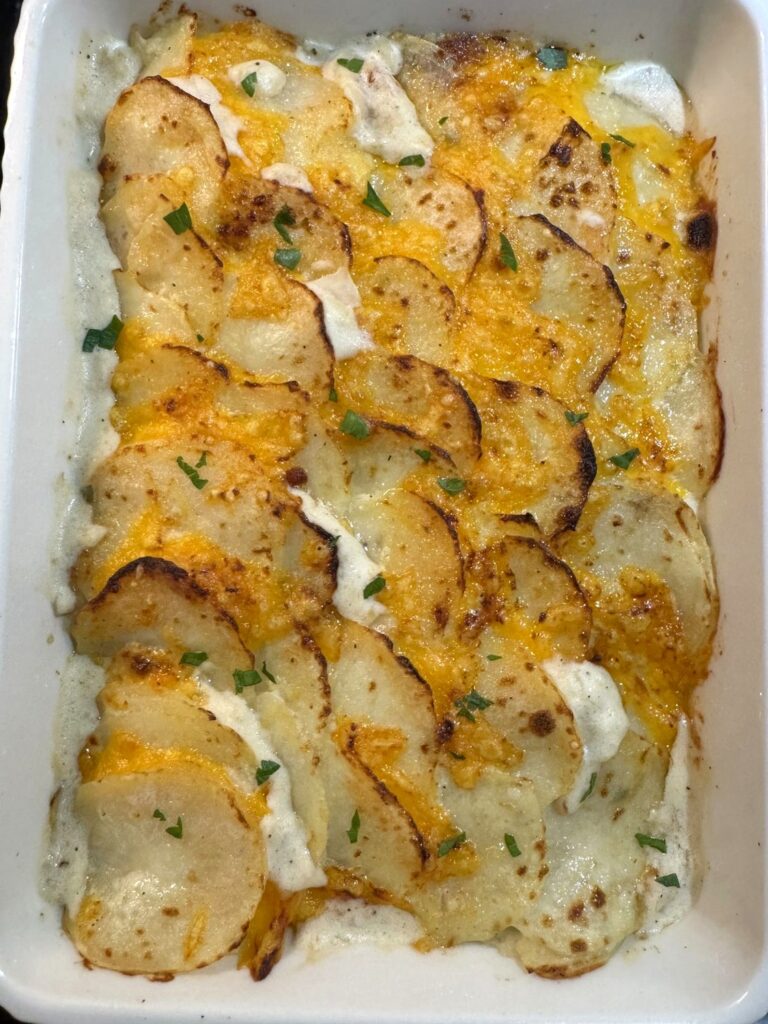
Let the potatoes rest for about 10 minutes before serving. The sauce keeps thickening as it cools a little, so you get creamy scoops instead of a runny puddle. Sprinkle with a little chopped parsley if you’d like some green.
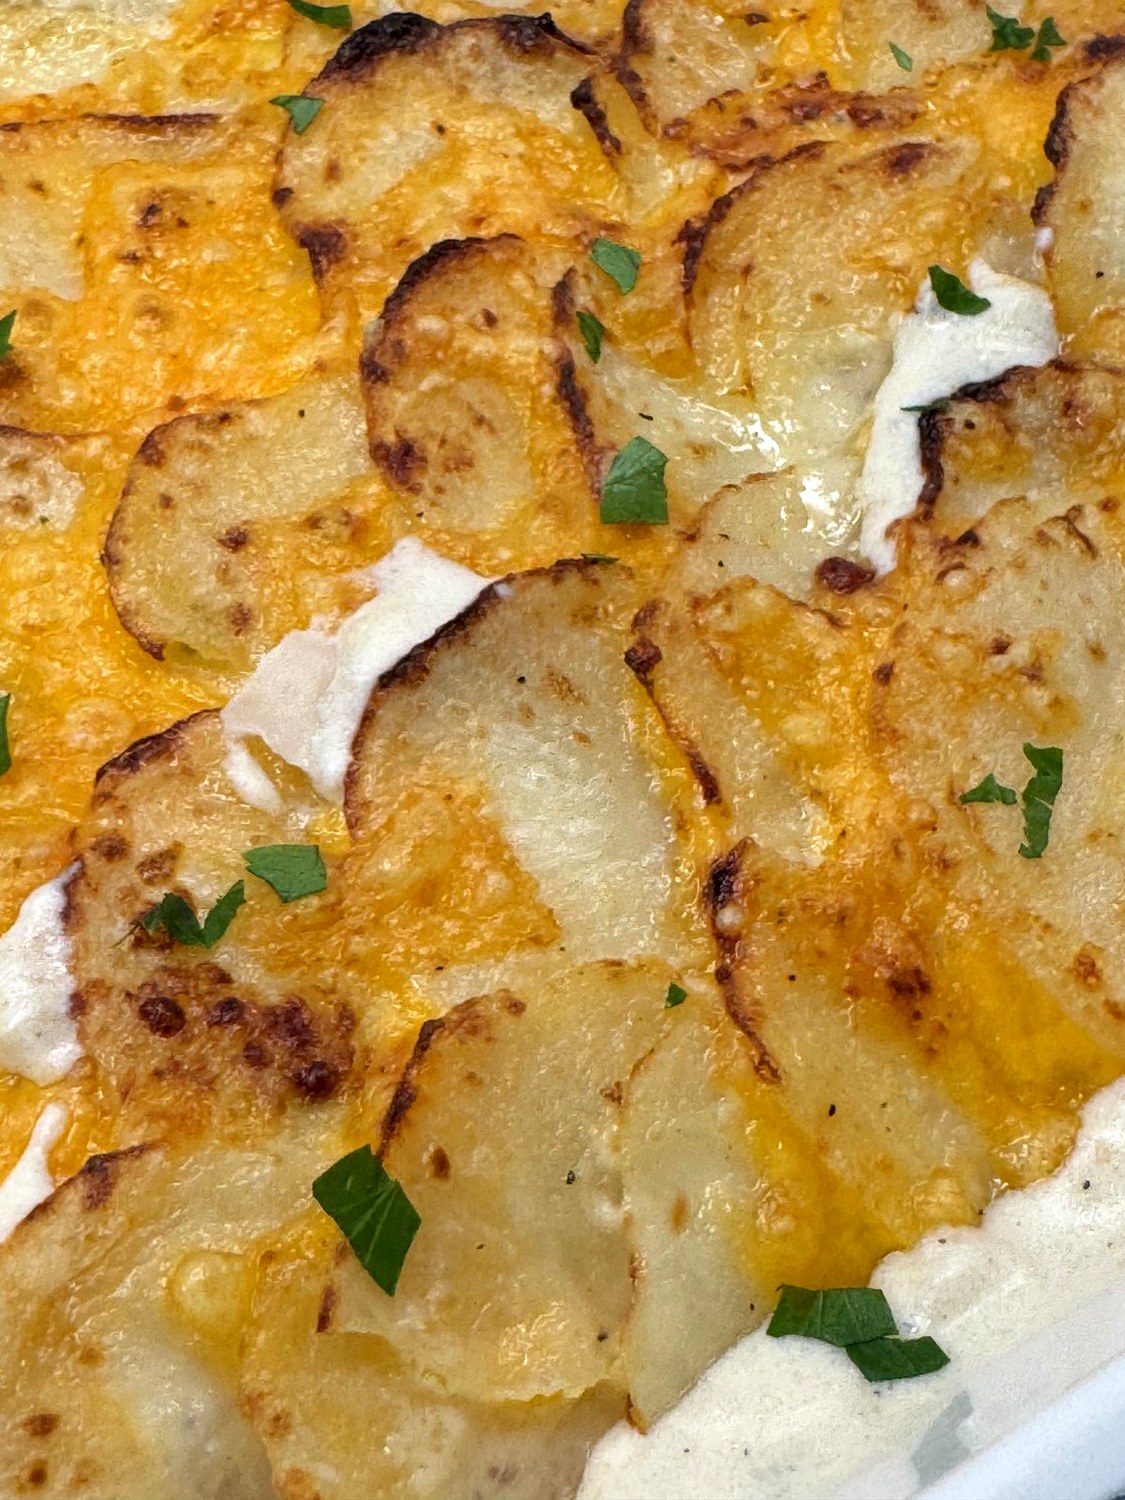
Want It Extra Saucy? Skip the Shingling
If you don’t care about the pretty top, you can skip Steps 5 and 6 completely. Use the full 4 cups of half-and-half, pour everything into the dish, smooth it out, and cover the top with all of the cheese. Bake it the same way, then broil it for 2 to 3 minutes to get some golden spots.
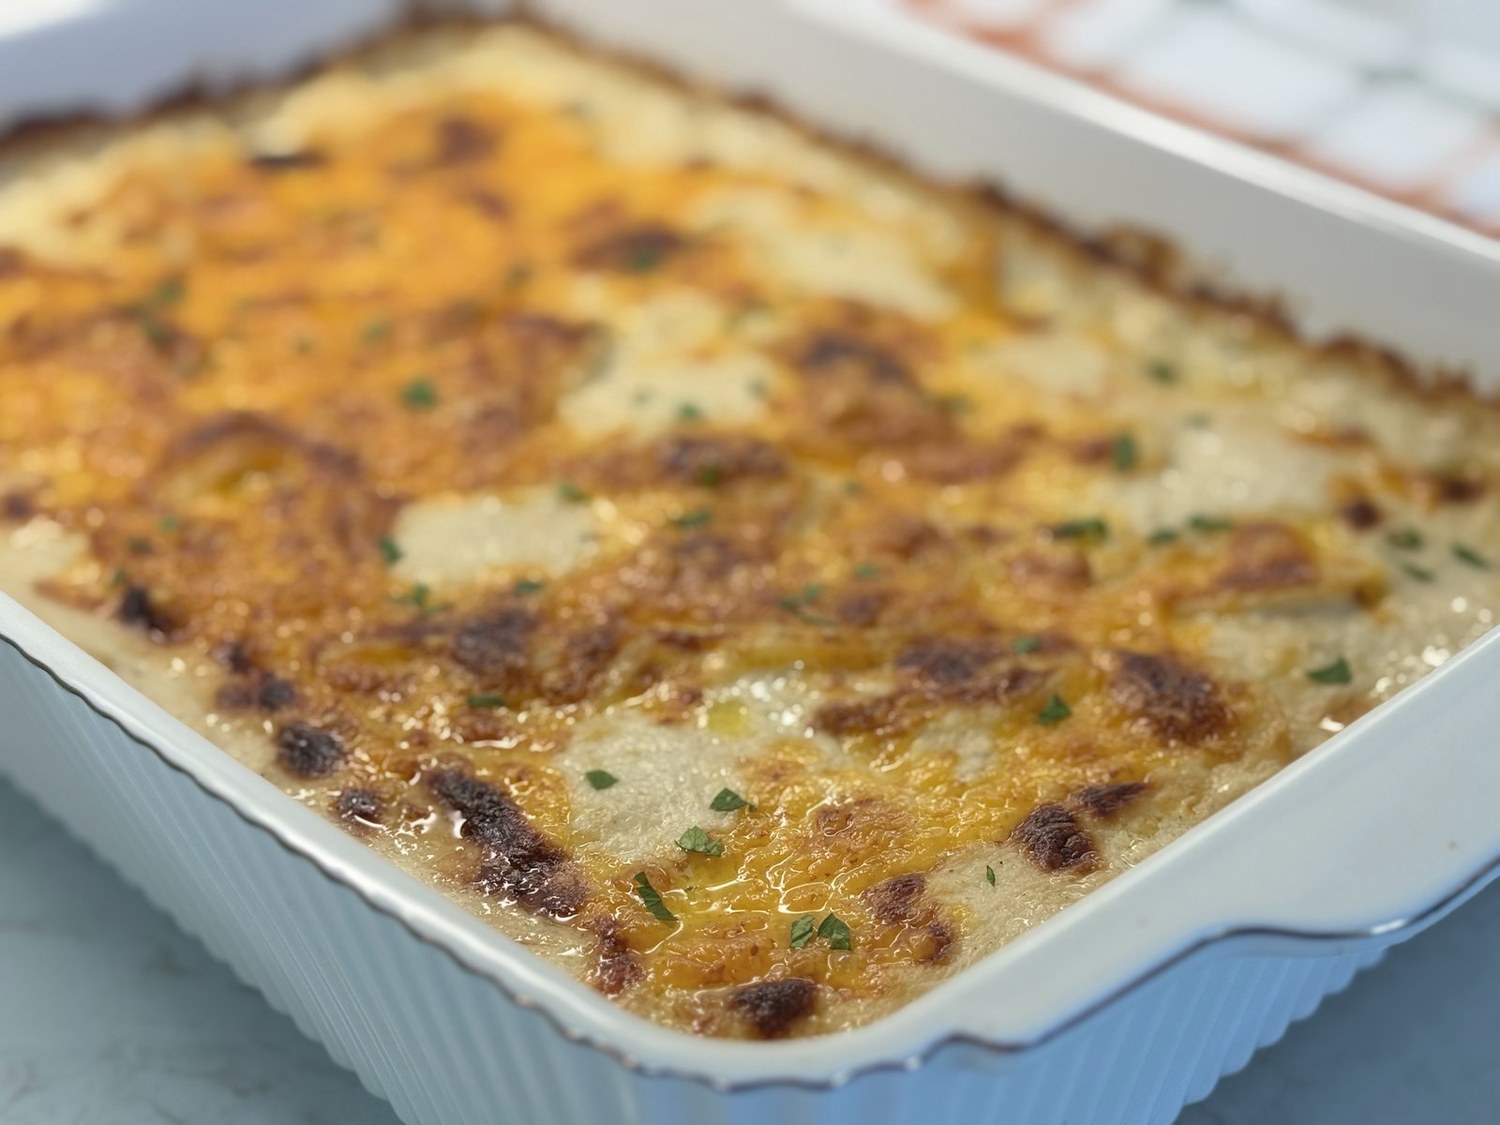
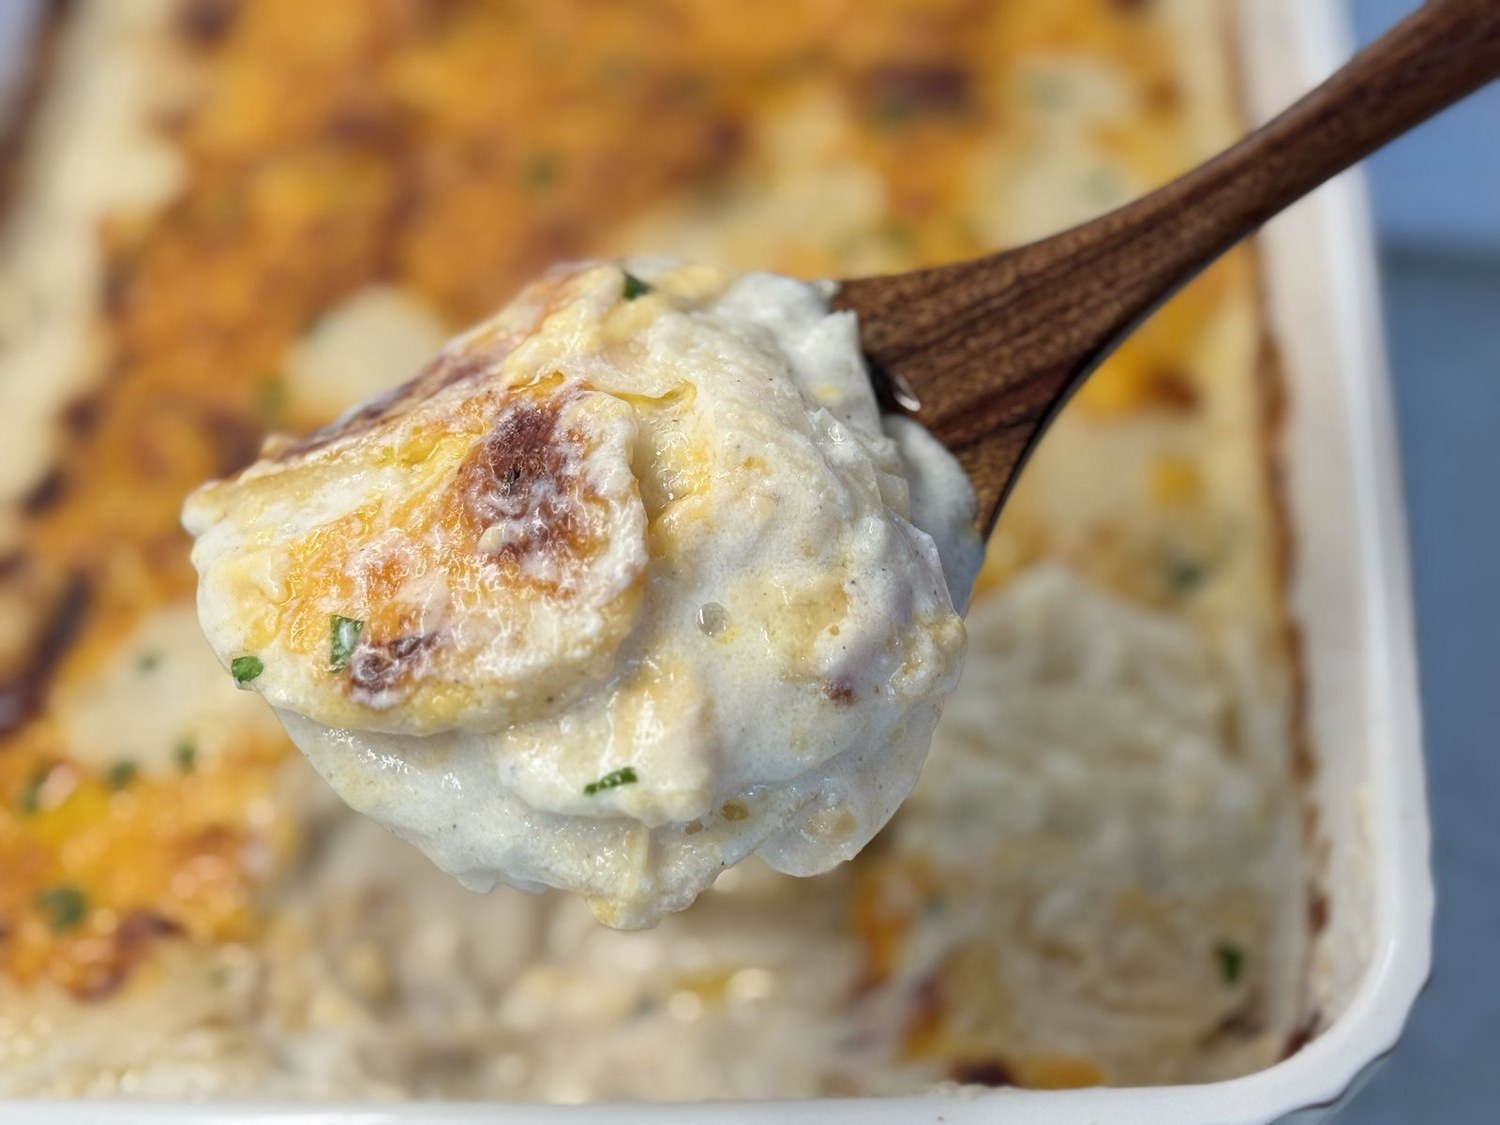
I’ve made pans this way, too, and they are SO GOOD. It’s softer and saucier, more like a cheesy potato casserole, and it’s perfect for spooning over a plate.
Can I Make Scalloped Potatoes Ahead of Time?
Yes. Bake them completely, let them cool for no more than about an hour, then cover and refrigerate. The next day, reheat covered with foil at 350°F for about 30 minutes, then uncover for another 15 minutes, until they’re hot in the center and bubbling around the edges. I haven’t reheated a full pan from the fridge yet, so go by the bubbling edges rather than the clock.
If you just need to hold them for dinner, that works too. I kept mine in a 200°F oven, loosely tented with foil, for about an hour and a half, and they were perfect. Pull the foil off for the last 10 minutes so the top firms back up.
How to Store and Reheat Scalloped Potatoes
Refrigerate leftovers, covered, for up to 4 days. Reheat single servings in the microwave for about a minute, or warm the whole dish covered at 350°F until it’s hot. I’d skip freezing these. Potatoes in a cream sauce can turn grainy and a little watery after they thaw.
Scalloped Potato FAQs
Why are my scalloped potatoes undercooked?
Usually the slices were too thick or uneven. Check a few slices with a paring knife before the dish goes in the oven. If they’re still firm, give them a few more minutes on the stove, because the oven won’t fully catch them up.
Why are my scalloped potatoes watery?
Waxy potatoes, rinsed slices, or cutting in too soon. Use russets, don’t rinse them, and let the dish rest at least 10 minutes before you scoop.
Why did my sauce curdle?
Most likely it boiled too hard. Don’t worry, a few small curds won’t hurt the flavor, and they mostly disappear in the oven.
What’s the difference between scalloped potatoes and au gratin?
Traditionally, scalloped potatoes are baked in a cream sauce and au gratin potatoes have cheese and a browned top. Mine is honestly a bit of both, but “scalloped potatoes” is what everyone I know calls it, so that’s what I call it too.
Can I make a smaller batch?
Yes. Halve everything and use an 8×8 dish. Start checking it a few minutes early. I haven’t made a half batch yet.
Cheesy Scalloped Potatoes
Equipment
- 9×13-inch baking dish
- Large Dutch oven or wide heavy pot (5 1/2 quarts or larger)
- Mandoline slicer (optional) or sharp knife
- Whisk, flat spatula, and pastry brush
Ingredients
- 4 pounds russet potatoes , peeled and thinly sliced
- 3 tablespoons butter divided, plus more for the dish
- 1 small yellow onion finely chopped
- 2 tablespoons all-purpose flour
- 3 1/2 cups half-and-half
- 2 teaspoons table salt
- 1/2 teaspoon black pepper
- 4 sprigs fresh thyme (or 1/2 teaspoon dried)
- 2 bay leaves
- 6 ounces sharp cheddar , shredded and divided
- fresh parsley for garnish (optional)
Instructions
- Heat the oven to 400°F. Butter a 9×13-inch baking dish.
- Peel the potatoes and slice them about 1/8 inch thick. Don’t rinse them.
- In a large Dutch oven, melt 2 tablespoons of the butter over medium heat. Add the onion and cook about 5 minutes, until soft. Sprinkle in the flour and stir for 1 minute.
- Slowly whisk in the half-and-half until smooth. Add the salt, pepper, thyme, bay leaves, and potatoes.
- Bring to a gentle simmer (never a hard boil), then cover and cook 10 to 15 minutes, gently turning the potatoes from the bottom every few minutes, until a paring knife slides into a slice with a little resistance.
- Remove the thyme stems and bay leaves. Taste the sauce and add more salt if needed.
- Spoon most of the potatoes and sauce into the baking dish and spread evenly. Sprinkle with about two-thirds of the cheddar. Press gently so the sauce settles.
- Lay the remaining whole slices across the top in overlapping rows so they sit on top of the sauce.
- Melt the remaining butter and brush it over the top slices. Scatter the rest of the cheddar along the seams between the rows.
- Bake uncovered 25 to 30 minutes, until bubbling around the edges. Broil 2 to 4 minutes, watching closely, until the potato edges are golden and the cheese is browned in spots.
- Let rest 10 minutes. Sprinkle with parsley and serve.
Nutrition
Notes
- Extra-saucy version: Use 4 cups half-and-half, skip the shingling and butter brushing, and spread all the cheese over the top. Bake the same way, then broil 2 to 3 minutes.
- Forgot the flour? Whisk it into 1/2 cup cold half-and-half, stir it into the simmering potatoes, and simmer at least 5 minutes more.
- Lactose free: Use lactose-free half-and-half. Aged cheddar and butter are naturally very low in lactose.
- Richer version (untested): Replace the half-and-half with 2 1/2 cups heavy cream plus 1 cup whole milk, and skip the flour.
- Garlic: Add 1 to 2 minced cloves with the onion if you like.
- Smaller batch: Halve everything and use an 8×8 dish.
- Make ahead: Bake, cool no more than 1 hour, cover, and refrigerate up to 2 days. Reheat covered at 350°F for 30 minutes, then uncovered 15 minutes, until hot and bubbling.
- Keep warm: Hold in a 200°F oven, loosely tented with foil, for up to 2 hours. Uncover for the last 10 minutes.
- Storage: Refrigerate leftovers, covered, up to 4 days. Freezing isn’t recommended.
- Reheating: Microwave single servings about 1 minute, or reheat the dish covered at 350°F until hot.
How to Trust This Recipe
I know it’s hard to know what is and isn’t real these days, so I like to take a special photo so you know this is a real recipe made in a real kitchen and eaten by real people. Here is my scalloped potatoes fresh from the oven, resting on my stove in my kitchen on Maker Farm.
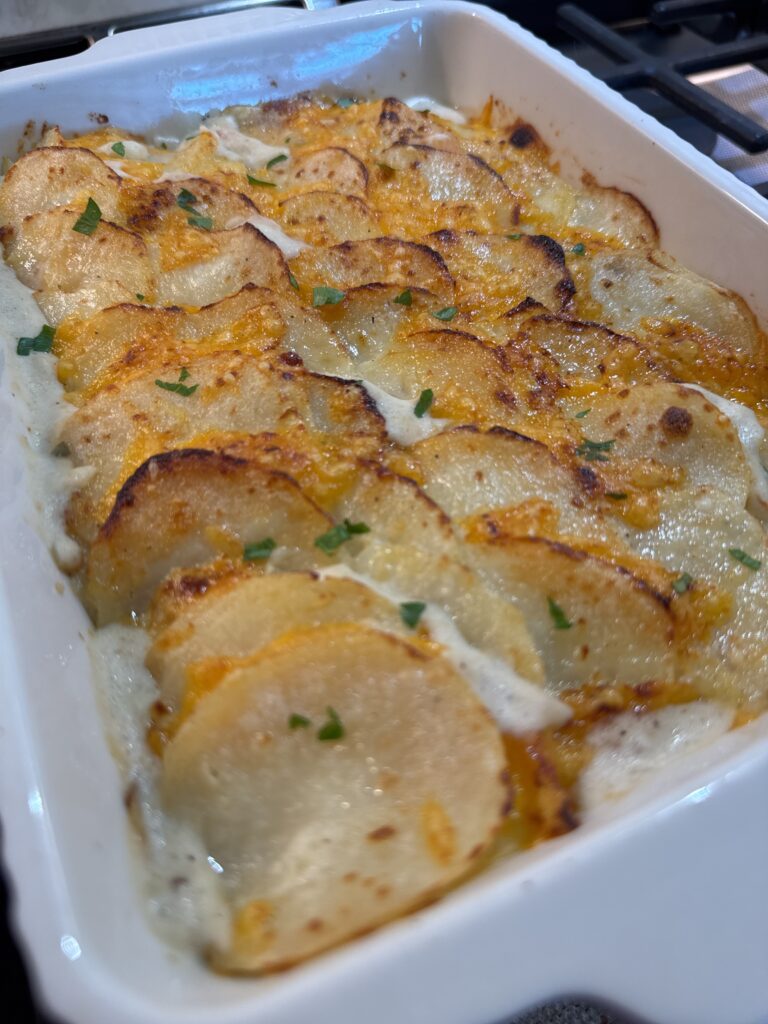
The above photo was taken with ProofMode, which attaches Content Credentials (the C2PA standard) to the image, so anyone can check that it’s a real photo taken by my iPhone on my farm on a particular date and place. Click here to download the proof files and learn how to verify that it is legitimate.
Whether you go for the golden shingled top or the extra-saucy version, I hope these end up on your holiday table. I’d love to hear which way you make them.
Happy cooking!
Love,
Jennifer
More Recipes You’ll Love

Meet Jennifer
Jennifer cooks and experiments in the kitchen at Maker Farm, where she focuses on simple pantry cooking, homemade staples, and practical recipes that make everyday meals easier. Over the years she has tested many ways to make cooking simpler and more dependable, and shares the methods that work best in her own kitchen, occasionally showing them on her Heart to Home at Maker Farm vlog.