

Sourdough pizza dough that’s crispy underneath, chewy and airy around the rim, and needs no commercial yeast. Mix it in the morning and bake the same day. Go for a deep-dish in a cast iron skillet, thin crust on a stone, or keep it simple on a plain sheet pan. Want to plan ahead? Cold-ferment it overnight or freeze it for later. I’ve got it all covered here.
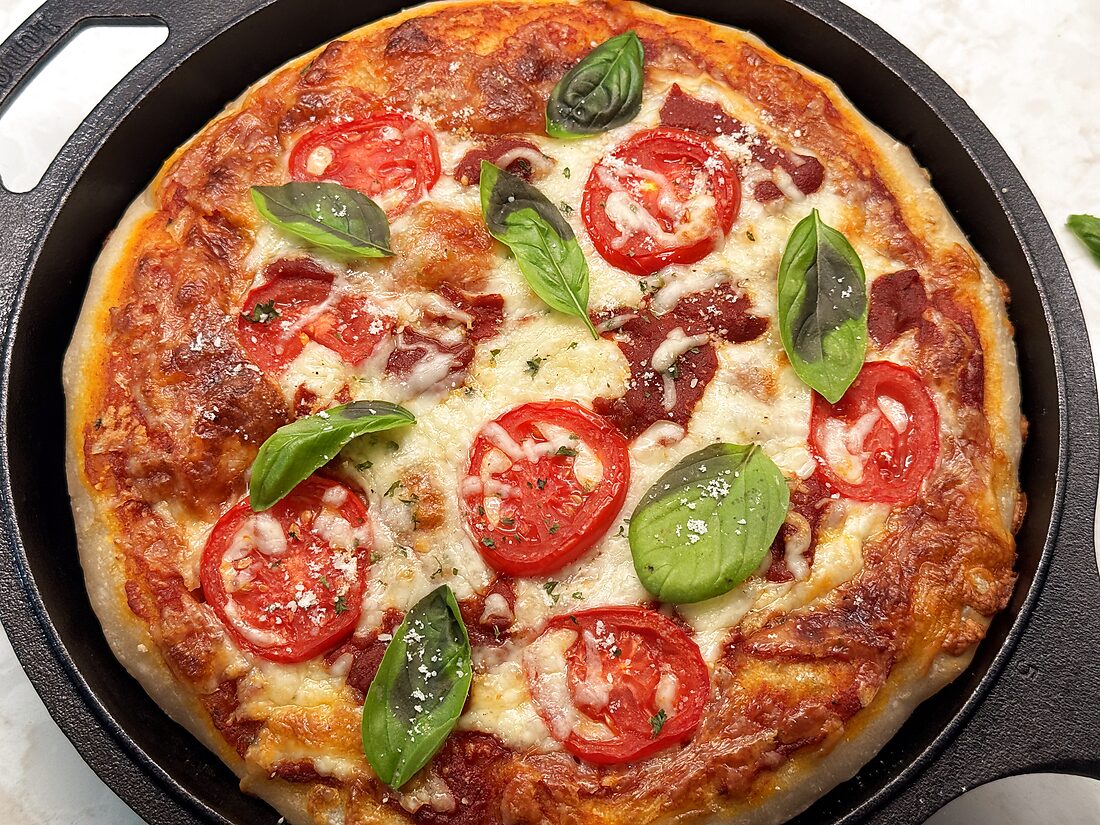
The No-Knead Way to a Better Pizza Crust

I have been making sourdough weekly on our farm for a while now, so pizza night was the natural next step. I tested this dough several ways, and this is the best sourdough pizza dough recipe … it’s just AH-mazing!
Sourdough pizza gets made WAY more complicated than it needs to be. Timed folds every 30 minutes, precise hydration math, overnight schedules that have you setting alarms… I skip almost all of it, and the crust still comes out crisp, chewy, and just plain good. This is the pared-down version I actually make when I’m busy. I’ll still point out the fussier options as we go, like the overnight ferment and formal stretch-and-folds, so you can reach for them if you want to. But, in my experience, you really don’t need any of that to make a fantastic pizza, and I’d rather you make one you’ll actually repeat than fuss over one you won’t.
So there’s no mixer, no dough hook, and no kneading. You just fold the dough over itself a few times to build strength, let it rise, and bake it the same day. My favorite way to bake it is a deep-dish version pressed right into a cast iron skillet. You can also cold-ferment the dough overnight for a tangier flavor, and it freezes beautifully, so I’ll walk you through those options too. One batch makes two 12-inch regular crust pizzas or two 10-inch deep dish pizzas.
Let’s dig in!

P.S. If you are brand new to all of this, my sourdough starter for beginners guide will get you a bubbly starter first, and my easy sourdough bread for beginners post is a gentle place to start.
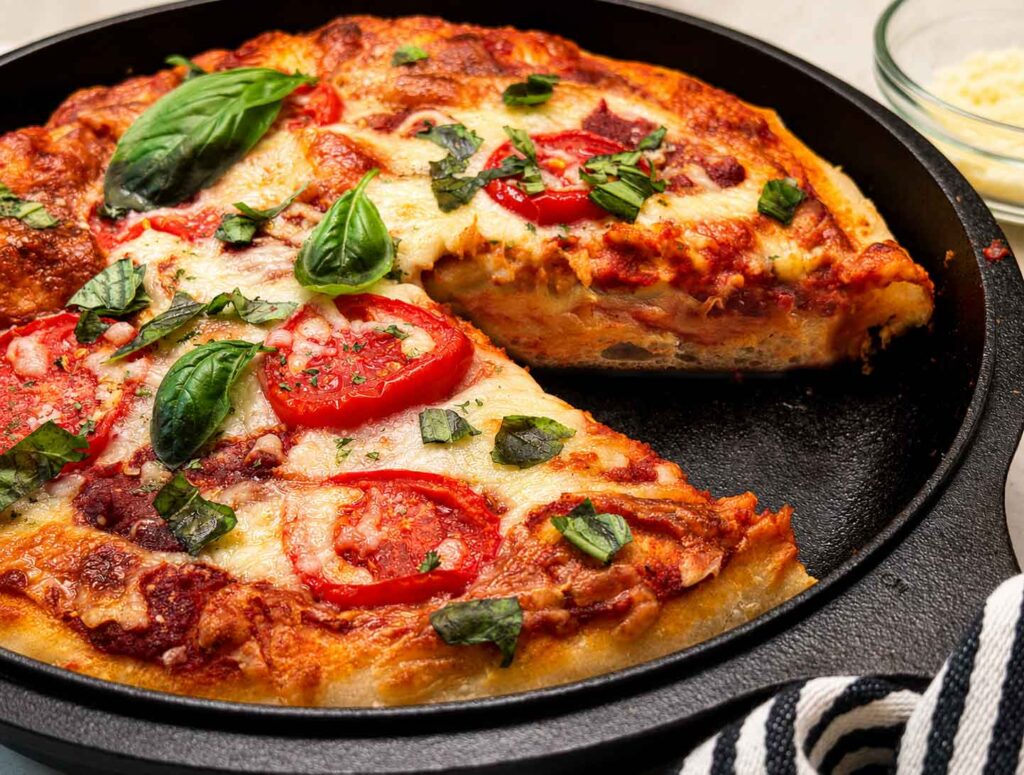
Table of Contents
- The No-Knead Way to a Better Pizza Crust
- A Sample Baking Schedule (So the Timing Isn’t Scary)
- Ingredients and Substitutions
- Equipment You’ll Want
- How to Make Sourdough Pizza Dough, Step by Step
- Baking Sourdough Pizza (3 Ways)
- Pizza Topping Ideas
- Storing, Refrigerating, and Freezing
- Sourdough Pizza Dough FAQs
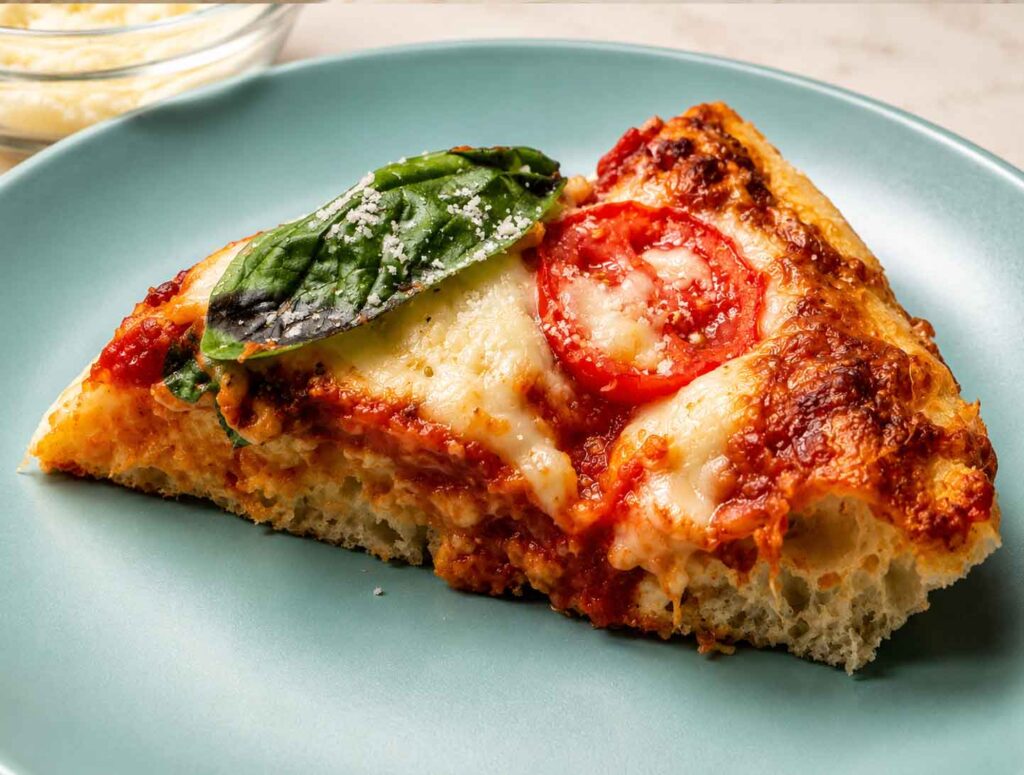
It’s hand-mixed with active sourdough starter, a little honey, bread flour, water, salt, and a splash of olive oil. Whether you call it sourdough pizza dough or sourdough pizza crust, it’s the same easy dough, and it turns into a pizza crust that’s crispy underneath and chewy at the rim.

Want to Save This Recipe?
Enter your email below and we’ll send it straight to your inbox! Plus you’ll get new recipes each week!
A Sample Baking Schedule (So the Timing Isn’t Scary)
The hardest part of any sourdough recipe isn’t the mixing, it’s fitting the rise into a normal day. So let’s map it out. Sourdough works on its own clock, and yours will run a little faster or slower depending on how strong your starter is and how warm your kitchen sits. Here are the two schedules I actually use, and don’t worry, you can nudge these times to fit your life.
| Time | Same-day (my favorite) | Make-ahead (overnight or freeze) |
|---|---|---|
| Morning | Feed your sourdough starter so it’s bubbly by midday | Feed your sourdough starter so it’s bubbly by midday |
| Midday | Mix the dough and fold it over itself a few times | Mix the dough and fold it over itself a few times |
| Afternoon | Let it bulk rise on the counter for 4 to 6 hours | Let it bulk rise on the counter for 4 to 6 hours |
| Early evening | Divide, ball, and rest 1 to 2 hours on the counter | Divide, ball, then chill overnight or freeze |
| Bake | Shape and bake that night | Warm to room temperature, then shape and bake |
Notice that both paths use the same dough. The only difference is whether you bake it the same day or let the balls chill overnight (or freeze) for later. I reach for the same-day version most nights because it’s fast and it’s the one we love best. The overnight rest adds a little more tang if you like that, and freezing is handy when you want pizza waiting in the wings.
How Do I Know When the Bulk Rise is Done?
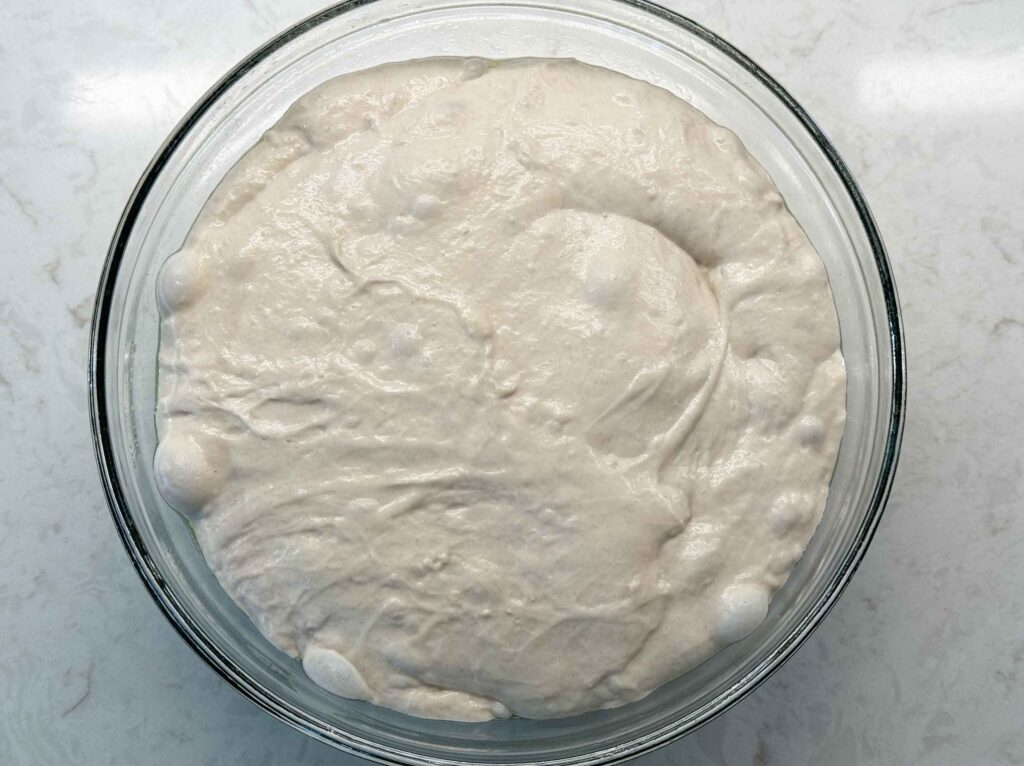
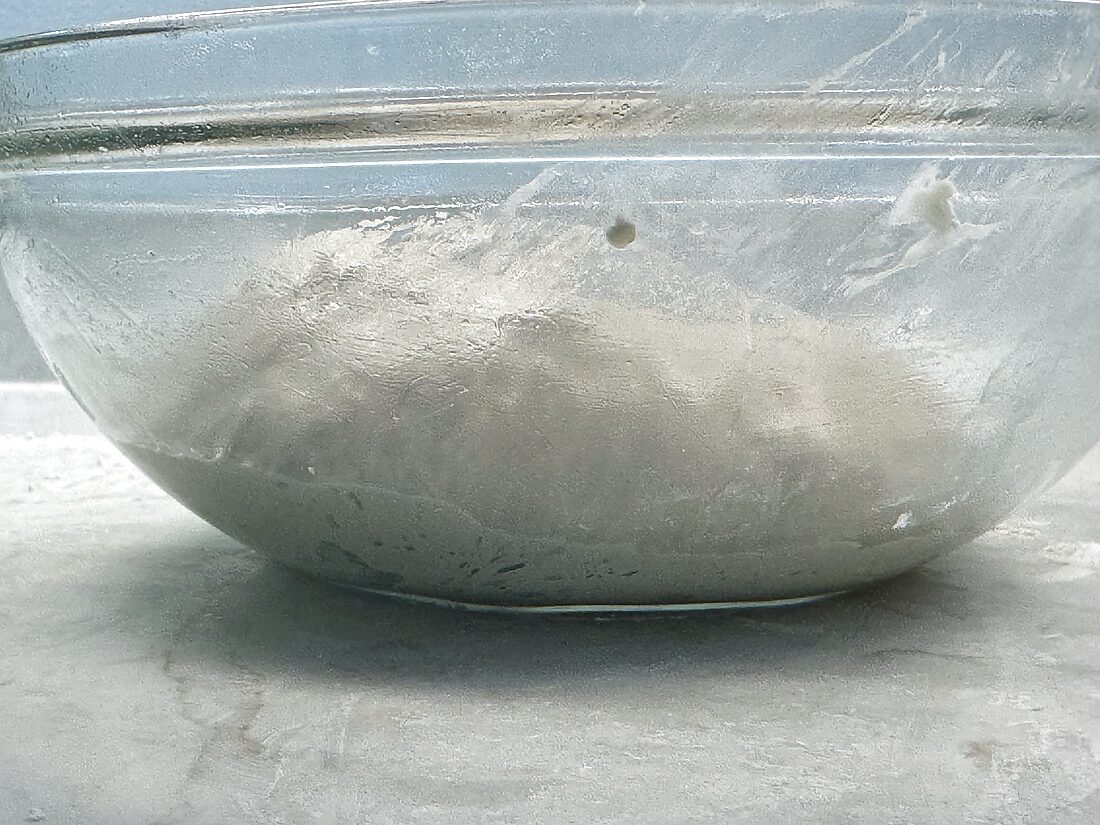
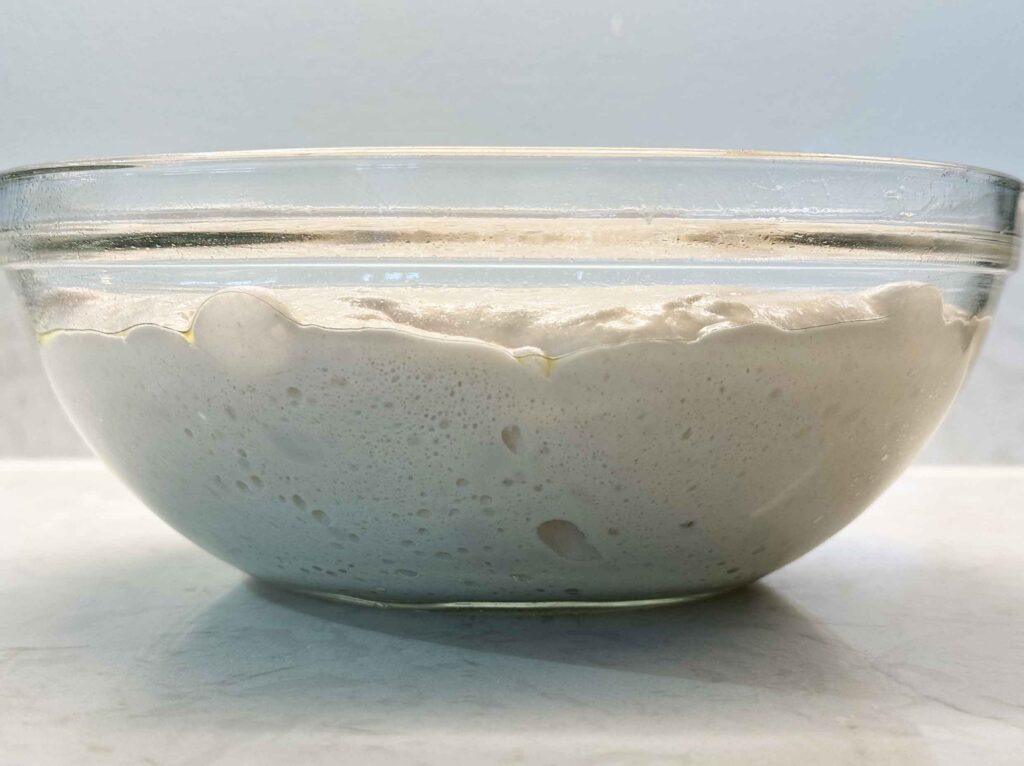
Watch the dough, not the clock. This helps because room temperature changes everything, and a timer can’t see your bowl. You are looking for dough that has grown by about 50% to 75%, feels puffy and a little jiggly, and shows a few bubbles on top. It does not need to fully double the way a sandwich loaf does. Here is what a jiggly, puffy, bubbly dough looks like after its bulk rise:
| Kitchen temp | Roughly how long | What it should look like |
|---|---|---|
| Warm (about 78°F) | 4 to 5 hours | Puffy and domed, bubbles forming, up about 50 to 75% |
| Average (about 70°F) | 5 to 6 hours | Slower and softer, jiggles when you nudge the bowl |
| Cool (about 65°F) | 6 to 8+ hours | Take your time here, just wait for the puff and bubbles |
Ingredients and Substitutions
You only need six things, and most of them are already in your kitchen. Here is what each one does, plus the swaps that actually work, because I know somebody is going to be standing there wondering if all-purpose flour will ruin everything. (It won’t.)
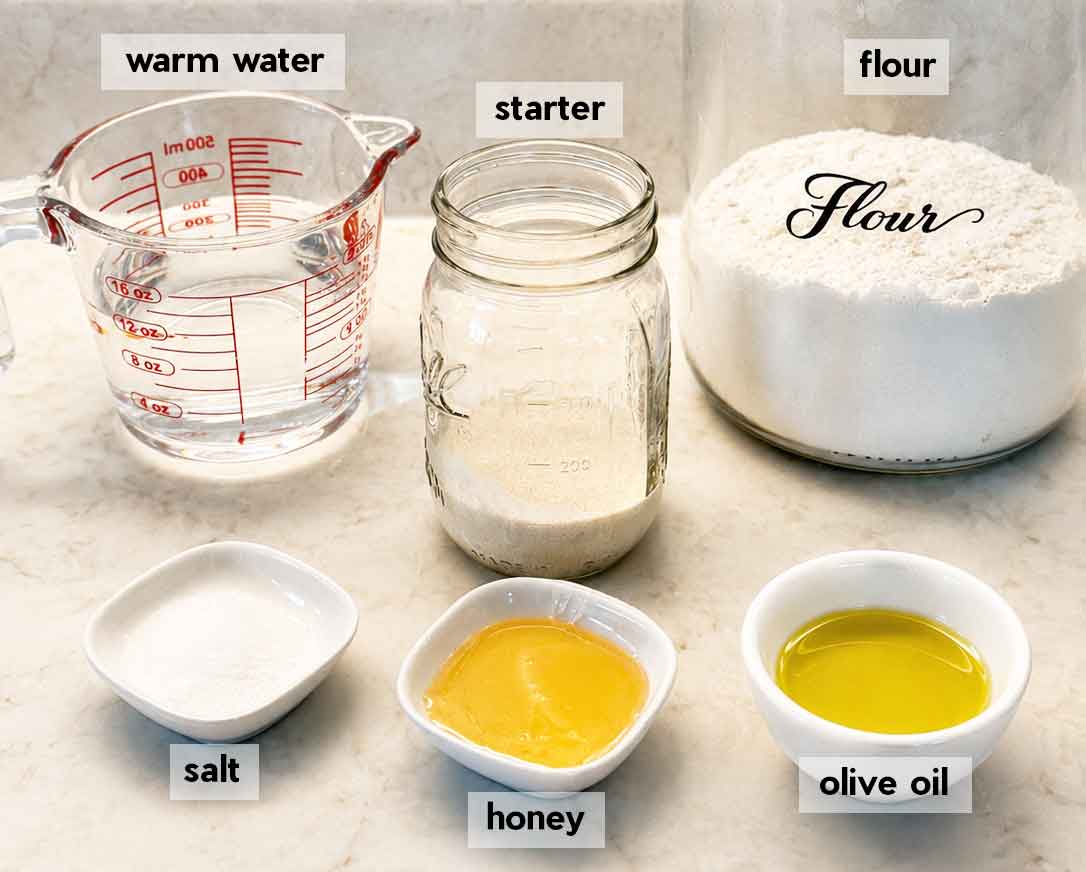
- Active sourdough starter (100 g), bubbly and recently fed. This is your rise and your flavor. You want it lively, ideally 4 to 8 hours after a feeding when it’s domed and full of bubbles. If you need help making one, see my sourdough starter recipe.
- Warm water (325 g). Weigh it if you can, since 1 ml of water weighs about 1 g, so 325 g is the same as 325 ml. Aim for 80 to 90°F, which is just warm to the touch. Cooler water simply slows the rise, so use it if your kitchen runs hot.
- Honey (1 teaspoon). Just a little, to give the wild yeast something to feed on and to help the crust brown. It does not make the dough sweet.
- Bread flour or all-purpose flour (500 g). Bread flour has more protein, so it gives you a chewier, sturdier crust and blisters nicely. All-purpose works too and bakes up a touch softer. If you want to go the classic Neapolitan route and can find it, 00 flour makes a silky, tender crust, though it browns a little slower in a home oven. You can also swap up to about 20% whole wheat flour for a nuttier crust, but go higher than that and the dough gets denser.
- Fine salt (10 g). Salt controls the ferment and wakes up the flavor. I measure it by weight because salt types vary so much. If all you have is flaky or coarse kosher salt, use a little more by volume, since those crystals take up more room than fine salt.
- Olive oil (1 tablespoon). This makes the dough easier to stretch and helps the bottom crisp. Any everyday olive oil is fine.
WHAT ELSE CAN YOU CAN SWAP?

No honey? You can substitute granulated sugar instead.
No olive oil? Try a neutral oil, such as avocado oil.
Need to use gluten free flour? Use a 1:1 baking blend containing xanthan gum, but expect a different consistency. You’ll also need to use a gluten-free starter to be truly allergen-safe.
Can I Use Sourdough Discard Instead of Active Starter?
You can, but I don’t love it for this one. Discard has plenty of flavor, but it doesn’t have the lifting power of a freshly fed, bubbly starter, so your rise will drag and the crust will come out flatter. If discard is all you’ve got, feed a little of it a few hours ahead and let it perk up first. If you have discard piling up, my sourdough focaccia recipe is a friendlier home for it (and you can even make it pizza like by adding sauce, cheese, and toppings to it if you wish).
Equipment You’ll Want

Nothing fancy here, and you almost certainly own most of it. The nice thing about this dough is that it bakes well on whatever you have, so don’t run out and buy a single-purpose gadget.
- A digital kitchen scale (this is the one tool I really do recommend for sourdough)
- A large mixing bowl
- A bench scraper or just a flexible spatula
- Bowls for the dough balls (plus lids, damp towels, or plastic wrap for covering)
- Your bake surface: a cast iron skillet (my preference), a pizza stone or steel, a pizza pan, or a plain sheet pan
- Optional: a pizza peel and a little parchment paper to make loading easier if you’re using a pizza stone or steel
How to Make Sourdough Pizza Dough, Step by Step
We’re making this in two stages. First we mix and build strength, then we let time do the flavor work. I’ll walk you through it, and I promise it’s easier than you think.
Step 1: Mix the Dough
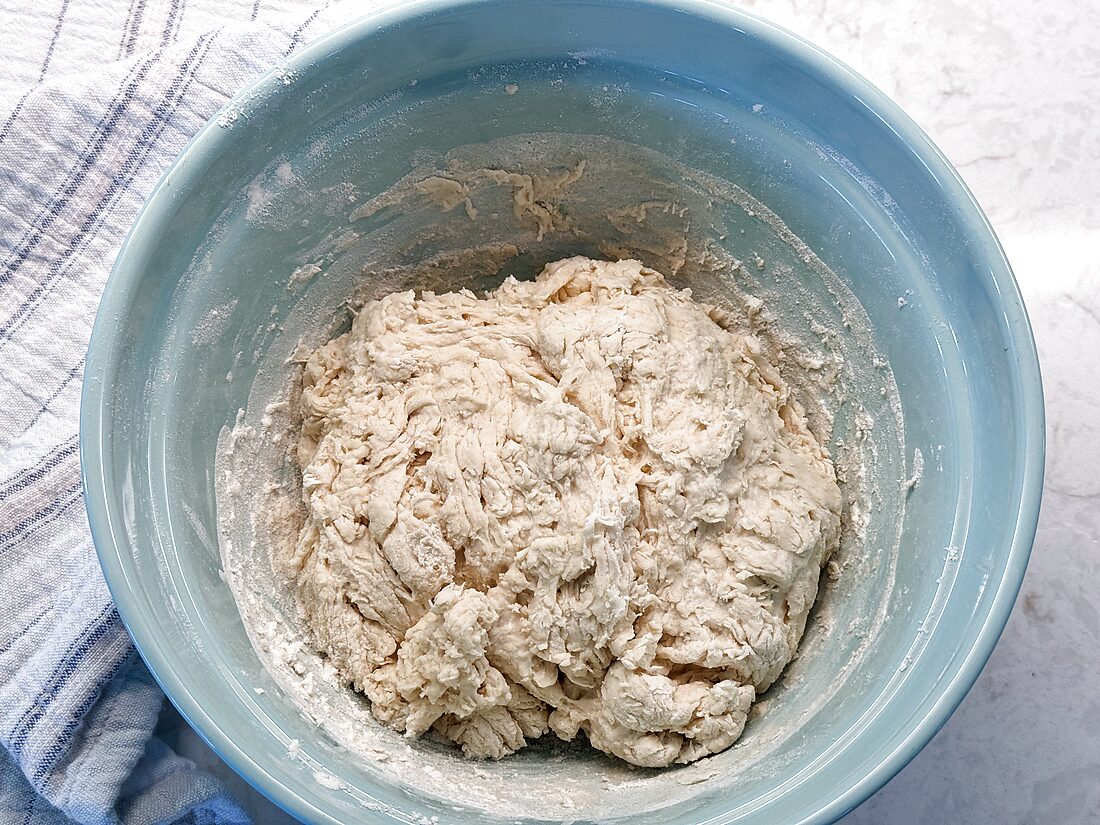
In a large mixing bowl, stir together the warm water, honey, and active sourdough starter until the starter is mostly dissolved. In a separate bowl, whisk the bread flour and salt together, then add that to the wet mixture. Mix by hand until it comes together and no big dry patches remain. It will look shaggy and rough right now, and that is totally normal.
Step 2: Rest the Dough
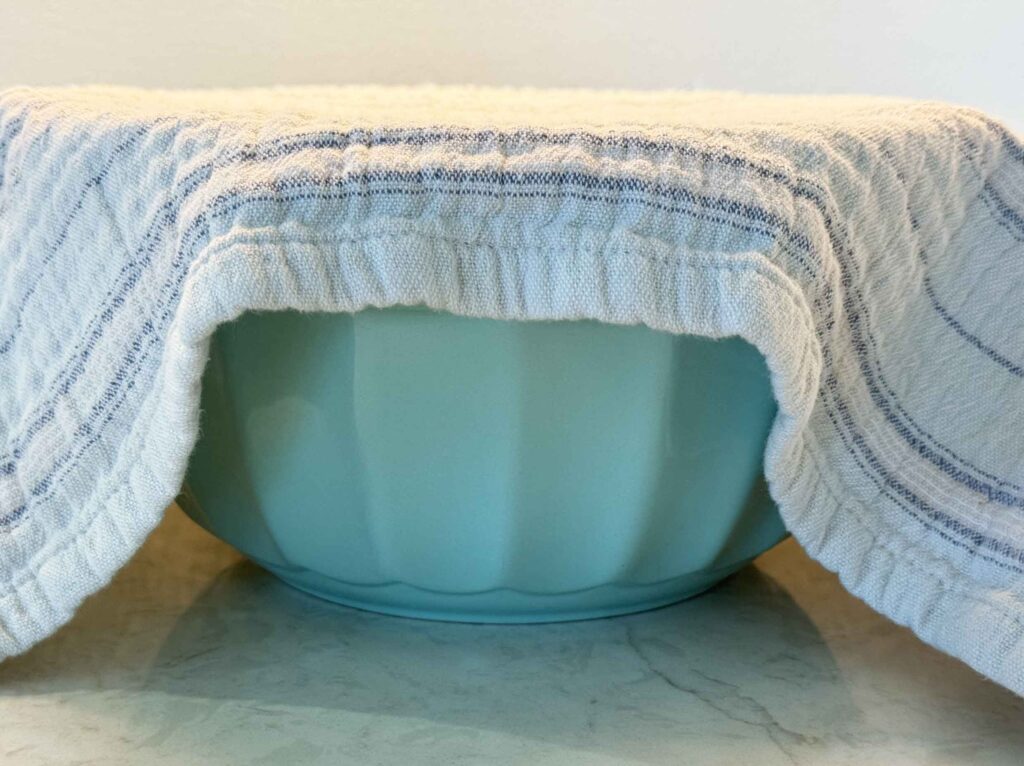
Cover the bowl and let it rest for about 20 to 30 minutes. This short rest works a lot like an autolyse, giving the flour time to drink up the water so the dough turns smoother and easier to handle.
Step 3: Work in the Oil and Fold the Dough Over Itself
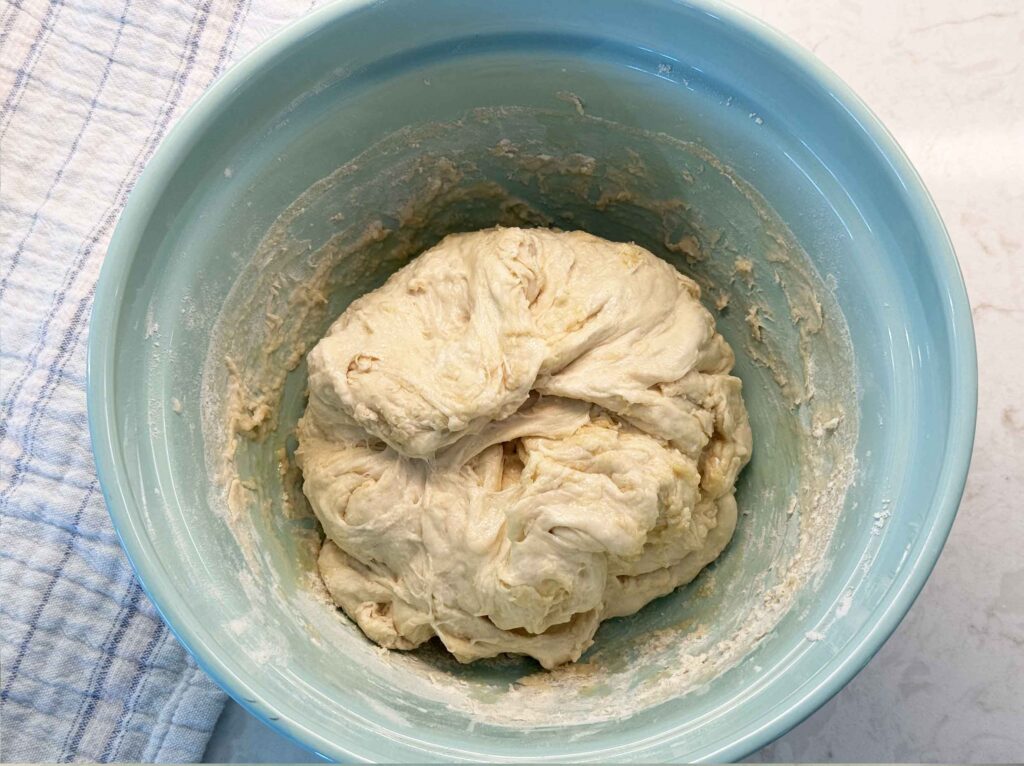
Drizzle in the olive oil, then use your hand to pinch, squeeze, and fold the dough over itself right in the bowl. Keep folding it over onto itself, turning the bowl as you go, until the oil disappears and the dough feels smoother and a little stronger, maybe eight to ten folds. It may feel slick or look a little separated at first. Don’t worry, it comes back together as you work it.
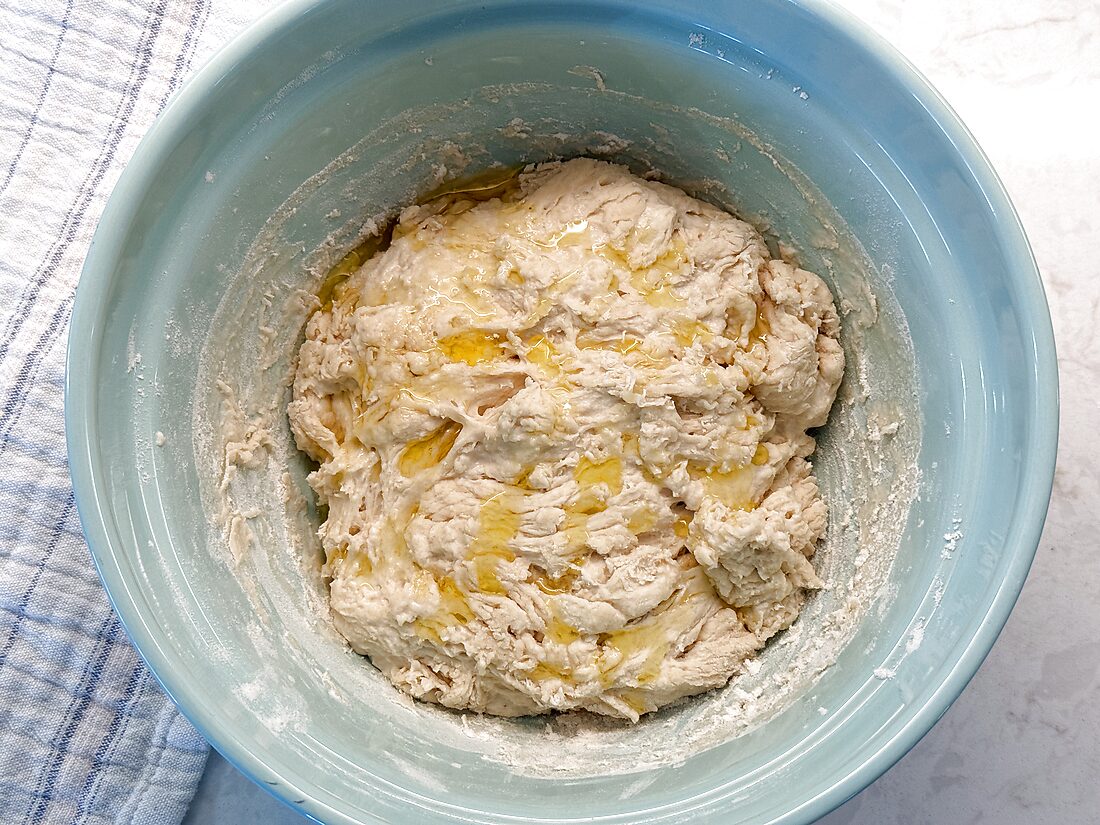
Here’s the why, because it matters. Folding the dough over itself takes the place of kneading and the usual timed stretch-and-folds. Working it while it’s still slack builds enough gluten for the crust to stretch later, no stand mixer needed and no babysitting the bowl with a timer every half hour. That’s honestly all I do for my pizza dough, and I’ve stopped feeling guilty about it. If you like a little extra structure, you can give it one gentle stretch-and-fold about an hour into the rise, but I usually skip it and the crust turns out great.
Step 4: Bulk Rise
Cover the bowl and let the dough rise at room temperature until it looks puffy and has grown by about 50% to 75%. This usually takes 4 to 6 hours total from when you first mixed, depending on your starter and your kitchen. Use the visual cues table above and trust your eyes over the timer.
Step 5: Divide and Ball
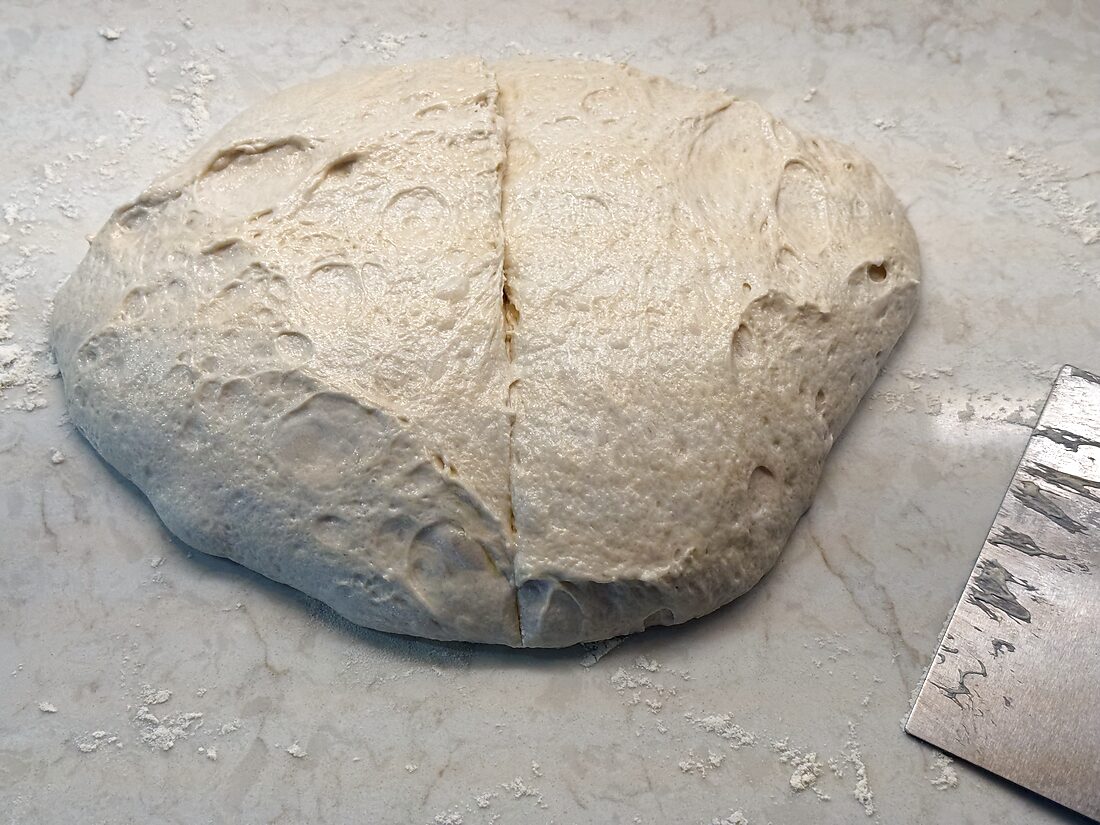
Turn the dough onto a lightly floured counter and divide it into 2 equal pieces. Shape each one into a smooth ball by gently tucking the edges underneath and dragging it toward you a few times to build a little surface tension. Set each dough ball in a lightly oiled bowl or container.
Step 6: Rest the Dough Balls (Bake Today, or Chill for Later)
Cover the balls and let them rest at room temperature for 1 to 2 hours, and they’re ready to bake that same day. That’s what I do most of the time, and it’s the version we love best (we’re having pizza tonight, in fact). If you’d rather plan ahead, refrigerate them for 12 to 48 hours for a tangier, make-ahead dough with a stronger sourdough flavor, or freeze them for later. Both options are covered down in the storage section.
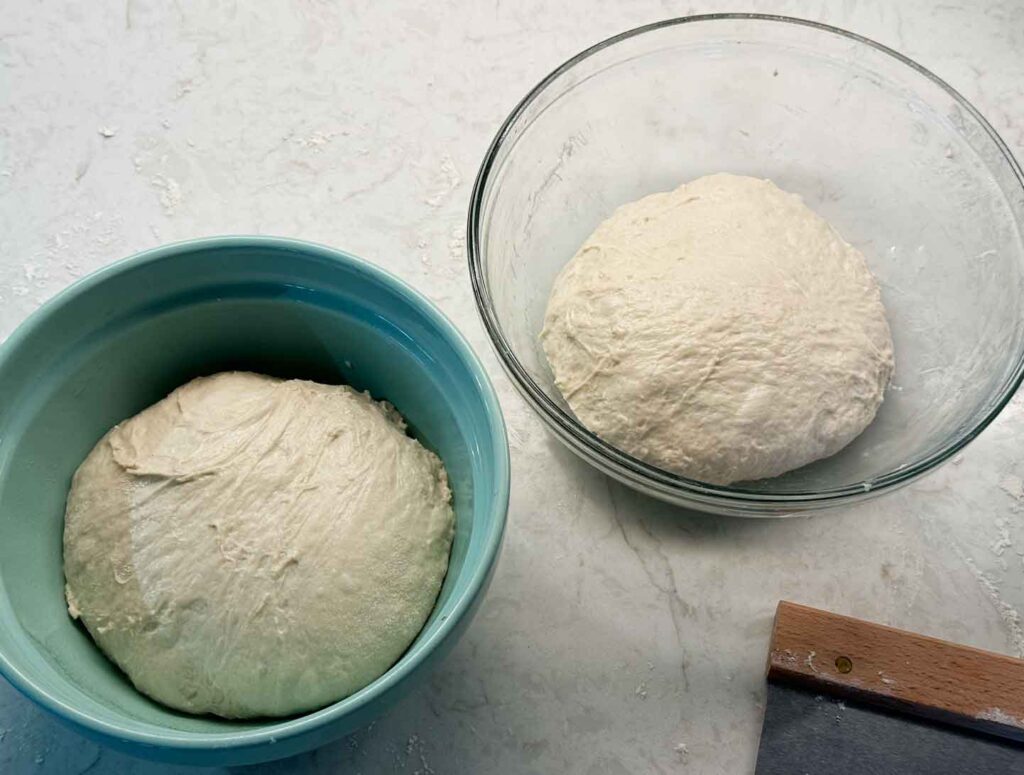
And that’s it! After this, you can use your pizza dough.
Baking Sourdough Pizza (3 Ways)
Once your dough is ready, the fun part starts. However you bake it, get your oven as hot as it will go, ideally 500 to 550°F, and if you have chilled your dough, let it sit out for 1 to 2 hours so it warms up and relaxes before you shape it. Cold dough fights you. Here are the three methods I use, starting with the deep-dish cast iron skillet that everybody keeps asking me about.
Cast Iron Skillet (My Favorite Deep Dish)
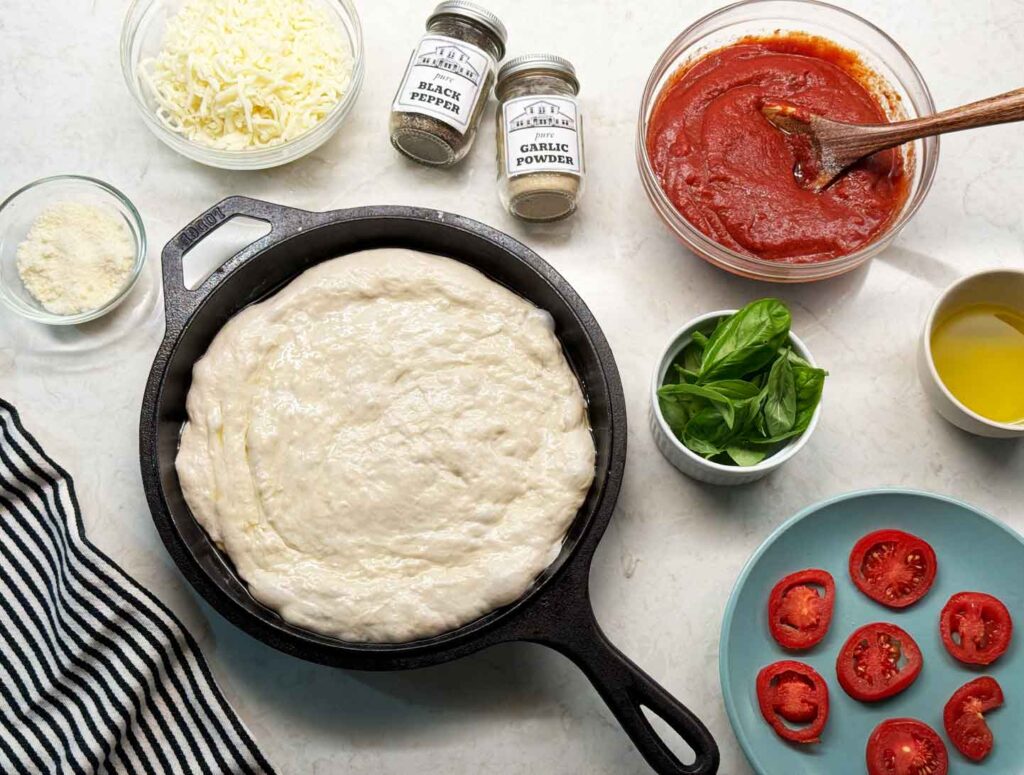
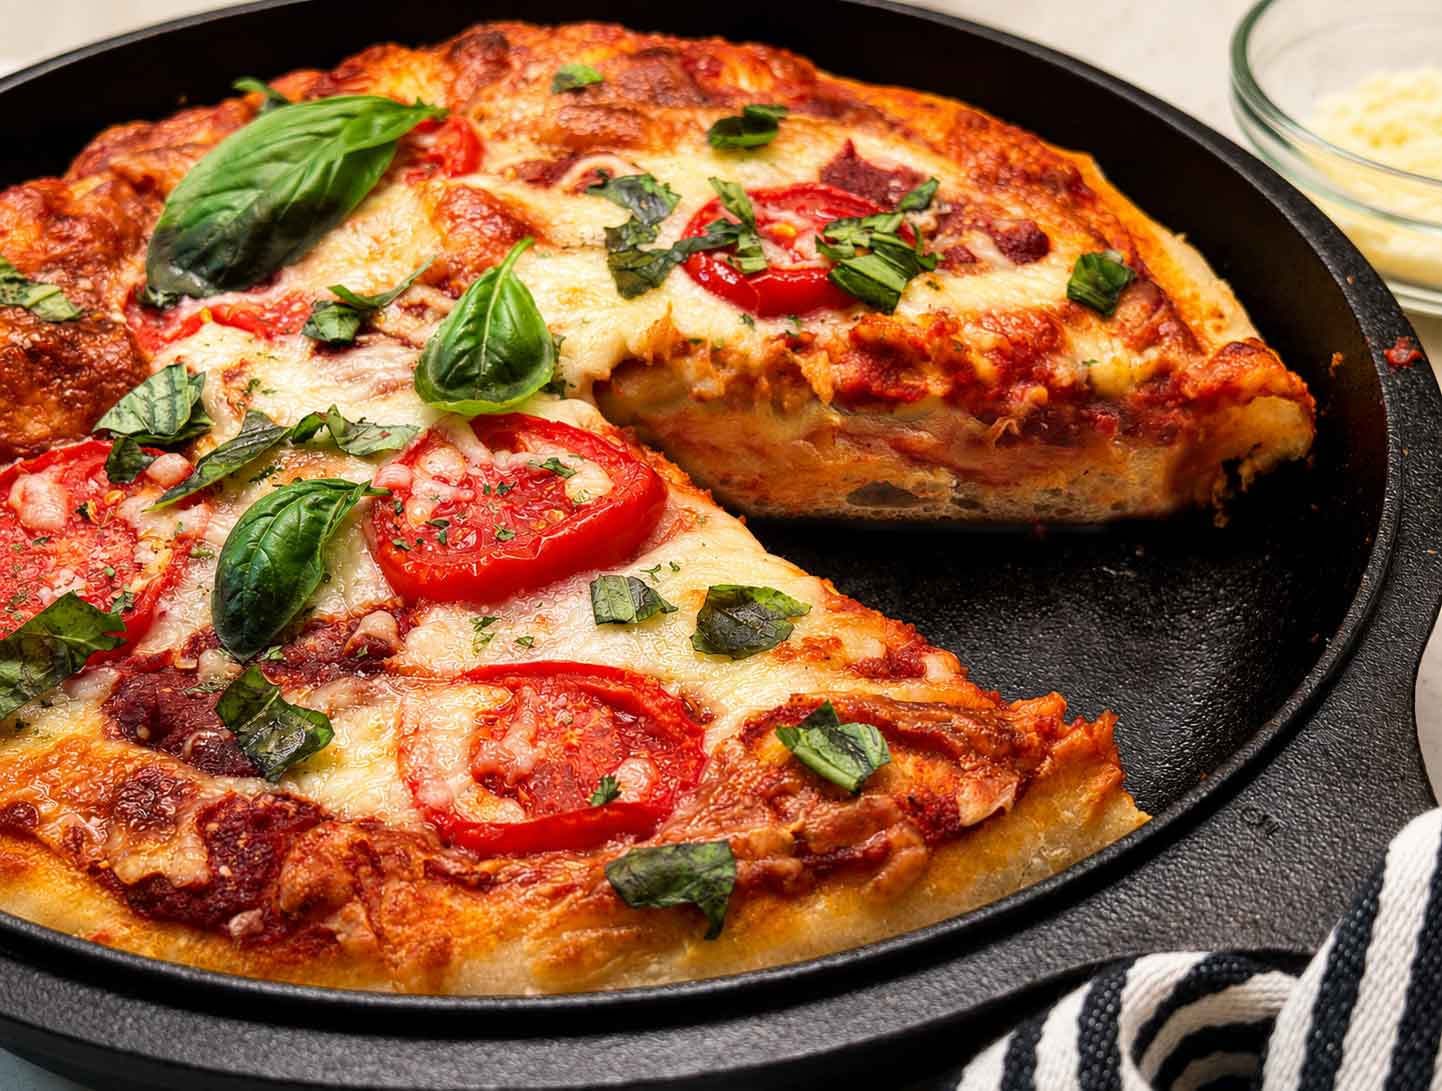
This is the one I can’t stop making, and it’s the method I’d steer you to first as it is more forgiving. Rub a 10-inch cast iron skillet with a little olive oil, then press one dough ball into the bottom and up the sides to make a deep, cozy crust. No need to preheat the skillet, just build your pizza right in it.
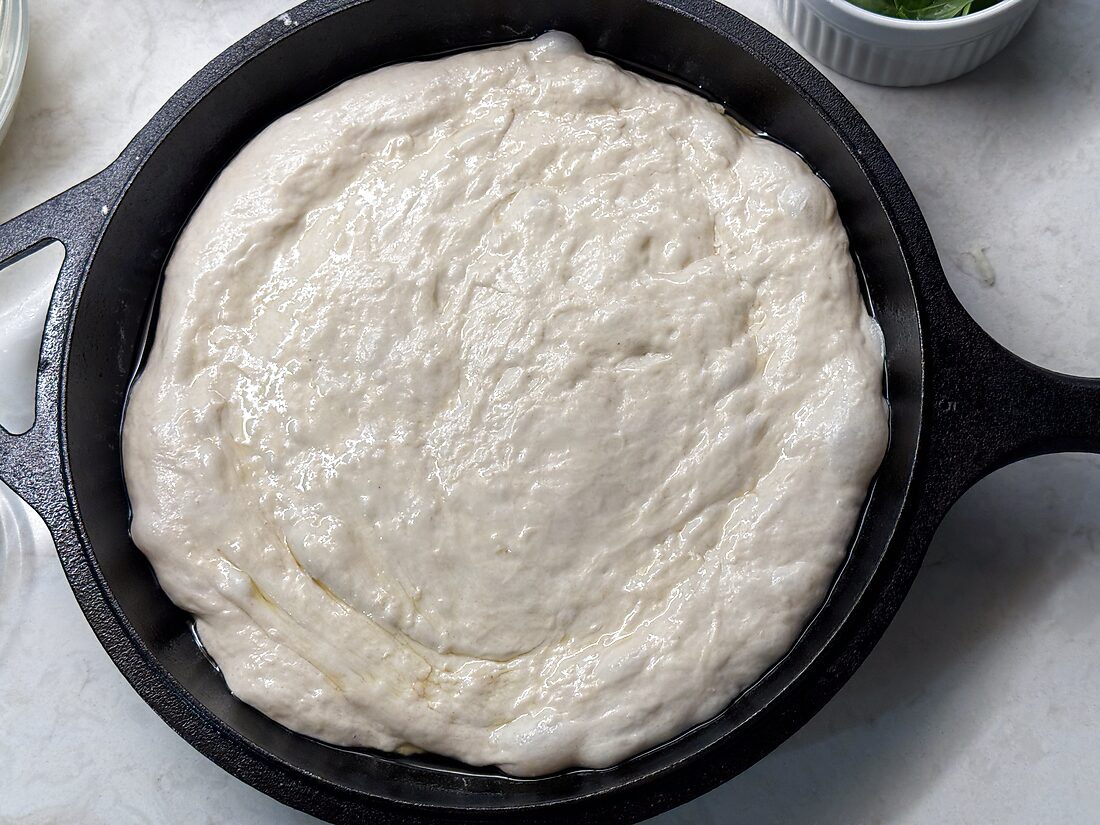
Add your sauce, cheese, and toppings, then bake in your hot oven for 12 to 15 minutes, until the top is bubbly and the edges are deep golden.
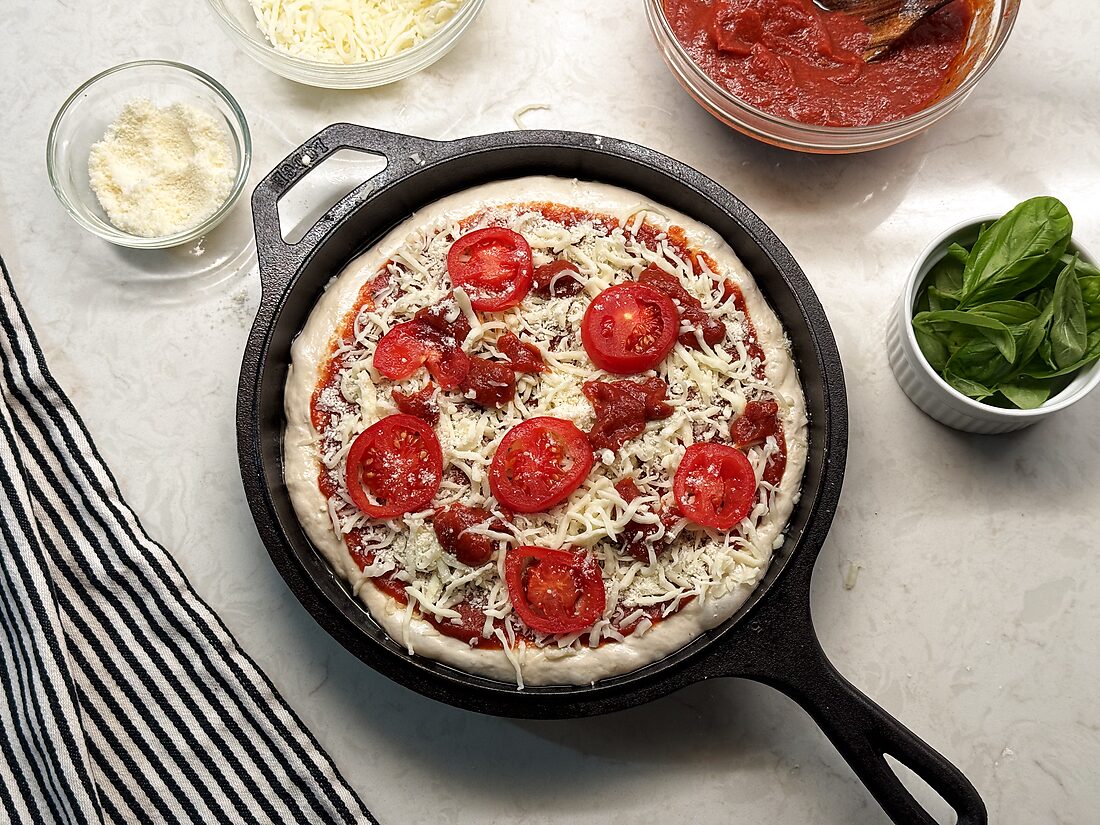
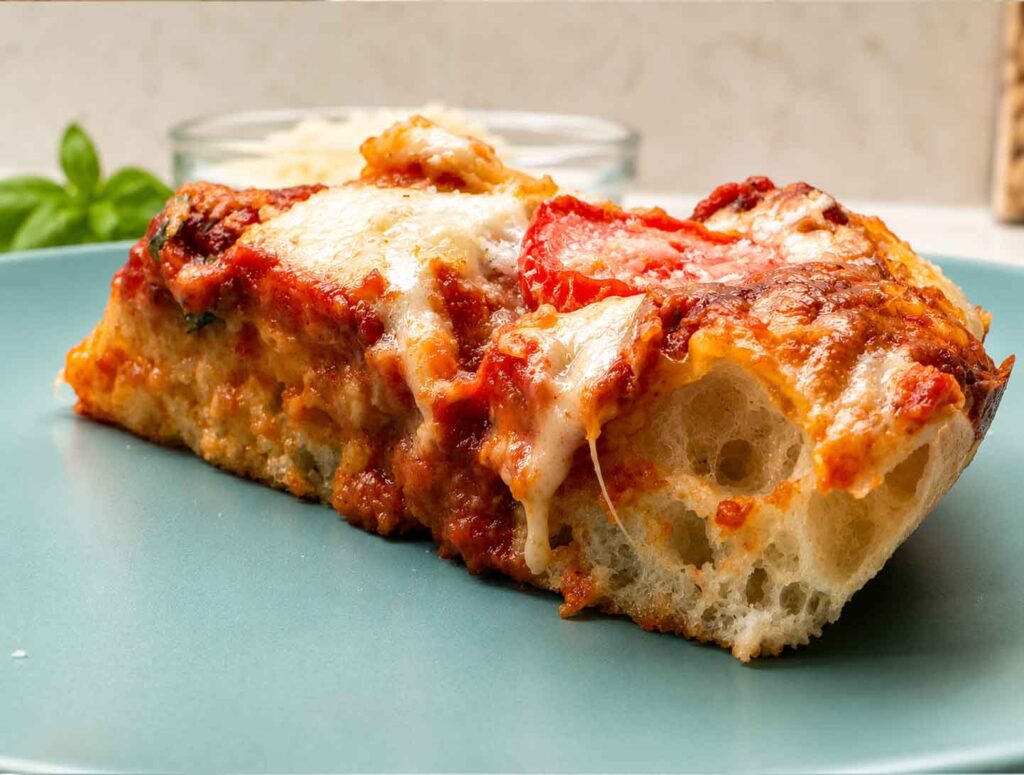
Then, for the crispest bottom, set the skillet on the stovetop over medium heat for 2 to 3 minutes after it comes out of the oven, until you hear the base sizzle and it releases easily. Be careful here, the handle will be super hot, so keep a towel or mitt handy. The bottom comes out very crisp and the inside stays pillowy. It is SO GOOD, and it’s exactly what we keep making again.
Pizza Stone or Steel (Thin and Crispy)
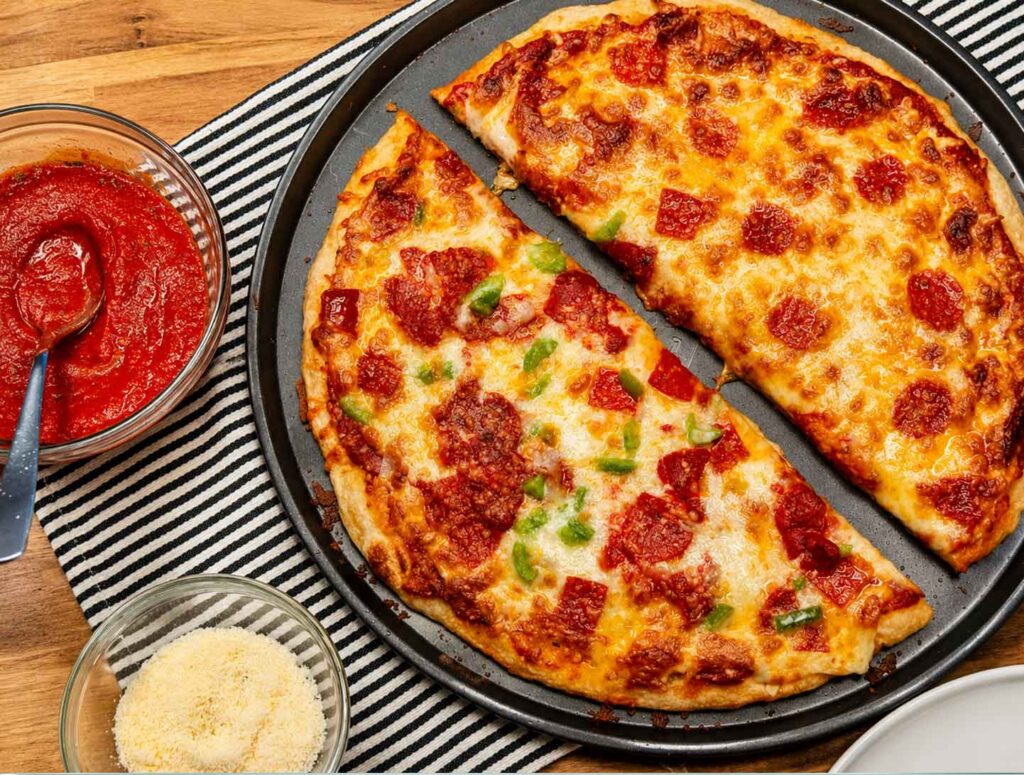
Slide your stone or steel onto the middle rack and preheat it for at least 45 minutes so it’s screaming hot. Stretch a dough ball into a 12-inch round on a piece of parchment, leaving a thicker rim around the edge. Top it, then use a pizza peel or a flat baking sheet to slide the pizza, parchment and all, onto the hot stone. Bake 8 to 12 minutes, until the crust is browned and the bottom is crisp. This is also how I bake the big thin one on my 16-inch pizza pan when I’m feeding a crowd, and it’s the pan I used for my overnight, make-ahead batch.
Round Pizza Pan or Rectangular Sheet Pan (the No-Special-Equipment Option)
No skillet and no stone? A regular pizza or sheet pan has you covered. Drizzle it with olive oil, then press and stretch a dough ball out toward the edges. It won’t fill a big sheet pan into a perfect rectangle, and that’s fine, mine never look tidy either. Top it and bake 12 to 18 minutes until the underside is golden and crisp. The oil in the pan basically fries the bottom, which is a wonderful thing.
How Do I Get a Crispier Crust?
A few small moves make a big difference. Brush the outer rim with a little olive oil before it goes in for a crackly, golden edge. Go lighter with sauce and cheese in the very center so it bakes through instead of staying gummy. And if your crust comes out pale, your oven probably wasn’t hot enough or the dough went in cold, so give it more preheat time next round.
Pizza Topping Ideas
This crust is a blank canvas, so let’s talk about what goes on top. Store-bought sauce is a perfectly good weeknight shortcut, and if you want to go homemade, I’ve got you covered there too.
- Quick pizza sauce: my homemade pizza sauce, which is intentionally thick so it does not make the pizza soggy (best if you’re going for a thin crust).
- Traditional classic red: my homemade spaghetti sauce with mozzarella, either on its own or loaded up with vegetables and meats (works fine for a thicker crust).
- White pizza: spread on homemade alfredo sauce, then add spinach and mozzarella for something a little dreamy.
- BBQ chicken: swap in homemade BBQ sauce with cooked chicken and a cheddar blend. This one disappears fast at our house.
Kitchen Tip

If you like lots of sauce on your pizza but worry about it making your crust too soggy, put dollops of extra sauce on over the cheese. Doing it this way gives you extra pools of sauce without it affecting the crust!
Storing, Refrigerating, and Freezing
One of the best things about this dough is how well it keeps, so you can make a batch now and have pizza night ready to go later. Here are the three ways I stash it.
Refrigerate (up to 72 hours)
Shaped dough balls hold happily in the fridge in lidded containers for up to about 3 days, and honestly they get better through day two. Just let them come to room temperature for 1 to 2 hours before you shape.
Freeze raw dough balls
Lightly oil each ball, wrap it well, and freeze for up to 3 months. Thaw overnight in the fridge, then bring to room temperature before shaping. This is a good make-ahead trick for busy weeks.
Par-bake and freeze crusts
This is my favorite way to keep pizza on standby, and it’s exactly what I do when I make several batches at once. You par-bake plain, unsauced crusts just until they set, freeze them, then top and finish baking whenever a craving hits. For any of these, make the dough all the way through the bulk rise, then divide and ball as usual, letting the balls come to room temperature if needed so they shape without fighting you. Preheat your oven to 475 to 500°F.
Cast iron deep dish (my favorite): These par-bake and finish right in the skillet, so you keep that deep, cozy crust on standby.
- Oil a cast iron skillet well, press a dough ball into the bottom and up the sides, and prick the base a few times with a fork.
- Par-bake for 6 to 8 minutes, just until the crust is set and holds its shape but hasn’t browned. It needs a minute or two longer than a flat round so the sides firm up enough to lift out.
- Let it cool in the skillet for a few minutes, then gently lift the shaped crust out and cool it completely on a wire rack. A well-oiled skillet lets it release cleanly. If it feels floppy, give it another minute in the oven, since it has to be set to hold that bowl shape.
- Wrap each shaped crust on its own, since they don’t stack flat like rounds do, and freeze for up to 3 months.
- To bake, set a frozen crust back into a same-size skillet, top it, and bake at 500 to 550°F for 8 to 12 minutes. Then finish on the stovetop over medium heat for 2 to 3 minutes for that crisp bottom.
The main trade-offs are that you’ll par-bake one at a time if you have a single skillet, and the deep-dish shape takes up more freezer room. If deep dish is your favorite, like it is mine, it’s worth it.
Flat rounds (thin and crispy): No cast iron, or feeding a crowd? Par-bake flat rounds you can stack. A pizza stone, steel, or plain sheet pan all work, and if you’re using a stone or steel, preheat it along with the oven.
- Shape a dough ball into a 12-inch round on a piece of parchment, leaving a slightly thicker rim. Prick the center all over with a fork. This helps because it keeps big bubbles from ballooning up while the crust bakes with no toppings to weigh it down.
- Par-bake for 5 to 7 minutes, just until the surface looks dry and set and is barely starting to color. You want it firm enough to lift but still pale and a little flexible. Be careful not to let it brown, since it finishes baking later and you don’t want it twice-baked and dry.
- If a big bubble puffs up, just press it back down with a spatula.
- Cool each crust completely on a wire rack. Don’t rush this part. Wrapping a warm crust traps steam and gives you a soggy bottom later (ask me how I know).
- Once they’re fully cool, stack them with a sheet of parchment paper between each one, then wrap the stack well in plastic and foil or slide them into a freezer bag. They keep for up to 3 months.
- When you’re ready for pizza, there’s no need to thaw. Top a frozen crust straight from the freezer, then bake at 500 to 550°F for about 6 to 10 minutes, until the toppings are hot and the crust is crisp and golden.
Sourdough Pizza Dough FAQs
Can I double the recipe?
Yes, just double every ingredient by weight, and make sure your mixing bowl is big enough for the bigger bulk rise. The dough may take a little longer to come together, but the rise time stays about the same. Fermentation depends on the temperature of your kitchen and the strength of your starter, not the size of the batch, so watch for that same 50% to 75% puff rather than adding time just because you made more.
Is parchment paper safe at 500°F?
Most parchment is rated to around 425 to 450°F, so at pizza temperatures it can darken and get brittle. I slide the pizza in on parchment, then pull the parchment out after a couple of minutes once the crust has set. Or skip it and use a floured peel or a lightly oiled pan.
What if my dough won’t stretch?
It’s just tight, not broken. Let it rest for 10 to 15 minutes so the gluten relaxes, then try again. Nine times out of ten it stretches right out.
Can I make this without a pizza stone or cast iron skillet?
Yes, and you won’t be missing out. A plain sheet pan rubbed with olive oil bakes a wonderfully crisp bottom, and any oven-safe metal pan will do in a pinch. The dough is happy on whatever you have, so use the pan that’s already in your cupboard.
Sourdough Pizza Dough Recipe
Equipment
- 1 10" cast-iron skillet or a pizza pan, sheet pan, pizza stone or steel
Ingredients
- 100 g active sourdough starter bubbly and recently fed
- 325 g warm water (about 325 ml, 80 to 90°F)
- 1 teaspoon honey
- 500 g flour bread flour or all-purpose flour
- 10 g fine salt
- 1 tablespoon olive oil
Instructions
- In a large mixing bowl, stir together the warm water, honey, and active sourdough starter until the starter is mostly dissolved.
- In a separate bowl, whisk together the flour and salt.
- Add the flour mixture to the starter mixture. Mix by hand until the dough comes together and no large dry patches remain. It will look shaggy and rough.
- Cover the bowl and let the dough rest for 20 to 30 minutes.
- Drizzle in the olive oil. Pinch, squeeze, and fold the dough over itself in the bowl, turning as you go, until the oil works in and the dough feels smoother and a little stronger, about 8 to 10 folds. It may feel slick at first, then come together. No timed stretch-and-folds needed.
- Cover and let the dough bulk rise at room temperature until puffy and about 50% to 75% larger, roughly 4 to 6 hours total, depending on your starter and kitchen.
- Turn the dough onto a lightly floured counter and divide into 2 equal pieces. Shape each into a ball by tucking the edges underneath. Place each in a lightly oiled bowl or container.
- Cover and rest at room temperature for 1 to 2 hours to bake the same day, or refrigerate 12 to 48 hours (or freeze) to make ahead.
- To bake, preheat the oven as hot as it will go, ideally 500 to 550°F. If using a pizza stone or steel, also pre-heat it at least 45 minutes. Do not pre-heat a cast-iron skillet. If the dough was refrigerated, let it sit at room temperature 1 to 2 hours before shaping.
- Place a dough ball on a lightly floured surface. Gently press from the center outward, leaving a thicker rim.
- For the cast iron deep dish (my favorite), press one ball into an oiled 10-inch skillet (no preheating), add sauce, cheese, and toppings, then bake 12 to 15 minutes, then set the skillet on the stovetop over medium heat for 2 to 3 minutes to crisp the bottom. On a stone or steel, add sauce, cheese, and toppings, then bake 8 to 12 minutes until browned and crisp. On an oiled sheet pan, add sauce, cheese, and toppings, then bake 12 to 18 minutes. In every case, bake until the crust is browned, the bottom is crisp, and the cheese is bubbly.
Notes
- Folding the dough over itself replaces kneading, building enough strength for shaping without a stand mixer, dough hook, or timed stretch-and-folds.
- Same-day dough bakes up great. For a tangier flavor and a slightly easier stretch, chill the shaped balls overnight before baking.
- If the dough feels sticky, lightly oil or wet your hands instead of adding extra flour, which can make the crust tougher.
- If the dough resists stretching, let it rest 10 to 15 minutes, then try again.
- Using active starter is best. If you only have discard, feed it a few hours ahead so it perks up first.
- If the dough feels stiff while mixing, add 10 to 25 g water. Flour absorbs differently by brand and humidity.
- To stock the freezer, par-bake plain 12-inch rounds at 475 to 500°F for 5 to 7 minutes, just until set but not browned. Cool completely, then freeze with parchment paper between them. Top and bake straight from frozen at 500 to 550°F for 15 to 20 minutes. You can also par-bake deep-dish crusts right in a cast iron skillet (6 to 8 minutes), lift them out to cool and freeze, then finish later in a same-size skillet.
That’s it, and I really hope you make this one soon. A same-day batch means pizza night doesn’t need a plan, and once you’ve made it once you’ll find yourself inventing excuses to fire up the oven. If you try it, come back and leave a comment to let me know how it turned out and which method you loved most. I’m partial to the cast iron, but I won’t judge.
Happy baking!
Love,
Jennifer
Tried this recipe?
Tap the stars in the recipe card to leave a quick rating. Your rating helps other home cooks know this recipe works in a real kitchen, not just mine.
And as a thank-you for your feedback, you will receive a free printable copy of my Maker Home Companion Cookbook, featuring my most popular recipes, each one formatted on a SINGLE, easy-to-use page, a perfect kitchen companion for easy meal prep. Click here to learn more about this cookbook and how you can get your copy!

Meet Jennifer
Jennifer cooks and experiments in the kitchen at Maker Farm, where she focuses on simple pantry cooking, homemade staples, and practical recipes that make everyday meals easier. Over the years she has tested many ways to make cooking simpler and more dependable, and shares the methods that work best in her own kitchen, occasionally showing them on her Heart to Home at Maker Farm vlog.
I love all your recipes.