Making homemade butter is surprisingly simple and incredibly rewarding. My daughter Alexa used to make butter often as a child, and we all loved it. Whether you’re looking for a fun kitchen activity with kids or want to enjoy fresh, creamy butter made from scratch, this guide will walk you through two easy methods: the classic mason jar shake method and the traditional butter churn method. Both techniques transform ordinary whipping cream into delicious homemade butter in minutes.
Why Make Homemade Butter?
Homemade butter tastes fresher and creamier than store-bought varieties. You control exactly what goes into it, with no preservatives or additives. Plus, making butter at home is surprisingly easy. Alexa would often make homemade butter when she was younger. The process is straightforward, requires minimal ingredients, and produces both butter and fresh buttermilk as a bonus.

What You’ll Need to Make Homemade Butter
The beauty of making butter at home is that you need very few supplies:
Essential Ingredients:
Heavy whipping cream (the only required ingredient) – look for one without Carrageenan and Polysorbate 80, as both of these emulsifiers will make it harder to turn your cream into butter
Cold water for rinsing
Salt (optional, for salted butter)
Equipment Options:
Mason jar with tight-fitting lid (for the shake method)
Small butter churn with dasher (for the traditional method)
Fine mesh strainer or cheesecloth
Bowl for collecting buttermilk
Storage container or butter crock
Method 1: Making Butter in a Mason Jar
The mason jar method is perfect for kids and beginners. It’s hands-on, requires no special equipment, and delivers excellent results.
Step-by-Step Instructions:
Start by bringing your heavy whipping cream to room temperature (60-65°F). This is crucial because room temperature cream churns much faster than cold cream. Pour the whipping cream into a mason jar, filling it only about halfway to allow space for shaking.
Secure the lid tightly on the mason jar. Make sure it’s sealed properly to avoid any messy spills during the shaking process.
Begin shaking the jar vigorously. This is where kids especially love to help. The shaking motion agitates the cream, causing the fat molecules to separate from the liquid.
Continue shaking for approximately 10 to 20 minutes. You’ll notice the cream going through several stages: first it becomes whipped cream, then it gets very thick, and finally it will suddenly separate into solid butter and liquid buttermilk.
Once you see clear separation between the yellowish butter solids and the thin, white buttermilk, you’re done shaking.
Method 2: Making Butter with a Butter Churn
Using a traditional butter churn with a dasher makes the process faster and less tiring, especially when making larger quantities.
Step-by-Step Instructions:
Just like with the mason jar method, ensure your heavy whipping cream is at room temperature before beginning. Pour the cream into the butter churn container.
Insert the dasher (the plunger-like mechanism) into the churn and secure the lid.
Begin moving the dasher up and down in a steady, rhythmic motion. The dasher works by agitating the cream, forcing the fat molecules to clump together.
Continue churning consistently. If the process seems to take too long, don’t worry. You can speed things up by having someone else take a turn, or get creative like my guy Greg did by attaching a drill to the handle to automate the churning process. This unconventional method worked perfectly and separated the cream into butter and buttermilk very quickly.
Watch for the same separation you’d see in the mason jar method. The cream will transform from liquid to thick, then suddenly separate into butter solids and buttermilk.

Homemade Butter
Equipment
- 1 Mason Jar
- 1 Jar-Based Butter Churn optional
- 1 Storage container or butter crock
- 1 Mesh strainer or cheesecloth optional if you want to keep the buttermilk
Ingredients
- 2 cups heavy whipping cream at room temperature
- cold water for rinsing
- 1/4 teaspoon salt optional, to taste
Instructions
- Step 1. Start with the CreamPour room temperature heavy whipping cream into your chosen equipment (mason jar, filling halfway, or butter churn). Seal the mason jar tightly or secure the lid and dasher on the butter churn.
- Step 2: Shake or Churn ItShake the mason jar vigorously or move the dasher up and down rhythmically until the cream separates into solid butter and liquid buttermilk. This typically takes 10-30 minutes. You'll be able to tell its done when the cream separates into solid yellow clumps (the butter) and a milky liquid (the buttermilk), with the butter clinging to the sides of the jar, often after passing through a whipped cream stage. Stop shaking or churning immediately once you see this distinct separation.
- Step 3: Drain the ButtermilkOnce separated, drain the buttermilk out of the butter. You can optionally drain it through a fine mesh strainer into a bowl and reserve the buttermilk for other recipes.
- Step 4: Rinse the ButterRinse the butter thoroughly under cold water, gently pressing and kneading it, until the water runs completely clear. This removes any remaining buttermilk and helps the butter last longer. You want to get off all the whey from the buttermilk so it stores well.
- Step 5: Add Salt (Optional)If desired, knead in salt to taste.
- Step 6: Store Your ButterPress the finished butter into a storage container or butter crock. Or just wash out your Mason jar and put it back in there. Store homemade butter covered in the refrigerator for a few weeks, or freeze for up to six months.
Finishing Your Homemade Butter
Regardless of which method you use, the final steps are identical and crucial for creating butter that stores well.
Draining the Buttermilk:
Pour off the buttermilk through a fine mesh strainer, collecting it in a bowl. Don’t discard this buttermilk … it’s genuine cultured buttermilk that’s perfect for baking pancakes, biscuits, or other recipes.
Washing the Butter:
This step is essential and often overlooked by beginners. Rinse the butter thoroughly under cold water while gently pressing and kneading it. The cold water helps firm up the butter while washing away any remaining buttermilk.
Continue rinsing and pressing until the water runs completely clear. Any buttermilk left in the butter will cause it to spoil faster, so take your time with this step.
Adding Salt (Optional):
If you prefer salted butter, knead in a small amount of salt to taste. Start with about 1/4 teaspoon per cup of butter and adjust according to your preference.
Storing Your Butter:
Press your finished butter into a storage container or butter crock, removing any air pockets. Homemade butter will keep in the refrigerator for several weeks when properly washed and stored in an airtight container. You can also freeze homemade butter for up to six months.
Tips for Perfect Homemade Butter Every Time
Temperature Matters: Room temperature cream churns significantly faster than cold cream. Let your cream sit out for 30 minutes to an hour before starting.
Don’t Overfill: Whether using a jar or churn, leave plenty of space for the cream to move around and agitate properly.
Be Patient: The process can take anywhere from 10 to 30 minutes depending on temperature, cream quality, and churning speed.
Quality Cream Equals Quality Butter: Use the best quality heavy whipping cream you can find. Organic, grass-fed cream produces butter with superior flavor and color.
Save the Buttermilk: The liquid byproduct is real buttermilk, far superior to the cultured buttermilk sold in stores. Use it in recipes within a week.
Common Questions About Making Homemade Butter
How much butter does heavy cream make?
Generally, one pint of heavy cream yields approximately one cup of butter plus one cup of buttermilk.
Can you use a stand mixer or food processor?
Yes, both work well for making butter. Use the whisk attachment on a stand mixer or the standard blade in a food processor. These methods are faster but less engaging for children.
Why isn’t my cream turning into butter?
The most common reason is that the cream is too cold. Let it warm to room temperature and try again. Also ensure you’re using heavy whipping cream, not light cream or half-and-half.
Can you flavor homemade butter?
Absolutely! After washing, knead in herbs, honey, cinnamon, garlic, or any other flavorings you enjoy.
The Joy of Homemade Butter
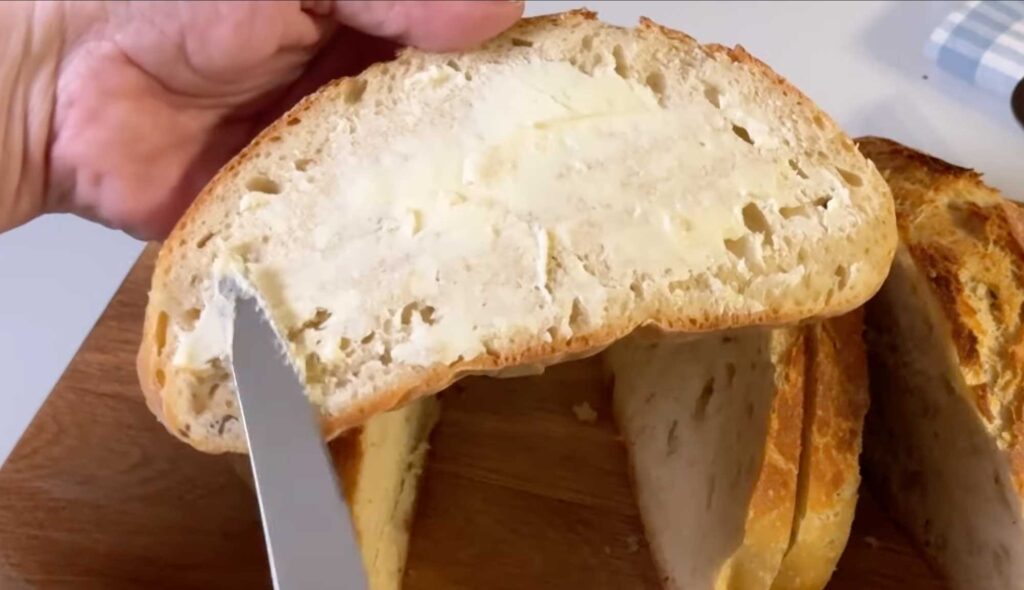
Making butter at home connects us to traditional food preparation methods that have been used for centuries. Whether you choose the playful mason jar method that kids love or the more efficient butter churn approach, you’ll end up with fresh, delicious butter that tastes far superior to anything from the grocery store. The simple act of transforming cream into butter is both educational and satisfying, making it a wonderful kitchen project for the whole family. Once you experience the rich, creamy taste of homemade butter spread on warm bread, you’ll understand why this traditional skill is worth preserving.
")


Meet Jennifer
Jennifer cooks and experiments in the kitchen at Maker Farm, where she focuses on simple pantry cooking, homemade staples, and practical recipes that make everyday meals easier. Over the years she has tested many ways to make cooking simpler and more dependable, and shares the methods that work best in her own kitchen, occasionally showing them on her Heart to Home at Maker Farm vlog.
I’ve been making my own butter for years now. I always add some olive oil at the end to make it more spreadable from the fridge.
(Also, as an Aussie, I have a Thermomix which makes the process so much quicker!)
I’ve heard about Thermomixes! I don’t have one yet though, but I am considering it. They are pretty pricey, so I need to consider it for a long time. LOL
Yes, I made this. Also use to make it at the restaurant.