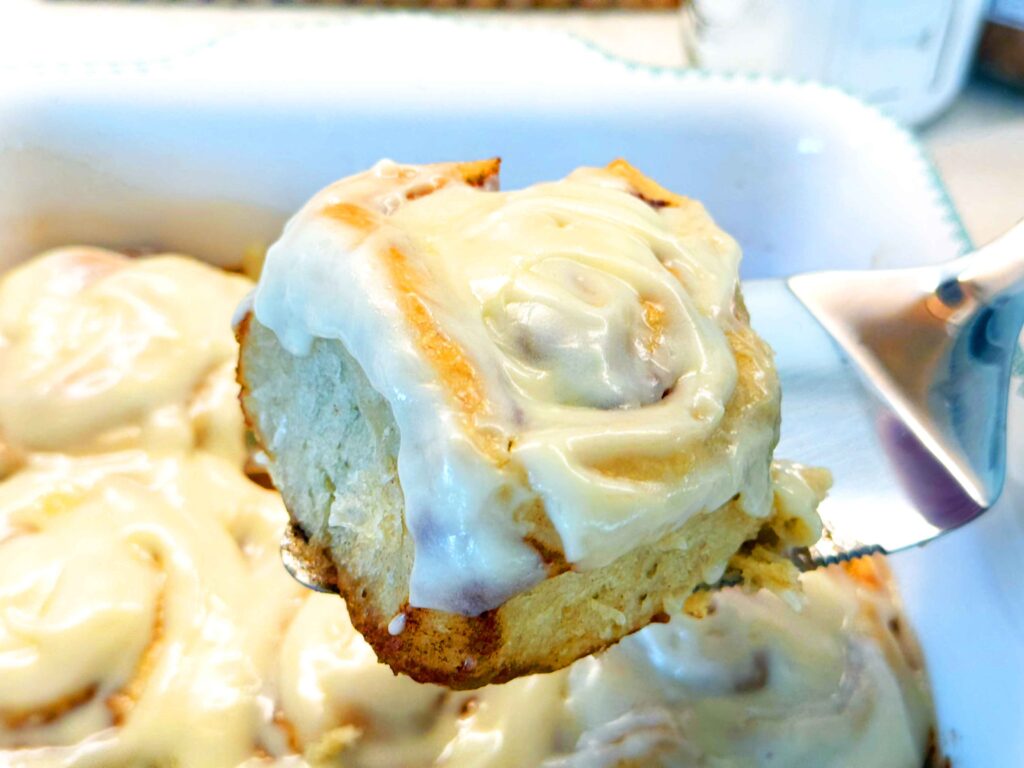
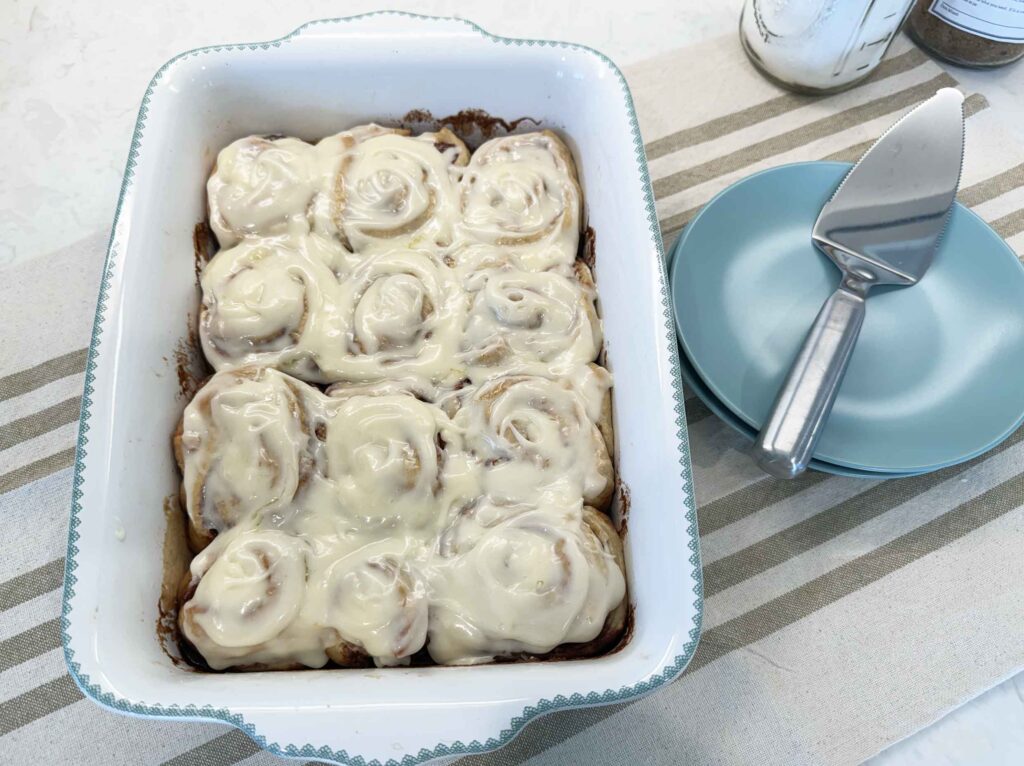
These overnight sourdough cinnamon rolls are soft, tender, and filled with buttery cinnamon sugar, then finished with rich cream cheese frosting that melts into every warm swirl. My easy and flexible no-yeast method uses the refrigerator as a timing buffer, then lets the shaped rolls finish proofing on the counter so you bake by look and feel, not just the clock. You can use active starter or discard; see the notes and baker’s schedule for exactly when to mix, shape, chill, proof, and bake.
Sourdough Cinnamon Rolls At A Glance
Prep
45 min
Bake
30 min
Total WITH RISE
21 hours
Serves
12
Pan
9×13 baking dish
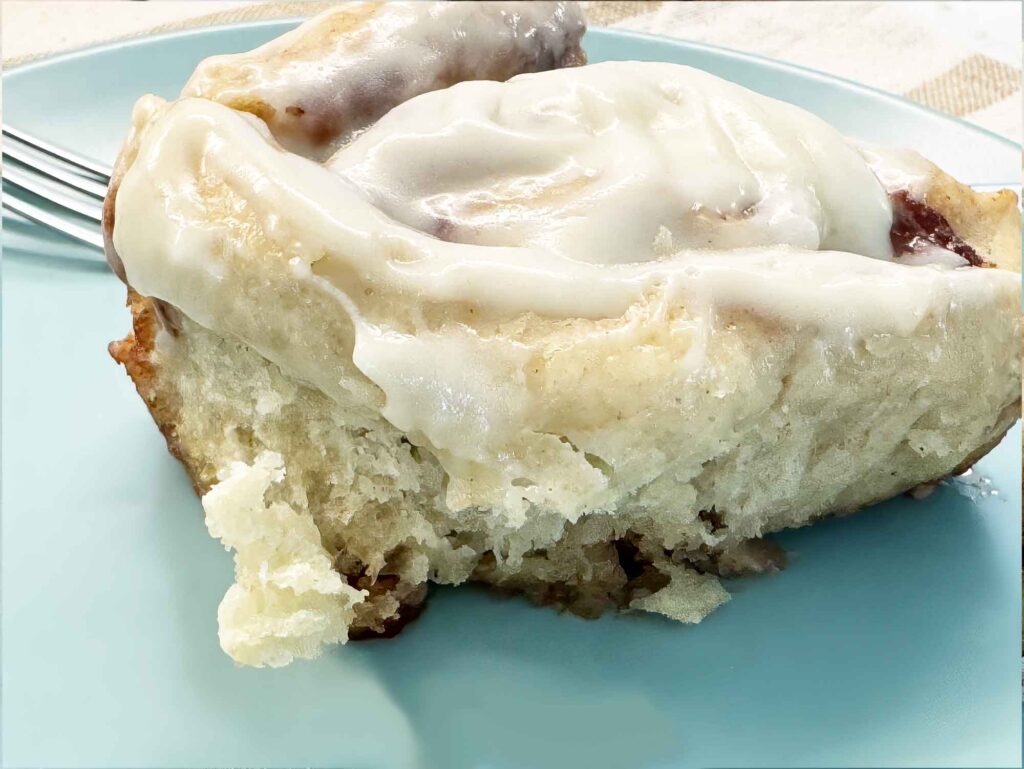
Tastes like: Ooey gooey cinnamon sugary buttery goodness with a slight tang that goes SO well with the sweetness

I found the biggest key to make easy sourdough cinnamon rolls is watching the dough, not the clock. My first rise takes about 12–14 hours in a gently warm spot, then I shape the rolls before bed, refrigerate them overnight, and let them finish proofing on the counter the next morning before baking. I’ve included the visual cues that helped me know when the dough was ready, from an active, bubbly starter to rolls that looked puffy, soft, and just beginning to touch, so you can adjust for your own kitchen, starter strength, and schedule.
I made these and they were excellent!
Donna (Pinterest user)
Table of Contents
- Sourdough Cinnamon Rolls At A Glance
- Why This Recipe Works
- What’s the Difference Between Regular Cinnamon Rolls and Sourdough Cinnamon Rolls?
- Pure Sourdough vs. Hybrid Sourdough Cinnamon Rolls
- Sample Baker’s Schedule
- What You Need to Make These Rolls
- How to Make Sourdough Cinnamon Rolls (Step-by-Step Method)
- Notes from the Farm
- Variations
- Answers to Common Questions
- Storage, Freezing, and Reheating
Why This Recipe Works
I show you how to use visual cues, not just the clock, to judge when the dough is ready, making the schedule easy to pause overnight and finish when it fits your day.

Want to Save This Recipe?
Enter your email below and we’ll send it straight to your inbox! Plus you’ll get new recipes each week!
What’s the Difference Between Regular Cinnamon Rolls and Sourdough Cinnamon Rolls?
The complex and satisfying flavor, a mix of tang and sweet! Sourdough cinnamon rolls take longer than yeast rolls, but that extra time changes the flavor in a way you can actually taste. The dough develops a light tang and more depth as it ferments, which keeps the buttery filling and cream cheese frosting from tipping into one-note sweetness.
The result is a cinnamon roll that tastes more balanced and a little more alive … it’s still soft and gooey, but with the kind of flavor that tastes amazing, not just sugary.
Pure Sourdough vs. Hybrid Sourdough Cinnamon Rolls
I make these cinnamon rolls as a pure sourdough recipe, which means they rely on sourdough starter alone for rise, with no commercial yeast added. Your rise time will depend on how strong and active your starter is, how warm your kitchen is, and how enriched the dough is with milk, butter, eggs, and sugar.
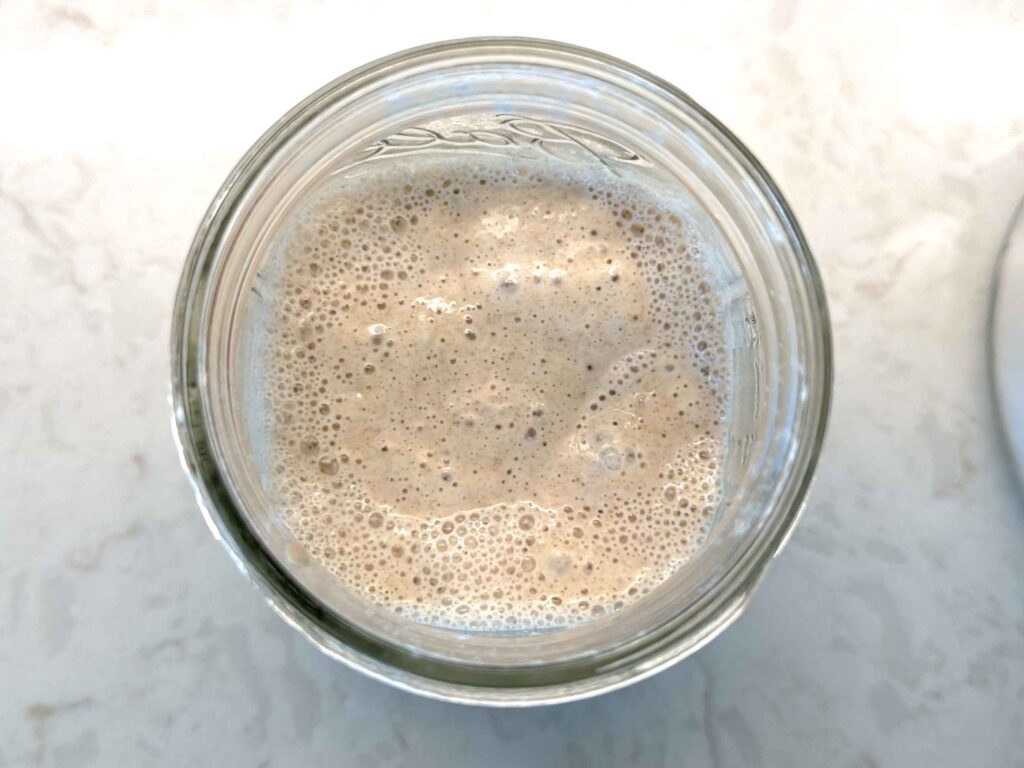
For the best results, use a sourdough starter that has recently peaked or is close to peak: bubbly, active, doubled in size, and full of air throughout, not just a few bubbles on top. A weaker starter will still work, but the dough may take longer to rise and the finished rolls may be a little denser.
If you want a faster, more predictable version, you can make these as hybrid sourdough cinnamon rolls by adding 1 teaspoon instant yeast to the dough. You’ll still get some sourdough flavor from the starter, but the commercial yeast will make the rise faster and more reliable. This is a good option if your starter is young, sluggish, or you need the rolls ready on a tighter schedule.
For the most traditional sourdough flavor, use the pure sourdough method detailed on this page. For the easiest, most predictable rise, use the hybrid option. No judgement here.
My Flexible Sourdough Cinnamon Roll Method
The hardest part of sourdough cinnamon rolls isn’t mixing the dough, it’s knowing when to move to the next step. After testing this recipe, I found the most reliable method was to use the refrigerator for the entire second rise.
After the dough rises at room temperature, I roll, fill, and cut the cinnamon rolls, then place them in the refrigerator overnight. In the morning, they may not look fully puffed yet, and that’s okay. The refrigerator slows fermentation dramatically, especially with an enriched dough made with milk, eggs, butter, and sugar.
Instead of baking straight from the fridge, let the rolls sit at room temperature until they look visibly fuller, softer, and slightly puffy. The rolls should begin touching or nearly touching in the pan, and the dough should slowly spring back when gently pressed. This extra counter proof is what gives the rolls a better texture without adding commercial yeast.
Sample Baker’s Schedule
This is the schedule I use. Your exact timing may vary depending on your starter strength, dough temperature, room temperature, and refrigerator temperature, but this gives you a real-life example of how the recipe can fit into 24 hours.
Day 1
11:00 a.m. — Mix and knead the dough
Mix the dough and knead until it is smooth, elastic, and cohesive.
11:30 a.m. — Begin the bulk rise
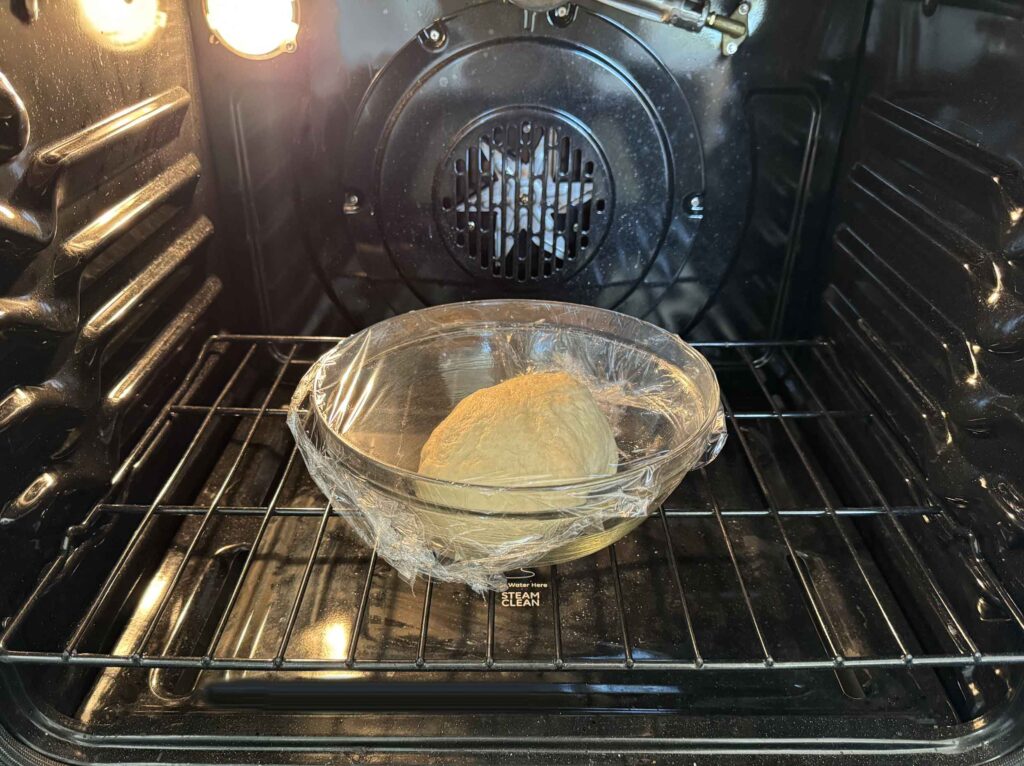
Place the dough in a covered bowl and let it rise in a warm spot. I used my oven with the light/pilot on to create a gently warm proofing environment. If your kitchen is too warm (around 78-82°F), shorten the bulk rise time.
Can the bulk rise take place in the fridge?

Yes, you can refrigerate the dough for the bulk rise, but it will slow fermentation quite a bit and make the timing less predictable. This recipe works best when the first rise happens in a gently warm spot, then the shaped rolls are refrigerated overnight. If you chill the dough earlier, plan on a longer overall rise and give it time to warm up and become puffy before shaping.
Evening, before bed — Fill and shape the rolls
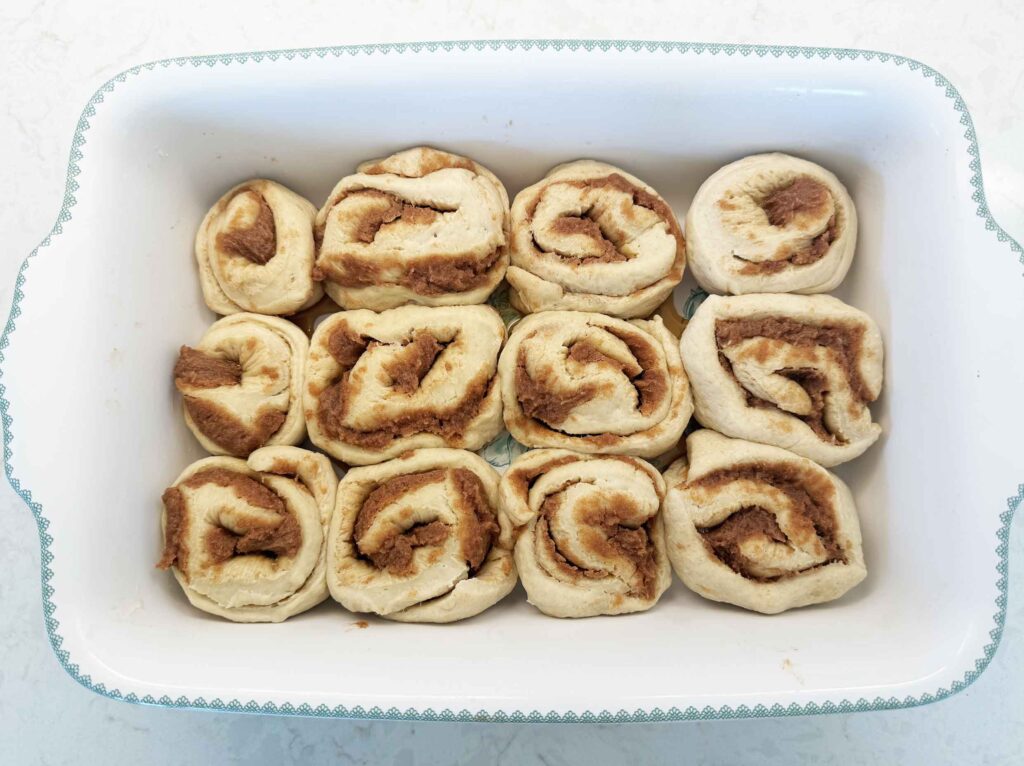
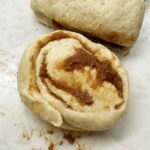
Once the dough is noticeably puffed, aerated, and expanded, roll it out, spread on the cinnamon-sugar filling, roll it up, cut into rolls, and place them in a greased baking dish.
Overnight — Refrigerate the shaped rolls
Cover the baking dish and place it in the refrigerator overnight. This slows the rise and gives you a helpful timing buffer. If you are doing this quite late at night and know you’ll be up early in the morning, you can also just leave them out on the counter at 67–70°F for 8–12 hours instead.
PAUSE IT

If the dough is rising faster than you expected, the refrigerator is your best pause button. Chilling it can buy you time without forcing you to rush into shaping before you are ready.
Day 2
8:30 a.m. (approx.) — Remove from the refrigerator
Take the rolls out and set them on the counter. They may still look a little firm or not fully proofed straight from the refrigerator, and that is normal.
10:30 a.m. — Bake
After about 2 hours at room temperature, the rolls should look fuller, softer, and puffier, with the edges beginning to touch. Bake once they look ready, not just when the clock says so.
RUNNING LATE?
If your morning gets away from you, keep the shaped rolls in the refrigerator until you are ready to give them their final room-temperature proof. When you do take them out, wait for them to look softer, fuller, and nearly touching before baking.
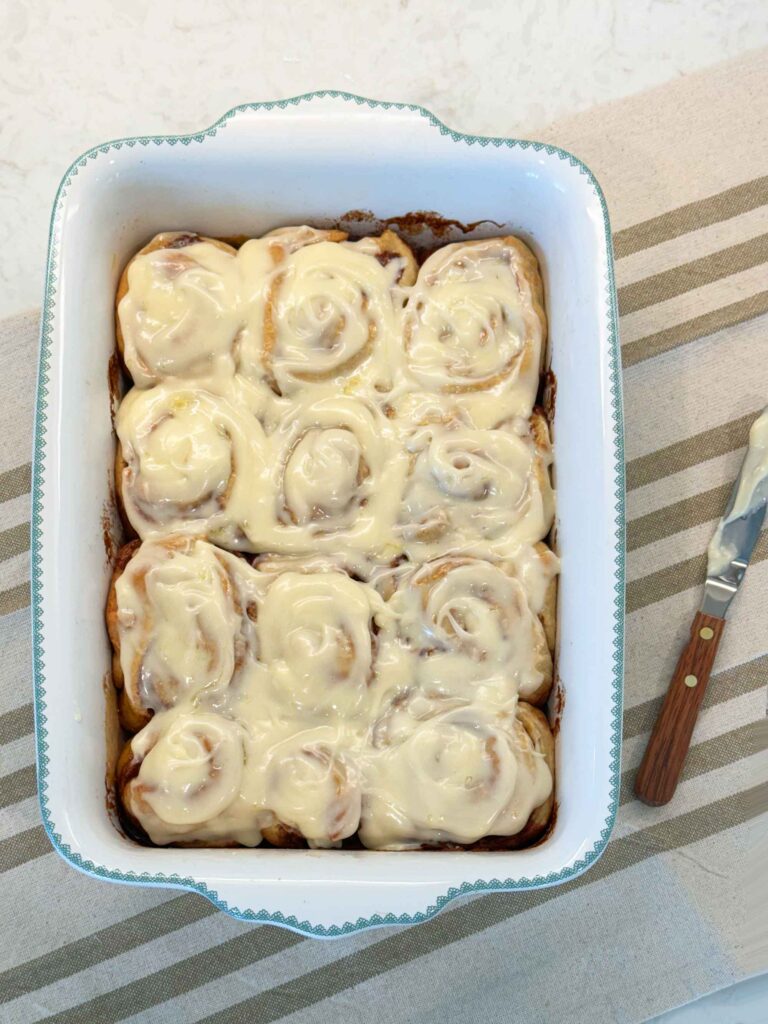
After baking — Frost while warm
Let the rolls cool slightly, then spread on the cream cheese frosting while they are still warm so it melts into the swirls.
TIMING TIP
This recipe works best when you think of it in two parts: a warm first rise for strength and flavor, then a slower overnight rest with a final counter proof the next day. The clock helps you plan, but the dough’s look and feel tell you when it is actually ready.
What You Need to Make These Rolls
Dough Ingredients
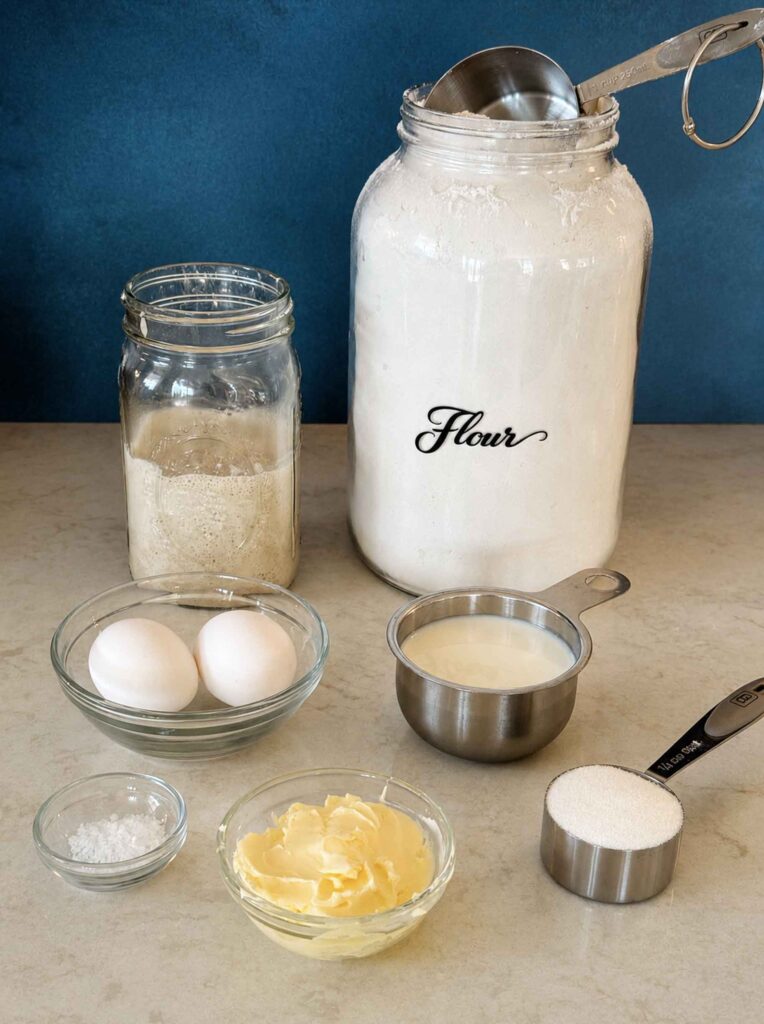
The dough starts with sourdough starter, which gives the cinnamon rolls their rise and gentle tangy flavor.
Starter: Active vs. discard

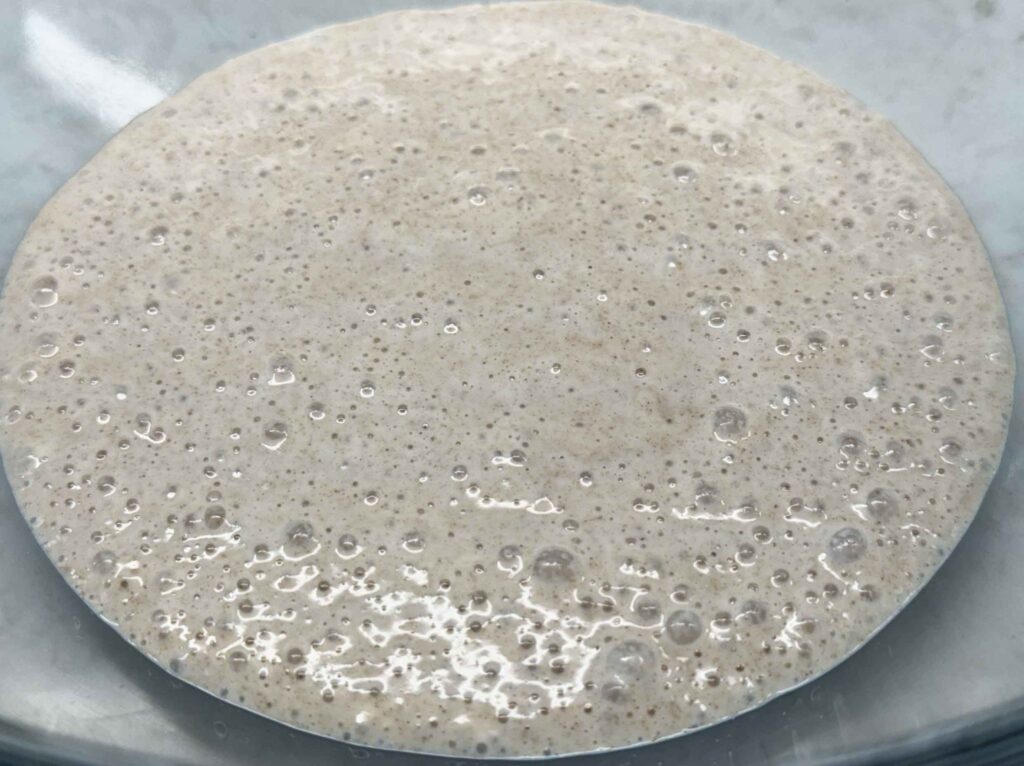
For the best rise, use an active, bubbly starter that has recently peaked or is close to peak. An active starter is one that has been fed recently, has noticeably risen, and is bubbly throughout.
A weaker starter can still work, but the dough may take longer to rise.
You can also use discard if it is recent, bubbly, and still active.
I do not recommend using an old, flat, cold, or very acidic starter, however, as it may not have enough strength to raise the dough well on its own — either feed your starter and let it become active first, or use the hybrid option mentioned above by adding some instant yeast for an extra lift.
You’ll also need milk, eggs, butter, sugar, salt, and flour. These make the dough soft, rich, and tender instead of lean and chewy. The butter and eggs add richness, while the milk helps keep the rolls soft.
Do I have to use regular dairy?

I developed this recipe with regular dairy, so that is still my baseline for the softest dough and the richest frosting. Similar substitutes can work, but in my experience they can change the way the dough feels as you mix and roll it, and they sometimes make the frosting a little looser or less creamy.
I use all-purpose flour for a tender cinnamon roll texture. Bread flour also works, but expect the rolls to be slightly chewier because of the higher protein content.
Cinnamon-Sugar Filling
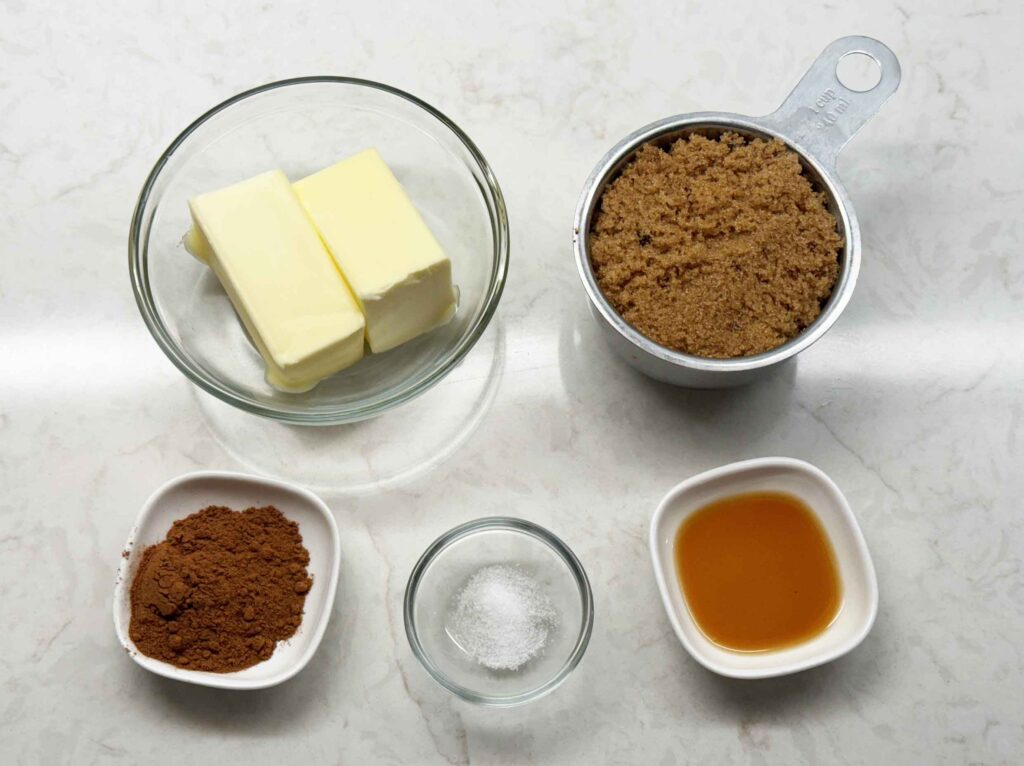
The filling is a simple mixture of softened butter, brown sugar, cinnamon, vanilla, and a pinch of salt. Softened butter is important here because it spreads easily over the dough and helps the brown sugar and cinnamon stay in place.
Avoid using melted butter for the filling if you can. It can leak out more easily and make the rolls messier to shape. A soft, spreadable cinnamon-sugar paste gives you better swirls and more even filling in each bite.
Cream Cheese Icing
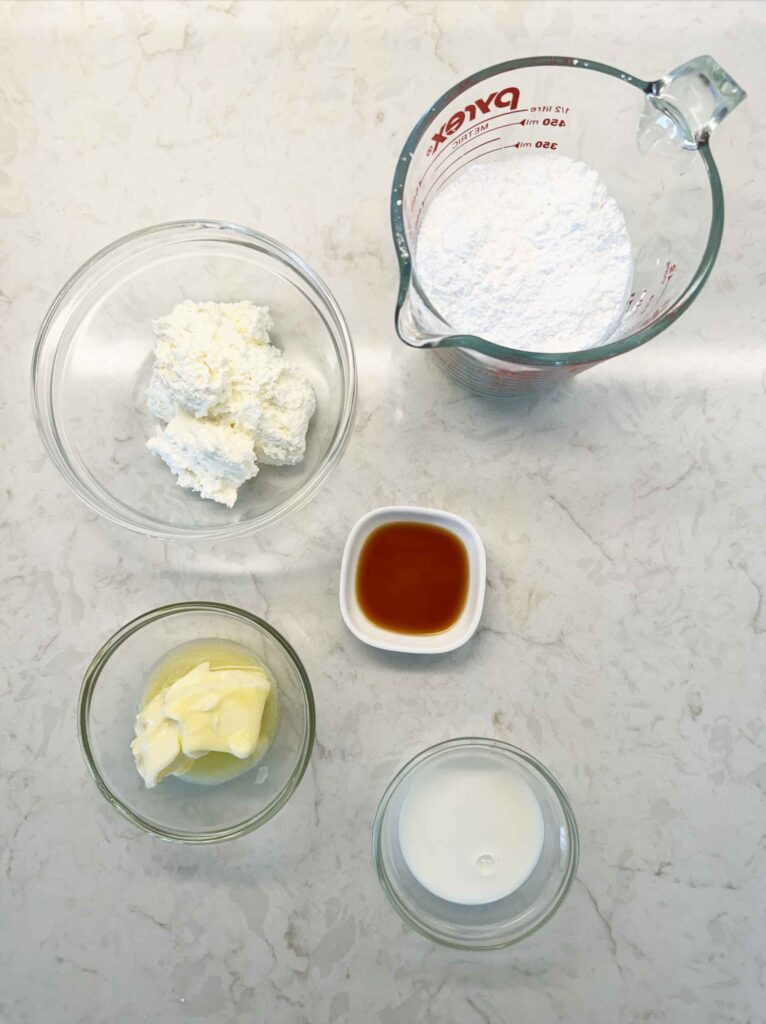
The icing is made with cream cheese, butter, powdered sugar, vanilla, and a little milk if needed. It should be thick enough to spread, but soft enough to melt slightly into the warm rolls.
Regular block cream cheese gives the icing a thicker, richer texture. Whipped cream cheese also works (it’s what I tend to use), but start with little or no milk because it tends to make a softer, fluffier icing.
How to Make Sourdough Cinnamon Rolls (Step-by-Step Method)
These steps walk you through the method, with the visual cues that matter most so you know when to move on.
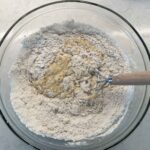
Step 1: Mix the Dough
Mix the sourdough starter, milk, eggs, sugar, butter, salt, and flour until a soft dough forms. Knead until the dough looks smoother and more elastic. It does not need to look perfectly silky, but it should be cohesive and stretchy rather than shaggy and tearing. You can knead in a stand mixer with a dough hook for about 6 minutes, but I like to knead by hand by pushing and folding for 10 minutes.
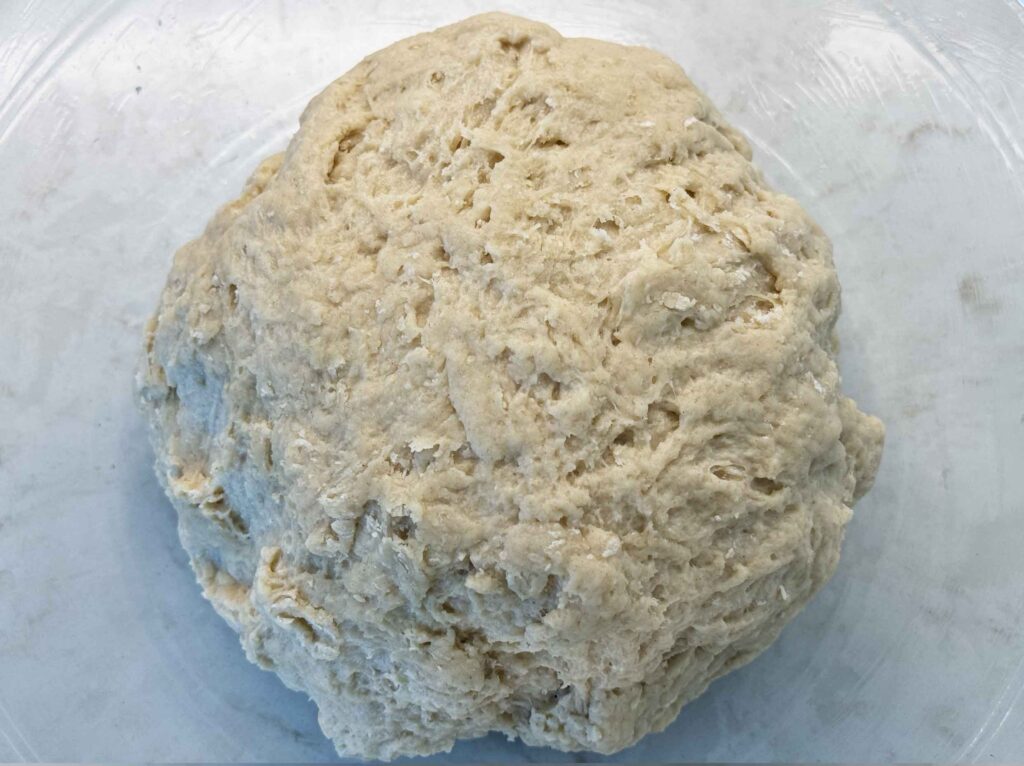
If the dough feels rough at first, let it rest for 20–30 minutes, then knead again briefly. That short rest gives the flour time to hydrate and makes the dough much easier to work with.
You’ll know you’re done when the dough pulls away from the sides of the bowl.
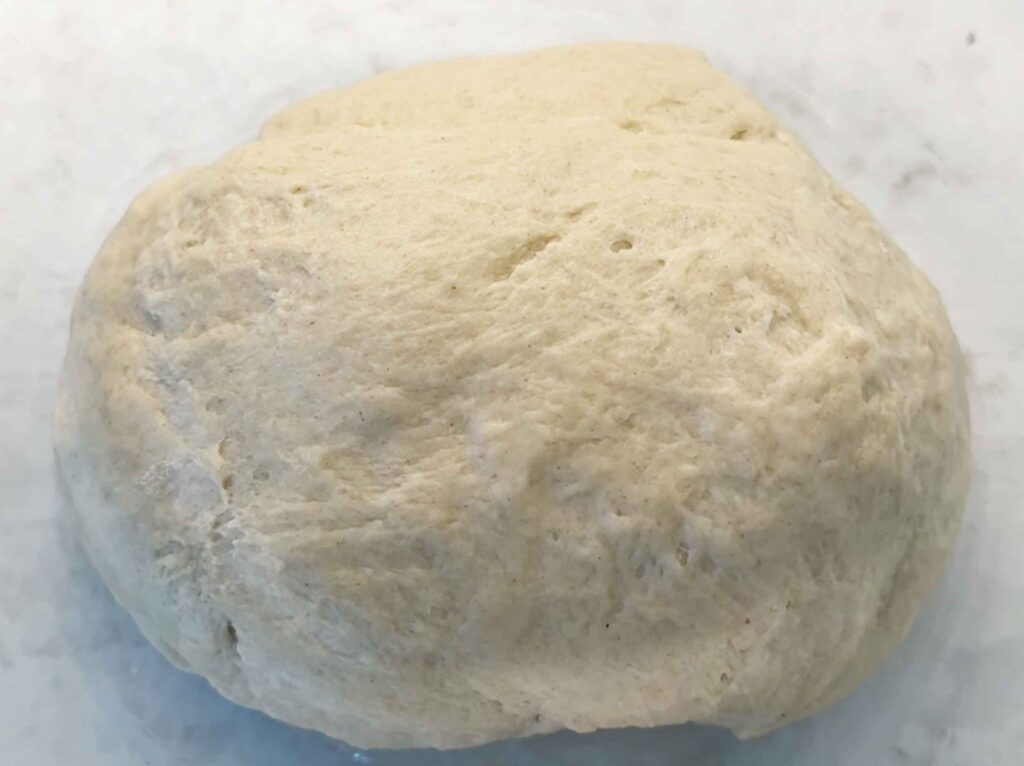
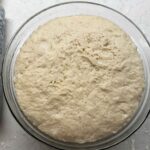
Step 2: Bulk Rise
Place the dough in a lightly greased bowl, cover it well, and let it rise in a warm spot until it is noticeably puffed and airy. I used a warm oven with the light on for the first rise.
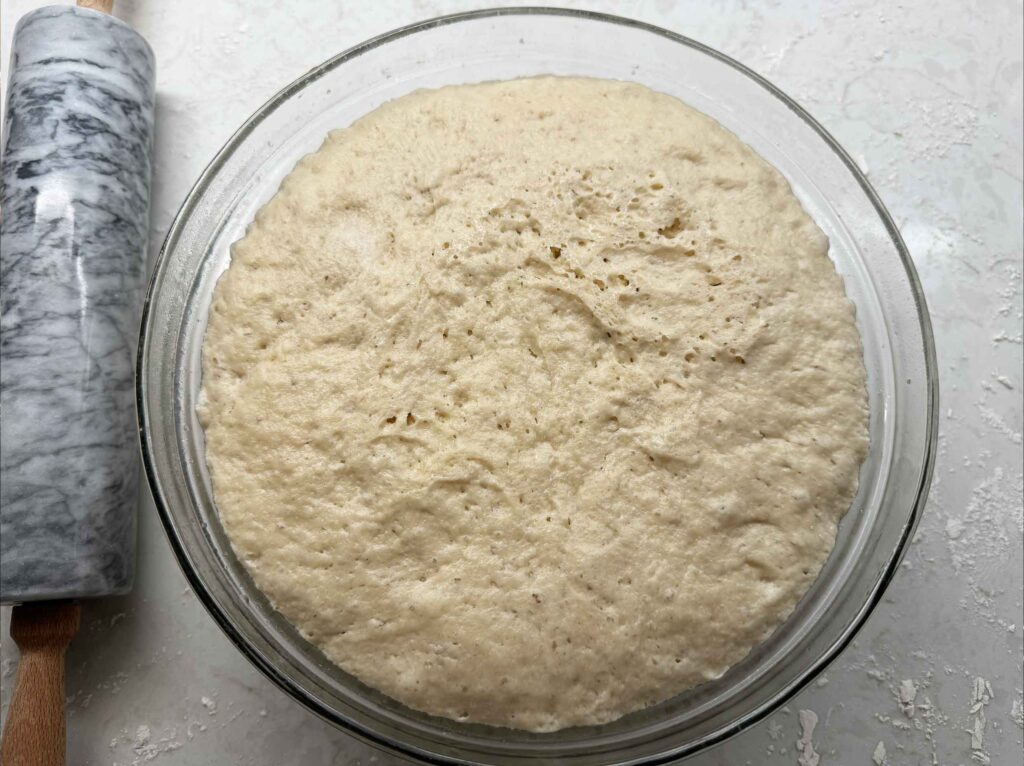
The dough does not have to triple in size, and it may not look as dramatic as a regular yeast dough. Look for dough that is domed, expanded, softer, and aerated, with small bubbles visible on the surface or underneath. It should still feel stretchy and alive, not loose, collapsed, or sharply sour.
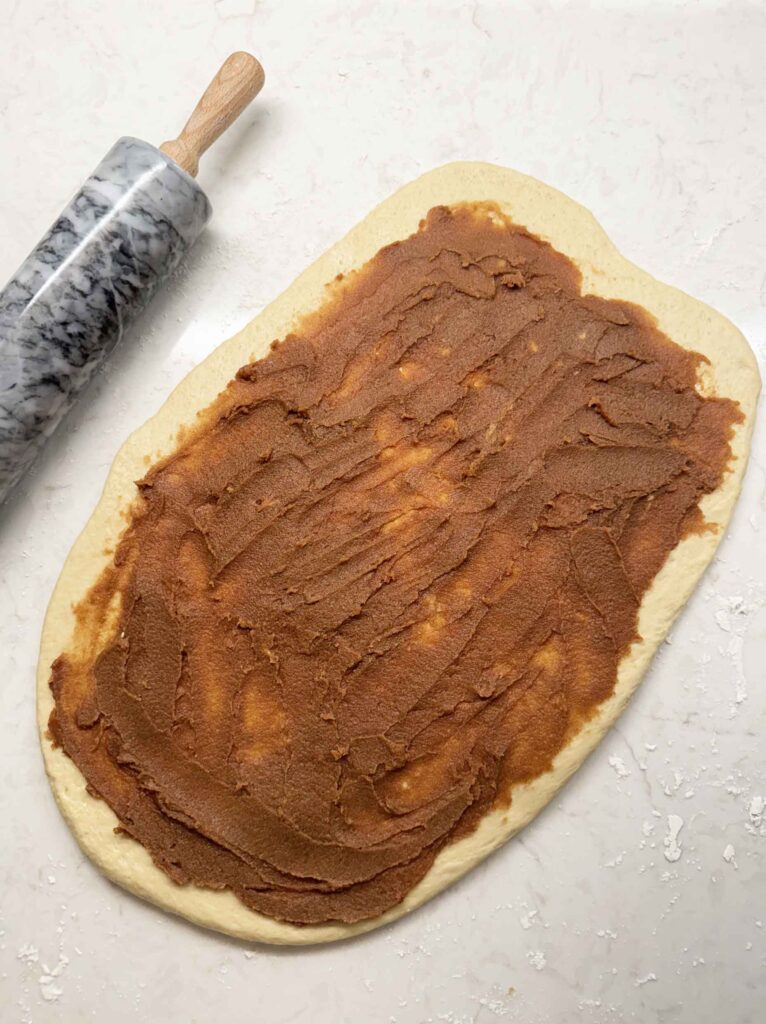
Step 3: Roll Out
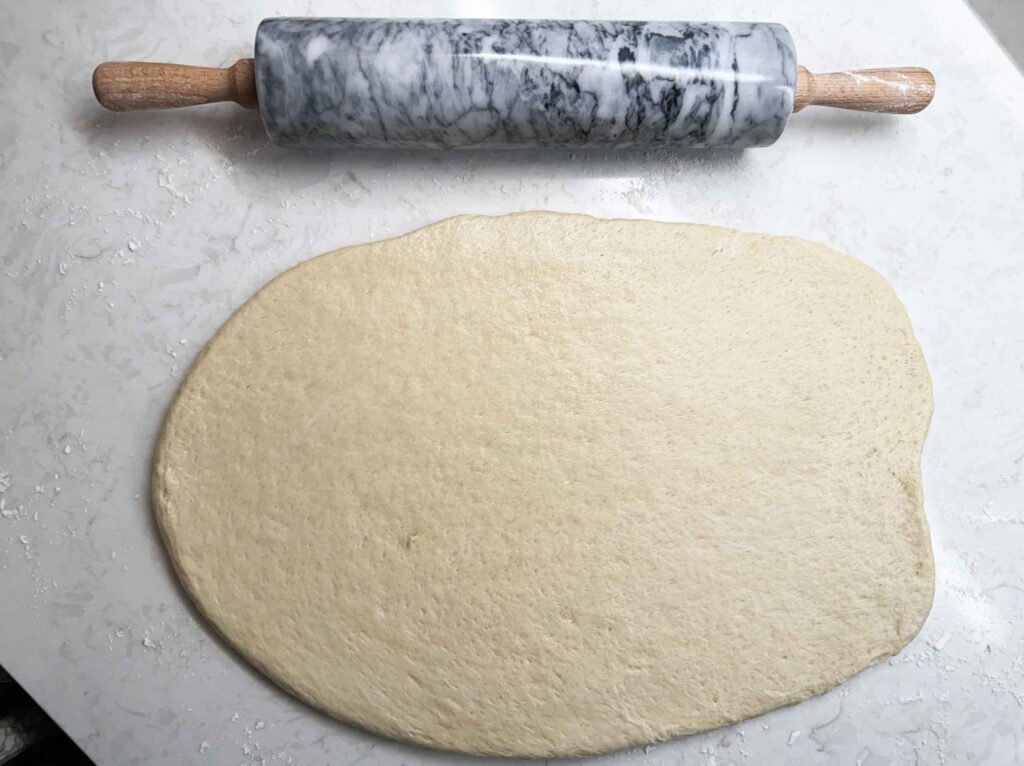
Turn the risen dough onto a lightly floured surface and roll dough into a large rectangle about 12″ wide by 16″ long. If the dough keeps shrinking back, let it rest for 5 to 10 minutes before rolling again; once it relaxes, it becomes much easier to shape into an even rectangle.
Use flour sparingly as you work. You want the dough soft and slightly tacky, not dry or stiff, so the rolls stay tender and the layers bake up light instead of heavy.
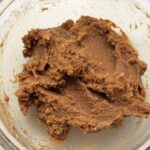
Step 4: Make Filling
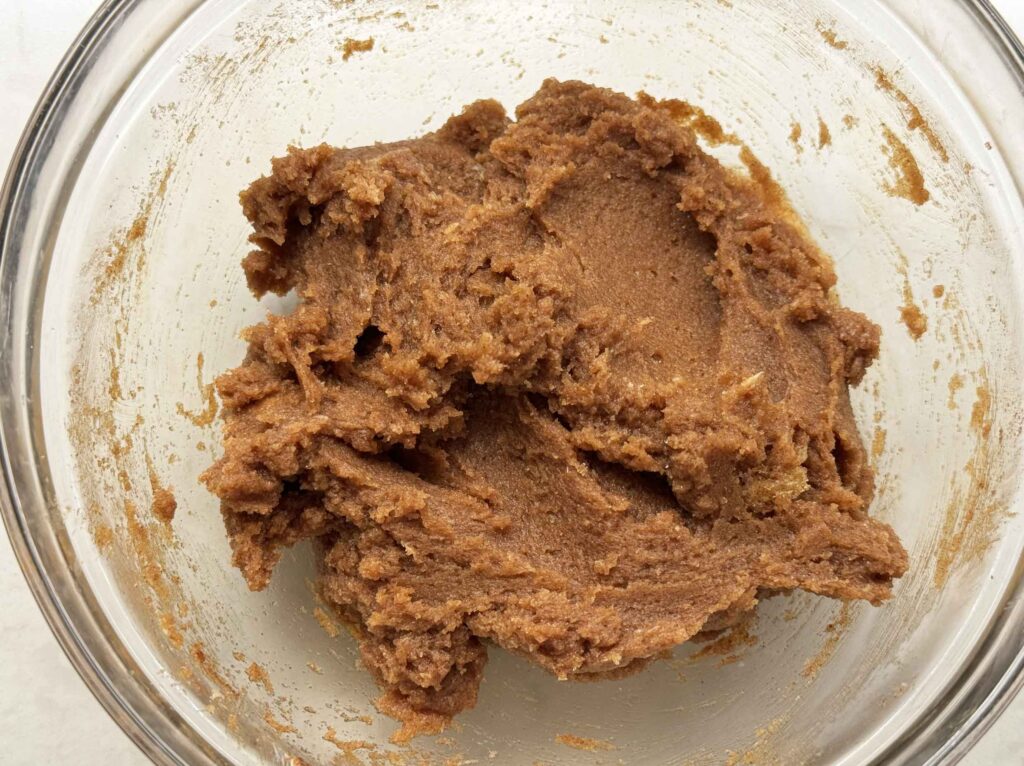
Stir the softened butter, brown sugar, cinnamon, vanilla, and salt into a smooth paste. You want the filling soft and spreadable so it clings to the dough instead of sliding out and helps give the rolls cleaner layers.
Use butter that is soft enough to mix smoothly but not melted, so the filling stays put as you roll and slice the dough.
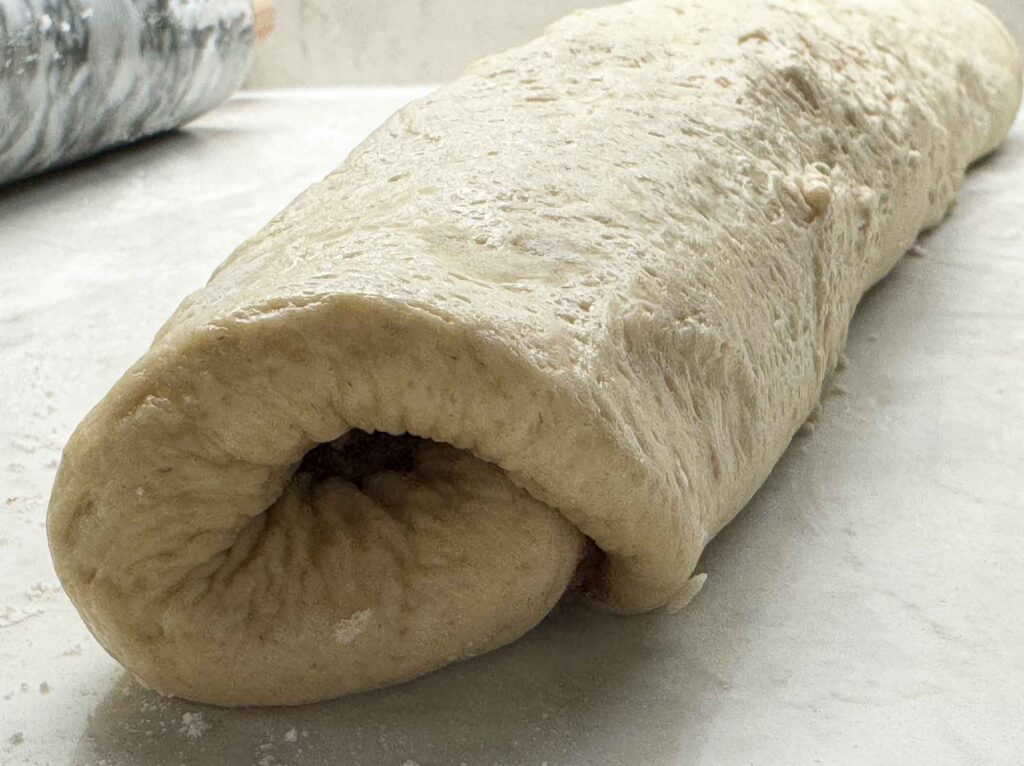
Step 5: Roll & Cut
Spread the filling over the dough, leaving about a 1/2-inch border along one long edge. Roll the dough snugly, but do not pull it so tight that the filling squeezes out.
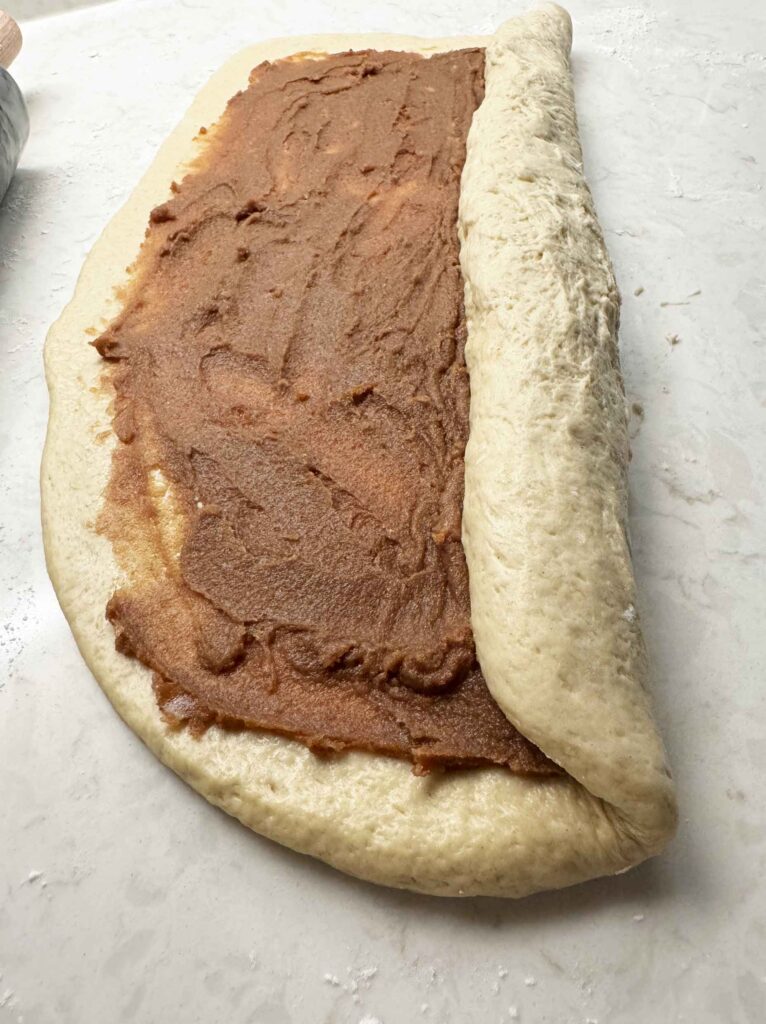
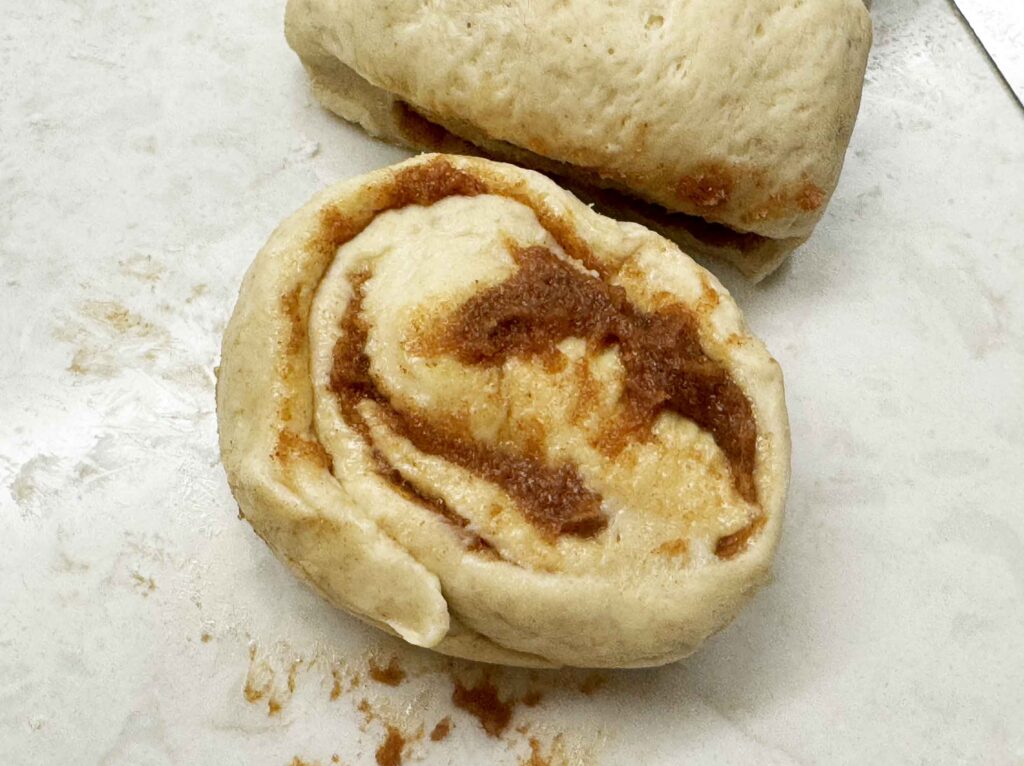
For cleaner slices, use unflavored dental floss or a very sharp knife. If the rolls squash when you cut them, gently reshape them before placing them in the pan.
FILLING LEAK PREVENTION TIP
Use softened, not melted, butter; leave a small border; roll snugly; and place the baking dish on a sheet pan if you are worried about brown sugar bubbling over. Some filling leakage is normal, especially with brown sugar, but these steps help keep more of it inside the rolls.
Step 6: Second Rise
Place the cut rolls in a greased baking dish, cover, and let them rise until they look puffy and soft.

If you refrigerate the shaped rolls overnight, they may not look fully risen straight from the fridge. That is normal. Let them sit at room temperature until they finish proofing.
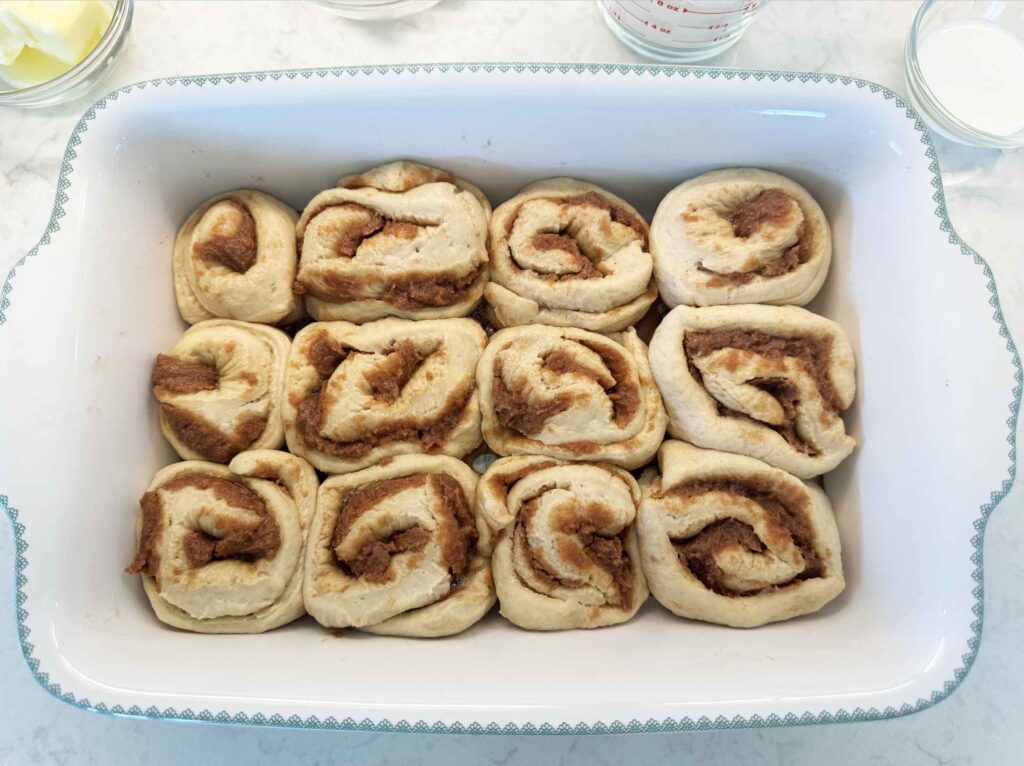
The rolls are ready to bake when they look fuller, the edges are softer and less sharp, and the rolls are touching or nearly touching. When gently pressed, the dough should slowly spring back and leave a slight dent. If it springs back immediately, give them more time. If it does not spring back at all and looks weak, bake right away.
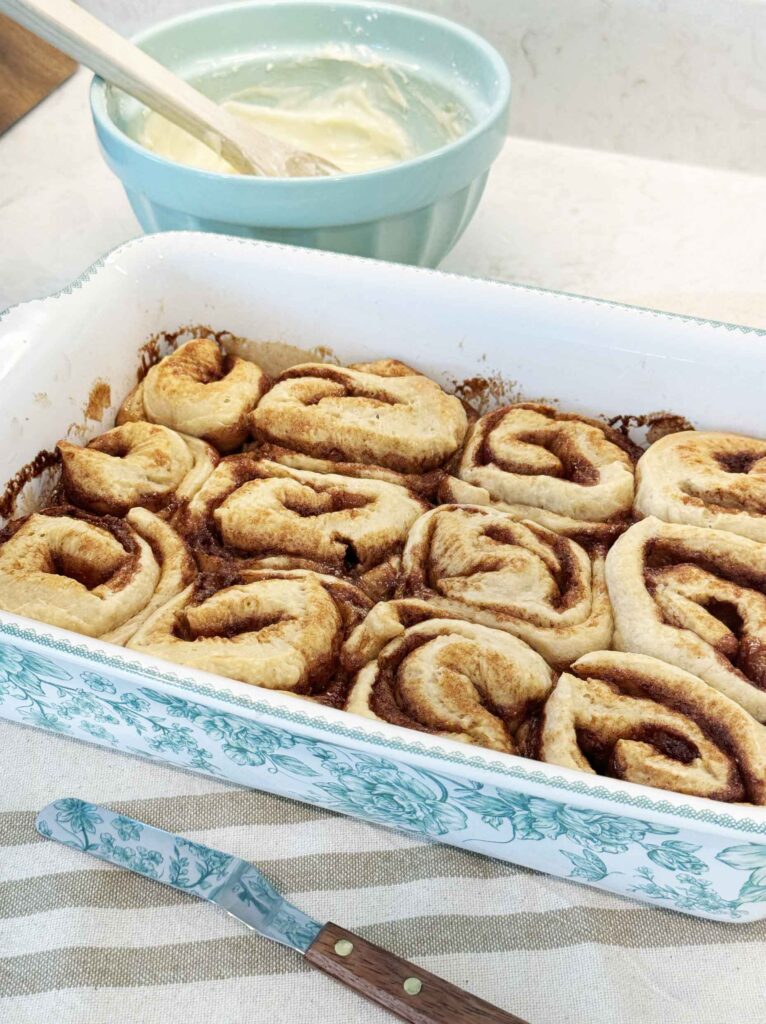
Step 7: Bake
Bake until the rolls are lightly golden and cooked through in the center. The tops should look set, and the center rolls should no longer look doughy.
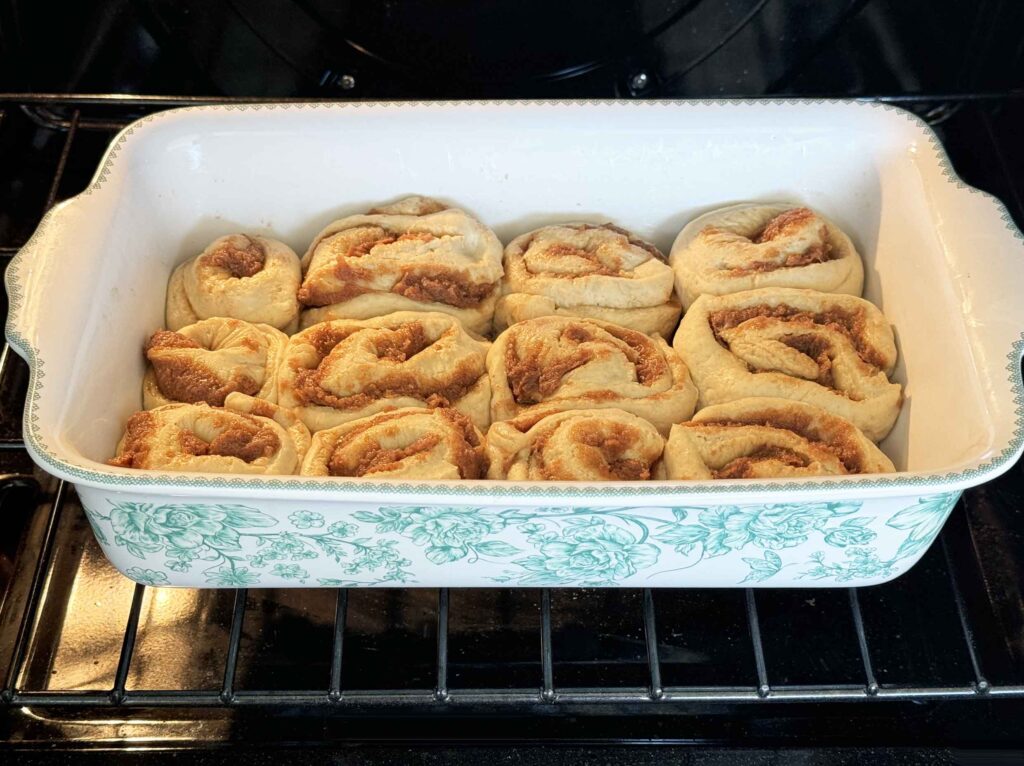
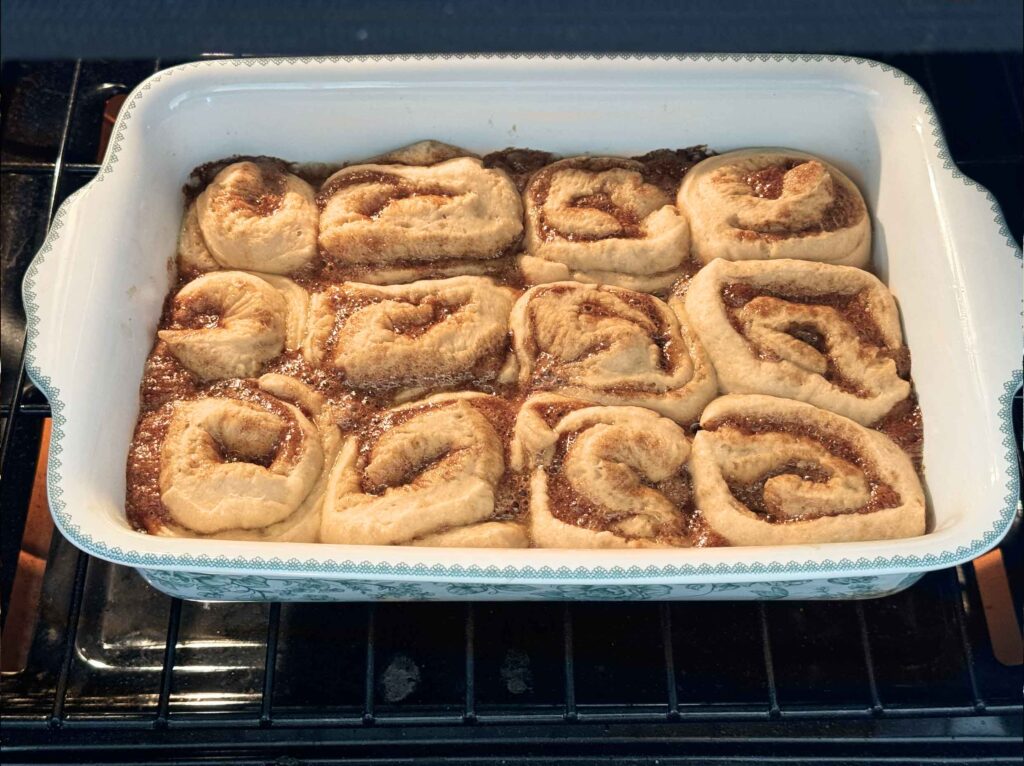
If the tops brown before the centers are done, loosely tent the pan with foil. For the softest rolls, avoid overbaking; cinnamon rolls can go from tender to dry if left in the oven too long.
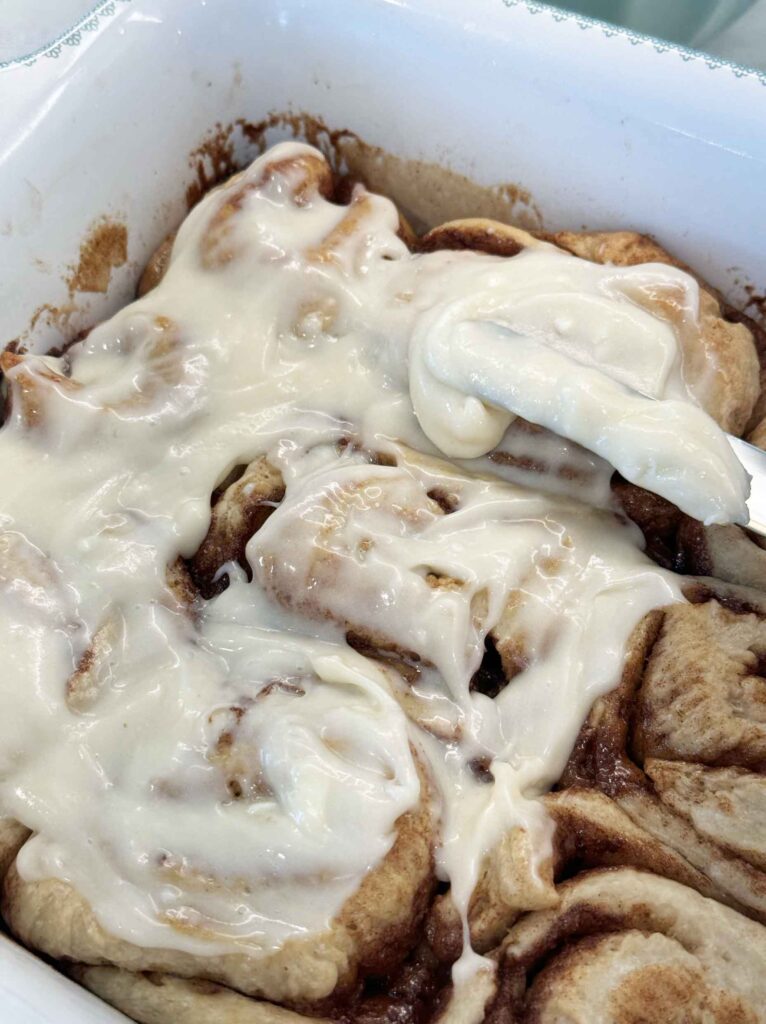
Step 8: Glaze
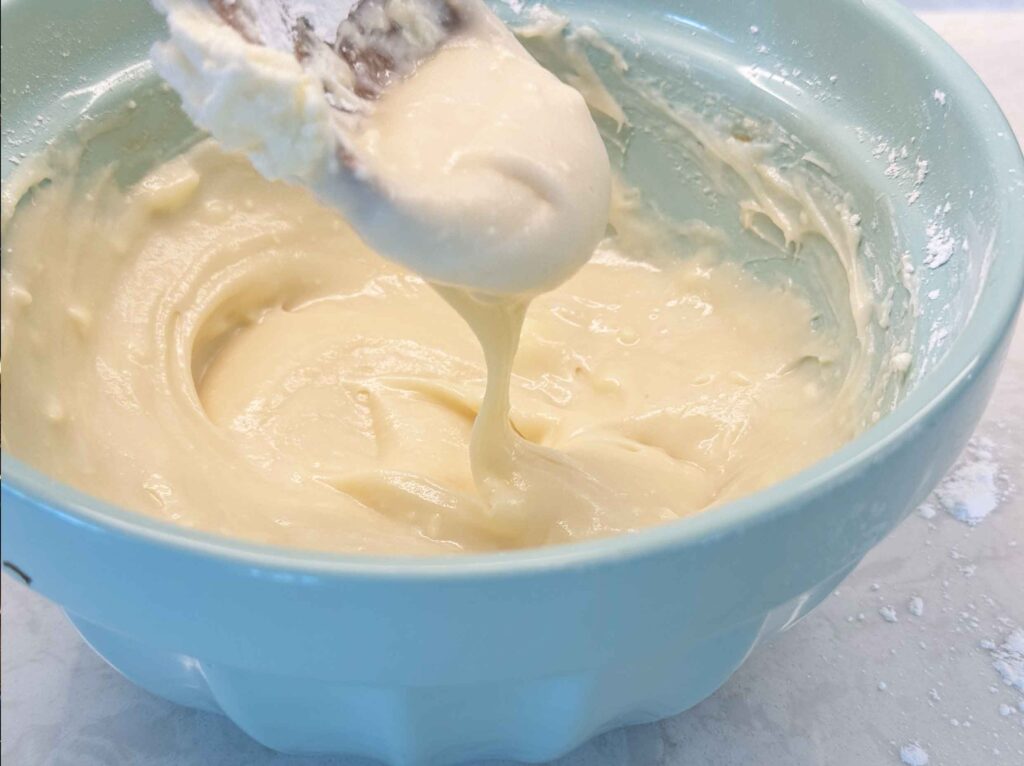
Let the rolls cool slightly before icing. They should still be warm, but not piping hot. Mix the softened cream cheese, butter, powdered sugar, vanilla, and milk into a spreadable paste. You’ll know when you have the right consistency when you can lift a spoonful and it slowly falls back into the bowl in a thick ribbon.
For the best result, spread the cream cheese icing over the rolls while they are warm, not hot, so it softens into the swirls without disappearing completely. If the rolls are too hot, the icing melts into a thin glaze. If they are completely cool, the icing sits on top instead of settling into the cinnamon layers.
ICING TIP
If the icing settles into a smooth blanket, you can coax the swirl back out with a knife by lightly tracing the shape of the roll underneath. It’s a simple finishing touch that helps the rolls keep their visual character instead of looking flat under the glaze.
Notes from the Farm
One thing I’ve learned with these rolls is not to expect dramatic movement right away after the fridge. Cold dough can look stiffer than you expect at first, but once the rolls have warmed up, they should feel softer, look a little puffier, and start to show some airiness around the edges. That visual change tells me much more than the clock does.
I also try not to roll the dough too tightly. A gentle, even roll still gives you a pretty spiral, but it bakes more evenly and keeps the centers from getting dense.
These rolls are soft and tender, but they will not feel exactly like a quick yeast cinnamon roll. Pure sourdough gives them a slightly more substantial bite and a deeper flavor, and to me that is part of what makes them so satisfying.

Sourdough Cinnamon Roll Recipe
Equipment
- 1 baking dish 9"x13"
- 1 large mixing bowl
- 1 Rolling Pin
- 1 sharp knife can also use a bench scraper or unflavored dental floss
- 1 stand mixer with dough hook optional
- 1 digital scale weighing the important ingredients with a scale improves your success!
Ingredients
Dough
- 227 grams active sourdough starter
- 170 grams whole milk slightly warm
- 2 large eggs
- 50 grams granulated sugar
- 1 teaspoon salt
- 6 tablespoons softened butter
- 500 grams all-purpose flour
Filling
- 1/2 cup softened butter unsalted
- 1 cup brown sugar, packed
- 1 tablespoon cinnamon
- 1 teaspoon vanilla extract
- 1 pinch of salt
Cream Cheese Frosting
- 4 ounces cream cheese softened
- 4 tablespoons butter softened
- 1 1/2 cups powdered sugar
- 1 teaspoon vanilla
- 1-2 tablespoons milk if needed
Instructions
- Mix the DoughIn a large bowl, mix starter, warm milk, eggs, and sugar. Then add salt, softened butter, and flour. Mix until a shaggy dough forms.227 grams active sourdough starter, 170 grams whole milk, 2 large eggs, 50 grams granulated sugar, 1 teaspoon salt, 6 tablespoons softened butter, 500 grams all-purpose flour
- Knead the DoughKnead about 8–10 minutes until smooth and elastic. The dough should feel soft and slightly tacky, but not wet. If using a stand mixer, knead on medium-low speed for about 6 minutes.

- First RisePlace dough in a greased bowl and cover with plastic wrap. Let rise at room temperature 8–12 hours, or until noticeably puffy and roughly doubled. Timing depends heavily on starter strength, room temperature, and how warm your dough is.
- Make the FillingAfter the first rise is complete, mix together softened butter, brown sugar, cinnamon, vanilla, and salt. You want a spreadable paste.1/2 cup softened butter, 1 cup brown sugar, packed, 1 tablespoon cinnamon, 1 teaspoon vanilla extract, 1 pinch of salt
- Shape the RollsTurn dough onto a lightly floured surface. Roll into a rectangle about 12 x 16 inches. Spread filling evenly across dough, stopping 1/2" from the edge. Roll tightly from the long side into a log. Cut into 12 rolls using a very sharp knife, thread, or dental floss. Place into a buttered 9×13-inch baking dish.
- Second RiseCover and let rise overnight in your refrigerator until puffy. Allow to sit at room temperature for two hours after removing from the refrigerator. The rolls should look expanded and lightly touching.

- BakeBake at 350°F for 25–30 minutes. The tops should be lightly golden, and the center rolls should register about 190°F internally. If they brown too quickly, loosely tent with foil.

- FrostBeat together cream cheese, butter, powdered sugar, and vanilla. Add milk as needed for spreadability. Spread onto warm (not blazing hot) rolls. The frosting should melt slightly into the swirls.4 ounces cream cheese, 4 tablespoons butter, 1 1/2 cups powdered sugar, 1 teaspoon vanilla, 1-2 tablespoons milk

Nutrition
Notes
Sample Schedule
Day 1, 11:00 a.m. – Mix and knead dough until smooth and elastic. Cover and let rise in a warm spot until puffed, aerated, and expanded. Check sooner if your proofing spot is very warm. Day 1 Evening, before bed – Roll out, fill, shape, cut, and place rolls in a greased baking dish. Overnight – Cover and refrigerate. Day 2, 8:30 a.m. – Remove from fridge and let sit at room temperature for about two hours. Bake when rolls look fuller, softer, and puffy, with edges beginning to touch. After baking – Cool slightly, then frost while warm.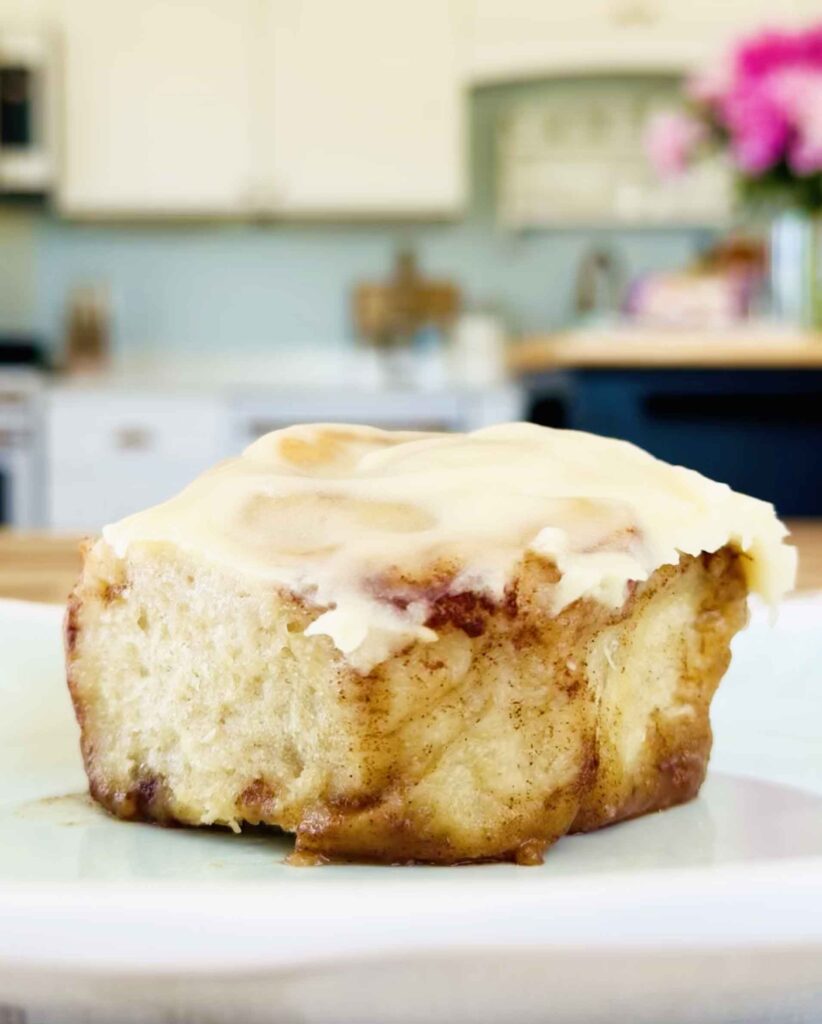
Variations
Maple Cinnamon Rolls
Add 2 tablespoons maple syrup to the filling and swap the vanilla frosting for maple frosting. This gives the rolls a deeper, cozier sweetness that works especially well with sourdough.
Orange Sweet Rolls
Add fresh orange zest to the dough and frosting for a brighter, more citrusy version. It lifts the richness and makes the rolls feel a little fresher.
Apple Cinnamon Rolls
Scatter very finely diced cooked apples over the filling before rolling up the dough. Use apples that are soft and not too juicy so the layers stay neat.
Nutty Rolls
Sprinkle chopped pecans or walnuts over the filling before rolling. They add texture and a slightly heartier feel without changing the method much.
Answers to Common Questions
Dough & Ingredients
Can I knead by hand?
Yes, you can knead this dough by hand. It will take a little longer than using a stand mixer, but it works well. At first, the dough may look shaggy or slightly rough. If it feels difficult to knead, let it rest for 20–30 minutes, then come back and knead again. That short rest gives the flour time to hydrate and makes the dough easier to smooth out. The dough is ready when it looks cohesive, smoother, and stretchy. It does not need to be perfectly silky, but it should hold together without tearing apart easily.
Can I double or triple the recipe?
Yes, you can double or triple the recipe, but make sure you have enough room for the dough to rise and enough pans for the shaped rolls. When scaling up, use the ingredient amounts as written and multiply evenly. The rise time may be a little longer with a larger batch, especially if the dough is cooler or more crowded. Watch the dough rather than relying only on the clock.
For best results, I recommend mixing very large batches in separate bowls or batches unless your mixer is large enough to handle enriched dough comfortably.
Can I use this recipe for regular dinner rolls, omitting the filling and glaze?
Yes, this dough makes wonderful dinner rolls. Simply prepare the dough as directed, skip the cinnamon-sugar filling and cream cheese icing, divide the dough into 12–15 equal pieces, shape into smooth balls, and place them in a greased baking dish or on a parchment-lined baking sheet. Let them complete the second rise until puffy, then bake at 350°F until golden brown, about 20–25 minutes. Brush with melted butter right after baking for a soft, flavorful crust.
Timing & Make-Ahead
Is it okay for the dough to sit out at room temperature with egg and milk?
Yes, in this recipe it is. Because the dough is fermented with sourdough starter, it is meant to rest for a long rise at room temperature. The key is using a moderately warm spot, not a hot one. If your kitchen is very warm, shorten the rise or move the dough to the refrigerator so it does not overproof.
How long can I leave the shaped rolls in the fridge before baking?
For this recipe, the shaped rolls are best left in the fridge only overnight, then brought back to room temperature before baking. You could stretch this for a little longer, but I wouldn’t recommend leaving the shaped rolls in the fridge for an extra full day unless you’re prepared for some variability. They may still bake up, but the longer cold rest increases the chance of overproofing, weaker rise, and softer structure. For best results, refrigerate them overnight, then let them finish proofing at room temperature.
Baking & Equipment
What can I bake cinnamon rolls in?
A 9×13-inch baking dish works best for this recipe, but you can also use a similar casserole dish or two smaller pans if needed. The main thing is to give the rolls enough room to rise until they are touching or nearly touching before baking. If you use a smaller or deeper pan, keep an eye on baking time since the rolls may need a little longer in the center.
Can I make smaller or mini cinnamon rolls with this dough?
Yes. You can cut the dough into more, smaller pieces to make mini cinnamon rolls. Just keep in mind that smaller rolls will usually proof faster and bake faster than full-size ones, so watch for the same visual cues, then bake until the tops are lightly golden and the centers are cooked through.
Troubleshooting
Why are my rolls dense?
Dense sourdough cinnamon rolls are usually because:
- your starter was not active enough
- the dough was underproofed
- your kitchen was too cold
- too much flour was added
Why did my filling leak everywhere?
This usually happens when butter was melted instead of softened, rolls were underproofed, or the dough was rolled too thin.
Why did my dough barely rise?
Your starter may not have been at peak activity. For enriched doughs like cinnamon rolls, the starter needs real strength. You can also place the dough somewhere warmer:
- oven with light on
- near a warm appliance
- proofing box
Storage, Freezing, and Reheating
These sourdough cinnamon rolls are best warm and freshly iced, but they also keep well if you want to make them ahead. The main thing to remember is that storage and reheating affect the finished rolls, while cold and frozen make-ahead steps affect proofing, so I treat those as two different situations.
Overnight refrigerator rest before baking
After shaping the rolls, cover the pan tightly and refrigerate overnight. In the morning, do not judge them by the clock alone. Cold rolls often look firmer and less expanded at first, so let them sit at room temperature until they look softer, puffier, and are touching or nearly touching before baking.
Freezing unbaked rolls
You can freeze the shaped rolls before the final rise, but this is the version I find less predictable with pure sourdough. If you do freeze them, thaw them overnight in the refrigerator, then give them plenty of room-temperature time to finish proofing before baking. They can turn out well, but they usually need more patience than yeasted rolls.
Freezing baked rolls
For the most reliable make-ahead option, I prefer freezing the rolls after baking. Let them cool completely, then freeze them unfrosted if possible so the texture stays cleaner and the icing looks better when served later. Once thawed, warm them gently and frost before serving.
Reheat: Oven vs Microwave
To reheat, cover the rolls and warm them gently in a 300°F oven until heated through (best method), or microwave individual rolls briefly for a quicker option. The oven gives the best texture for a pan or several rolls, while the microwave is best for a single serving. If a roll seems a little dry after storage, a tiny bit of butter, milk, or cream before reheating helps soften it again.
After icing
Because the frosting contains cream cheese, I refrigerate leftover frosted rolls if they will be sitting longer than a couple of hours. For the best texture later, let them sit at room temperature for 20-30 minutes before serving, or warm them gently first.
CREAM CHEESE ICING FOOD SAFETY NOTE
Unfrosted rolls can be stored at room temperature for a short time, but once the cream cheese icing goes on, I treat them like a refrigerated baked good.
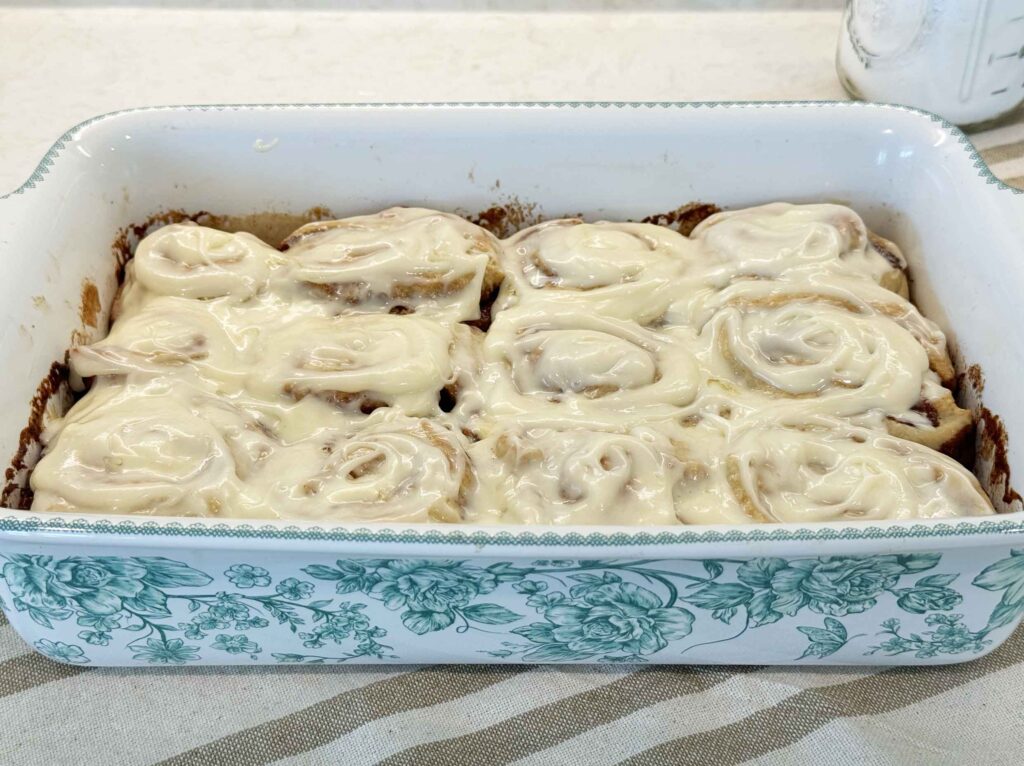
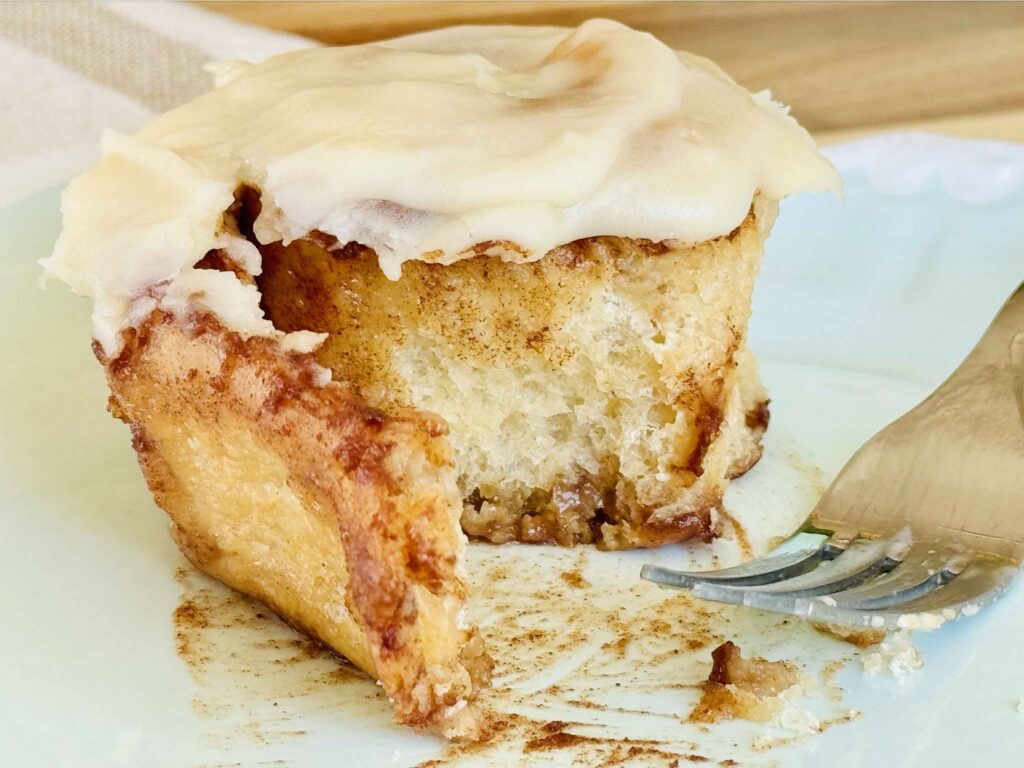
The finished sourdough cinnamon rolls had a soft, tender crumb with gooey cinnamon filling and a thick cream cheese frosting that melted slightly into the warm rolls.
We adore these cinnamon rolls and love to make them for special occasions, like birthdays and holidays, and also just because. Here’s a candid shot of Greg enjoying a fresh, warm cinnamon roll while taking a break from some outside work (he didn’t know I had a camera). That smile says it all.

If you want more delicious sourdough ideas once you’ve got cinnamon rolls down, my sourdough focaccia uses the same starter and is so easy to make. Sourdough biscuits are a great use for any discard you have, too!
Tried this recipe?
Tap the stars in the recipe card to leave a quick rating. Your rating helps other home cooks know this recipe works in a real kitchen, not just mine.
And as a thank-you for your feedback, you will receive a free printable copy of my Maker Home Companion Cookbook, featuring my most popular recipes, each one formatted on a SINGLE, easy-to-use page, a perfect kitchen companion for easy meal prep. Click here to learn more about this cookbook and how you can get your copy!
")

")

Meet Jennifer
Jennifer cooks and experiments in the kitchen at Maker Farm, where she focuses on simple pantry cooking, homemade staples, and practical recipes that make everyday meals easier. Over the years she has tested many ways to make cooking simpler and more dependable, and shares the methods that work best in her own kitchen, occasionally showing them on her Heart to Home at Maker Farm vlog.
These are the best cinnamon rolls I have ever had! Amazing. Will have to make a double batch next time. Thank you!!!
Wonderful to hear, Dana! Thank you for letting me know. 🙂
I made these last night and baked today. My husband said on his first bite that this is good. Since we are on low carb diets I shared the rest with my neighbors. I also added some pecans to the tops of some. Yummy
I’m SO happy to hear you enjoyed these, Terri! Thank you VERY MUCH for your feedback on my recipes — it truly means a lot to me!!