
To store leftovers, refrigerate them promptly, divide large batches so they cool faster, and mark when the food was made. Keep the portions you expect to eat soon in the fridge and freeze the rest. When you come back for dinner, the preparation date and what you know about cooling and cold storage matter more than a perfect container, a sniff test, or how thoroughly you reheat the meal.
Take the Guesswork Out of Storing Leftovers
Here on Maker Farm, Greg and I share the kitchen, and I want the food we’ve cooked to become another dependable meal, not a mystery container at the back of the fridge. There are still dinner dishes to wash and ingredients to put away, so the routine needs to work in a real kitchen. You don’t need a matching set of containers to save dinner.
The part I take seriously is the food’s history. Bacteria that cause food poisoning can grow when perishable food spends too long without refrigeration, and food can look perfectly normal even when that history is a problem. A lid helps keep food from drying out, but it cannot undo time spent too warm.
We’re really doing two things here: getting cooked food cold promptly, then leaving ourselves enough information to decide whether to eat it later. The containers and meal sizes can bend around your kitchen. The time and temperature boundaries cannot.
On This Page
- Take the Guesswork Out of Storing Leftovers
- Can Hot Leftovers Go Straight in the Fridge?
- How Do You Cool a Large Batch Without Leaving It in the Pot?
- Is Your Fridge Cold Enough for the Storage Plan?
- How Should You Cover and Pack Leftovers?
- How Much Should You Put in Each Container?
- Refrigerator or Freezer: Where Should Each Meal Go?
- How Will You Find and Date the Older Meals?
- How Long Are Leftovers Good in the Fridge?
- What If You Don’t Know How the Food Was Stored?
- How Should You Reheat a Leftover Meal?
- Keep the Routine, Not the Guesswork
Can Hot Leftovers Go Straight in the Fridge?
Yes. A small hot portion can go into the refrigerator now if there’s room for cold air to move around it. A large, deep batch needs dividing first. Neither one has to sit on the counter until it reaches room temperature.
That may sound different from the advice to let food cool before you put it away. For a big batch, the useful part is making room for the heat to escape. The NOT useful part is waiting for every serving to reach room temperature. How much food you have, how deep it is, and how long it has been out matter more.
Refrigerate perishable leftovers within two hours at room temperature, or within one hour when the air temperature is above 90°F. Those are maximum times outside refrigeration, not timers telling you how long to wait. If dinner has been on the table, that time counts too. This is why a speedy table-to-fridge transition matters: it leaves less opportunity for bacteria to grow before the food gets cold.
If your refrigerator is full and there is no room for a hot serving, rearrange the shelf rather than squeeze it between containers. For the deep pot, make space for the smaller containers you’ll use in the next step.
How Do You Cool a Large Batch Without Leaving It in the Pot?
A full stockpot doesn’t cool like a shallow container. Heat has farther to travel from the middle, even when the outside of the pot doesn’t feel quite so hot. Shallow containers help, but they still need room in the fridge for cold air to circulate. We want the food out of the deep pot and cooling promptly, not crowded onto one shelf.
Here’s the sequence I use when a large batch is ready to put away:
- Check the depth. If soup or stew is still deep in its cooking pot, transfer it into clean, smaller, shallow containers. For a large solid item, cut it into smaller pieces. More of the food is exposed to cooling this way, rather than leaving one slow-cooling center.
- Make room in the refrigerator. Set the containers where cold air can move around them instead of stacking them tightly while they’re hot. Dividing the batch uses more containers and shelf space, but it gives that heat an easier way out. The containers you already own are fine if they’re clean and suited to the food.
- Use a cold bath if the load is substantial. An ice or cold water bath can help pull heat from a container before it goes into the fridge. This is a quick-cooling option, not permission to leave food out past the applicable two-hour or one-hour limit.
- Check the fridge after loading. An appliance thermometer tells you whether it’s at 40°F or below. If the reading rises above that, address crowding or the appliance setting and consider what you know about exposure of both the new batch and other affected food.
If the shallow containers still crowd the fridge, use the cold bath while you rearrange shelves. Don’t leave the full pot on the counter as a workaround.
Is Your Fridge Cold Enough for the Storage Plan?
A storage timeline assumes the food actually stayed cold. The usual refrigerator target is 40°F or below, but turning a dial toward “colder” doesn’t tell you the temperature where your food sits. Check it with an appliance thermometer. Check the freezer too: its target is 0°F or below.
This matters after a large hot load, and it matters on an ordinary day when you’re counting on refrigerated meals for later in the week. A thermometer reading gives you a condition you can check, rather than asking a date label to do a job it cannot do.
If a reading is warm, work through these separate questions:
- What do the thermometers show? Check the actual refrigerator and freezer readings where food is stored. After loading a big batch, make sure air can circulate and recheck the refrigerator rather than relying only on its setting.
- Can you correct the problem? Look for crowded shelves or blocked airflow, check the setting, and address an appliance that isn’t holding its target temperature. Recheck to see whether the correction worked.
- What happened to the food? Consider what you reliably know about how long affected items were warm. A corrected reading cannot reconstruct an unknown stretch of exposure or give food its planned storage period back.
There isn’t one keep-or-discard answer for every unexplained warm reading. A freezer reading above 0°F, for example, is a problem to address, but that reading alone doesn’t establish that every package must be thrown away. If you cannot establish enough about a particular food’s time and temperature history to support eating it, don’t use its label or its smell as reassurance. You aren’t failing at meal planning by taking that uncertainty seriously.
How Should You Cover and Pack Leftovers?
Do you close the lid while food is warm, or wait for the steam to disappear? A clean, well-fitting container is useful for storage because it limits drying and odor pickup. During brief cooling inside a properly operating refrigerator, you can cover a shallow portion right away or leave its cover a little loose and close it once cool. Neither choice calls for a long wait on the counter.
These are the packaging decisions worth making:
- For brief refrigerator cooling: If steam collects under the lid and softens something crisp, a loose or partial cover can reduce trapped condensation. Close the container when it has cooled. Moisture on the lid is a texture concern, not evidence that the food spent too long unrefrigerated.
- For ongoing fridge storage: Use a clean container with a lid that fits, a sealed bag, or suitable wrap. If food starts drying out or picking up other foods’ odors, check how well it’s covered. Leaving it exposed for ongoing storage has a cost, even if brief venting suited that meal.
- For the freezer: Choose freezer-suitable, moisture-resistant packaging that closes well, with excess air limited. Specialized containers and vacuum sealing are optional, not the price of admission to saving supper.
- For moisture-sensitive meals: Keeping dressing, sauce, or a crisp component separate may make the later meal more pleasant, but it takes another container or an extra serving step. Soggy food can have a sound storage history, and crisp food can have an unsafe one.
One common mistake is treating a tight seal as proof that a meal is safe. It helps protect quality, but it cannot tell you when the food was made, how it cooled, or whether the fridge stayed cold. Use a container that closes well, whatever works for you, and check the food’s history separately.
How Much Should You Put in Each Container?
Think about the next meal, not the size of the original pot. One shallow container might hold tomorrow’s lunch; another might suit a dinner you’ll share. They don’t need to be identical or measured into exact single servings.
This helps because you can retrieve the meal you actually want without taking out and reheating the whole batch. The other portions stay cold. With a large batch, keep those usable portions shallow enough to cool promptly, even if one container holds more than one person will eat.
WHY I LIKE TO USE SMALL LEFTOVER CONTAINERS
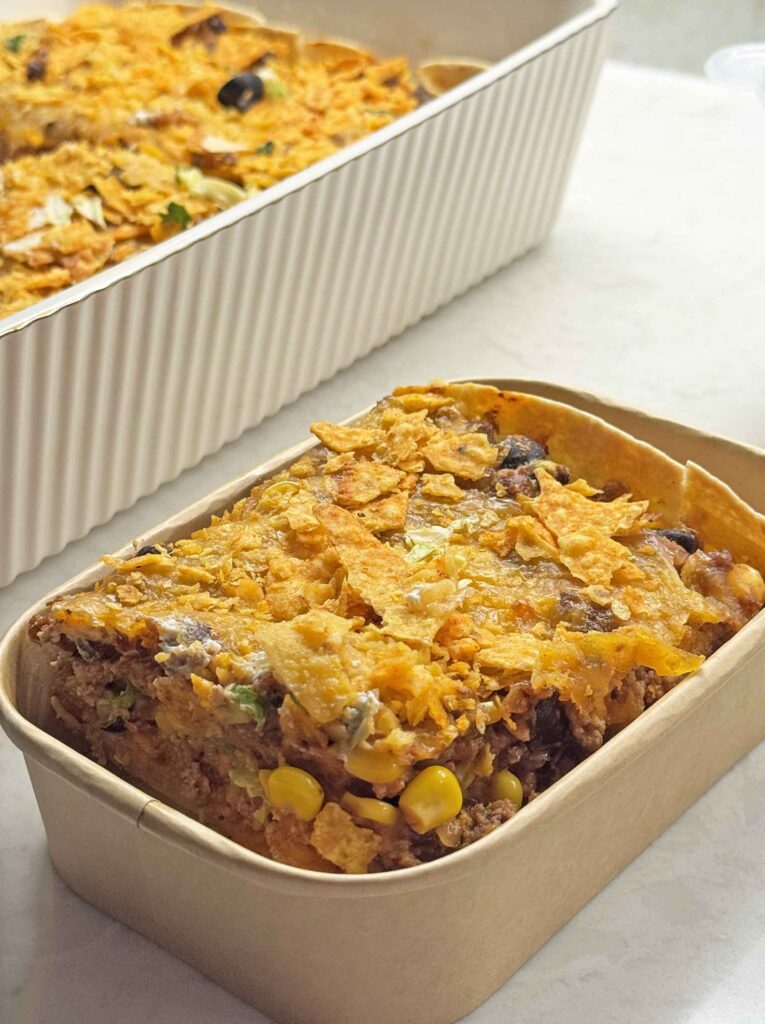
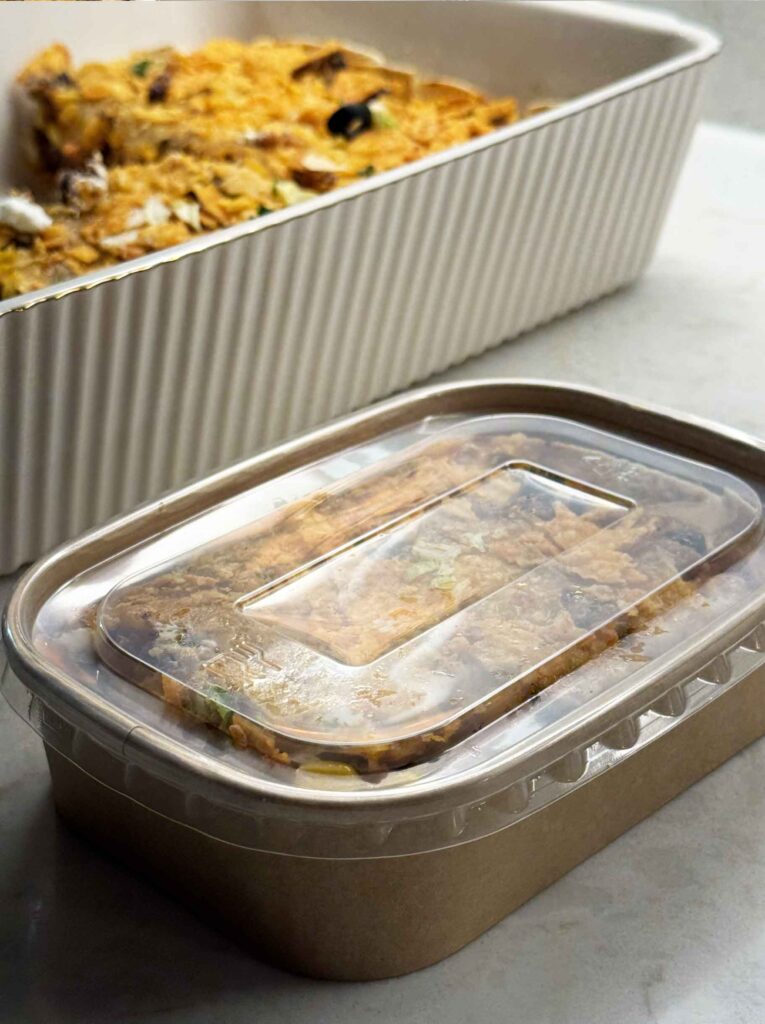
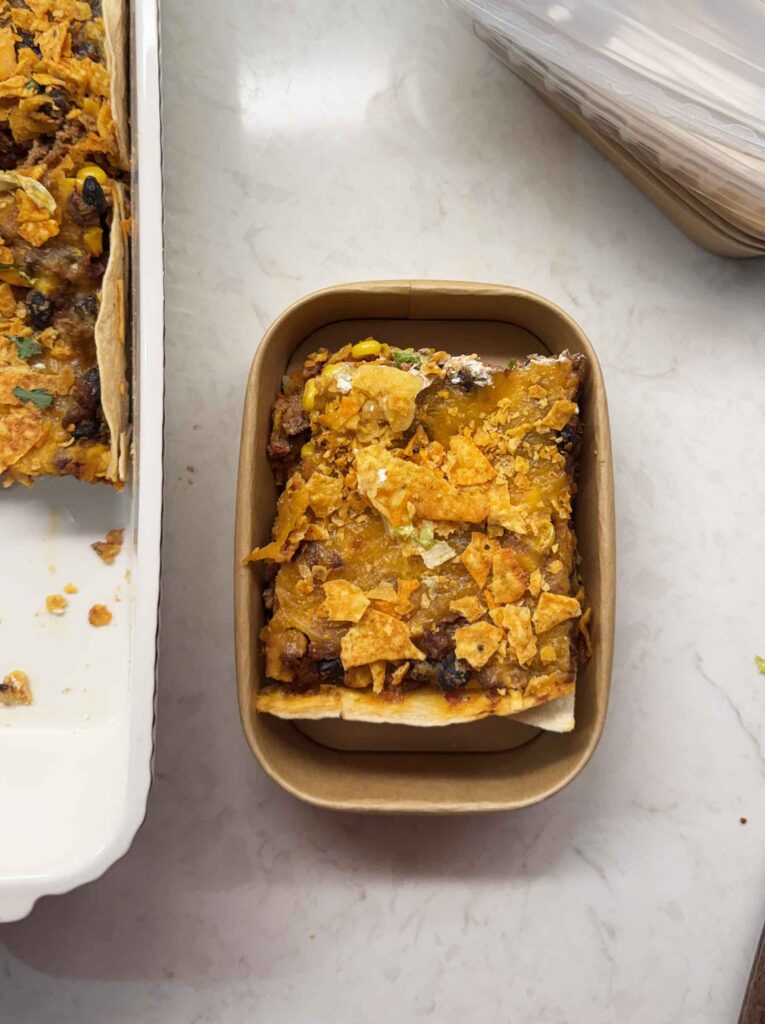
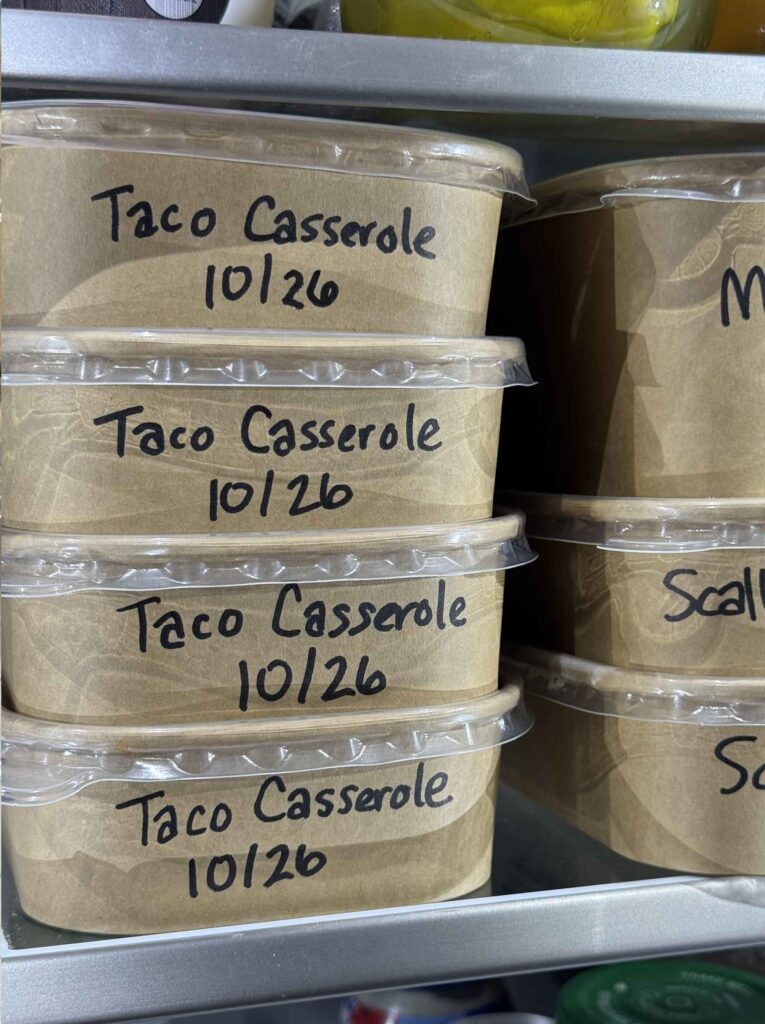
I like using small kraft paper containers for storing leftovers because they’re just the right size for individual portions, stack neatly in the refrigerator, and have well-fitting lids. They’re also freezer-safe, so if we don’t eat our leftovers within a few days, I can simply move them to the freezer for another time. They are also microwave friendly, so we can eat right out of it if we’re in a hurry. They’re lightweight, convenient, and make it easy to grab a ready-to-eat meal without any extra fuss! This means less food waste for us, which is huge.
I also use small glass containers, including pint- and quart-size Mason jars, for non-meal leftovers, such as dressings, sauces, and things like muffins and salads.
Individual portions make grab-and-go lunches easy, but they can be more packaging than a shared dinner needs. Planning around likely meals is quicker, though a container meant for a shared meal may hold more than you want on a different day. And that’s okay! You can take the amount you need with a clean utensil and return the rest promptly, rather than repeatedly warming everything.
Refrigerator or Freezer: Where Should Each Meal Go?
Tomorrow’s lunch may have a clear place in your plans while two more portions do not. Decide where each will go now, rather than waiting to see which containers remain in the fridge later.
There are two practical destinations for properly handled portions:
- Refrigerator: Keep the meals you expect to eat within the general three-to-four-day window. The convenience is that they’re ready when you are, but the plan depends on prompt chilling and a fridge that stays at 40°F or below.
- Freezer: Freeze portions intended for later, or ones you haven’t scheduled, while they’re still within that refrigerated window. Earlier is preferable for quality. A well-closed, freezer-suitable package sized for a usable meal is easier to thaw when the time comes.
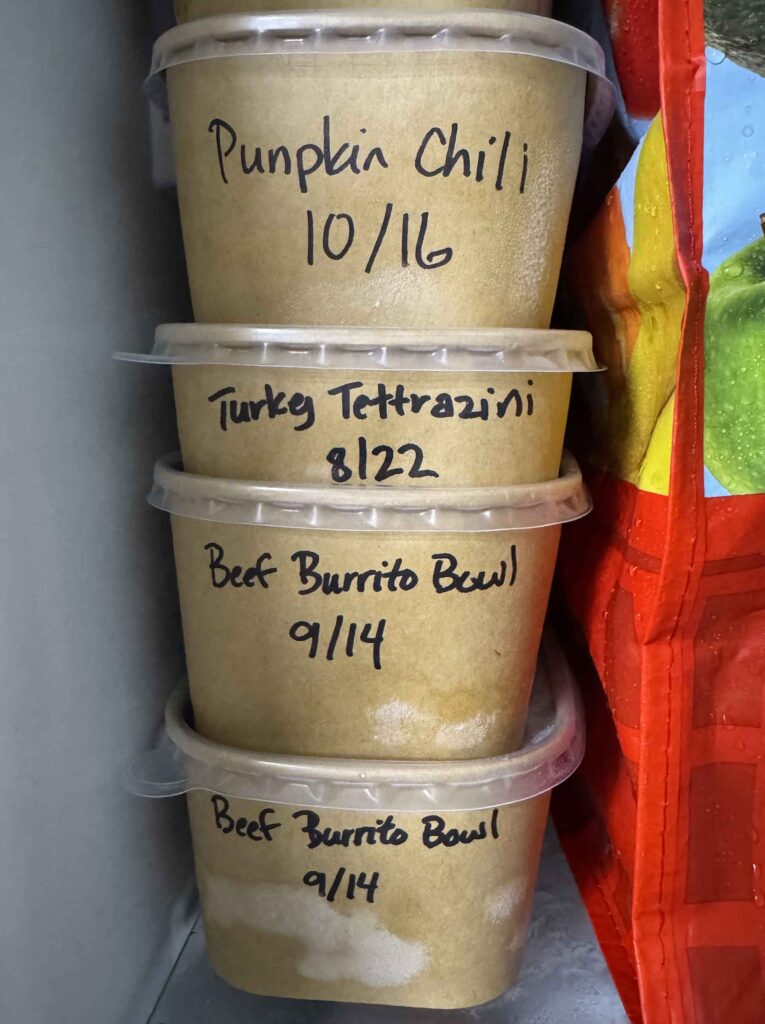
For a general freezer planning guide, aim to use frozen leftovers within about three to four months for best quality when they’ve remained continuously frozen at 0°F or below. That’s a quality window, not a claim that every dish becomes unsafe on the next day. Different foods have different recommended freezer-quality periods, so check the FoodSafety.gov Cold Food Storage Chart when you want the guidance for a particular food.
Freezing gives you a future meal, though creamy dishes and some vegetables may change texture after thawing. Thawing takes a little planning, too. Freeze what you’re unlikely to eat soon so it’s there for later; not every extra portion has to go in the freezer. And freezing cannot fix food that was mishandled beforehand.
How Will You Find and Date the Older Meals?
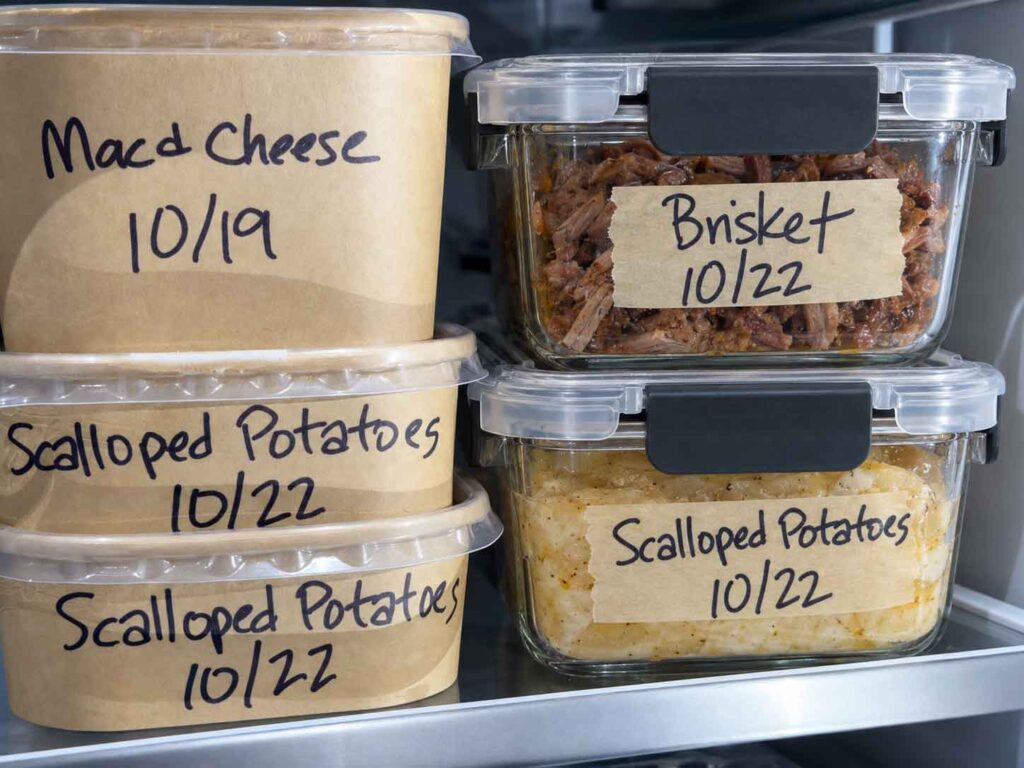
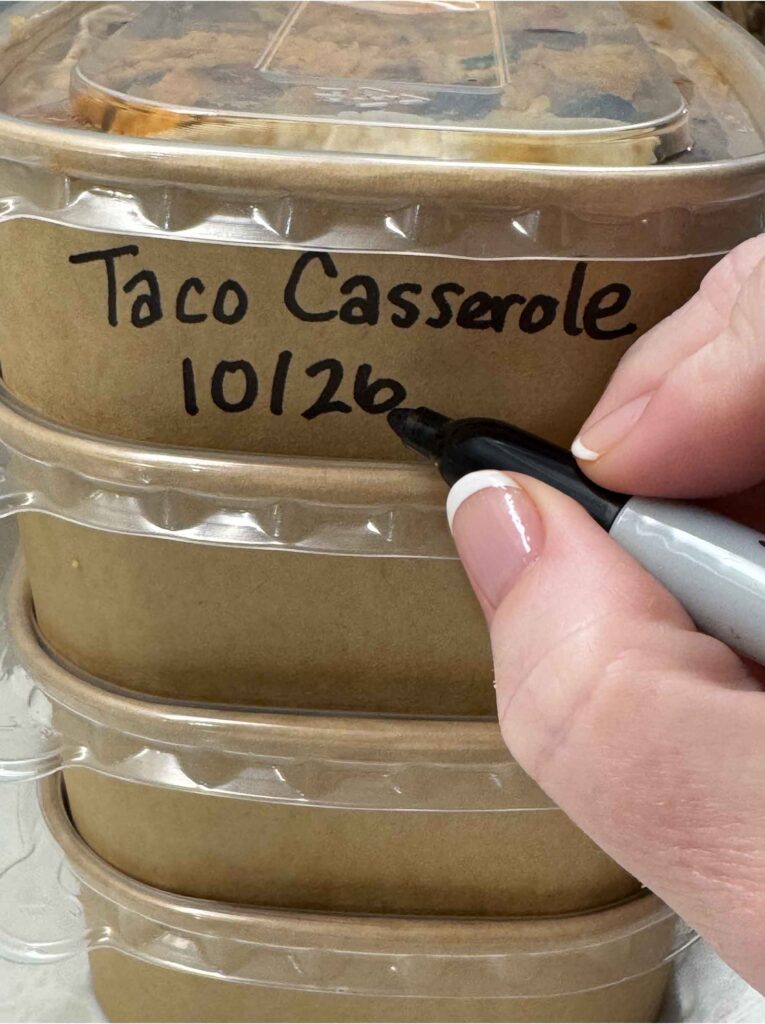
Before the fridge door closes, write the food name and its preparation date on it. It can be written on a piece of tape, an existing lid, or on the side of the container if you use paper containers like I do. Nothing fancy. That date saves you a much harder guess later. Write when the food was made, not when you move it or finally find a pen.
Keep Your LABEL METHOD HANDY
Keep your marker, tape, or whatever you use in a dedicated, easy-to-find spot. I use a thick black permanent marker on my recyclable paper containers and keep it right next to the refrigerator so I can grab it as I’m loading my leftovers.
Then give the containers a spot you’ll see. A visible section of a shelf is enough; you don’t need an entire dedicated leftovers shelf. I confess that I do have a dedicated leftover shelf, but that’s because we have a LOT of leftovers from all of my cooking. Put newer meals behind older dated ones, and check that you can see the older container without moving the new food out of the way. Leave room for cold air to circulate.
Keep ready-to-eat leftovers above raw meat, poultry, and seafood so raw-food juices cannot drip onto them. That protects against drips, not against forgetting how long the food sat out. A tidy fridge helps, but it cannot tell you whether a batch cooled promptly.
If you find an undated container, look for a reliable preparation date and storage history rather than putting today’s date on it (I like to take photos of my food, so I check my phone’s camera history). A label records what you know; it cannot create facts you’ve lost. Tape and pen earn their keep because they make older meals easier to choose, not because they certify food safety.
How Long Are Leftovers Good in the Fridge?
For ordinary cooked leftovers, use three to four days from preparation as a general refrigerator guide when you know they were chilled promptly and kept at 40°F or below. Count from the day you made the food. Moving it into a different container, adding a label later, or reheating one portion doesn’t start a new clock for the batch.
The condition matters as much as the number. Check the preparation date and what you know about cooling and refrigeration before planning a meal. A container can be only a couple of days old and still have an unsafe history if it spent too long out, while a neatly dated lid cannot tell you whether the appliance ran warm.
What about cooked poultry, beef, seafood, rice, pasta, or a vegetable-based dinner? Be careful not to turn conflicting day counts into a special rule for one of them. The general household guide is a starting point for properly stored leftovers. Check the FoodSafety.gov Cold Food Storage Chart for the applicable food-specific refrigerator and freezer entries, rather than choosing the longest number because you hoped to save a meal.
Look at the date, yes, but don’t stop there. The useful question is whether both the time and the known storage conditions support eating this particular portion.
What If You Don’t Know How the Food Was Stored?
An undated container can feel like a choice between wasting supper and taking a chance. First see whether a reliable person or record can establish when the food was made, how long it stayed out, and whether it was refrigerated adequately. Decide from those facts, not from a sniff or taste test.
Here’s how to act on what you can actually establish:
| Condition | Facts to check | Action |
|---|---|---|
| Known storage history | Preparation date, time outside refrigeration, and cold-storage conditions are reliable. | Apply the relevant storage guide to that food and its known conditions. A date alone is not enough. |
| Known unsafe time out | Perishable food spent more than two hours at room temperature, or more than one hour when the air temperature was above 90°F. | Discard it. A later trip to the fridge or freezer does not undo that time. |
| History cannot be established | No reliable record or person can establish the necessary preparation, time-out, or storage facts. | Discard it rather than using appearance, smell, taste, or reheating to fill in the gaps. |
Mold or a suspicious odor is a reason to discard food. But food that smells normal isn’t thereby cleared to eat, and tasting an uncertain leftover is not a safety test. Some harmful bacteria don’t announce themselves in the way dinner looks or smells. If a fridge has been running warm and you don’t know when the problem began, a cold reading after you fix it cannot answer how long the food was affected.
Be careful not to confuse an unappealing meal with an unknown safety history. If you know the food was handled and stored properly but its topping has gone soft, deciding whether you want to eat it is about quality. If the necessary safety facts remain unknown, throwing it away isn’t a failure at meal planning. It’s refusing to gamble on information you don’t have.
How Should You Reheat a Leftover Meal?
Heating is for a meal you’ve already judged suitable to eat. It isn’t a reset button for time spent too warm before storage, even if the food comes out steaming. Once its history checks out, you can think about the amount you need and the texture you’d like.
I’d keep those jobs in this order:
- Confirm the storage decision. Check the date and known cooling and cold-storage history before turning on the stove or microwave. Reheating to a target temperature does not make perishable food safe again after too much time at room temperature.
- Take out the intended meal. Unless you’re serving the whole batch, use a clean utensil to remove what you plan to eat and return the remainder to the fridge promptly. The rest stays cold, though a large shared meal may take more than one round of heating.
- Heat and verify the portion. Reheat suitable leftovers to 165°F internally, checking with a food thermometer so you know the heat reached throughout. Bring soups, sauces, and gravies to a rolling boil. For microwave reheating, cover and rotate the food, allow standing time, then check several places for cold spots.
A method that makes a crisp component crisp again may give you a nicer supper, but crispness doesn’t verify 165°F. Likewise, a thermometer reading during reheating answers how hot the portion is now, not whether it was stored safely before. Keep those two questions separate.
Keep the Routine, Not the Guesswork
Next time you have extra supper, put small portions away promptly, divide the big batch, and make sure the fridge is doing its job. Pack amounts you’ll use, freeze the meals meant for later, and write the real preparation date before it slips your mind. Then when you open the fridge, you have something better than a guess: a meal with a history you know.
That’s the part I hope feels a little easier in your kitchen. What leftover are you most likely to find hiding behind everything else? I’d love to hear what small change helps you find it in time.
Happy cooking!
Love,
Jennifer

Meet Jennifer
Jennifer cooks and experiments in the kitchen at Maker Farm, where she focuses on simple pantry cooking, homemade staples, and practical recipes that make everyday meals easier. Over the years she has tested many ways to make cooking simpler and more dependable, and shares the methods that work best in her own kitchen, occasionally showing them on her Heart to Home at Maker Farm vlog.