

Everybody needs one really good burger patty recipe in their back pocket, and this is mine. These come out thick, juicy, and seasoned all the way through with two special ingredients, ending up good enough to eat right off the plate with a fork. No egg, no breadcrumbs, no filler, and you can get 2-3 on the table in about 30 minutes. Cook them on a grill pan, in a skillet, or out on the grill, and they turn out the same every time.
BURGER PATTIES At A Glance
Prep
15 min
COOK
11 min
Total
30 min
Serves
6
Pan
Grill pan, grill, or skillet
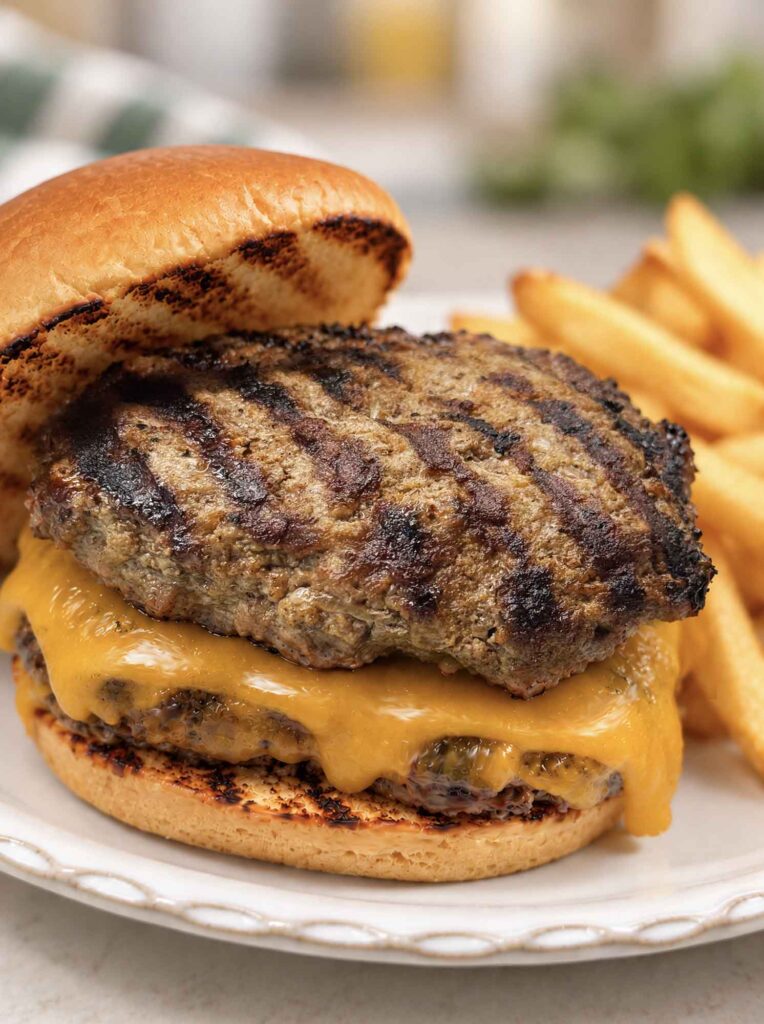
My Favorite Way to Make Juicy Burger Patties

We recently filled our freezer with ground beef and various cuts from a whole Black Angus steer, raised locally by the nephew of the farmer we lease our fields to. That means I have over 100 lbs of ground beef now and you better believe I intend to put it to good use. But that doesn’t always mean elaborate meals … sometimes a good burger is all we need.
We love our smash burgers but we also love a traditional burger patty that works on a grill or stove. My seasonings and method help you keep the patties juicy and delicious, without any stuff you don’t need.
Let’s dig in!

Tips and Notes Before You Start
- This recipe uses 2 pounds of ground beef, not 1. Check what you have before you start mixing, or just halve everything for three 1/3 lb. patties.
- 80/20 ground chuck is best. Leaner beef makes a dry patty and seasoning will not fix it.
- Grated onion and Worcestershire sauce are my special ingredients. These make a difference!
- Plan on freezing some patties if you can. I cooked three and froze three raw. This means you’re making some for a future dinner!
- A grill pan works great here! You can “grill” any time of the year with one and get those appetizing grill marks. But you can also take these patties out to an actual grill, or just cook them with a skillet.

Want to Save This Recipe?
Enter your email below and we’ll send it straight to your inbox! Plus you’ll get new recipes each week!
What You Need for This Burger Patty Recipe
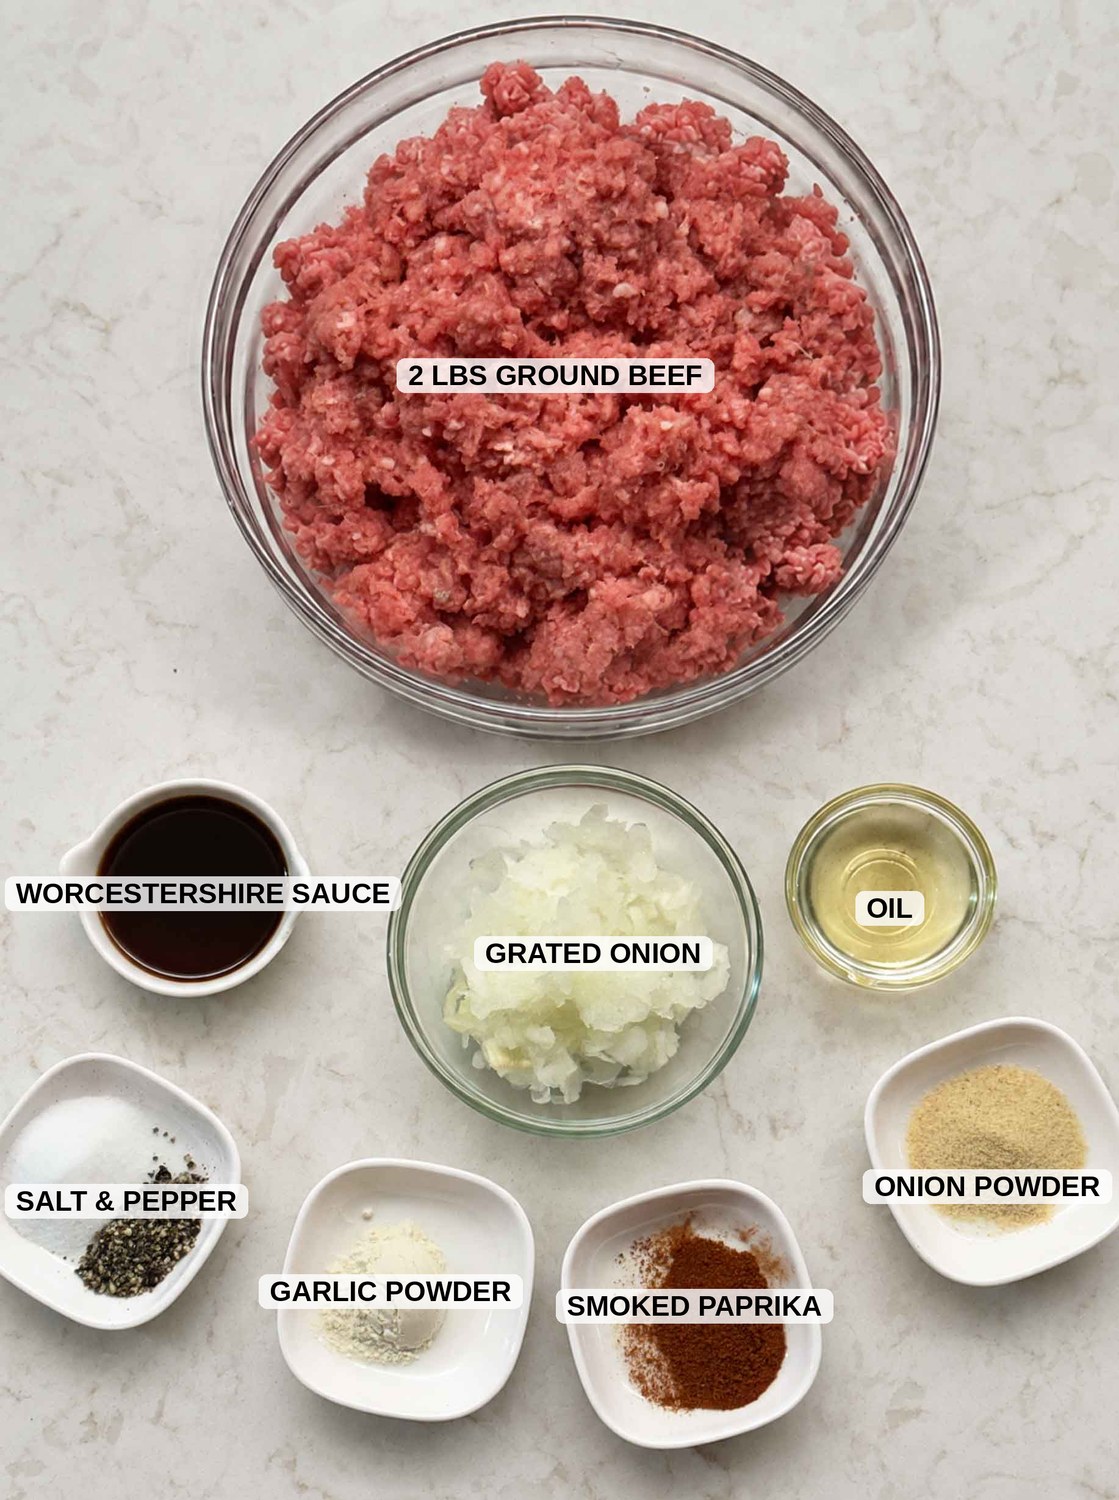
- Ground chuck (80/20), cold from the fridge.
- Grated yellow onion, about half a small onion, juices and all
- Worcestershire sauce
- Garlic powder
- Onion powder
- Smoked paprika (optional, and not spicy at all)
- Coarsely ground black pepper
- Salt, for the outside of the patties
- Neutral oil or beef tallow, for the pan
- Cheese and hamburger buns, if you are building actual burgers
Why 80/20 Ground Chuck Beats Everything Else

That 20% fat is insurance. Beef loses moisture as it cooks and melted fat stays behind to make up for it, which is why an 80/20 patty tastes juicy while a 93/7 patty turns into a hockey puck at the same temperature. Chuck also has more beefy flavor than generic ground beef. If your store does not have it, 85/15 works and is what I keep on hand anyway. Be careful not to go leaner than that… past 90/10 you have to add fat back some other way, and that is a fussier recipe than this one.
How to Season Burger Patties (and When to Add the Salt)
Salt dissolves the proteins in ground beef. So if you mix salt into the meat and let it sit, you end up with a bouncy, sausage-like texture. That may be perfect for a bratwurst, but it’s not what you want in a burger, and it is why a patty comes out springy even when you swear you barely touched the meat… overmixing gets the blame, but the salt in the bowl is usually the culprit.
So we split the seasoning into two jobs. Into the meat we add grated onion, Worcestershire, garlic powder, onion powder, smoked paprika, and black pepper, none of which firm up the texture. Then on the outside of the patties, we sprinkle salt on both faces of the formed patties right before they go in the pan. Surface salt seasons every bite and helps the crust form.
The Worcestershire is what makes a 30-minute patty taste like it took longer, and the grated onion adds sweetness plus moisture. Be careful not to add too much onion juice, though, because a sloppy mix slumps on the way to the pan and splits at the edges in it. If it looks wet enough to be meatball mixture, leave some juice behind on the plate. Don’t worry about the salt being precise… nobody will notice once it is on a bun.
Forming Patties That Don’t Puff Up or Fall Apart
Start with cold beef and a large bowl. Break the meat up with your fingertips, scatter the seasonings and Worcestershire and grated onion over it, then toss with your fingertips for about 20 to 30 seconds. That is it. It will not look uniform, and it is not supposed to. Warm hands and heavy kneading squeeze the fat into a paste, and pasty fat renders out all at once instead of gradually, which is how you get a dense patty. Loosely handled meat cooks up tender even when the mixing looks sloppy. Mine always does.
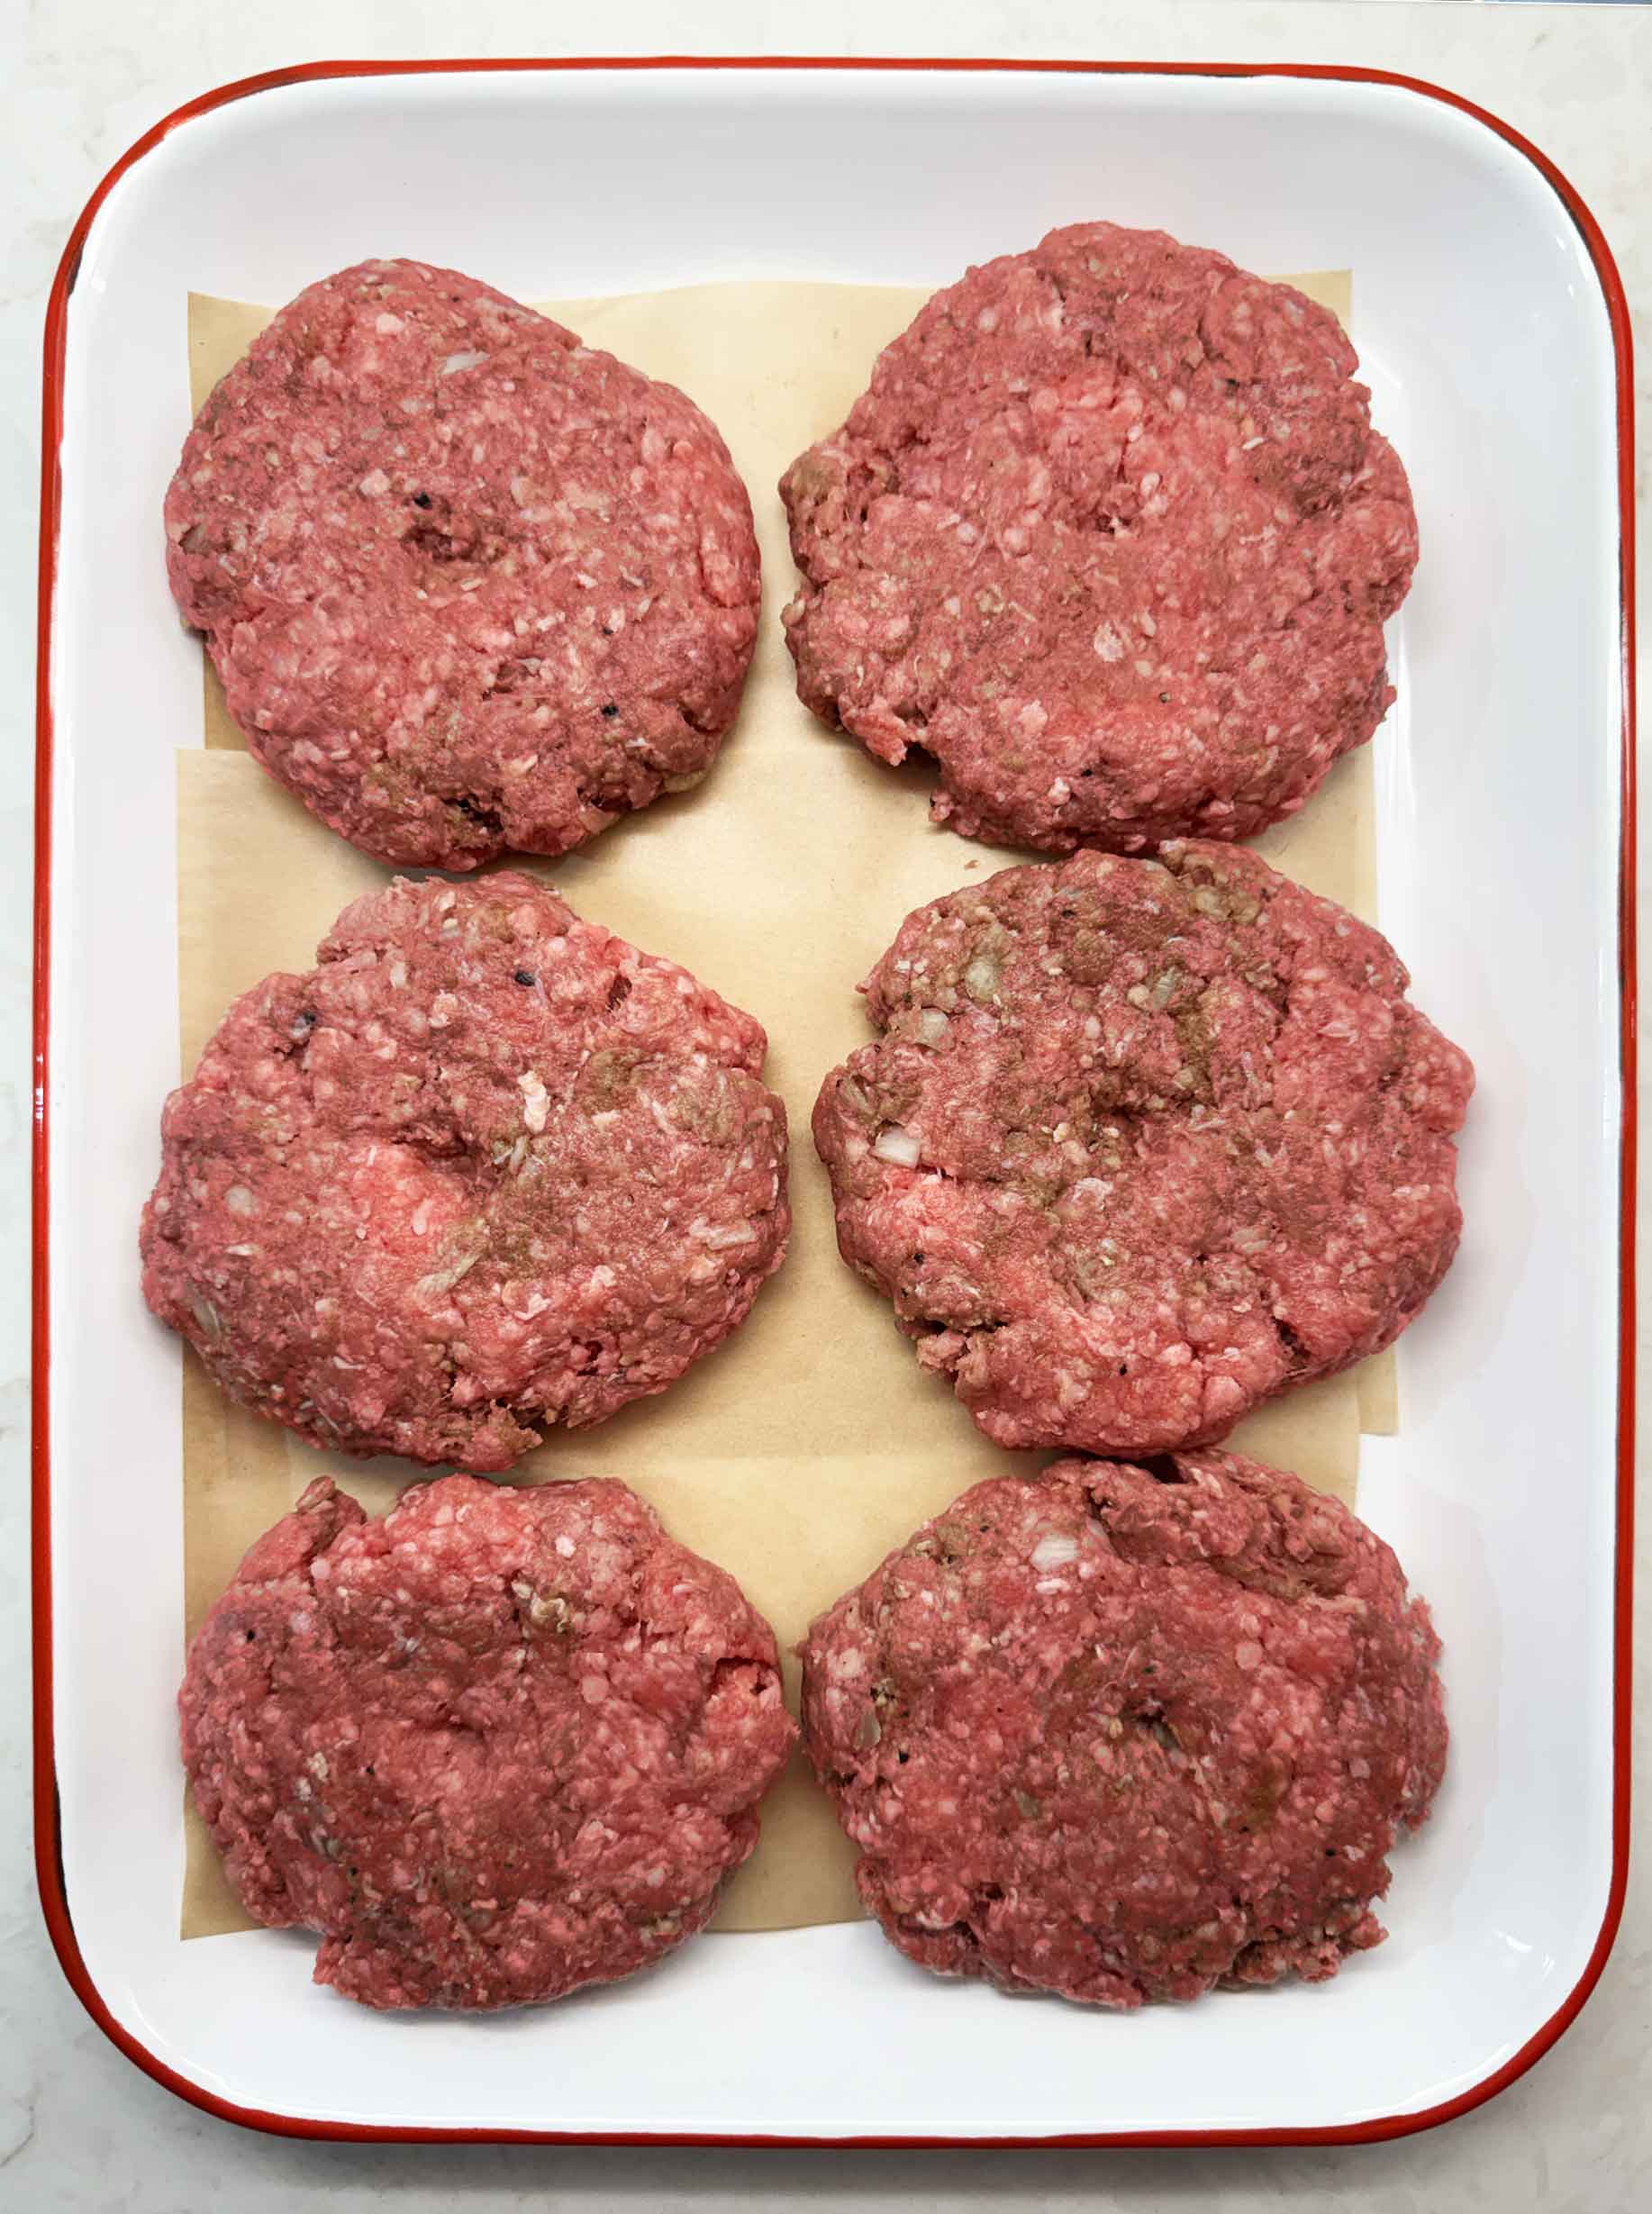
Divide the meat into 6 portions, about 5 1/3 ounces each, and pat each into a disc 3/4 inch thick and 4 1/2 inches across. That width will feel like a lot… it always does to me. But a third of a pound has to go somewhere, and if you keep it narrow it goes up instead of out, and a tall patty cooks slowly in the middle. It shrinks back to about bun-sized anyway.
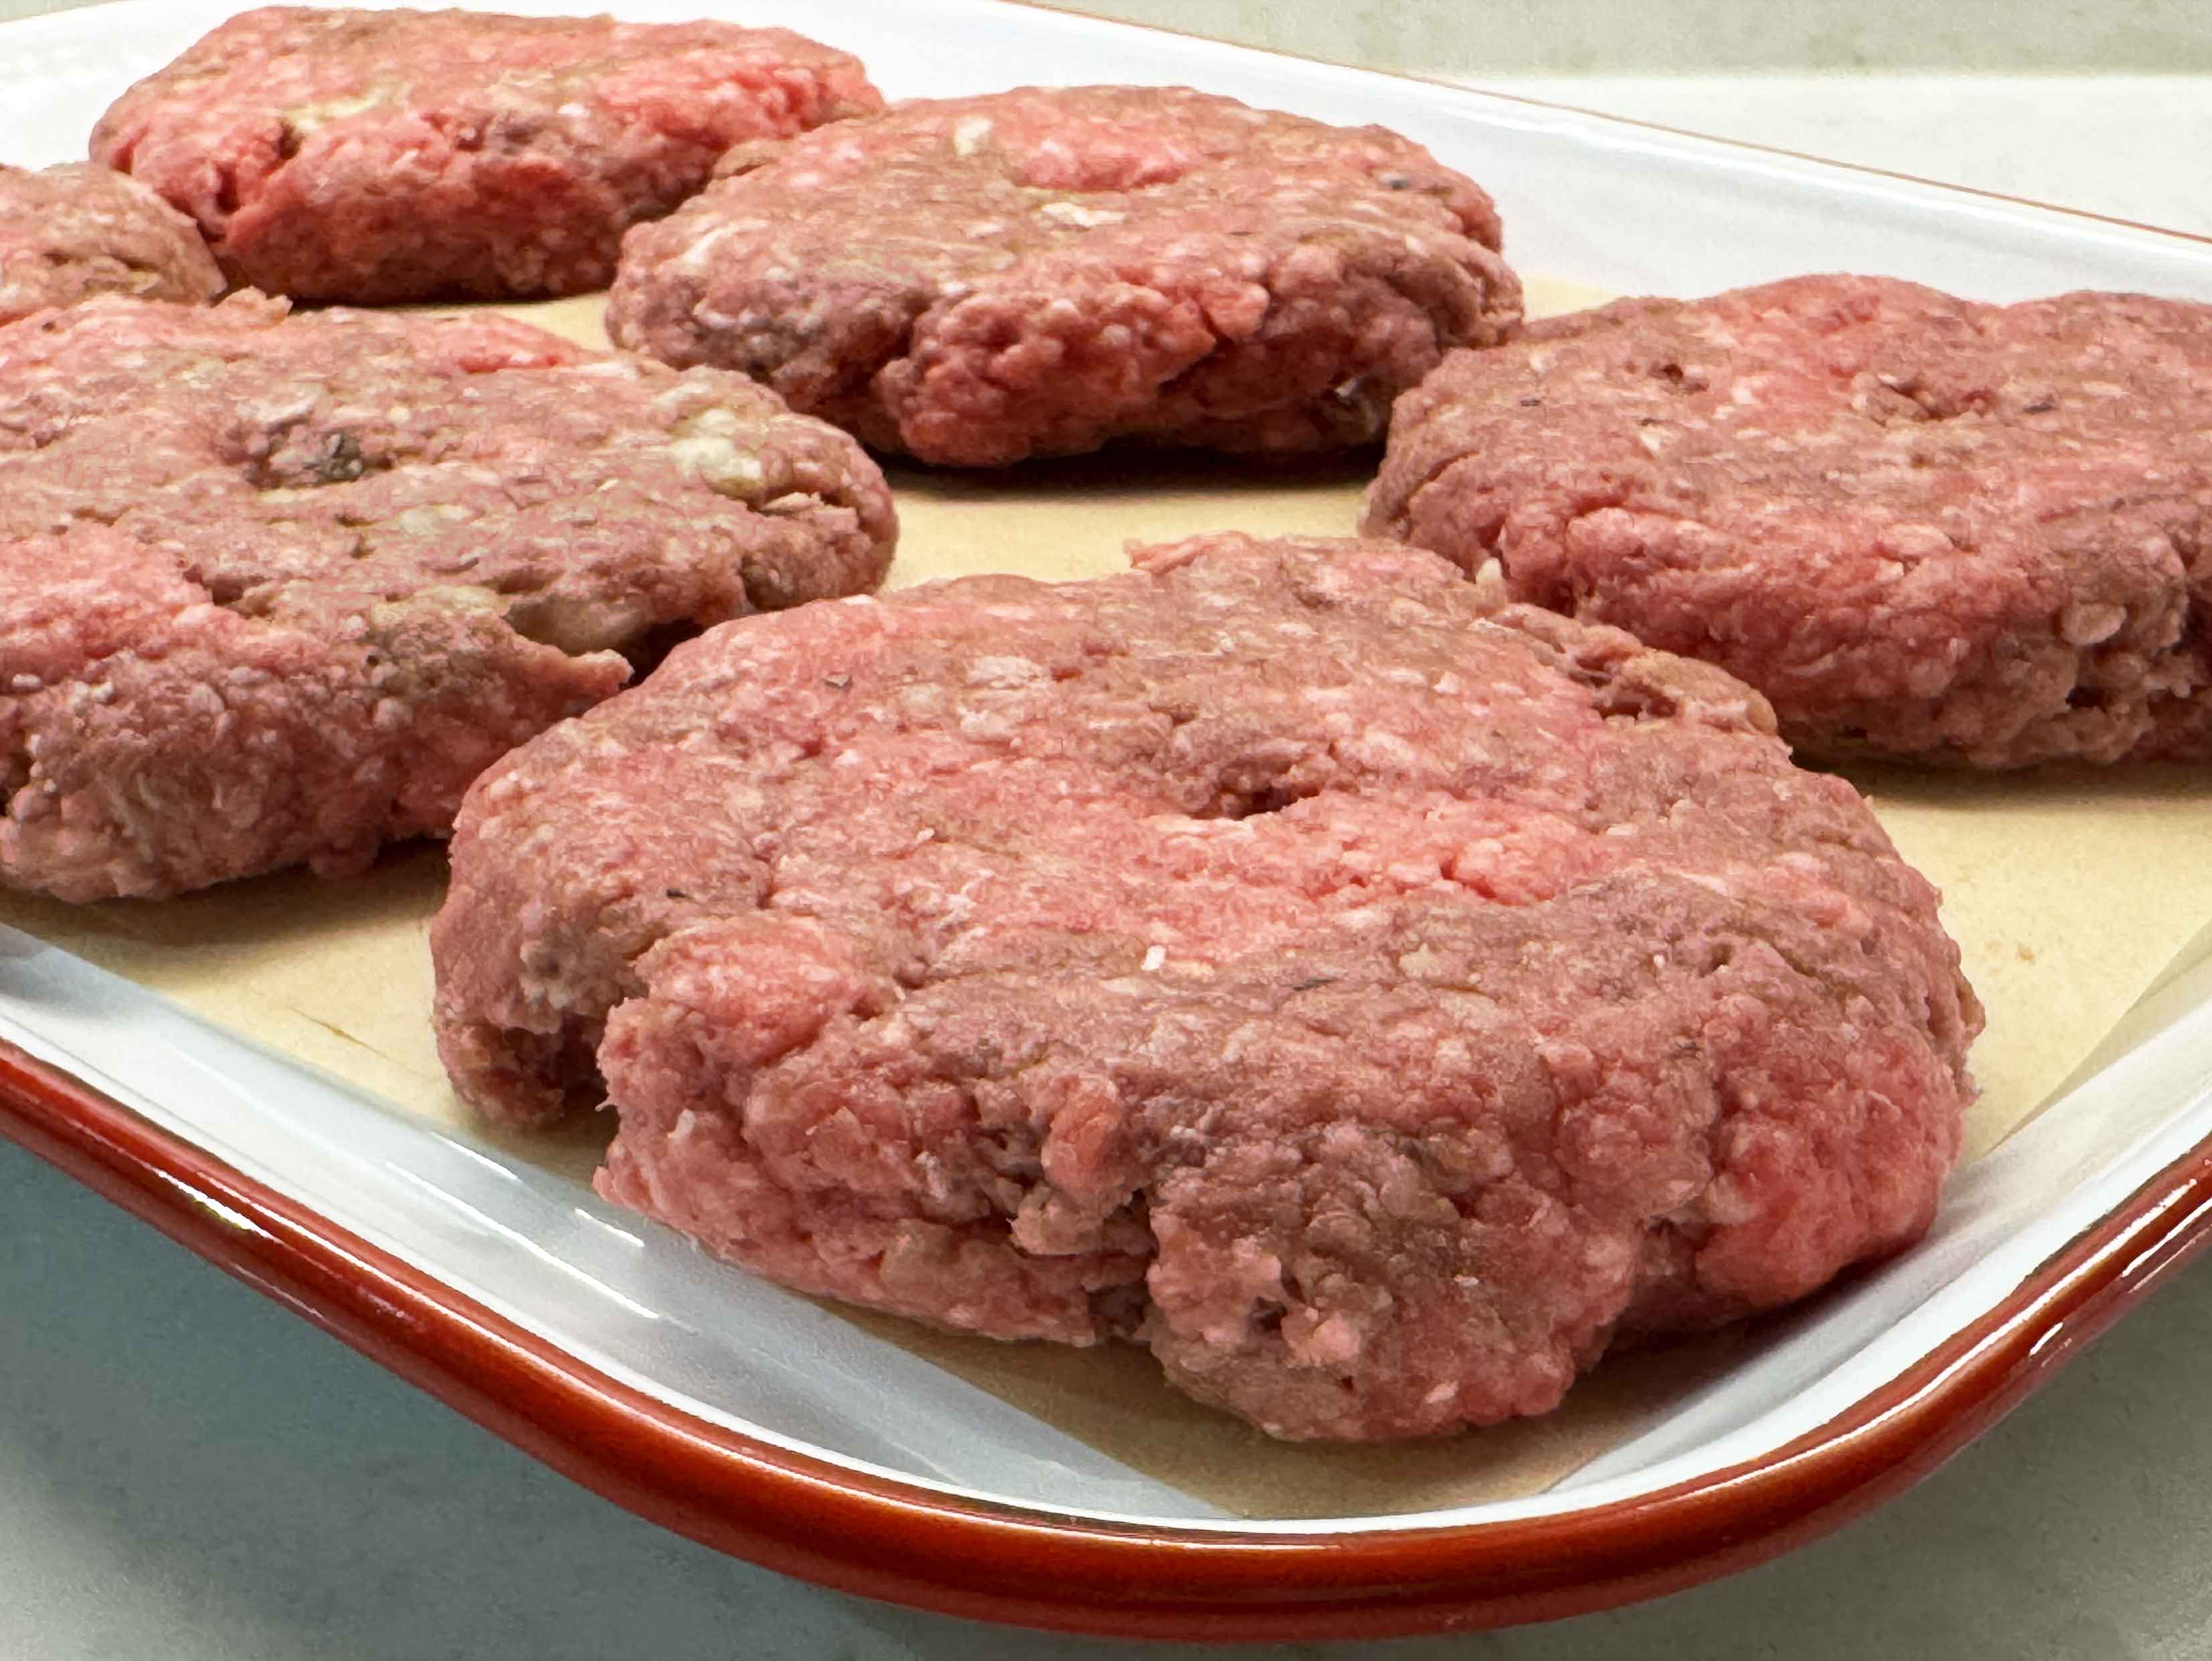
Press your thumb into the center of each one to make a shallow dimple about 1/4 inch deep. As a patty cooks the edges tighten and push the center up into a dome, and a domed patty wobbles on the bun and squeezes its toppings off the sides. The dimple gives the center somewhere to go.
Now, do you have to chill them? You can, but it’s not strictly necessary, and here is why. Set the patties on a parchment-lined plate and go heat your pan. By the time a skillet or cast iron grill pan is properly hot, and you have toasted your buns on it, roughly 10 minutes have gone by and the patties have had their rest without you planning one.
Put them in the fridge for that stretch if your kitchen is warm or your hands ran hot and the fat went soft while you were shaping, because cold fat stays put long enough to sear. Otherwise the counter is fine. You can also hold them covered in the fridge for up to a day at this point.
How to Cook Burger Patties in a Cast Iron Grill Pan
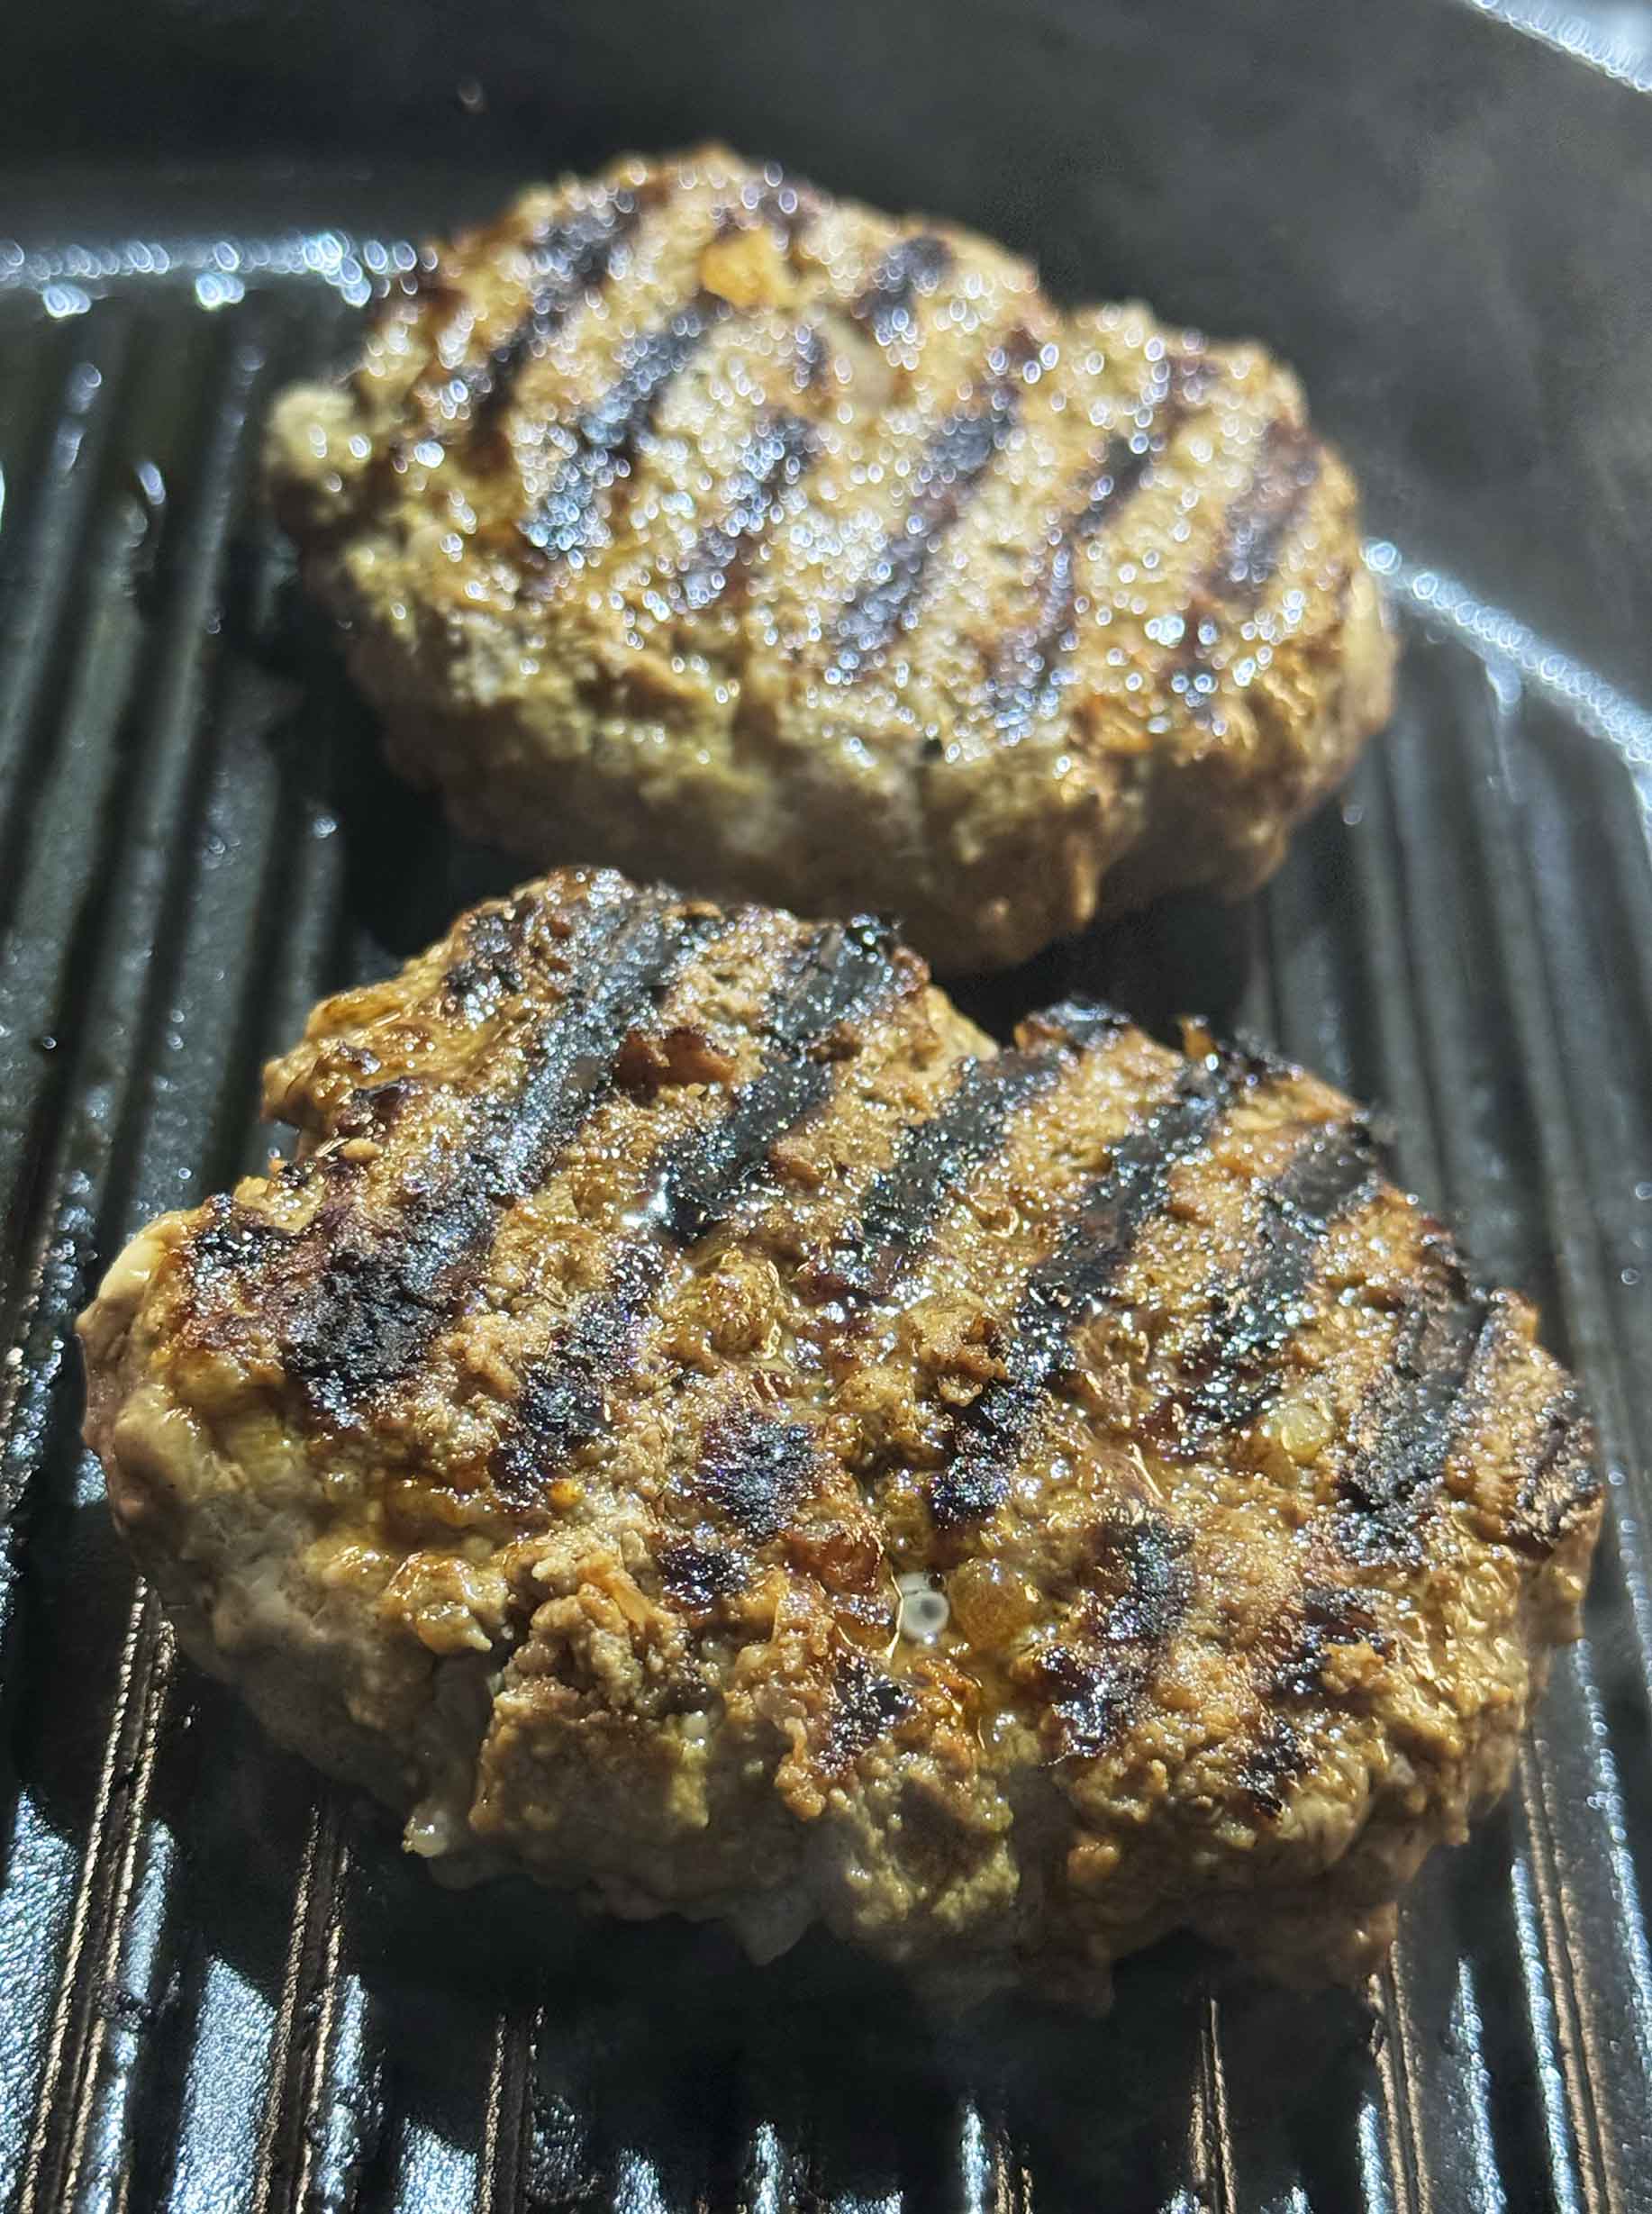
Besides the grill marks, the ridges in the cast iron grill pan let the fat drain into the channels instead of sitting under the patty and frying it. One practical thing first: a 12-inch pan holds 3 patties, not 6. Crowding drops the temperature and you steam instead of sear, so plan on two batches, or cook three for dinner and send the other three to the freezer.
Preheat over medium-high for a full 5 to 7 minutes, longer than you would a flat skillet, because a grill pan has more mass and ridges to bring up to temperature. A pan that is not hot enough is the most common reason patties stick and tear. Oil the ridges, and turn your vent on now rather than later, because this makes smoke.
Toast your buns first, cut side down on the hot ridges for about a minute. The pan is still clean, the buns get their own marks, and you are not holding cooked burgers while you fuss with bread.
Salt both faces of the patties, lay three on the ridges dimple-side up, and walk away for 5 to 6 minutes. Do not poke them, do not slide them, and do not press them with the spatula… every bit of juice you squeeze out was going to be in your dinner. Flip once, cook another 4 to 5 minutes, and check the temperature in the thickest part. Cheese goes on right after the flip, with foil tented over the pan to melt it.
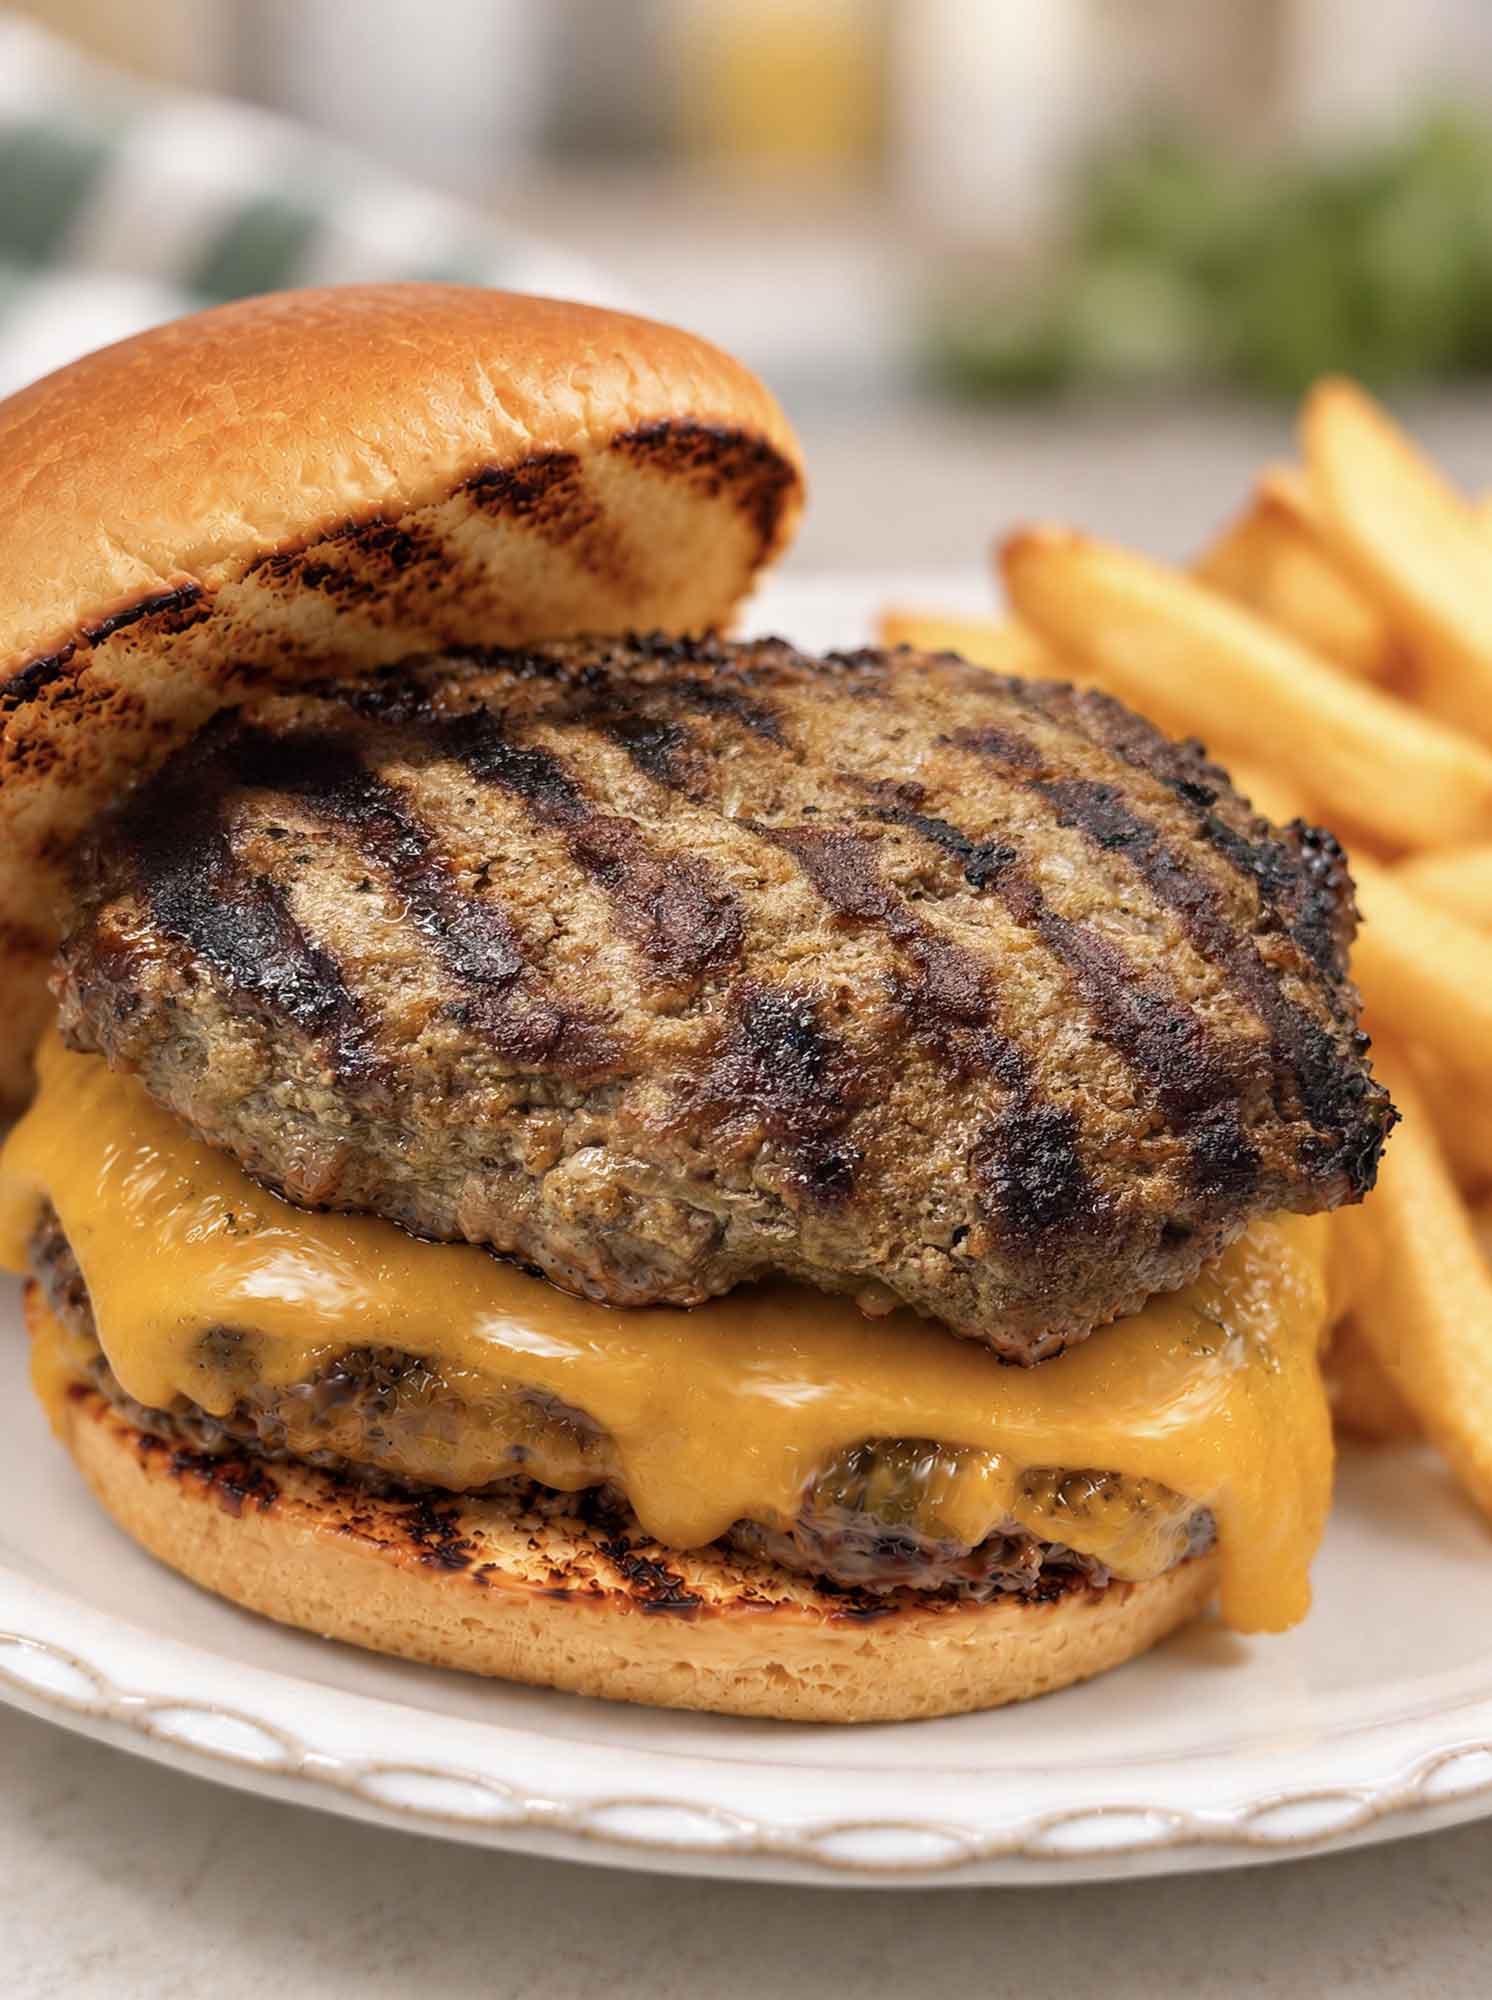
Rest the patties 3 to 5 minutes before they go on a bun, so the juices settle back through the meat. Two stacked with cheese between them makes a proper double patty burger, which is how they ended up on our plates and one honest reason 2 pounds does not stretch far. Sauce goes on now if you want it, usually my homemade BBQ sauce.
What If I Don’t Have a Grill Pan?
Any heavy skillet works, and you may get a better crust this way since the whole face of the patty touches hot metal instead of just the ridges. You trade grill marks for browning. Preheat about 4 minutes, since a flat pan heats faster, and tip off a little fat partway through if it pools, because it has nowhere to drain. Times run close, though the first side may pull ahead by a minute from the extra contact, so lean on the thermometer rather than the clock.
Can You Cook These on the Grill Instead?
You can. Medium-hot fire, clean oiled grates, about 5 minutes a side over direct heat with the lid down, to the same 160°F. Salt at the last second, one flip, no pressing. Watch for flare-ups, since the fat that drains away harmlessly in a grill pan lands on the coals out here. Slide the patties to a cooler part of the grate if the flames get ambitious.
How Do You Know When Burger Patties Are Done?
By temperature, not color. Ground beef browns unevenly and can look done outside while the center is well behind. The USDA recommends 160°F, so that is what we cook to. Slide the thermometer in from the side, horizontally, so the tip lands in the middle. I pull mine around 155°F and let carry-over finish the job during the rest.
People ask me for a medium-rare number and I do not give one for ground beef. A steak is sterile inside and only its surface needs searing, but grinding moves the outside of the meat all through the middle, so the middle has to get hot too. If a pink center matters that much, grind your own chuck from a roast you seared first… that is a different recipe than this one.
| What you see | What it means |
|---|---|
| Juices pooling on top after the flip | Normal, and a good sign. That is fat and moisture, not a leak. |
| Patty domed in the middle | The dimple was too shallow. Still delicious, just wobbly on the bun. |
| Patty stuck to the ridges | Pan was not hot enough, or you tried to flip too early. Give it another minute and it usually releases on its own. |
| Shrank noticeably smaller than the bun | Some shrinking is normal as fat renders. Start wider than the bun, and check that the pan is not so hot the outside seizes instantly. |
| Gray all the way through and firm | Overcooked past 165°F. Next time pull earlier and lean on the thermometer. |
Cook Half Tonight, Freeze Half for Later
Stack the raw patties with a square of parchment between each one so they do not weld together, wrap tightly, and freeze up to 3 months. Do not salt them first… save that for the pan. You can cook them straight from frozen, which I do on busy nights: add roughly 50% to the time and keep the heat a little lower so the outside does not scorch before the middle catches up. Thawing overnight in the fridge gives you a better crust if you plan ahead.
Storing and Reheating Leftover Patties
Cooked patties keep 3 to 4 days in an airtight container. Reheat in a covered skillet over low heat with a splash of water, 2 to 3 minutes, and the steam brings them back without turning them to leather. The microwave works at 50% power, though it toughens the edges.
Leftovers are also a head start on a second dinner. Two chopped up and warmed in brown gravy over mashed potatoes is on the table in 10 minutes and tastes like you planned it, which is the same idea behind most of my ground beef dinner recipes.
Burger Patty Questions I Get Asked
Do I need an egg to hold burger patties together?
No. Those are binders for meatloaf and meatballs, where the mix is loose and wet. The proteins on the surface of ground beef tack to each other when you press the patty together, and cold fat holds that shape through the sear. If you find your patties aren’t staying together well, rest them in the refrigerator for longer.
What is the difference between these and a smash burger?
A smash burger is pressed hard onto a flat surface for maximum crust. These are never pressed, and the flavor is seasoned through the middle instead of concentrated on the outside.
Can I mix the salt in if I am cooking them right away?
Yes, if you are cooking within about 10 minutes the texture change barely has time to happen. I still salt the outside out of habit, because the crust is better that way.
Best Burger Patties Recipe
Equipment
- 12-inch cast iron grill pan (or an outdoor grill)
- Box grater
- instant-read thermometer
- Parchment paper and a large plate or sheet pan
Ingredients
Ingredients
- 2 pounds ground chuck (80/20) cold (see the note below)
- 1/4 cup grated yellow onion, with juices
- 2 tbsp Worcestershire sauce
- 1 tsp garlic powder
- 1 tsp onion powder
- 1/2 tsp smoked paprika optional
- 1/2 tsp coarsely ground black pepper
- 1 1/2 tsp kosher salt, for seasoning the outside of the patties
- 1 tbsp neutral oil or beef tallow, for the pan
- 6 slices cheese optional
- 6 hamburger buns optional
Instructions
Instructions
- Grate the onion on the large holes of a box grater until you have 1/4 cup, including the juices. If it looks very wet, leave some of the juice behind.
- Put the cold ground chuck in a large bowl and break it up loosely with your fingertips. Scatter the garlic powder, onion powder, smoked paprika, and black pepper over the top, then add the grated onion and Worcestershire sauce.
- Toss the mixture with your fingertips, lifting and folding, for 20 to 30 seconds, just until the seasonings are distributed. Do not knead or compress the meat. Do not add the salt yet.
- Divide the meat into 6 equal portions, about 5 1/3 ounces each. Pat each into a patty 3/4 inch thick and a full 4 1/2 inches wide. This is wider than a bun on purpose, and it is what keeps the patty from cooking up too thick.
- Press a shallow dimple about 1/4 inch deep into the center of each patty with your thumb. Set the patties on a parchment-lined plate and move on to the pan. They rest while it preheats, about 10 minutes, which is all they need. Refrigerate them for that stretch if your kitchen is warm, or up to 1 day covered.
- Preheat a 12-inch cast iron grill pan over medium-high heat for 5 to 7 minutes, until a drop of water skitters and evaporates instantly. Turn on your vent fan. Lightly oil the ridges.
- Toast the buns cut side down on the hot grill pan for about 1 minute, until marked. Set them aside.
- Sprinkle both faces of each patty with kosher salt, about 1/4 teaspoon per patty, right before cooking.
- Lay 3 patties on the pan dimple-side up, leaving space between them. A 12-inch grill pan will not hold more than that without crowding. Cook undisturbed for 5 to 6 minutes, until the underside releases easily and has dark grill marks.
- Flip once and cook 4 to 5 minutes more, until an instant-read thermometer inserted horizontally into the center reads 155°F. Do not press the patties with the spatula.
- For cheeseburgers, lay a slice of cheese on each patty during the last minute and tent the pan with foil to melt it.
- Transfer the patties to a plate and rest 3 to 5 minutes. They will carry over to 160°F, the USDA’s recommended temperature for ground beef. Serve on toasted buns.
Nutrition
Notes
- Outdoor grill: direct medium-hot heat, lid down, about 5 minutes per side to 160°F, watching for flare-ups.
- Make it a double: stack two patties with a slice of cheese between them on one bun. It is a big burger, and it halves your patty count per person.
- Halving: cut every ingredient in half for 1 pound of beef and 3 patties. Times and temperatures do not change.
- Freezing raw: stack unsalted formed patties with parchment between them, wrap tightly, and freeze up to 3 months. Cook from frozen by adding about 50% to the cook time over slightly lower heat.
- Storage: cooked patties keep 3 to 4 days in an airtight container in the fridge. Reheat covered over low heat with a splash of water for 2 to 3 minutes.
- Leaner beef: 85/15 works well. Below 90/10 the patties turn dry.
- Ground turkey or chicken: add 1 tablespoon olive oil to the mix and cook to 165°F.
Make these once and you will stop reaching for the freezer case at the store, I promise. Come back and tell me how they turned out, and whether you used the grill pan or the grill.
Happy cooking!
Love,
Jennifer
Tried this recipe?
Tap the stars in the recipe card to leave a quick rating. Your rating helps other home cooks know this recipe works in a real kitchen, not just mine.
And as a thank-you for your feedback, you will receive a free printable copy of my Maker Home Companion Cookbook, featuring my most popular recipes, each one formatted on a SINGLE, easy-to-use page, a perfect kitchen companion for easy meal prep. Click here to learn more about this cookbook and how you can get your copy!


Meet Jennifer
Jennifer cooks and experiments in the kitchen at Maker Farm, where she focuses on simple pantry cooking, homemade staples, and practical recipes that make everyday meals easier. Over the years she has tested many ways to make cooking simpler and more dependable, and shares the methods that work best in her own kitchen, occasionally showing them on her Heart to Home at Maker Farm vlog.
perfect every time