

Canning spaghetti sauce with meat turns a big harvest of garden tomatoes, ground beef, and a handful of pantry seasonings into shelf-stable jars of thick, rich meat sauce. It is a hot-pack method processed in a pressure canner, and a full batch makes about 9 or 10 pints. It takes a good afternoon, but most of it is hands-off simmering, and the payoff is a pantry full of dinner that beats anything from a jar.
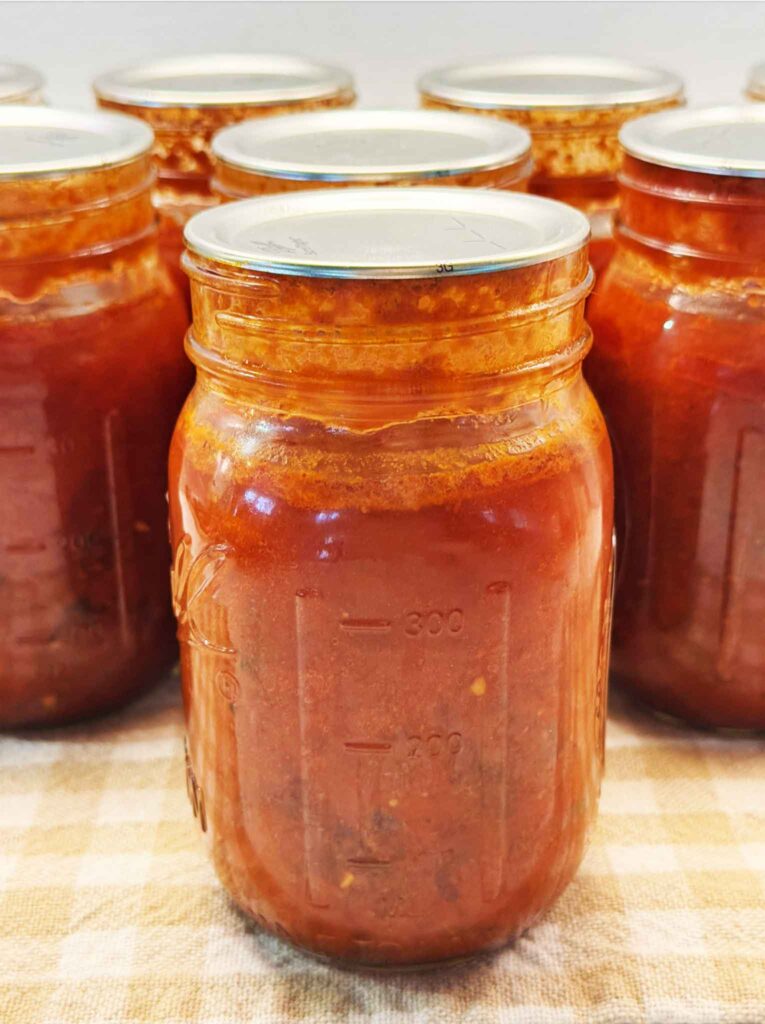
Preserving Summer in a Jar

I have been canning food from our garden, and this meat sauce is super exciting because it is basically a whole dinner in a jar. I put up my first big batch this summer, straight from our garden tomatoes, and it made 10 pints. I canned 8 of them and kept 2 in the fridge to eat that week, and every single jar sealed, with only the tiniest bit of siphoning.
This is a tested, science-backed canning recipe, and I have written it out exactly as the food-safety folks lay it out, then added my own kitchen notes on top. So think of me as the friend standing next to you at the counter, talking you through the parts that tripped me up, not the person who gets to change the safety rules. I am not a canning rebel, I am a play-by-the-rules sort of girl.
Just so you know where the numbers come from: the safety-critical parts of this process, which are the ingredient proportions, jar size, headspace, pressure, altitude adjustment, and processing time, all follow the current tested guidance from the National Center for Home Food Preservation for Spaghetti Sauce with Meat. My personal touches, like seasoning it to taste like our homestyle spaghetti sauce and reducing it slowly in the slow cooker, only change the flavor and the how, never the tested method underneath. I will point out very clearly which parts you can play with and which parts you cannot.
Let’s dig in!

Is It Safe to Can Spaghetti Sauce with Meat at Home?
Yes, when you follow a tested recipe exactly and pressure can it. This is the part of home canning I take the most seriously, so let me explain it plainly. A tested meat-sauce recipe has been lab-checked to make sure that a jar of a specific size, packed with a specific ratio of tomatoes to meat and vegetables, and processed at a specific pressure for a specific length of time, gets hot enough all the way to the center to be safe. Change the ratio, the jar size, or the time, and that promise no longer holds.
So here is my simple rule for this recipe, and it is the same one I use myself. The flavor is yours to play with: the herbs, the salt, the sweetness, a pinch of red pepper flakes, all of that is fair game. The structure is not: the amount of tomatoes, meat, onion, celery or pepper, and mushrooms stays exactly as written, you do not add any thickeners, and you do not swap the jar sizes or shortcut the processing time. Season it like your family loves. Just do not rebuild it. Once you have that line clear in your head, the rest of this is honestly pretty relaxing.
Why does spaghetti sauce with meat need a pressure canner?

Meat, onions, garlic, and peppers are all low-acid foods, and once you add them to your tomatoes, the whole sauce becomes a low-acid product. Low-acid foods can grow the bacteria that cause botulism if they are not heated hot enough, and a boiling-water canner simply cannot reach that temperature. A pressure canner can. This is the one rule I never want you to bend. Please do not water-bath can meat sauce, and please do not can it without a pressure canner… it is not safe, and it is worth waiting until you have the right equipment.
Can You Use Fresh AND Frozen Tomatoes?
You can, and this is one of my favorite things about this recipe. Garden tomatoes almost never ripen all at once, so like a lot of gardeners, I stash them in the freezer as they come in, whole and unpeeled, right in freezer bags. Then when I finally have enough put by, I can thaw the whole stash and can a big batch at once. Fresh tomatoes straight off the vine work beautifully too, and you can absolutely use a mix of both in the same pot. What matters for safety is the total amount of prepared tomato you end up with, not whether it started fresh or frozen.
Frozen tomatoes actually come with a happy little bonus: the skins slip right off. As a frozen tomato thaws, or the moment you run it under warm water, the skin loosens and practically peels itself. And with fresh tomatoes, you do not even need to peel them ahead of time, because the food mill lifts out the skins and seeds after they cook. I will walk you through that in a minute. Either way, you are aiming for roughly 30 pounds of tomatoes for a full canner batch of about 9 or 10 pints, because tomatoes cook WAY down once you simmer the water out of them.
What You Need to Can Spaghetti Sauce with Meat
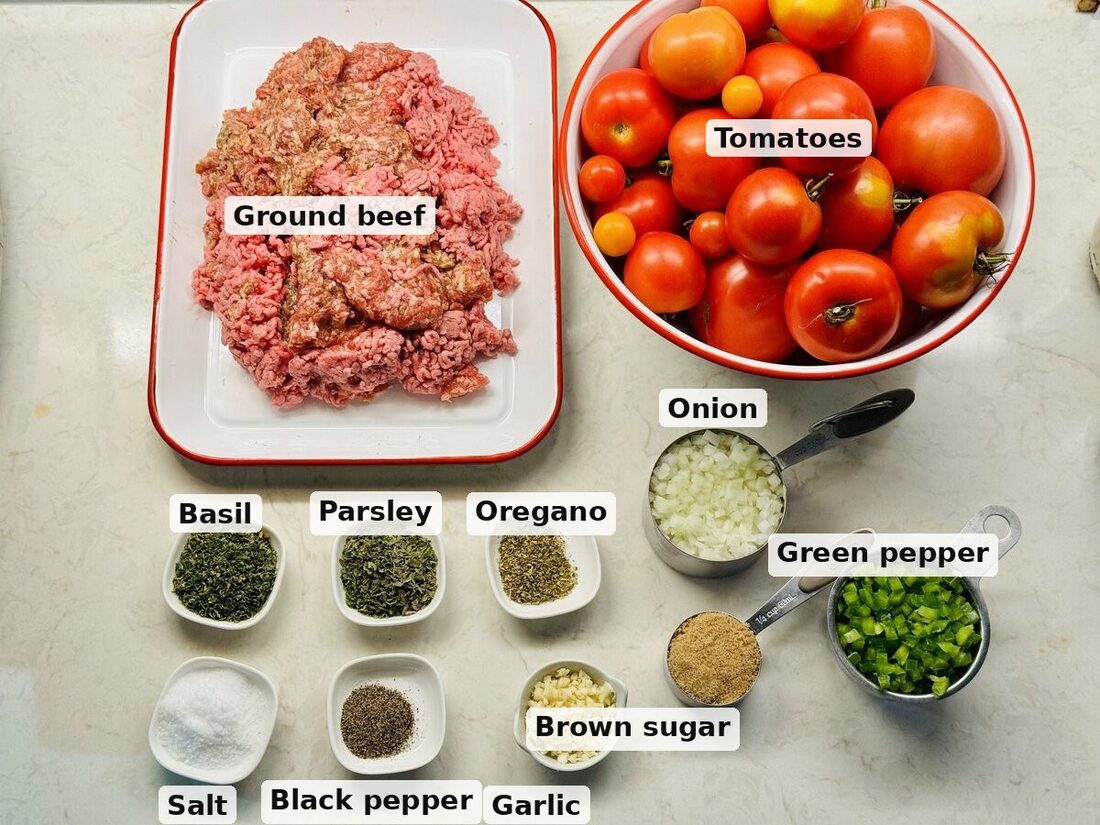
The ingredient list looks long, but most of it is tomatoes and a few seasonings you probably already have. The amounts below are the tested proportions, and I have seasoned them to taste like our Homestyle Spaghetti Sauce, which is basil-forward: lots of basil and parsley, plenty of garlic, and just a little oregano in the background, with just a little brown sugar to round off the acidity, since our garden tomatoes are already on the sweet side. The full list is also in the recipe card at the bottom.
Ingredients
- 30 pounds tomatoes, fresh or frozen (or a mix of both)
- 2 1/2 pounds ground beef (I use 85/15 for flavor)
- 5 cloves garlic, minced
- 1 cup chopped onion
- 1 cup chopped celery or green pepper
- 1 pound fresh mushrooms, sliced, optional
- 2 tablespoons dried basil
- 2 tablespoons dried parsley (or 4 tablespoons fresh minced parsley)
- 2 teaspoons dried oregano
- 4 1/2 teaspoons canning or kosher salt
- 2 teaspoons black pepper
- 2 tablespoons brown sugar
- 1/2 teaspoon red pepper flakes, optional and very mild
A couple of honest notes on the seasonings, since this is where I made it our own. I use all ground beef, the full 2 1/2 pounds. I tried a batch with Italian sausage mixed in, but we found it made the sauce a bit too rich, so all beef won out (the tested recipe lets you use beef, sausage, turkey, or venison, as long as the total stays right around 2 1/2 pounds).
The parsley, garlic, salt, and pepper are straight from the tested recipe. I use about half the brown sugar the recipe calls for, because our garden tomatoes reduce down naturally sweet, but I do not skip it entirely, since a little really does soften the acidic edge. I also leaned into the dried basil and eased the oregano back so it tastes like our homestyle sauce, which uses much more basil than oregano, plus an optional pinch of red pepper flakes. Adjusting the dried herbs and spices to your taste is a safe change… it is the vegetables and the ratios that have to stay put.
One thing I do want to gently flag: keep the onion, celery or pepper, and mushrooms at the amounts listed. Those are low-acid vegetables, and piling in more is exactly the kind of change that makes a canning recipe unsafe. More basil, sure. More onion, please don’t.
Want even better basil flavor? Dry your own
Here is a little from-scratch upgrade if you grow basil. Store-bought dried basil has usually been sitting on a shelf for months, slowly losing the oils that give it its flavor, but basil you dry yourself stays greener and much more aromatic. Snip it at the end of summer and dry it in bundles, in a dehydrator on low, or in a very low oven, until the leaves are completely crisp and crumbly with no soft or leathery spots left. Then crumble it and use it in place of the store-bought dried basil. Freshly dried basil is more potent, so taste as you go… in a basil-forward sauce like this one, that extra punch is just what you want. Do keep it dried, not fresh, for the jars, and save fresh basil for stirring in when you reheat a jar to serve.
No TomATO PASTE
Please do not add tomato paste or any other thickener. I know it is tempting, especially if you love a thick sauce like I do. But flour, cornstarch, and even tomato paste change how the heat moves through the jar, and they can leave the center under-processed. This recipe gets thick the safe way, by simmering the water out until the sauce reduces by nearly half. That is what all that patient cooking is for, and it works beautifully.
Equipment
Here is the gear that makes a canning day go smoothly.
- Pressure canner with a rack (I use a Presto Digital Pressure Canner, which I recommend)
- A very large stockpot for cooking the tomatoes and building the sauce
- A slow cooker or two for the long reduction, optional but so handy (more on this below)
- A food mill, sieve, or food processor for turning tomatoes into pulp
- Pint or quart canning jars, new flat lids, and screw bands
- Jar lifter, canning funnel, ruler or headspace tool
- A clean plastic or silicone utensil for removing air bubbles
- A clean damp cloth or a few paper towels
My equipment notes are specific to my pressure canner, so if your canner is a different model, follow your own manual for the water amount and how the lid closes. Every canner is a little different, and your manual is the boss of those details.
How Do You Prepare the Tomatoes?
This is the longest part of the day, but almost none of it is hard. We are turning all those tomatoes into a smooth, peeled tomato pulp, which is exactly what the tested recipe wants. If you have made our homemade tomato sauce, this will feel familiar, because it is the very same prep… the food mill does the peeling for us.
For fresh tomatoes, wash them, cut out the cores, and quarter them into a large pot. I have detailed instructions on how to cut out the cores in my tomato sauce recipe. There is no need to blanch and peel them first, and here is why: you cook them soft and then run everything through a food mill, which catches the skins and seeds for you automatically. Peeling ahead of time would just be extra work for the same result. For frozen tomatoes, you get that happy little bonus… as they thaw, the skins slip right off on their own, and they let out a lot of water, so pour off some of that thin liquid before you cook. Then core and quarter them the same way.
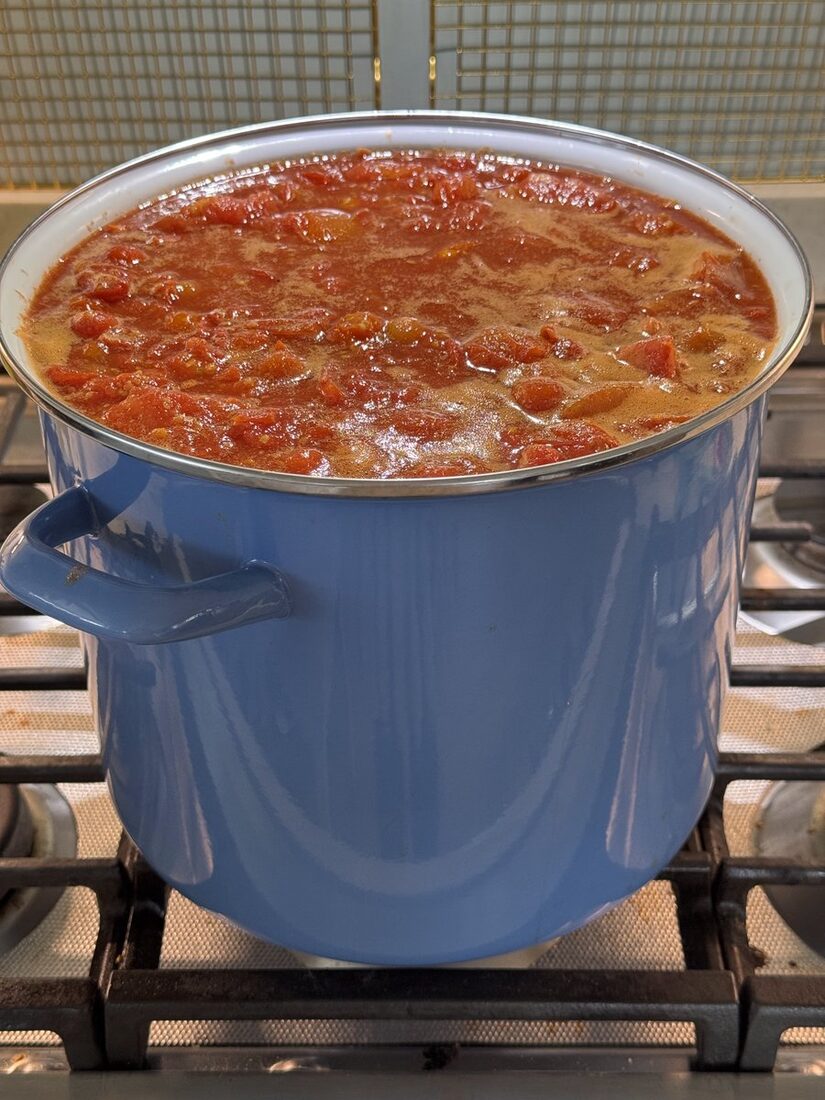
Cook the quartered tomatoes, uncovered, until they are soft and saucy, about 20 minutes. One little trick to keep the color a bright red: add just a few quarters to the hot pot first to get the juices going, then add the rest as you go. This helps because it keeps the heat ahead of the enzymes that dull the color. Then run everything through a food mill or press it through a sieve to make a smooth pulp, leaving the skins and seeds behind. That milled pulp is your peeled tomato base, ready for the sauce.
Browning the Meat and Building the Flavor
While the tomatoes cook, let’s build the savory base. In a large skillet, brown the ground beef over medium heat, breaking it up as it cooks, until there is no pink left. Drain off most of the fat. Then add the garlic, onion, celery or green pepper, and the mushrooms if you are using them, and cook until the vegetables are tender. This helps because it wakes up all that flavor before it ever meets the tomatoes, so the finished sauce tastes deep and cooked-in instead of flat.
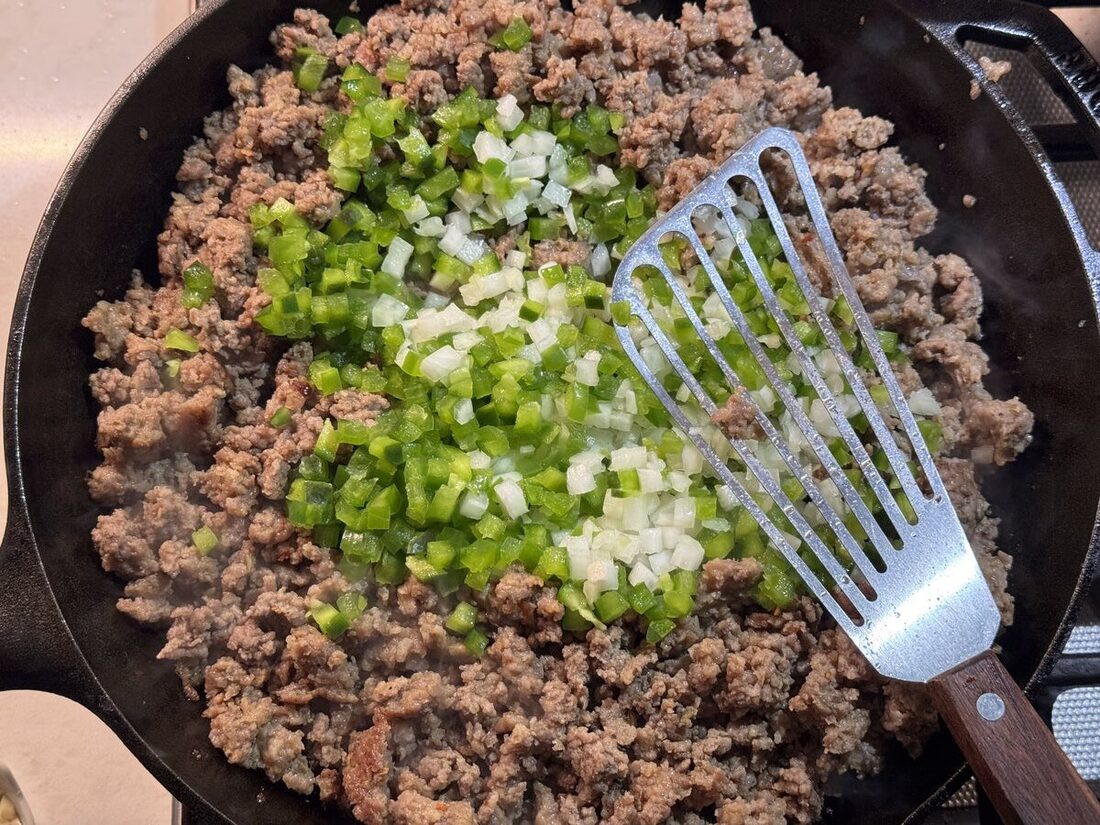
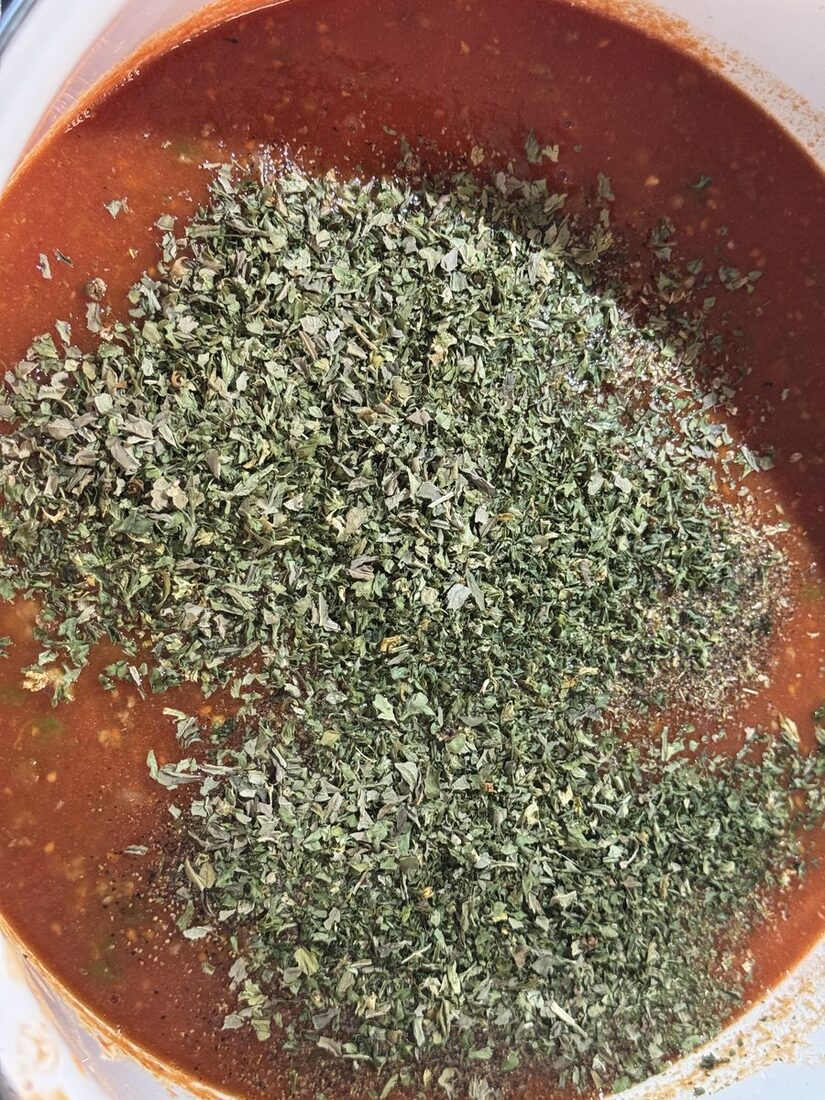
One common mistake here is rushing the vegetables. Give them a few real minutes to soften, because they will not cook much more once the sauce goes into the jars and gets pressure-canned. Now stir the browned meat and vegetables into your tomato pulp, and add the basil, parsley, oregano, salt, black pepper, brown sugar, and the red pepper flakes if you want the gentlest bit of warmth. Give it a good stir, taste it (careful, it’s hot), and adjust the herbs and salt to your liking. This is your moment to make it taste like your family’s sauce.
Simmering the Sauce in the Slow Cooker
Here is where the slow cooker earns its spot on the counter. The sauce needs to reduce by nearly half so it turns thick and rich, and that can take hours of simmering. Doing it in a big pot on the stove means standing there stirring so the bottom does not scorch. The slow cooker lets you walk away and let it cook down gently over the afternoon instead.
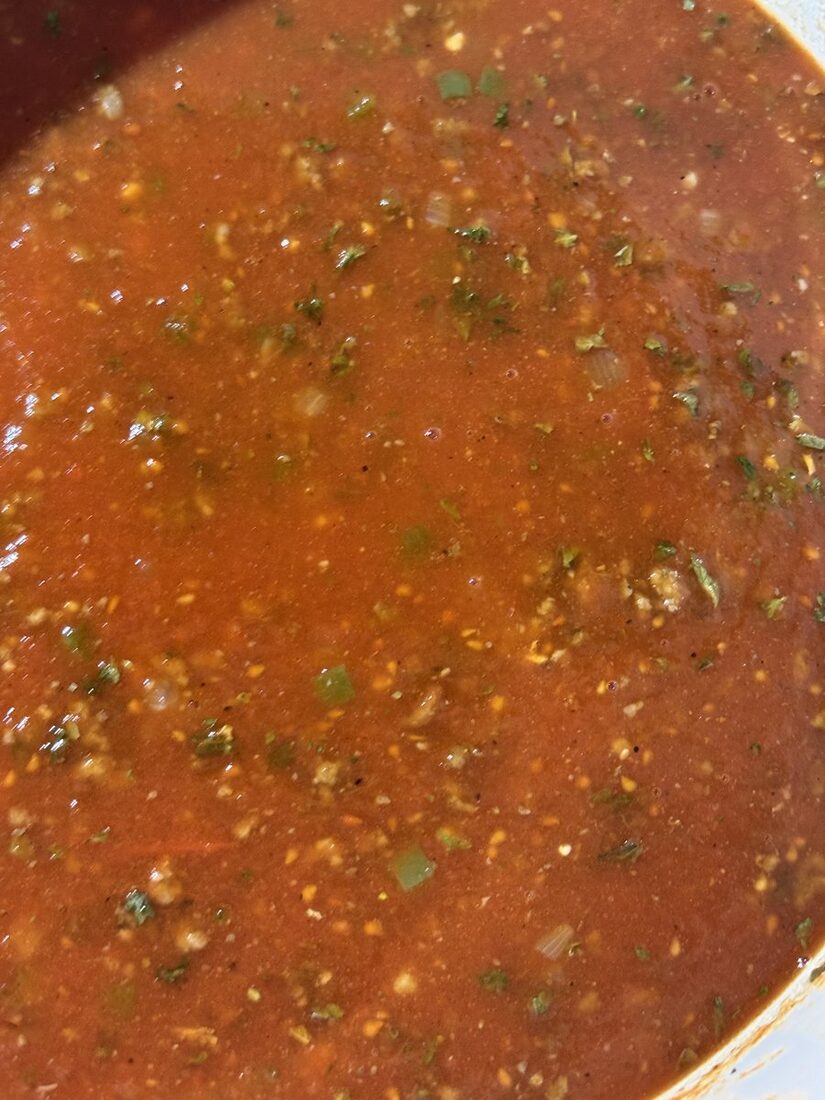
Pour the combined sauce into your slow cooker, set it on high (or on low if you will be reducing it overnight, more on that just below), and prop the lid open a crack (or leave it off) so the steam can actually escape and the sauce can reduce. Let it go for several hours, stirring now and then, until it has cooked down by close to half and looks thick and glossy. If you started it and needed to step away, that is totally fine… this is a forgiving, low-fuss stretch of the day.
How Long Does It Take, and Will It Burn Overnight?
For a full 30-pound batch, plan on the reduction being an overnight job, roughly 10 to 16 hours, and a little longer if you used juicy slicing tomatoes or frozen ones, since those hold more water. That sounds like a lot, and it is, but a slow cooker evaporates gently, only about half a cup to a cup of water an hour, so a big pot of sauce just takes its time to thicken. Here is the reassuring part, though: this is exactly why it will not burn while you sleep. A batch this size cannot fully cook down in one night, so you will wake up to sauce that still needs a few more hours, not a scorched crock.
Here is how I would run it overnight. Set it on low, which is gentler and even less likely to catch, and give it a good stir right before bed so nothing is sitting against the sides. In the morning, when you are up and can keep an eye on it, bump it to high to drive off the last of the water. That thick, nearly-done stage is the only time it can really start to scorch, so that is the stretch to stir a little more often and watch the edges. If you ever notice a darker ring forming at the sauce line, just stir it back in early and it melts right in with no burnt taste. And if you want to shorten the whole thing, pour off the thin watery liquid that rises off the milled pulp before you start, or knock down the bulk of the water in a wide pot on the stove first, then move it to the slow cooker to finish.
And yes, the meat is safe sitting in there all night. Your beef is already browned before it goes in, so you are simply holding cooked meat hot while the water cooks off, not slow-cooking raw meat overnight. A slow cooker on low or high holds the sauce at a simmer, well above 140°F, which keeps it out of the range where bacteria grow… it is really no different from letting a pot of chili go all day. The only thing to check is that it is genuinely simmering and not on a lukewarm “warm” setting. If you see steam and an occasional bubble, you are holding it nice and hot, and if your cooker runs cool or is packed full, just bump it to high.
Two important things about the slow cooker

First, the slow cooker is only a tool for cooking the sauce down. It is not a canner and it does not preserve anything, so this does not replace the pressure canning step at all. Second, right before you fill your jars, pour the sauce back into a pot on the stove and bring it up to a full, rolling boil. Home canning uses a hot pack, which means the sauce needs to go into the jars boiling hot, not just warm. So reduce it low and slow in the slow cooker, then finish with that hard boil on the stove, and you get the best of both.
How Thick Should the Sauce Be, and What If It Stays a Little Thin?
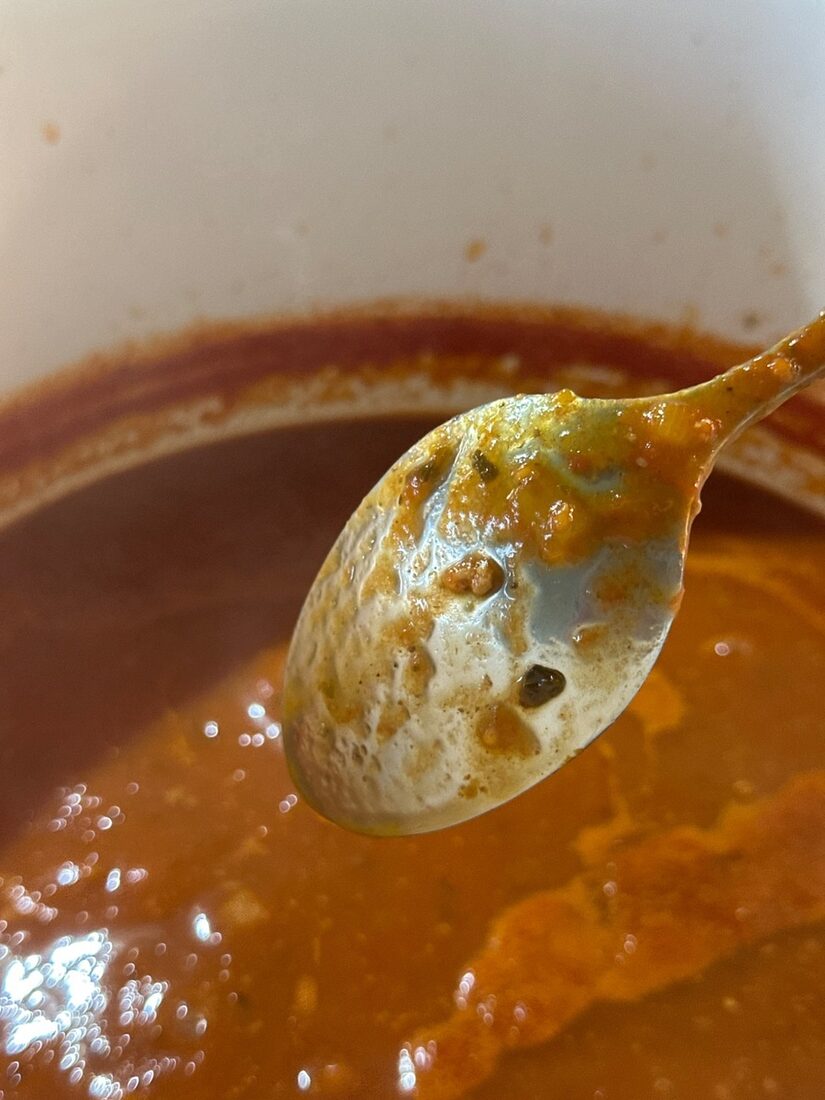
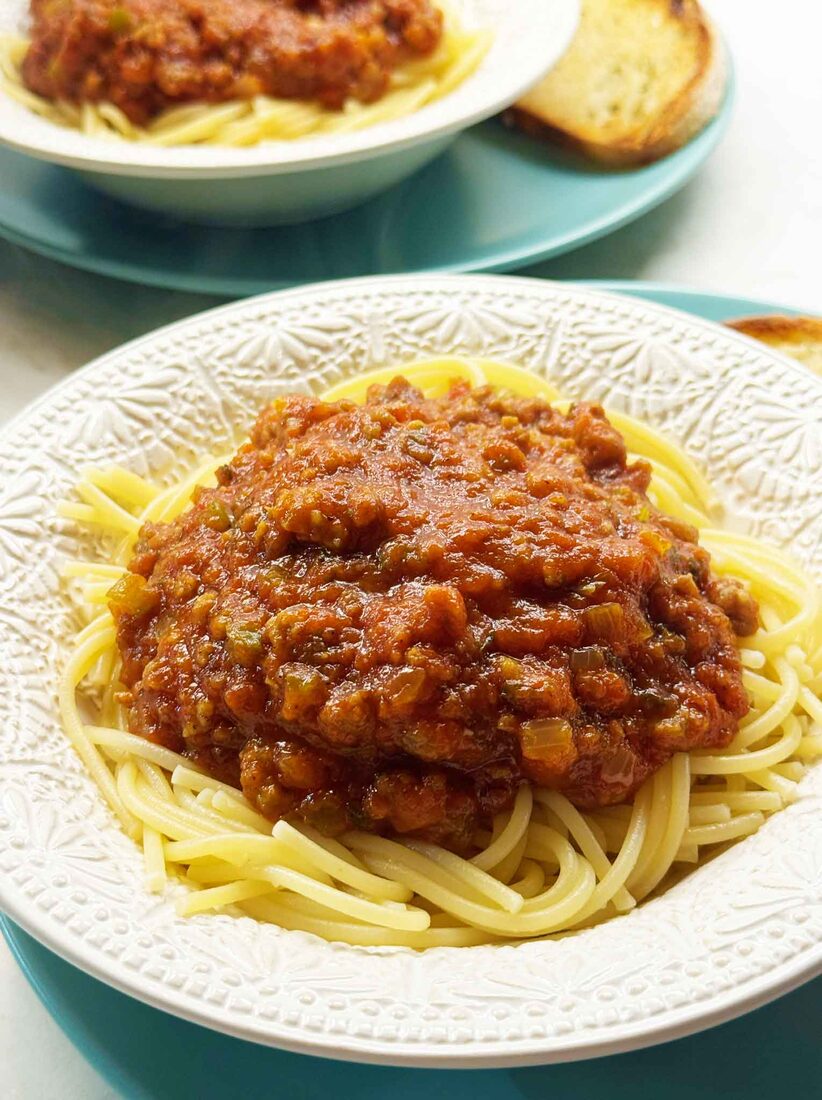
You are aiming for the consistency of a thick spaghetti sauce, one that coats a spoon but still slides off it, not a dense paste. Let me tell you what actually happened in my kitchen, because it surprised me. Even after I stirred the browned beef into tomato that already looked close, it still took several more hours of simmering to reach a real spaghetti-sauce thickness.
Mine ended up maybe a touch thin even then, and that turned out to be completely fine. A slightly thinner sauce is actually the safe direction for canning, because it heats all the way through faster than a thick one does. I spooned a little into a bowl to check, decided it tasted just like the spaghetti sauce we love, and canned it. So don’t stress about hitting a perfect thickness. Anywhere from a nice spoon-coating sauce to a touch thinner is good… just don’t cook it down into a dense paste, which is the one direction that works against safe processing.
Getting Your Jars and Lids Ready
While the sauce reduces, let’s prep the jars so everything is ready at the same time. Wash the jars and screw bands in hot, soapy water and rinse them well. Inspect each jar for cracks, chips, and nicks around the rim, because a damaged jar can fail during processing. Keep the clean jars warm until you fill them, which also helps prevent them from cracking when the hot sauce goes in.
Here is a detail that surprises a lot of beginners: the jars do not need to be pre-sterilized for this recipe, because the long processing time takes care of that. They just need to be clean and hot. For the lids, wash the new flat lids and prepare them according to the manufacturer’s directions.
In fact, you need to be careful not to boil modern canning lids the old-fashioned way, because prolonged boiling can damage the sealing compound on some newer lids and actually interfere with the seal. Use a brand-new flat lid for each jar. The screw bands can be reused, but the flat lids cannot.
How Do You Fill the Jars?
Once your sauce is boiling hot, set your warm jars on a towel and ladle the sauce in through a canning funnel, leaving 1 inch of headspace. Headspace is just the empty gap between the top of the sauce and the rim of the jar, and 1 inch is the tested amount for this recipe, so this is one of those numbers I really don’t want you to change.
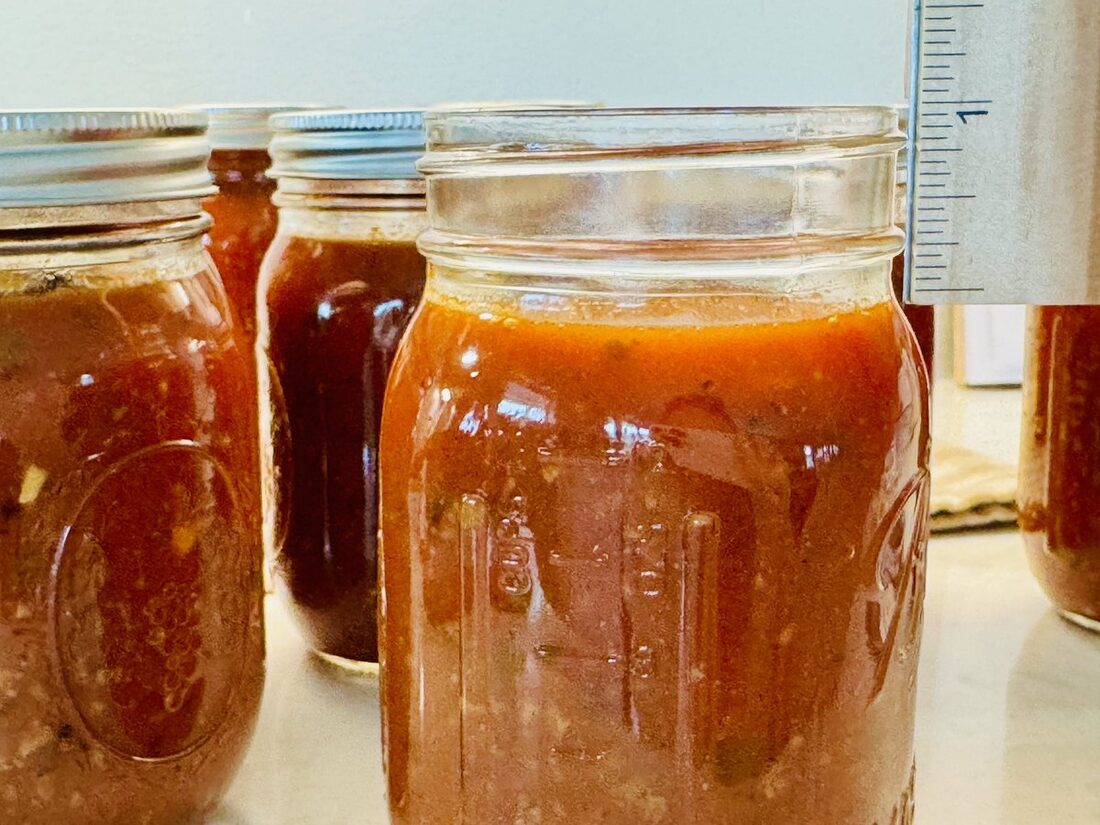
After the jars are filled, slide a clean plastic or silicone utensil gently down the inside of each jar and move it around to release trapped air bubbles. Thick sauces love to hide air pockets, so take your time here. This helps because trapped air can throw off your headspace and interfere with a good seal. Be careful not to use a metal knife, which can scratch and weaken the glass. Once the bubbles are out, check your headspace again with a ruler and add a little more sauce if you need to, keeping that 1 inch.
Wipe the top rim of every jar carefully with a clean, damp cloth. This is a step people skip when they are tired at the end of a long canning day, and I get it, but one smear of sauce on the rim is all it takes to keep a jar from sealing. Center a clean, new flat lid on each jar, then add the screw band and turn it just until fingertip-tight. That means snug, but not cranked down hard, because air needs to escape during processing.
Setting Up and Venting the Pressure Canner
Place the rack in the bottom of your canner and add the amount of water your manual calls for. For my Presto Digital Pressure Canner, that is roughly 2 to 3 inches of water (there’s a handy mark on the inside of the pot). Use your jar lifter to set the filled jars upright on the rack, giving them a little breathing room rather than wedging them together.
Set the canner lid on and secure it according to your manual, but leave the pressure regulator weight off the vent pipe for now. Turn the heat up and watch the vent pipe. Once a strong, steady column of steam is escaping, start your timer and let the canner vent continuously for a full 10 minutes (my digital pressure canner does all of this timing for me). Please do not shorten this venting time, even when you are eager to be done. Venting pushes the trapped air out so the canner can reach the correct internal temperature, and skipping it can leave you with under-processed jars. Ten minutes of steady steam, every time.
How Long Do You Process Spaghetti Sauce with Meat?
After the full 10 minutes of venting, place the regulator weight on the vent pipe at the correct pressure for your canner type and your elevation. Then bring the canner up to pressure. Do not start timing until the canner has actually reached the required pressure. Once it has, process the jars for these times:
| Jar size | Processing time |
|---|---|
| Pints | 60 minutes |
| Quarts | 70 minutes |
The pressure you use depends on whether you have a weighted-gauge or a dial-gauge canner, and on how high above sea level you live. Find your own line in these tables, because this is another one of those safety-critical numbers worth looking up before you start. (Note: If you’re using a Presto DIgital Pressure Canner as I am, there’s an internal sensor that manages and maintain pressure for your local altitude, so you do not need to manually set the pressure.)
Weighted-gauge pressure canner
| Elevation | Pressure |
|---|---|
| 0 to 1,000 feet | 10 pounds |
| Above 1,000 feet | 15 pounds |
Dial-gauge pressure canner
| Elevation | Pressure |
|---|---|
| 0 to 2,000 feet | 11 pounds |
| 2,001 to 4,000 feet | 12 pounds |
| 4,001 to 6,000 feet | 13 pounds |
| 6,001 to 8,000 feet | 14 pounds |
Hold that pressure steadily for the entire processing time. If the pressure ever drops below the required level, you need to bring the canner back up and start the full processing time over from the beginning. I know that is a little heartbreaking if it happens near the end, but it is the only safe way. And please, do not leave the canner unattended while it is processing.
Cooling Down and Checking the Seals
When the processing time is up, turn off the burner and then… wait. Do not remove the regulator, loosen the lid, or try to force the canner to cool. Let it depressurize all on its own, naturally. Once the dial returns to zero and the canner is fully depressurized, remove the regulator, wait a couple of minutes, and open the lid tilted away from your face so the hot steam escapes away from you. (In the case of my digital pressure canner, it beeps when it is completely cooled down and ready to open, which I find very convenient.)
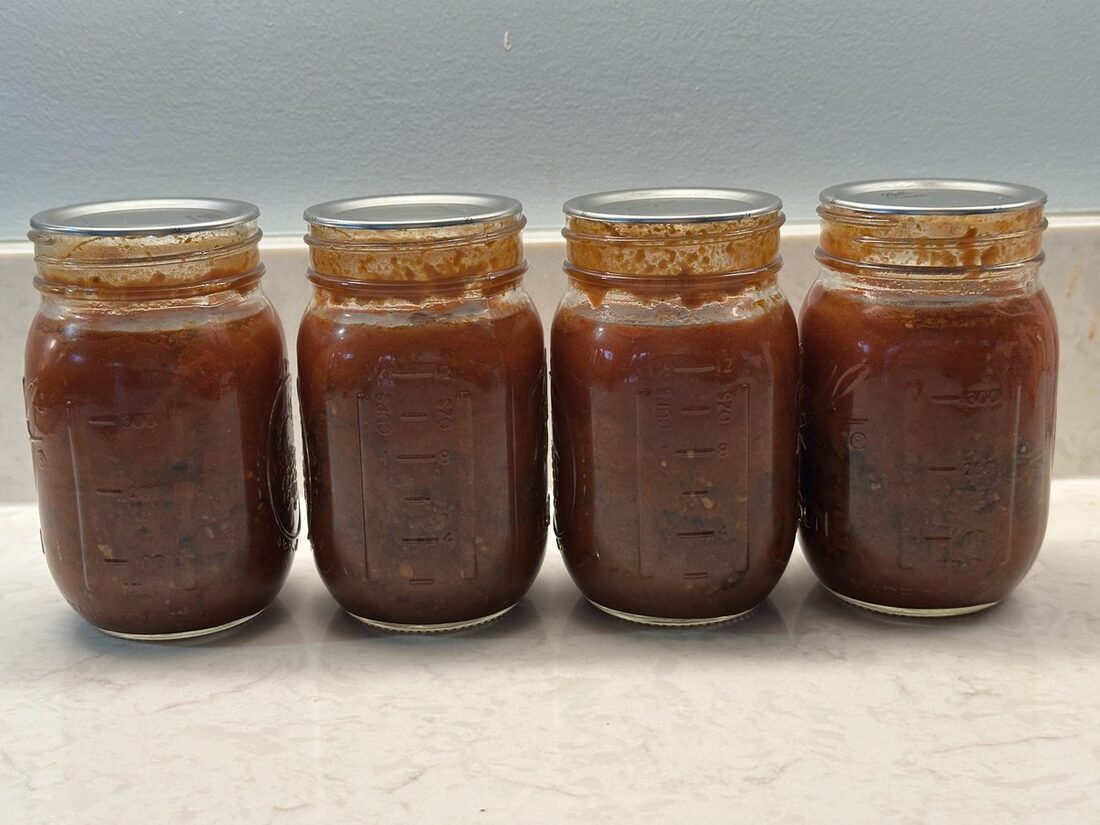
Lift each jar straight up with your jar lifter and set it on a folded towel or cooling rack, with a little space between the jars. Now resist the urge to fuss over them. Do not tighten the bands, press the lids, or tip the jars. Just let them sit undisturbed for 12 to 24 hours. You will probably hear them ping as they seal, and that little sound is SO satisfying.
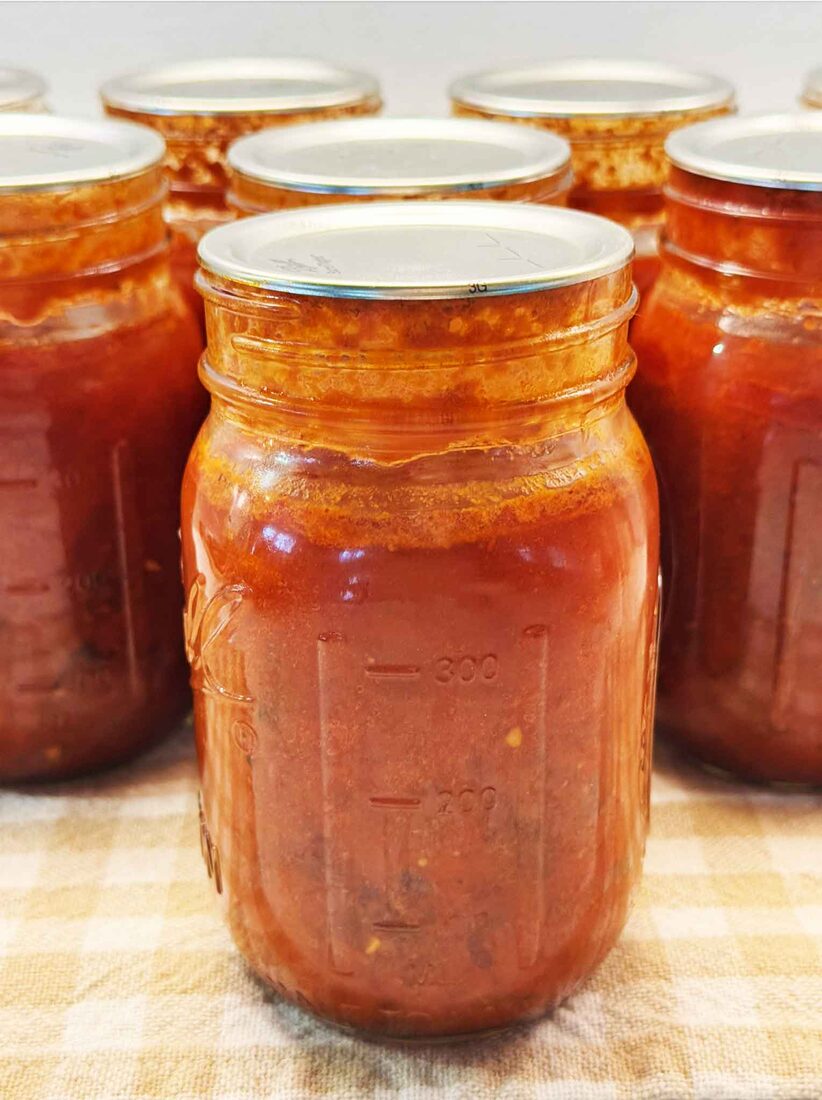
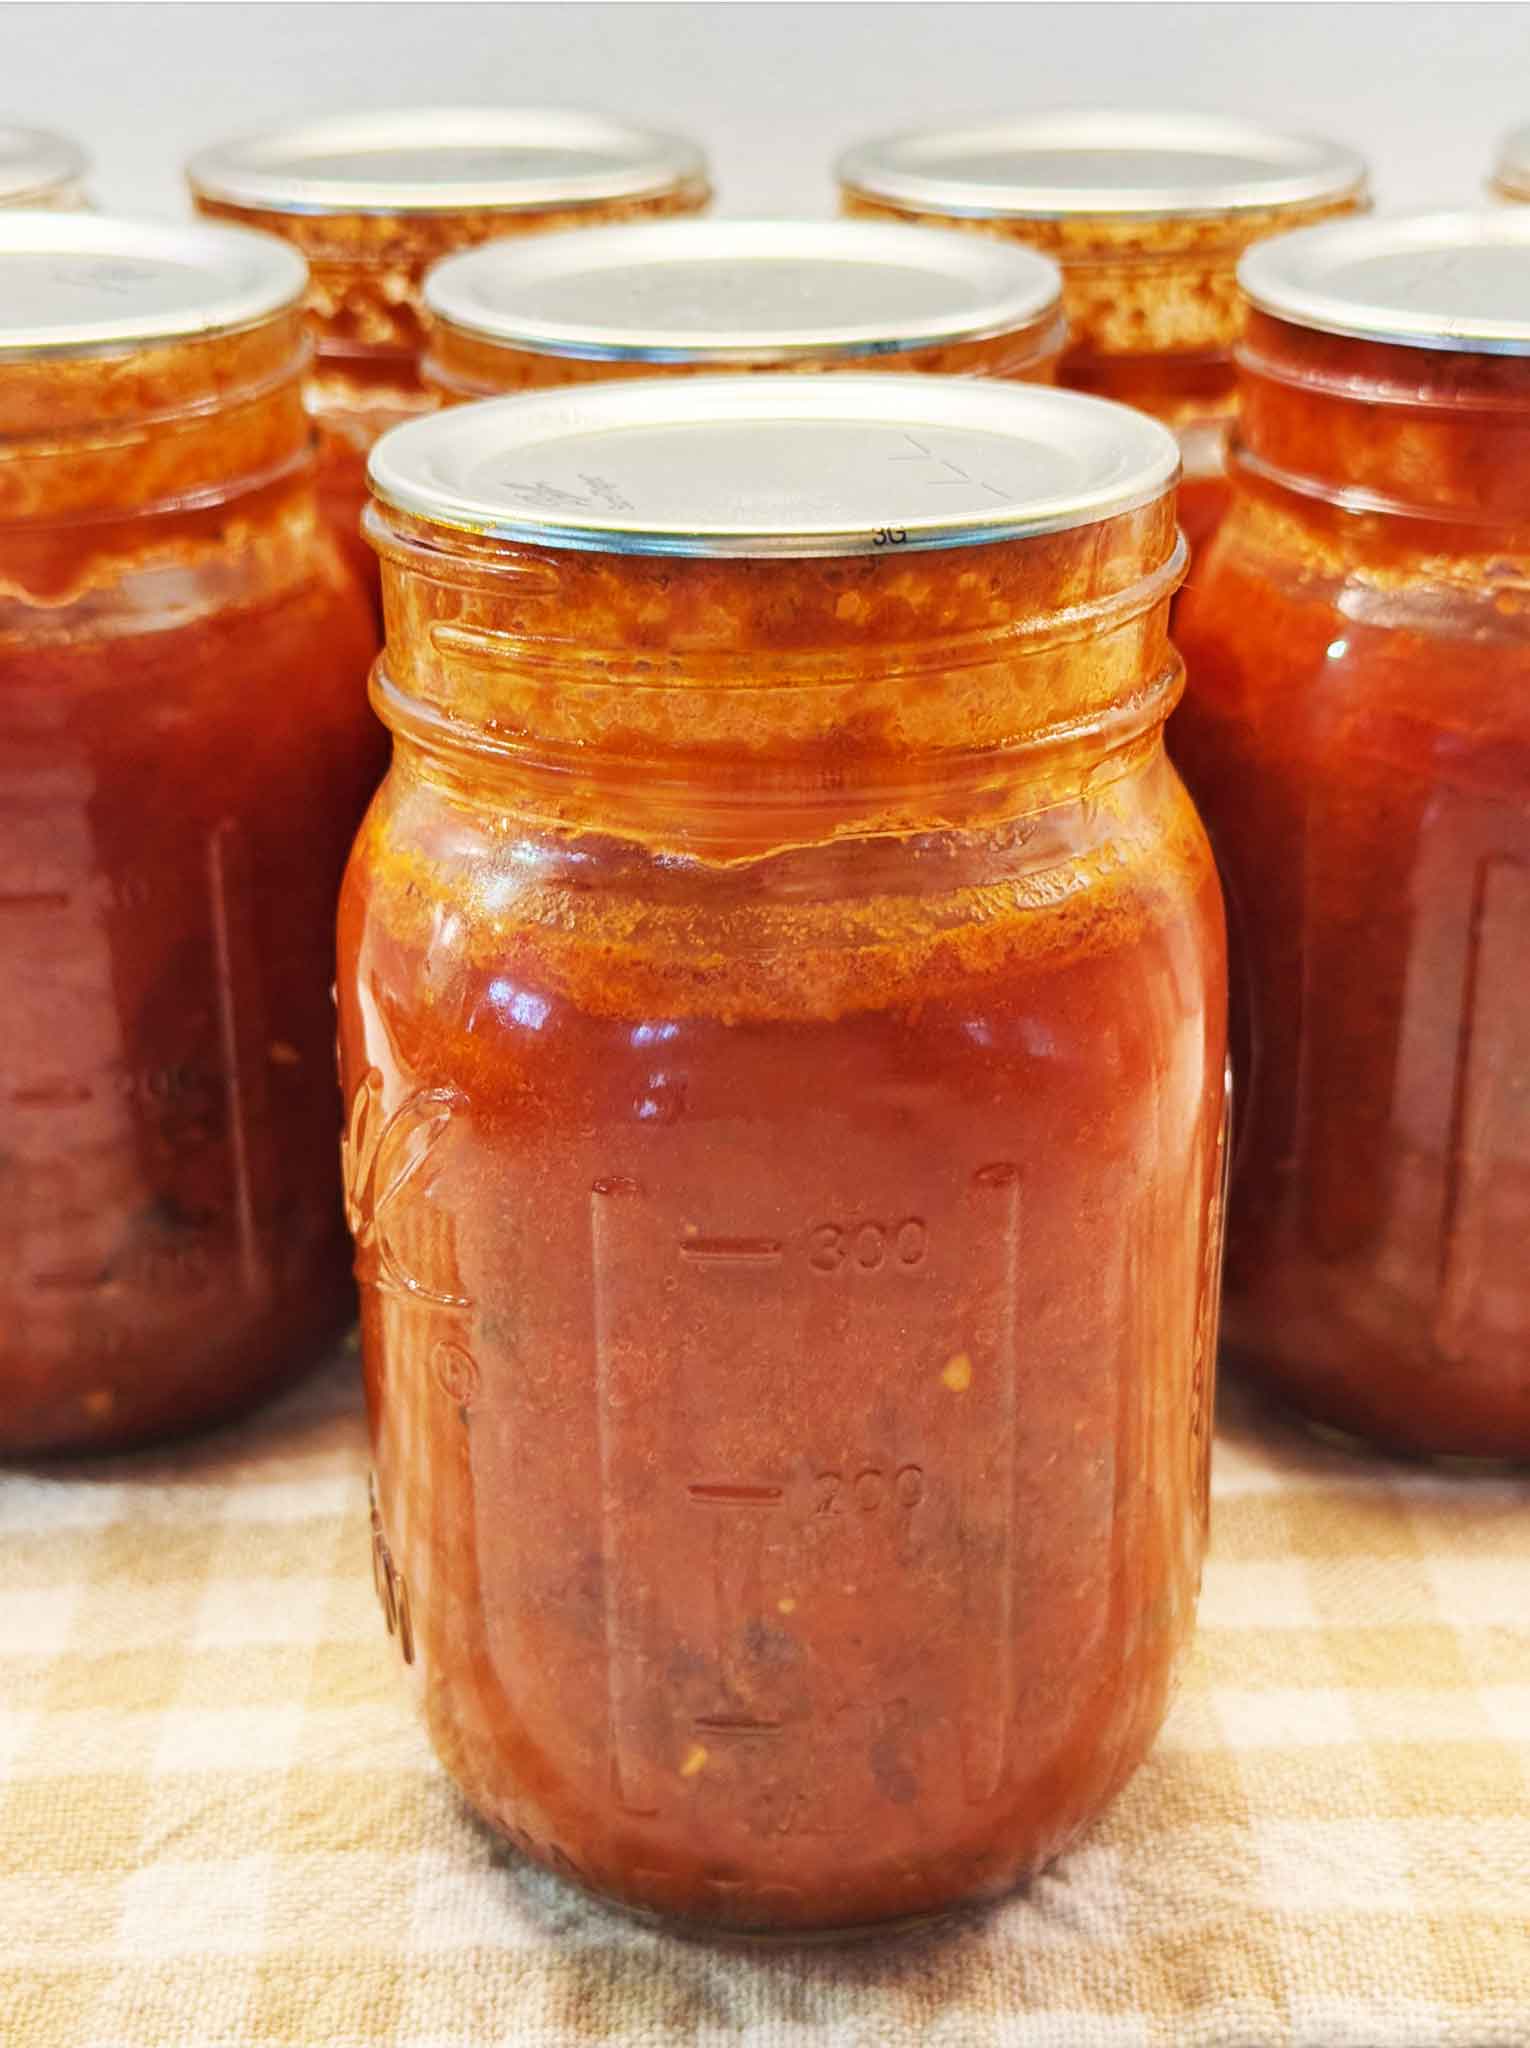
After 12 to 24 hours, remove the screw bands and press gently on the center of each lid. A properly sealed lid curves slightly downward, feels firm, and does not flex or pop back when you press it. If a jar did not seal, don’t panic… just refrigerate it and use it within a few days, or freeze it. Wash the sealed jars, label each one with the contents and the date, and store them without the bands in a cool, dark, dry place. For the best quality, plan to use your sauce within about a year.
Canning Spaghetti Sauce with Meat
Equipment
- Large stockpot
- Slow cooker, optional, for the long reduction optional
- Jar lifter, canning funnel, ruler or headspace tool, plastic bubble tool
Ingredients
- 30 pounds tomatoes, fresh or frozen (or a mix)
- 2 1/2 pounds ground beef (85/15)
- 5 cloves garlic, minced
- 1 cup chopped onion
- 1 cup chopped celery or green pepper
- 1 pound fresh mushrooms, sliced, optional optional
- 2 tablespoons dried basil
- 2 tablespoons dried parsley (or 4 tablespoons fresh) or 4 tablespoons fresh
- 2 teaspoons dried oregano
- 4 1/2 teaspoons canning or kosher salt
- 2 teaspoons black pepper
- 2 tablespoons brown sugar
- 1/2 teaspoon red pepper flakes, optional optional
Instructions
- Wash the jars and bands in hot soapy water, rinse, and keep the jars hot. Prepare the lids per the manufacturer’s directions. No need to pre-sterilize the jars.
- Prepare the tomatoes. Fresh: wash and core (no need to peel, the food mill removes the skins later). Frozen: thaw, slip off the loosened skins, and pour off some of the released water, then core. Quarter all of them.
- Cook the quartered tomatoes, uncovered, about 20 minutes, until soft. Run through a food mill or sieve to leave the skins and seeds behind and make a smooth pulp.
- Brown the ground beef; drain most of the fat. Add the garlic, onion, celery or pepper, and mushrooms (if using), and cook until the vegetables are tender.
- Stir the meat and vegetables into the tomato pulp. Add the basil, parsley, oregano, salt, black pepper, brown sugar, and red pepper flakes (if using). Taste and adjust the seasonings.
- Reduce the sauce until it cooks down by nearly half and is thick, either simmering uncovered on the stove or in a slow cooker set on high with the lid propped open, stirring occasionally. Do not add any thickeners.
- Just before filling, bring the sauce to a full rolling boil on the stove.
- Ladle the boiling sauce into hot jars, leaving 1 inch of headspace. Slide a plastic tool around the inside to release air bubbles, then recheck the headspace and top up if needed.
- Wipe the rims clean, center a new flat lid on each jar, and add the band until fingertip-tight.
- Set the jars on the rack in a canner prepared per your manual. Secure the lid with the weight off, heat until steam streams from the vent, and vent a full 10 minutes.
- Add the regulator weight at the correct pressure for your canner and elevation (weighted gauge: 10 pounds at 0 to 1,000 feet, 15 pounds above; dial gauge: 11 pounds to 2,000 feet, up to 14 pounds at higher elevations). Bring to full pressure, then process pints 60 minutes or quarts 70 minutes, holding pressure steadily. If it drops, return to pressure and restart the time.
- Turn off the heat and let the canner depressurize naturally. At zero, remove the regulator and open the lid away from your face. Lift jars straight up onto a towel and cool undisturbed 12 to 24 hours.
- Check the seals: a sealed lid curves down and does not flex. Remove the bands, wash, dry, label with contents and date, and store without bands in a cool, dark place. Use within about a year for best quality.
Notes
Just Want It for Dinner Tonight?
If you are not canning and simply want a really good meat sauce to eat this week, you do not need any of this equipment. I have a separate, family-sized stovetop version that skips the jars entirely and leans on canned tomatoes, so you can make it any night of the year. You will find the full recipe in my homemade sauce recipe. This post stays focused on the canning method, which is a craft all its own.
Common Questions About Canning Spaghetti Sauce with Meat
Can I make the sauce thicker with tomato paste or cornstarch?
Not for canning, for the safety reasons above. But if you want it thicker, you can always stir in a little tomato paste when you reheat a jar to serve.
Can I change the meat or the seasonings?
Season away… the herbs, salt, and sweetness are all yours to adjust. You can also use beef, sausage, turkey, or venison, as long as the total stays right around 2 1/2 pounds. Just keep the vegetable amounts as written, since those are part of what keeps it safe.
How many jars does this make?
About 9 or 10 pints from a 30-pound batch of tomatoes; mine made 10. The exact number depends on how ripe and watery your tomatoes were and how far you cook the sauce down, so I always wash and ready a couple of extra jars just in case.
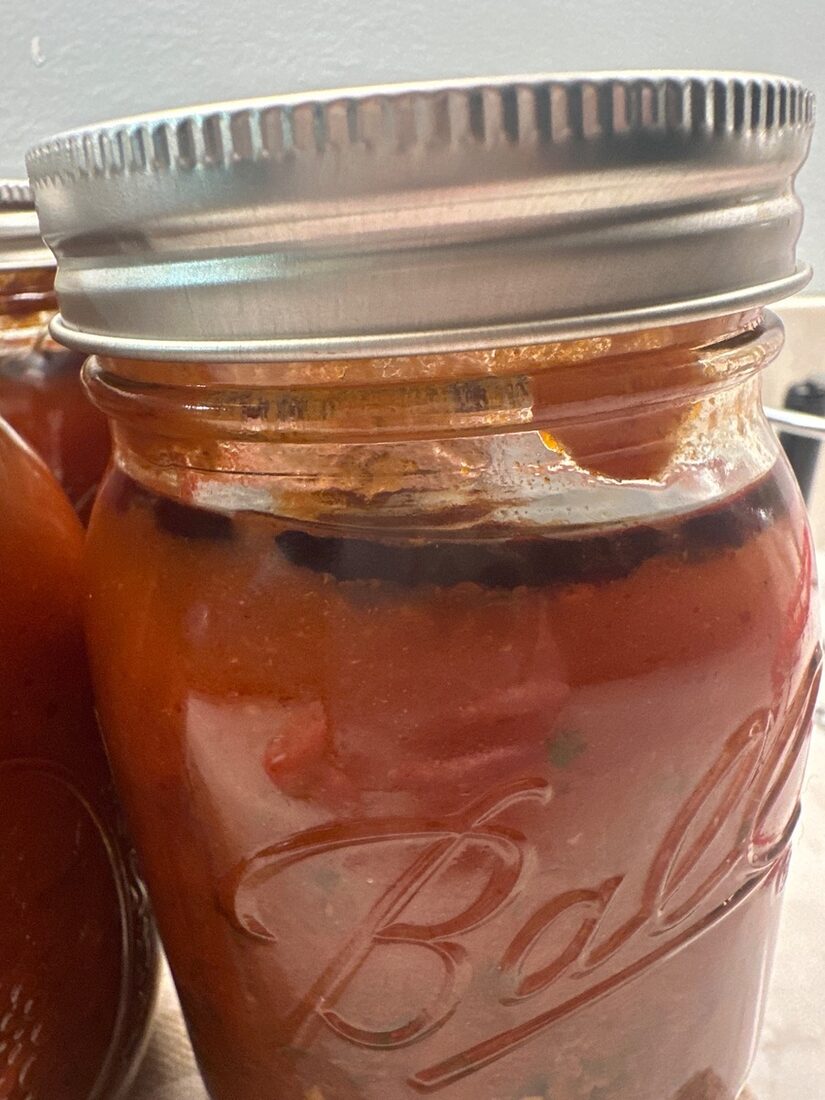
Why is there a dark line at the top of the sauce right out of the canner?
Don’t worry, I saw this too and it startled me at first. When I lifted my jars out, the sauce was still gently bubbling inside, and there was a dark line right at the very top of the sauce. By the next morning it had settled out completely, and every jar had sealed. It is just the hot sauce at the surface while it is still boiling in the jar, and as the jar cools and the contents settle, it evens right back out. As long as the jar seals and that line fades as it cools, it is nothing to worry about.
How long does home-canned spaghetti sauce last?
For the best quality, plan to use it within about a year. It can be safe a bit longer if the seal holds and it is stored well, but the flavor is nicest in that first year.
One important food-safety note

Everything I changed here, the all-beef swap, the herbs, the lighter sugar, is just flavor. The tested method underneath, the amounts, jar sizes, headspace, pressure, and processing times, stays exactly as written. When in doubt, check the current guidance from the National Center for Home Food Preservation.
And that is canning spaghetti sauce with meat, start to finish. This one is real work, not for the faint of heart, and it gave me a whole new respect for how stout our grandmothers must have been to put food up like this every single year. But it is so worth it. There is nothing quite like reaching into the pantry on a cold winter night, long after the garden has stopped producing, pulling down a jar of sauce you grew and put up yourself, and having dinner on the table in the time it takes to boil the noodles.
Knowing I am feeding my family something I grew back in the warmth of summer is exactly why I keep canning. Once you have that first row of jars sealed and cooling on the counter, I think you will be as hooked as I am.
Happy canning!
Love,
Jennifer

Tried this recipe?
Tap the stars in the recipe card to leave a quick rating. Your rating helps other home cooks know this recipe works in a real kitchen, not just mine.
And as a thank-you for your feedback, you will receive a free printable copy of my Maker Home Companion Cookbook, featuring my most popular recipes, each one formatted on a SINGLE, easy-to-use page, a perfect kitchen companion for easy meal prep. Click here to learn more about this cookbook and how you can get your copy!


Meet Jennifer
Jennifer cooks and experiments in the kitchen at Maker Farm, where she focuses on simple pantry cooking, homemade staples, and practical recipes that make everyday meals easier. Over the years she has tested many ways to make cooking simpler and more dependable, and shares the methods that work best in her own kitchen, occasionally showing them on her Heart to Home at Maker Farm vlog.
I’ve already canned all of my tomato harvest for this year but I can’t wait to try this next season! I appreciate you not being a Rebel Canner and posting a safe tested recipe and guidelines. 🩷