

This pulled pork comes out tender, juicy, and easy to shred, with a sweet Dr Pepper braise and a sticky finish of homemade BBQ sauce. You start with a 4 to 6 pound pork shoulder and a simple brown sugar rub, then pick your method: slow cooker (about 8 to 10 hours on LOW), oven or Dutch oven (roughly 4 to 6 hours at 300°F), or Instant Pot (around 75 to 90 minutes plus a natural release). It shreds beautifully for sandwiches, tacos, and sliders, and it freezes like a dream.
Jennifer’s Recipe Notes from Maker Farm

We love pulled pork around here, and this is our favorite version, the one we keep coming back to. Actually, I have it going in the slow cooker as I write this, because tonight is date night and Greg and I are playing Daggerheart (a tabletop RPG game). That’s the whole reason I reach for the slow cooker … it just does its thing all afternoon and it’s ready right when we are, no babysitting required.
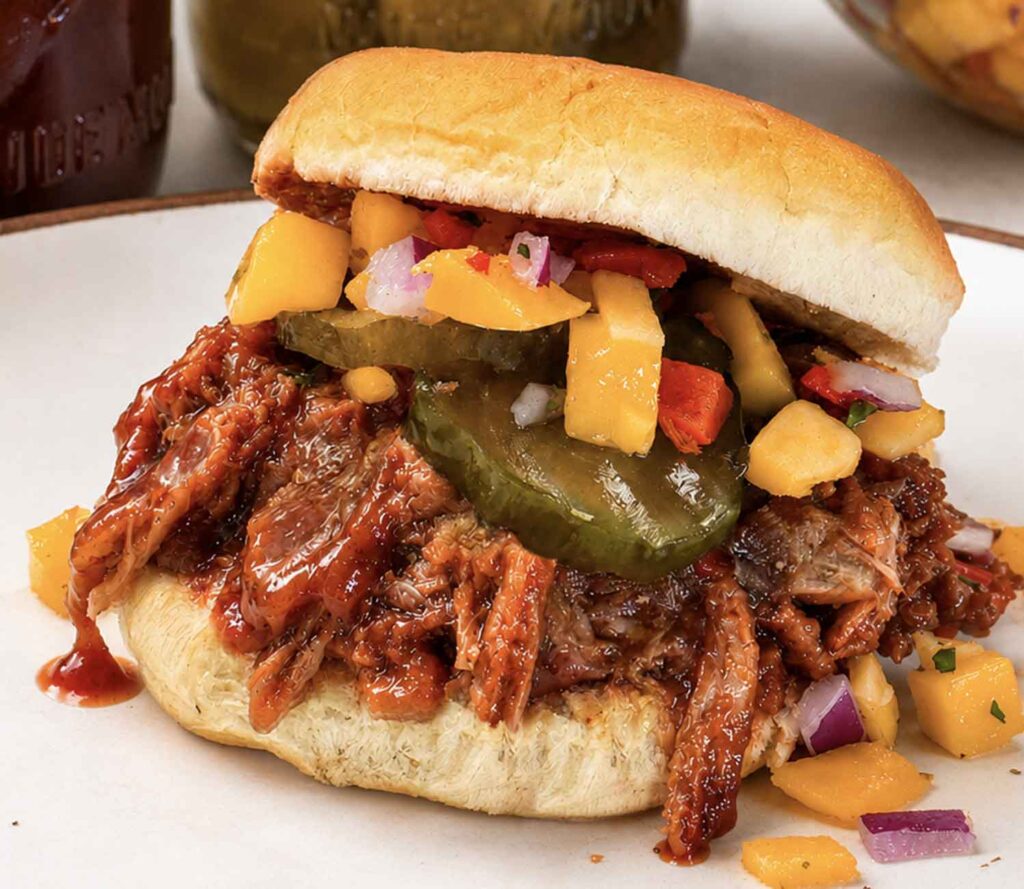
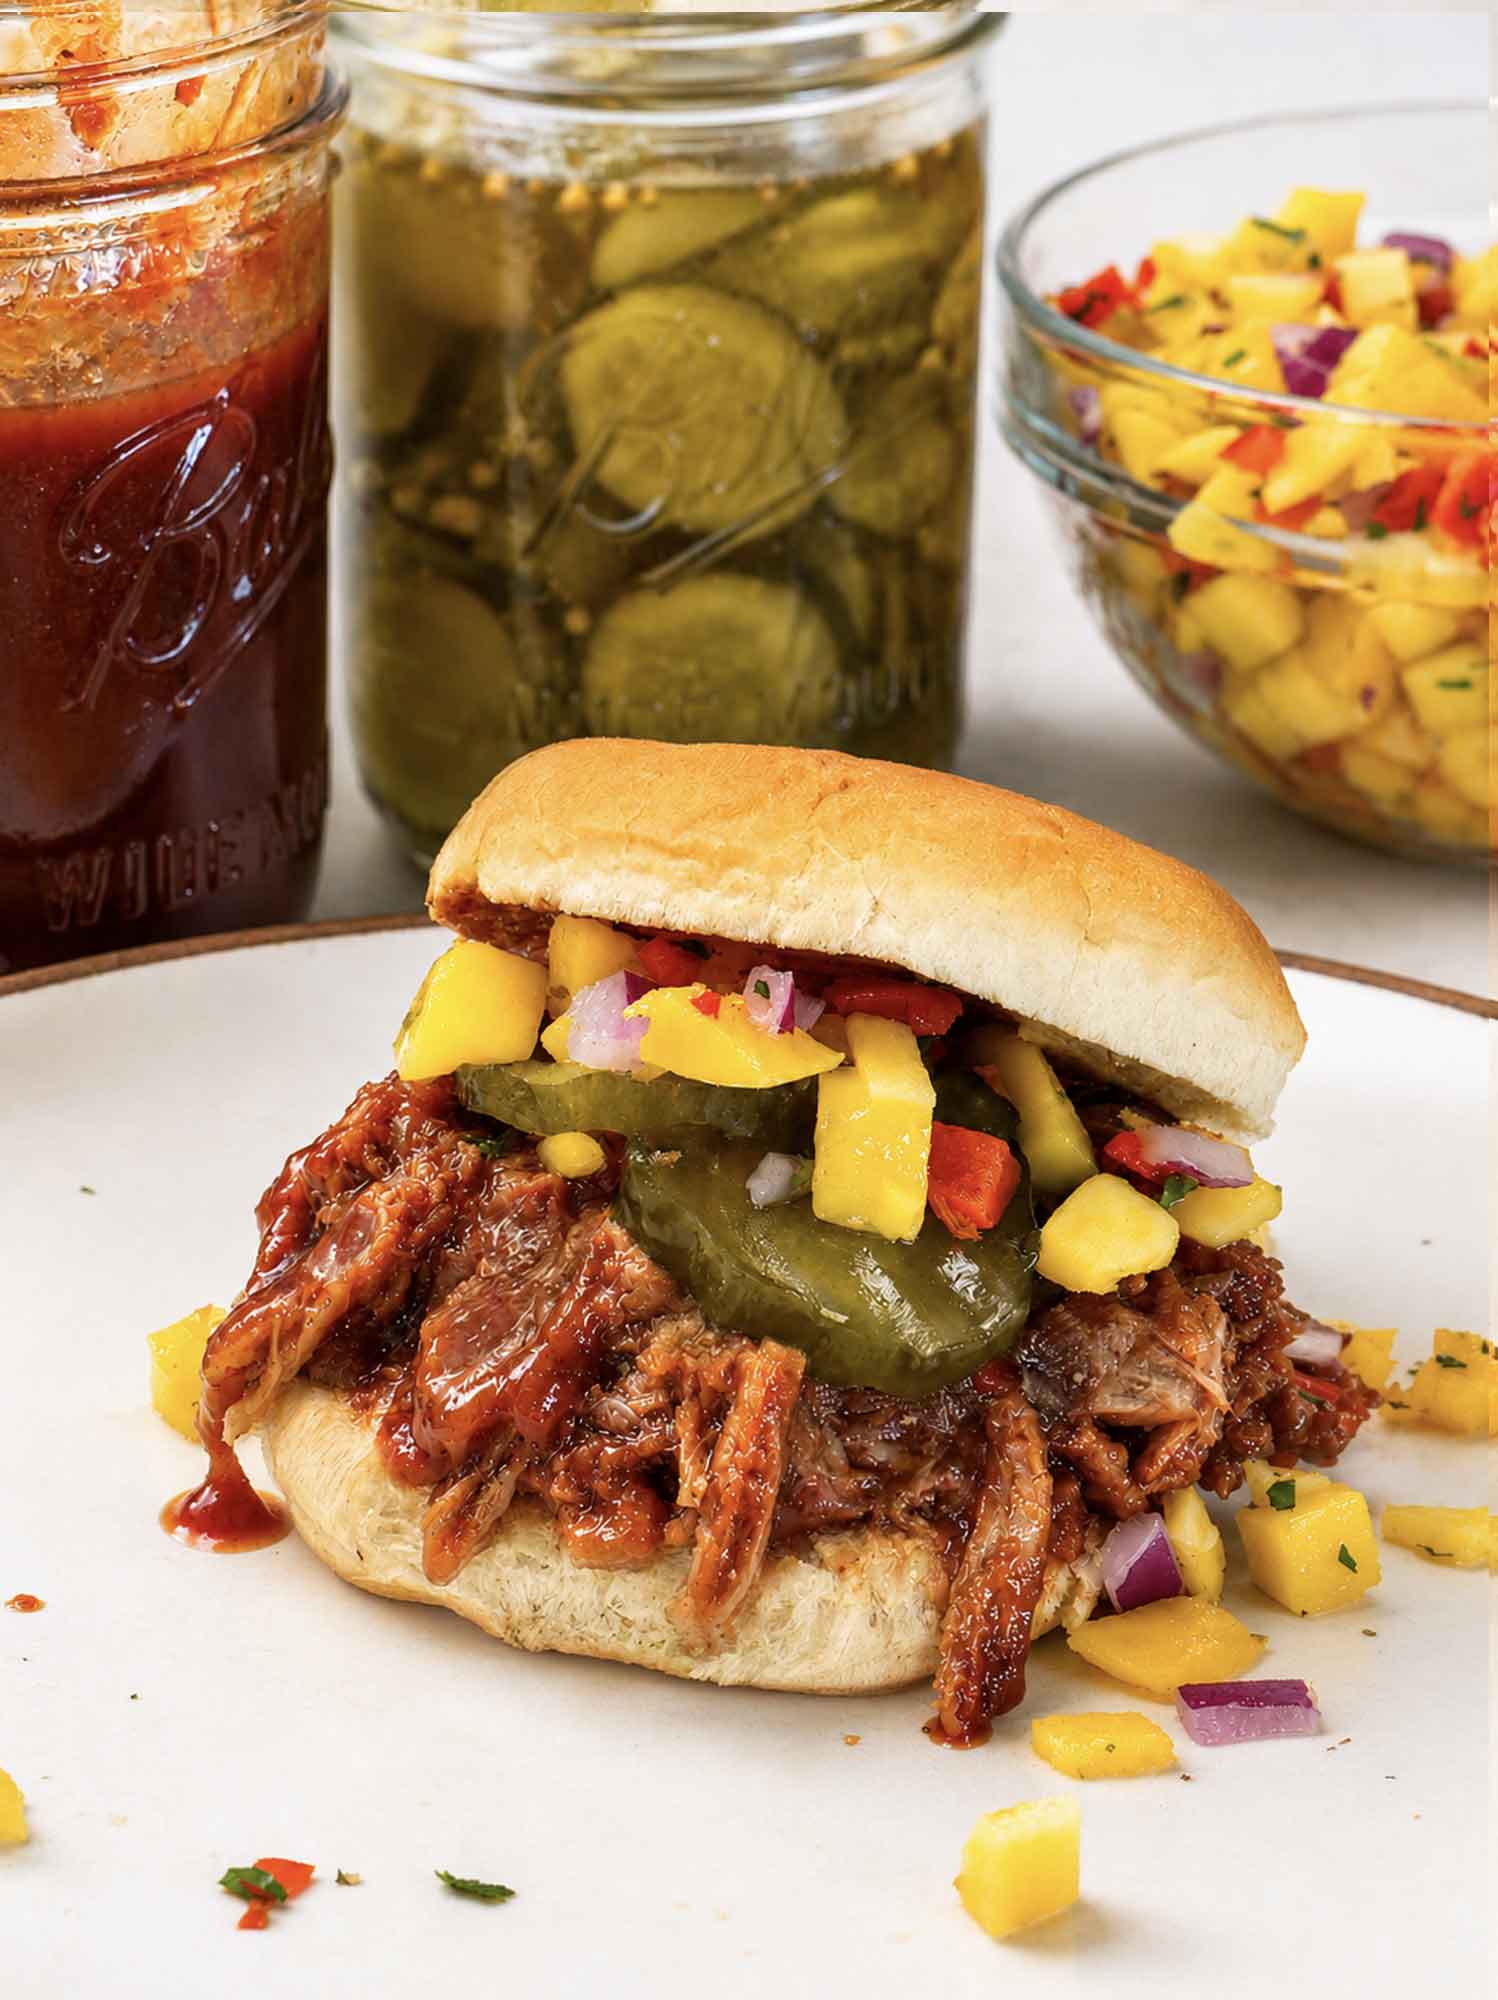
Greg piles his high on a slider with our bread and butter pickles, and I go for a little mango salsa on mine.
I’ll walk you through all three methods here, so you can use whatever works for you.
Let’s dig in!

P.S. If you love barbecue, you might also enjoy my oven-baked BBQ rib recipe!

Want to Save This Recipe?
Enter your email below and we’ll send it straight to your inbox! Plus you’ll get new recipes each week!
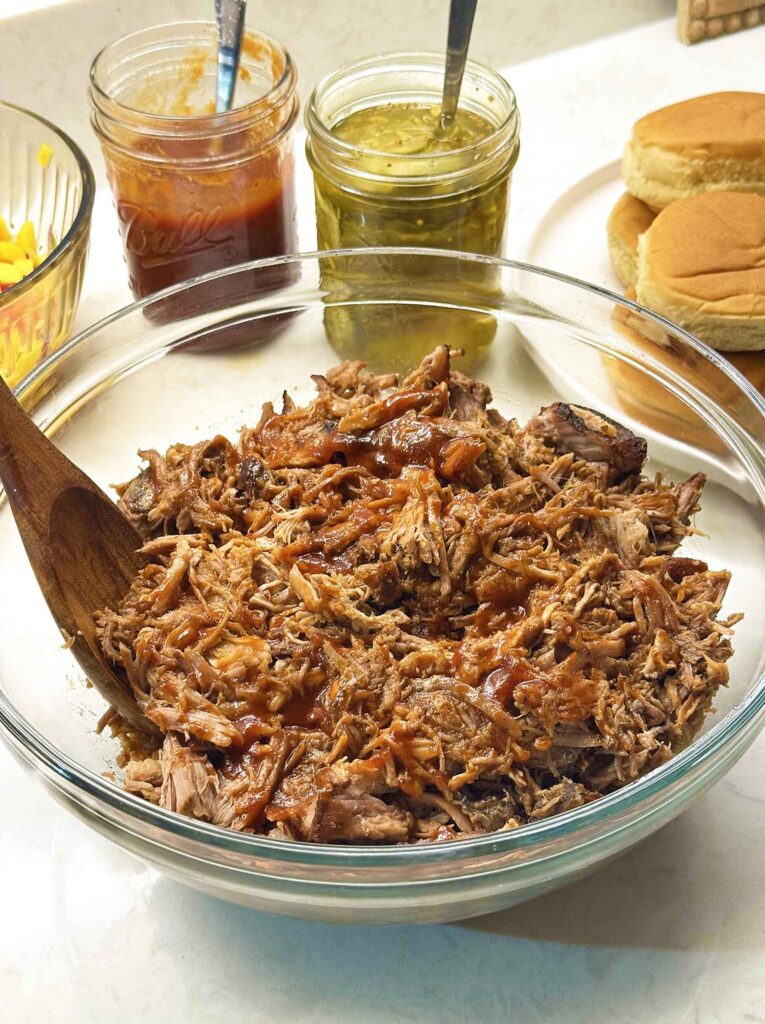
Table of Contents
What’s the Best Pork for Pulled Pork?
The short answer: you want pork shoulder, and don’t let the label names trip you up. “Pork shoulder,” “pork butt,” and “Boston butt” all point to the same well-marbled, forgiving cut, and any of them will shred like a dream. That fat and connective tissue is exactly what melts down over a long, low cook and makes the meat so tender. A leaner pork roast or pork loin just won’t get there… it turns dry and stringy instead of juicy, so I’d steer clear of those here.
Anything in the 4 to 6 pound range works well here, so grab whatever looks good at the store… a bigger one just needs a little more time and gives you more leftovers. You’ll see both bone-in and boneless at the store, and both work. Bone-in adds maybe 30 to 45 minutes and helps the meat stay a touch juicier, while boneless is a little quicker and easier to shred.
One thing worth doing before it goes in: look at the fat cap, that thick layer of white fat on one side. If it’s more than about a quarter inch thick, trim it down to roughly a quarter inch. This helps because the rub can actually reach the meat instead of sitting on a slab of fat, and you won’t end up with greasy pockets in the finished pork.
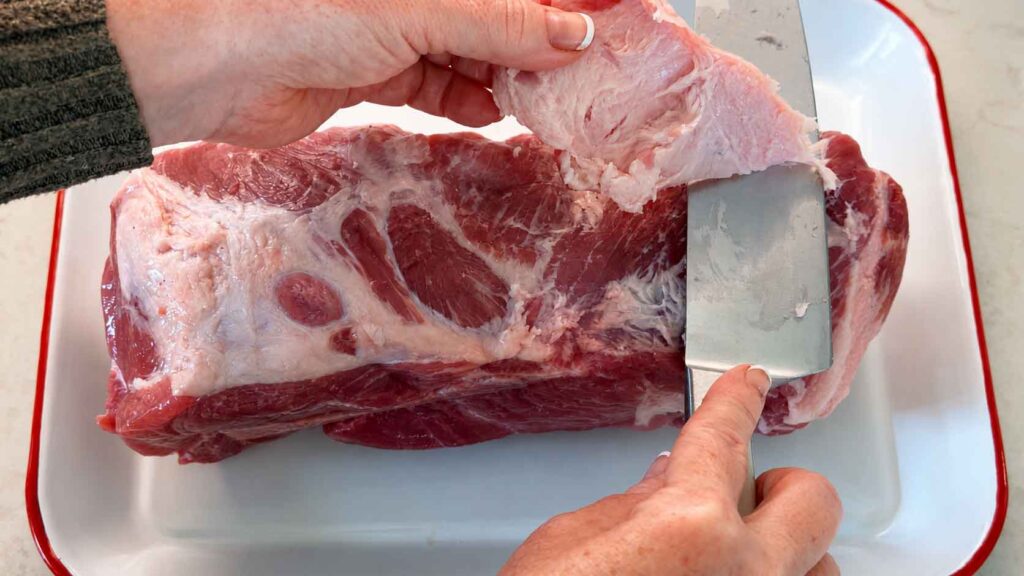
To trim it, set the pork fat-side up and slide a sharp knife almost flat along the top, just under the surface of the fat. Work in shallow strokes and lift the fat away as you go, rather than trying to carve it all off in one thick piece. You’re not removing every bit of fat… you want to leave about a quarter inch behind so the meat stays moist while it cooks. Go slow, keep your other hand well clear of the blade, and don’t worry about making it neat. Nobody sees this part once it’s shredded, and a few uneven spots won’t matter one bit.
If all you can find is a fattier cut like pork neck, it can still work… just expect a slightly smaller yield and cook it to temperature rather than by the clock.
Flavor Profile: The Rub, the Dr Pepper, and the Sauce
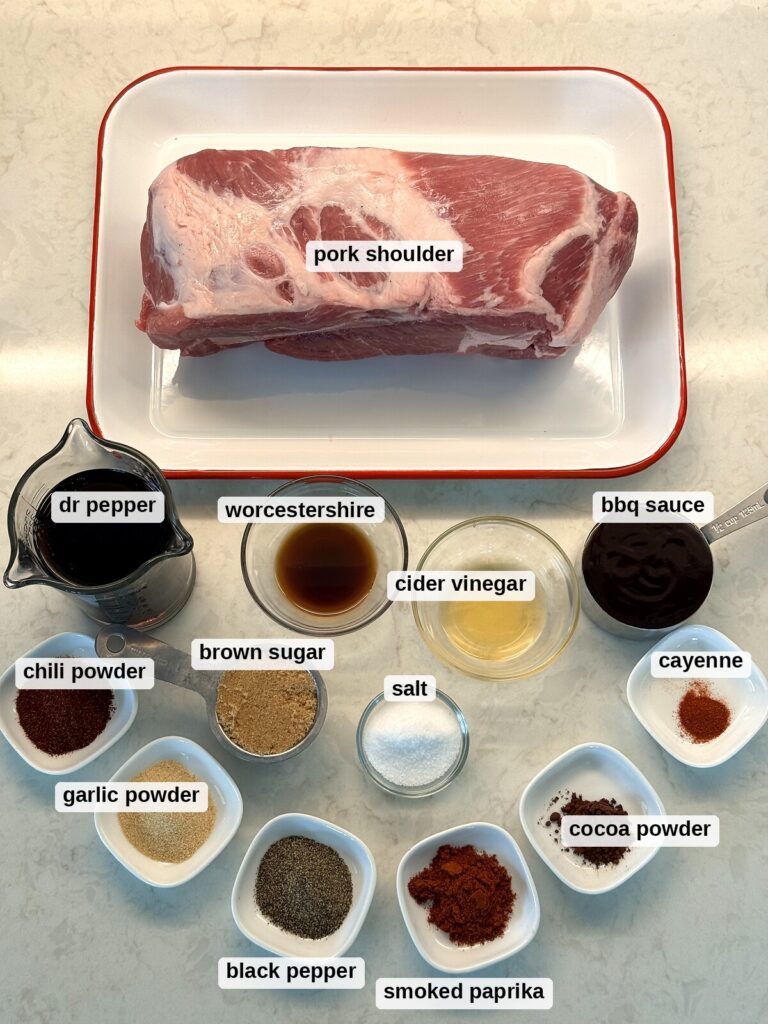
We’re really building flavor in two stages here: a dry rub that seasons the meat, and a braising liquid that keeps it moist and adds a little sweetness.
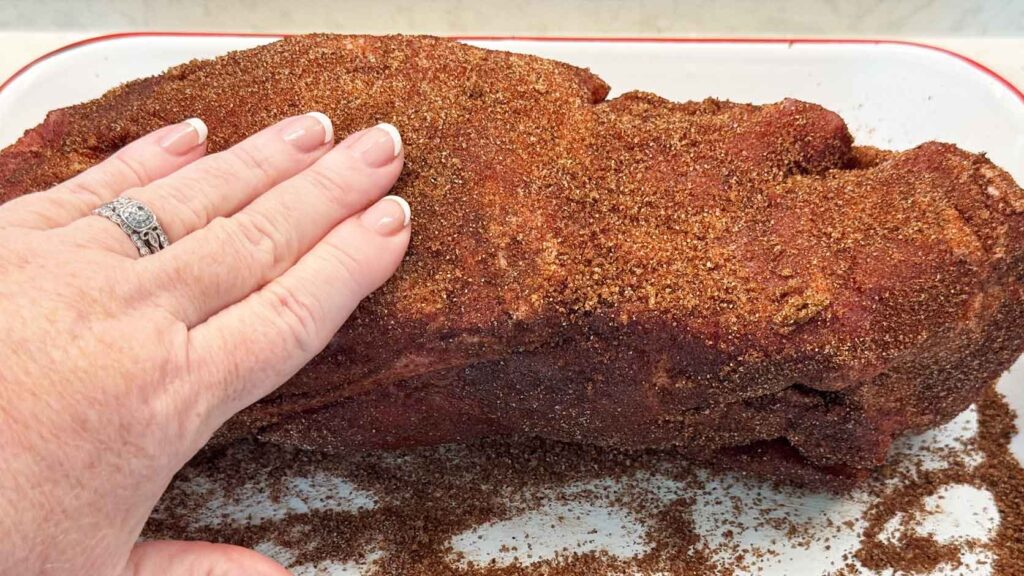
For the rub I stir together brown sugar, salt, black pepper, garlic powder, a little chili powder, some smoked paprika, just a pinch of cayenne pepper, and my secret ingredient: a teaspoon of unsweetened cocoa powder. Don’t worry, it won’t make your pork taste like chocolate at all. It just adds a deep, almost smoky richness in the background that plays so well with the Dr Pepper soda… it’s the same trick I use in my chili, and most people can never quite name what makes it taste so good.
I’m a supertaster and not big on heat, so a pinch of cayenne is all I use… you can leave it out entirely or bump it up, whatever suits your table. Rub it all over the pork and let it sit while you get everything else ready.
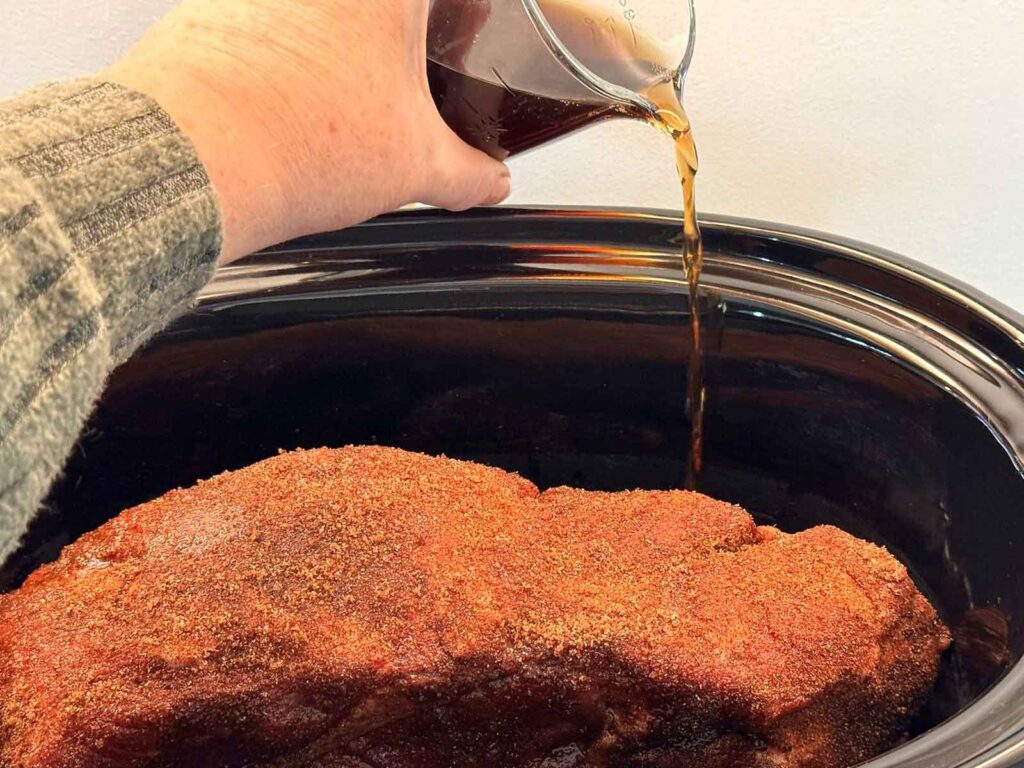
For the liquid, I pour Dr Pepper down the side of the pot, not over the top of the meat. This is the answer to a question I get a lot: no, the soda won’t wash off your rub as long as you add it around the pork instead of pouring it right over the seasoning. The Dr Pepper cooks down into a sweet, faintly spiced background note that works so well with pork. Coca-Cola works too if that’s what you have.
If you’d rather skip the soda altogether, and I know some of you prefer to for the additives, you have easy swaps. Apple cider or apple juice keeps that touch of natural sweetness the soda was giving you, so they’re my favorite stand-ins. For a less-sweet, more savory braise, use chicken stock or broth with a splash of cider vinegar. Any of them will give you tender, juicy pork.
The BBQ sauce goes on at the end, after shredding, so it stays bright and sticky instead of cooking away. I use our homemade BBQ sauce because I can control the sweetness and skip the corn syrup, but any sauce you love is fine. If your finished pork ever tastes too sweet for you, pull back on the brown sugar in the rub next time, or lean on that vinegar splash to balance it. And if a recipe calls for molasses and you’re out, dark brown sugar, honey, or maple syrup all fill in nicely… start with a tablespoon or two and taste as you go.
How to Make Pulled Pork (3 Ways)
Here’s the good news: the pork doesn’t care much which appliance you use, as long as it cooks low and slow to the same finish temperature. I’ll give you my main method first, the slow cooker, then the oven and Instant Pot right after. You only need to pick one.
Slow Cooker (my go-to)
Season the pork, set it in the slow cooker, and pour the Dr Pepper down the side. Cook on LOW for 8 to 10 hours, or HIGH for about 4 to 6 hours. LOW is worth the wait if you can swing it, because the extra time gives the fat and collagen more room to break down. You’ll know it’s done when a fork twists in the meat with almost no effort. Don’t worry if it looks like a lot of liquid at the end… that’s normal, and you’ll save some of it.
Oven or Dutch Oven (300°F)
Nestle the seasoned pork into a Dutch oven, add the Dr Pepper around it, and cover tightly. Roast at 300°F for about 4 to 6 hours. For the last 30 to 45 minutes, you can pull the lid off to build a little bark, that darker, slightly crisp exterior. That uncovered time also cooks down the liquid and concentrates the flavor. If you’d rather leave it covered the whole time, that’s totally fine… the pork will still be beautifully tender. Just spread the shredded pork on a sheet pan and broil it for 5 to 8 minutes at the end if you want those crisp edges.
Instant Pot
Cut the pork into a few large chunks so it cooks evenly, season, and add the Dr Pepper (you need at least a cup of liquid for the pot to come to pressure). Pressure cook on HIGH for about 75 to 90 minutes, then let it release naturally for 15 to 20 minutes before opening. Be careful not to rush the release… quick-releasing a big cut of pork can seize up the meat and make it tougher. This is the method I reach for when I forgot to start it earlier in the day.
How do I know when it’s done?
Temperature is more reliable than the clock here. You’re looking for an internal temp of about 200 to 205°F in the thickest part, well past the “safe” 145°F, because at that higher range the connective tissue finally melts and the meat shreds instead of slices.
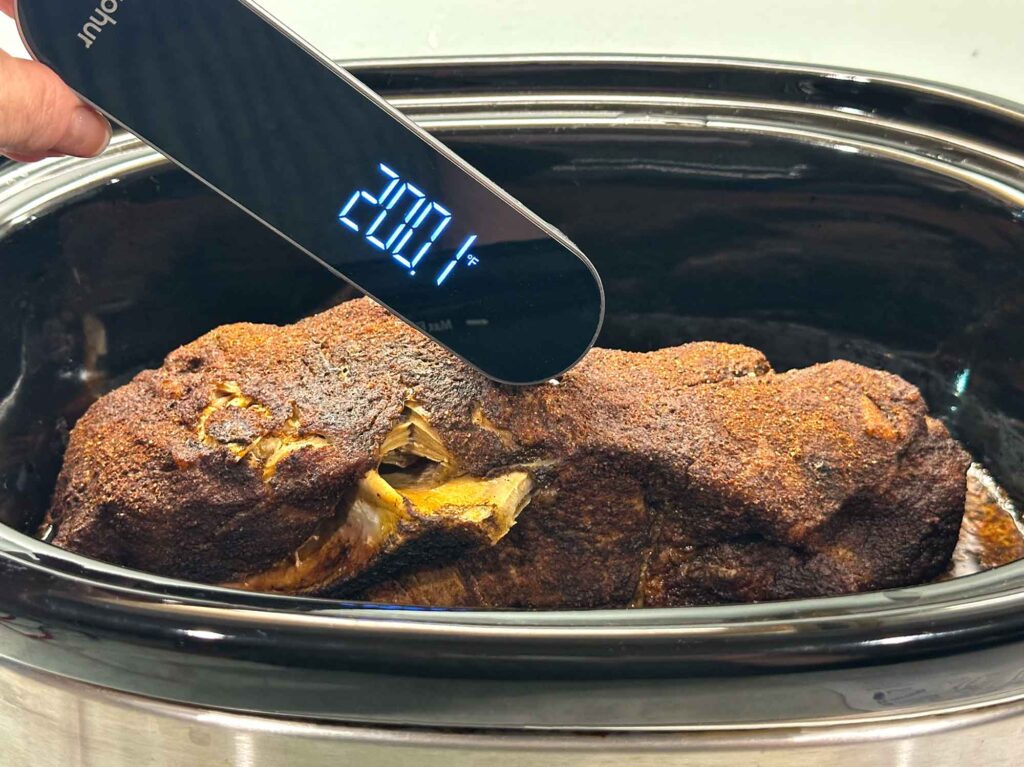
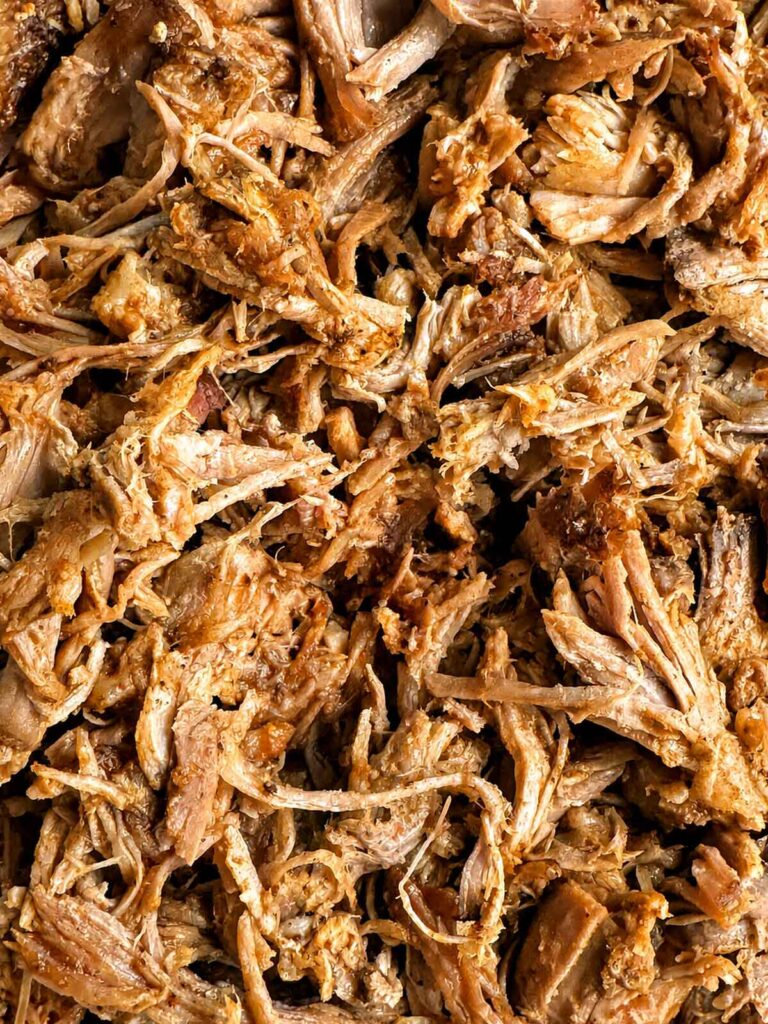
When it’s ready, two forks (or your fingers in gloves) will pull it apart with barely any resistance. One gentle warning: stop once it shreds cleanly. Over-cooking and then stirring it hard can turn pulled pork pasty and mushy, and we want strands, not paste.
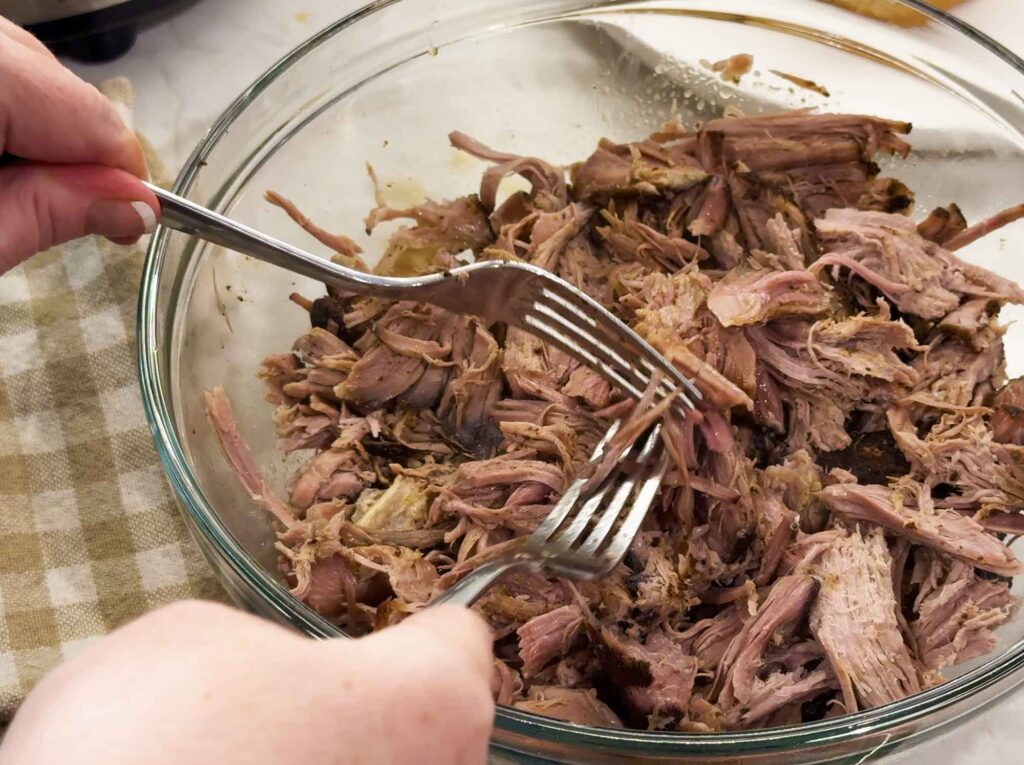
Once it’s shredded, spoon a little of the cooking liquid back over the meat, then stir in your BBQ sauce to taste. If you love a smoky bite on your shredded pork the way we do with our oven-baked BBQ ribs, a quick pass under the broiler gives you those caramelized edges.
How to Serve Pulled Pork
This is where pulled pork earns its keep, because it stretches across so many dinners. Our house favorite is sliders: a soft roll, a heap of pork, a few of the bread and butter pickles we canned last summer, and a spoonful of mango salsa for a little sweet-tangy brightness. A crunchy broccoli slaw on top adds the perfect fresh snap, and our regular coleslaw does the same job if that’s more your style.
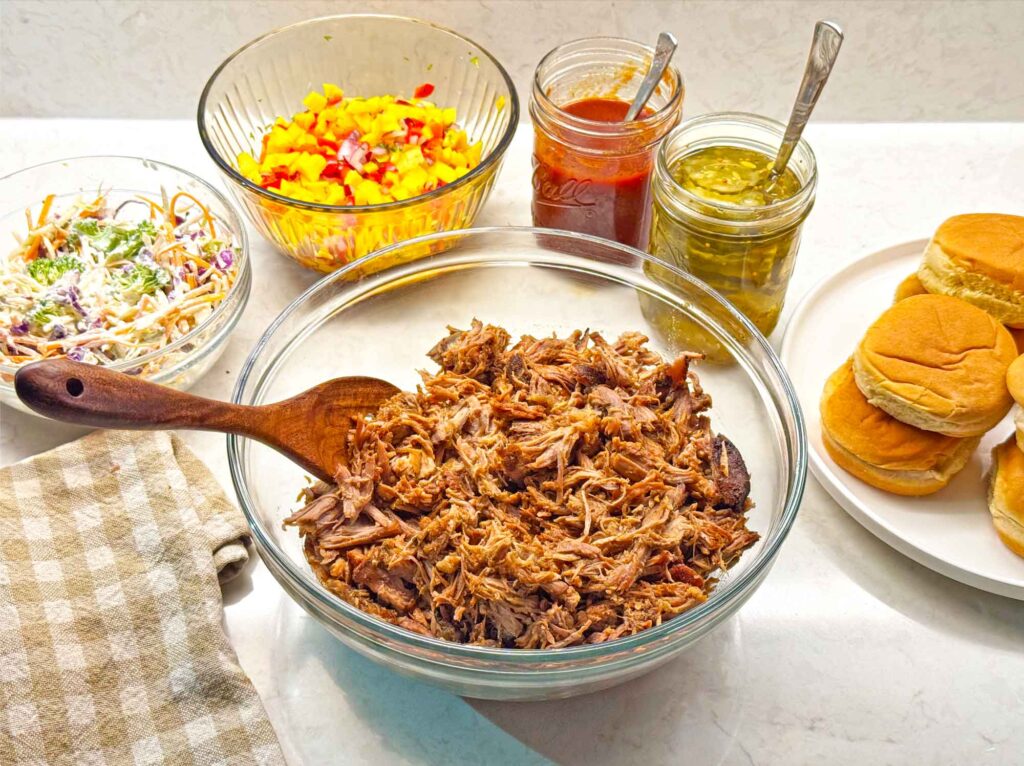
Beyond sliders, the same shredded pork turns into tacos with onion, cilantro, and a squeeze of lime; loaded nachos with cheese; or a simple rice bowl with slaw and extra sauce. For a full plate-style dinner, I round it out with our baked beans and a scoop of potato salad. Comfort food, all the way down.
Serving a Pulled Pork Bar for a Party
Pulled pork is one of the easiest things to feed a crowd, and a build-your-own bar keeps you out of the kitchen once guests arrive. For planning, figure on about a third to a half pound of cooked pork per adult, less for kids. So for 20 adults, 20 times 0.4 pounds is roughly 8 pounds of cooked pork, and since a shoulder loses close to half its weight as it cooks, you’d buy around 16 pounds raw. One serving works out to about 4 ounces of cooked meat, which is a generous two-thirds to one cup, or a little less piled onto a slider.
For the setup itself, keep the pork warm in a slow cooker on the WARM setting with a splash of the reserved juices so it never dries out. Set the buns out separately, not pre-filled, so they don’t go soggy. Then line up the fixings: extra BBQ sauce, a bowl of vinegar sauce for the folks who like it tangy, slaw, pickles, sliced onion, and a good pair of heat-proof tongs. If you can, cook the pork the day before, chill it right in its juices, and just reheat the day of… it honestly tastes even better after a night in the fridge.
Make-Ahead, Storing, and Reheating
The single best trick for juicy leftover pulled pork is to save the cooking liquid. Strain it, chill it, and skim off the firm layer of fat that rises to the top. Then store your shredded pork with a few spoonfuls of those juices (and a little sauce) rather than dry… this is what keeps it from turning into cardboard on day two. It’ll keep in the fridge for about 4 days.
To reheat, cover it and warm it gently with a splash of juices until it reaches 165°F. In the oven, that’s 300°F, covered, for 20 to 30 minutes; in the slow cooker, LOW for 1 to 2 hours; or in the microwave, in 30 to 60 second bursts with a spoonful of liquid stirred in between. For the freezer, pack the pork flat in bags with a little juice, which helps it thaw faster and keeps it moist. It freezes well for up to 3 months.
Pulled Pork Recipe
Ingredients
Ingredients
- 4 to 6 lbs pork shoulder (also sold as pork butt or Boston butt) fat cap trimmed to 1/4 inch
- 1/4 cup brown sugar
- 1 tablespoon salt
- 2 teaspoons black pepper
- 2 teaspoons garlic powder
- 2 teaspoons chili powder
- 2 teaspoons smoked paprika sweet
- 1 teaspoon unsweetened cocoa powder my secret ingredient, adds depth without any chocolate flavor (optional)
- 1/4 teaspoon cayenne pepper (optional, adjust to taste)
- 1 cup Dr Pepper (or Coca-Cola)
- 1 tablespoon Worcestershire sauce
- 1 tablespoon cider vinegar
- 1/2 cup BBQ sauce plus more for serving
Instructions
Instructions
- Trim the pork's fat cap to about 1/4 inch. Stir together the brown sugar, salt, black pepper, garlic powder, chili powder, smoked paprika, unsweetened cocoa, and cayenne, then rub it all over the pork.
- Set the pork in the slow cooker. Stir the Worcestershire sauce and cider vinegar into the Dr Pepper and pour it down the side of the pot, not over the meat, so the rub stays put.
- Cover and cook on LOW for 8 to 10 hours (or HIGH for 4 to 6 hours), until the pork is probe-tender and reaches about 200 to 205°F in the thickest part.
- Transfer the pork to a bowl and shred with two forks, discarding any large fat pieces and the bone if bone-in.
- Skim the fat from the cooking liquid, then spoon some of the juices back over the pork to moisten. Stir in the BBQ sauce to taste. Serve, or broil the shredded pork 5 to 8 minutes for crisp edges.
Nutrition
Notes
- Oven / Dutch oven: Cover and roast at 300°F for 4 to 6 hours to 200 to 205°F. Uncover for the last 30 to 45 minutes to build bark.
- Instant Pot: Cut into large chunks, use at least 1 cup liquid, pressure cook on HIGH 75 to 90 minutes, then natural release 15 to 20 minutes.
- Bone-in vs boneless: Bone-in adds 30 to 45 minutes and stays a bit juicier; boneless is quicker and easier to shred.
- Soda swaps: No soda? Use apple cider or apple juice for natural sweetness, or chicken stock/broth with a splash of cider vinegar for a savory braise. No molasses in your sauce? Use dark brown sugar, honey, or maple syrup, 1 to 2 tablespoons to start.
- Keep it juicy: Save and skim the cooking juices; store and reheat the pork with a few spoonfuls stirred in.
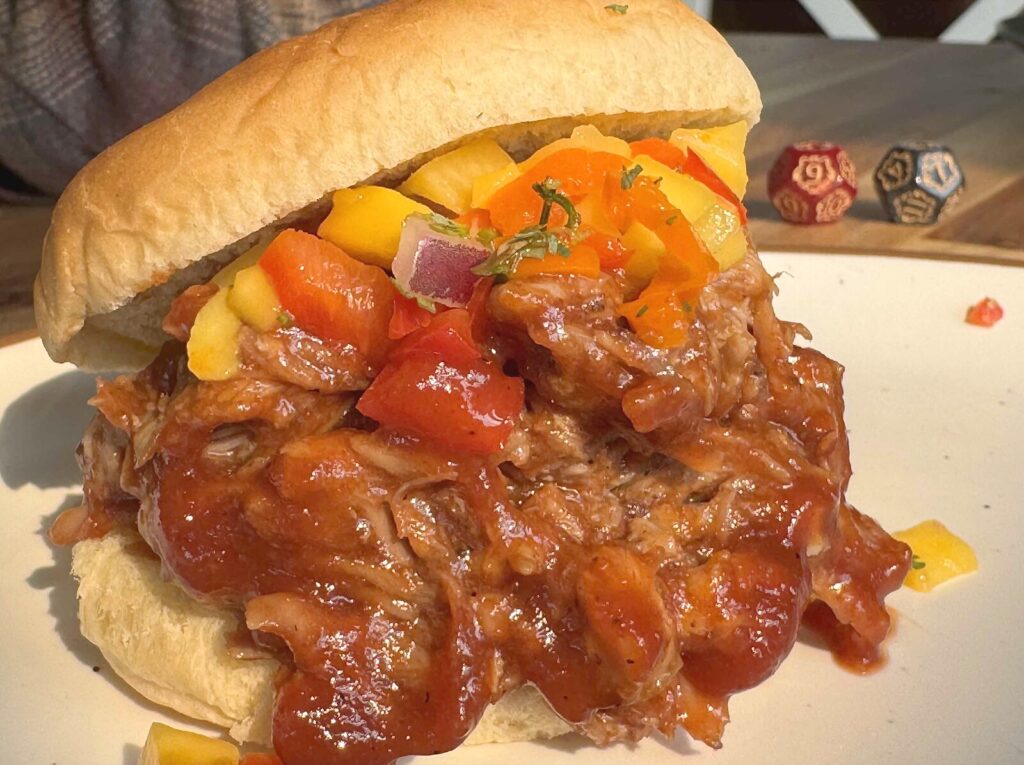
If you make this one, I hope it lands on your table on a night you actually get to sit down and enjoy it… that’s the whole point of the slow cooker, after all. Let me know how you serve yours.
Love,
Jennifer
Tried this recipe?
Tap the stars in the recipe card to leave a quick rating. Your rating helps other home cooks know this recipe works in a real kitchen, not just mine.
And as a thank-you for your feedback, you will receive a free printable copy of my Maker Home Companion Cookbook, featuring my most popular recipes, each one formatted on a SINGLE, easy-to-use page, a perfect kitchen companion for easy meal prep. Click here to learn more about this cookbook and how you can get your copy!



Meet Jennifer
Jennifer cooks and experiments in the kitchen at Maker Farm, where she focuses on simple pantry cooking, homemade staples, and practical recipes that make everyday meals easier. Over the years she has tested many ways to make cooking simpler and more dependable, and shares the methods that work best in her own kitchen, occasionally showing them on her Heart to Home at Maker Farm vlog.
Made today and it was absolutely delicious. I didn’t have Dr. Pepper so I used Coke and served with Cole slaw. Thank you Jennifer. I look forward to making again soon.