This sourdough bread recipe for beginners uses just 4 ingredients and a simple stretch-and-fold schedule. Plan for a 3 to 5 hour bulk rise plus an overnight fridge proof, then bake in a hot Dutch oven at 450°F.
For a long time, sourdough bread felt like something other people knew how to do. I’d see beautiful loaves online with crackling crusts and airy interiors, and the process always looked complicated. But once I slowed down and paid attention to the rhythm of sourdough, to feed the starter, mix the dough, let time do the work, it turned out to be much simpler than it first appeared. In this guide, I’ll show you the beginner method that finally worked for me so you can bake a reliable sourdough loaf using just four ingredients: flour, water, salt, and an active starter.

Table of Contents
What Is Sourdough Bread?
Sourdough bread is a traditional, naturally-leavened bread made with wild yeast and bacteria from an active starter instead of commercial yeast. The longer fermentation is what builds the distinctive tangy flavor and affects rise time. It has a chewy texture surrounded by a crispy crust.
Many people, including myself, prefer sourdough bread to regular white bread because the flavor is much more interesting. I also believe the fermentation process makes the bread is easier to digest.
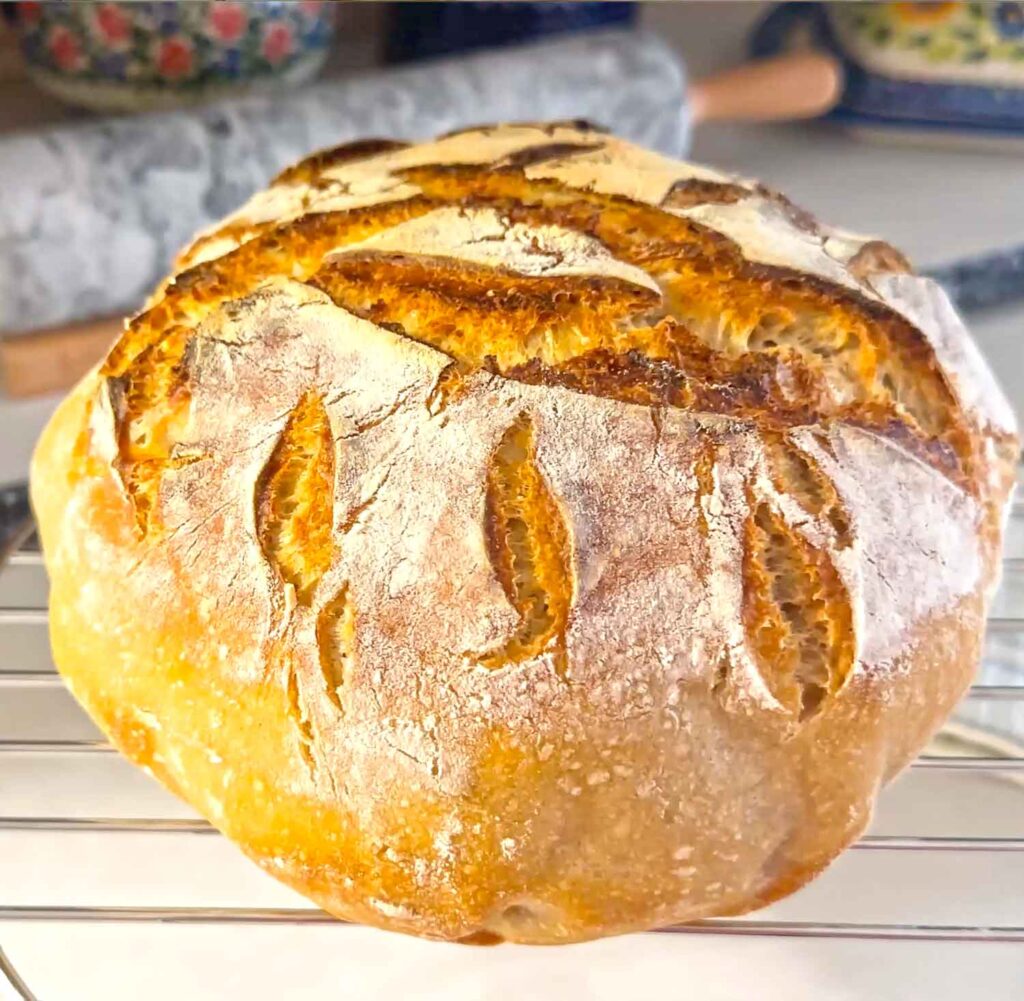
Sourdough baking has become one of my favorite kitchen rhythms. After working on it for a year, I eventually settled on a straightforward process that works reliably for me as a beginner. It doesn’t require a long prep period, during which your enthusiasm can wane … just a healthy starter and time for the dough to ferment naturally. Every loaf I’ve made with this method rises beautifully and tastes ah-mazing.
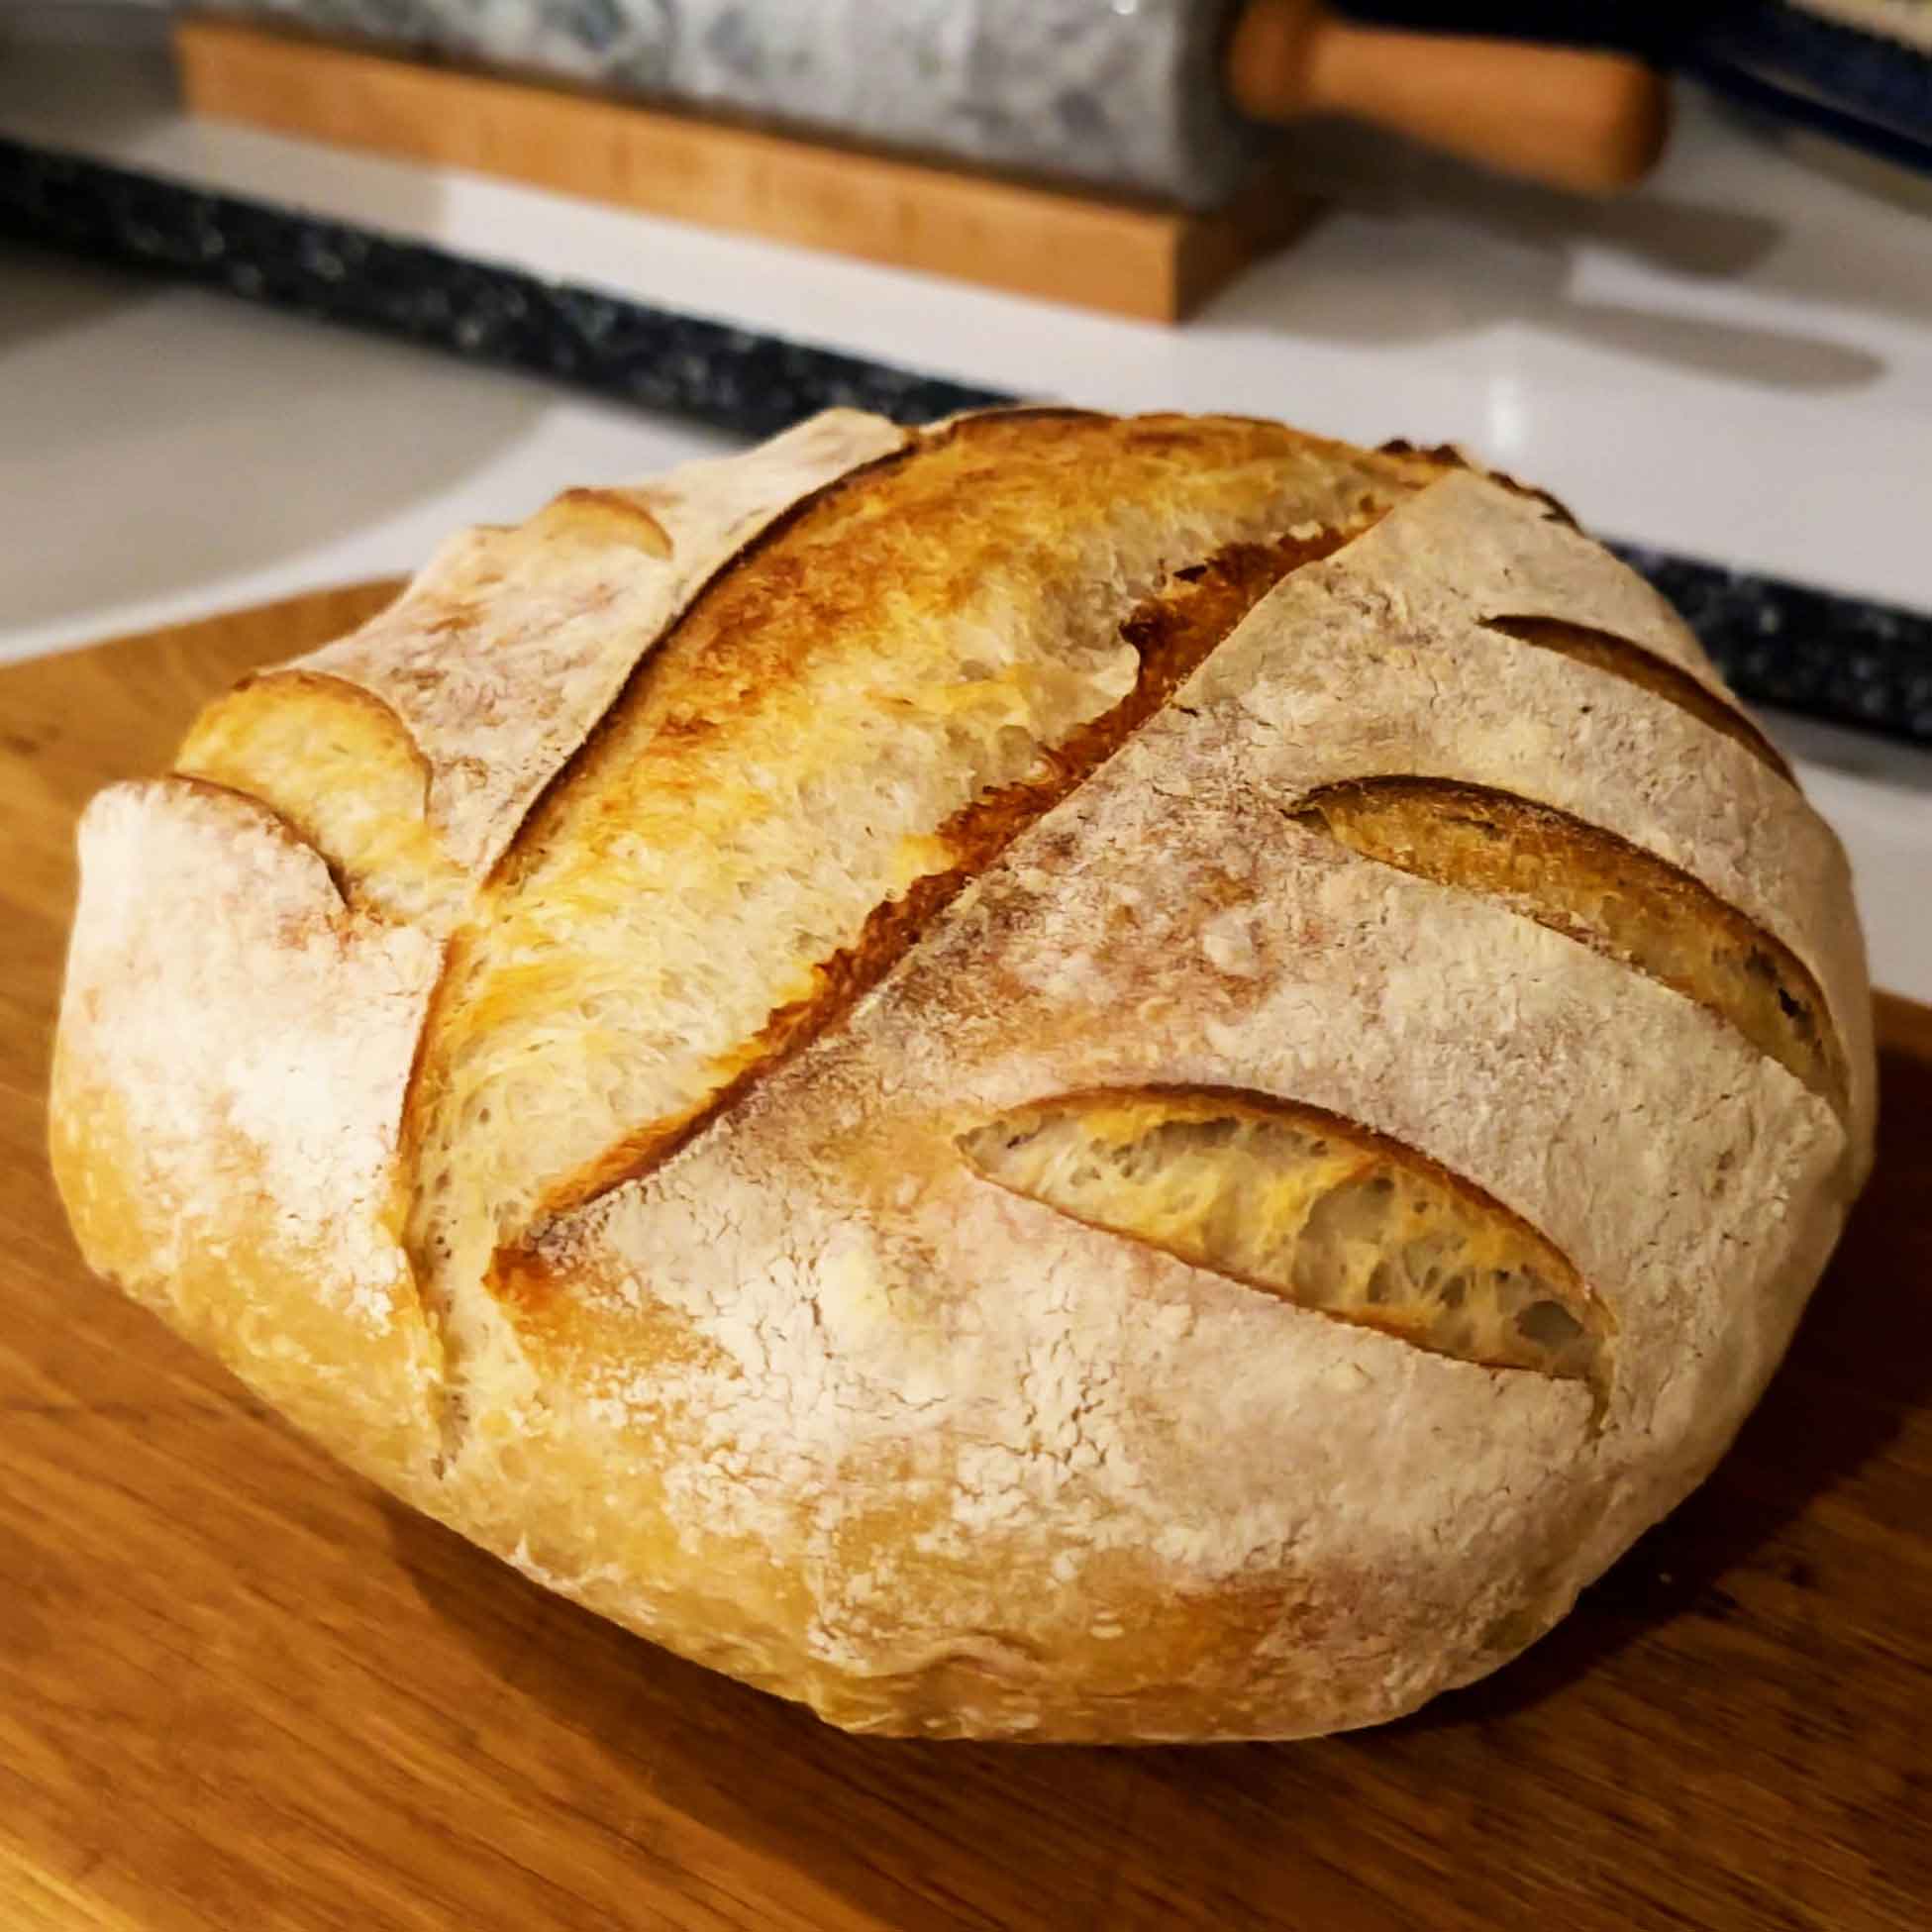
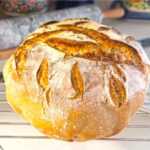
Here is my very first loaf made with this recipe:
If you’re new to sourdough, I also created a free beginner guide with my personal sourdough notes and tips to help you get your first successful loaf.
Download my free guide:
It covers starter basics and the simple rhythm that makes sourdough bread easier, along with the seven things that actually made the difference for my first loaf!
Sourdough Terminology
If you’re new to sourdough bread, some of the words can make it sound far more complicated than it really is. Once you understand a few basic terms, the whole process feels much simpler. Here are the ones you’ll see most often.
Sourdough Starter
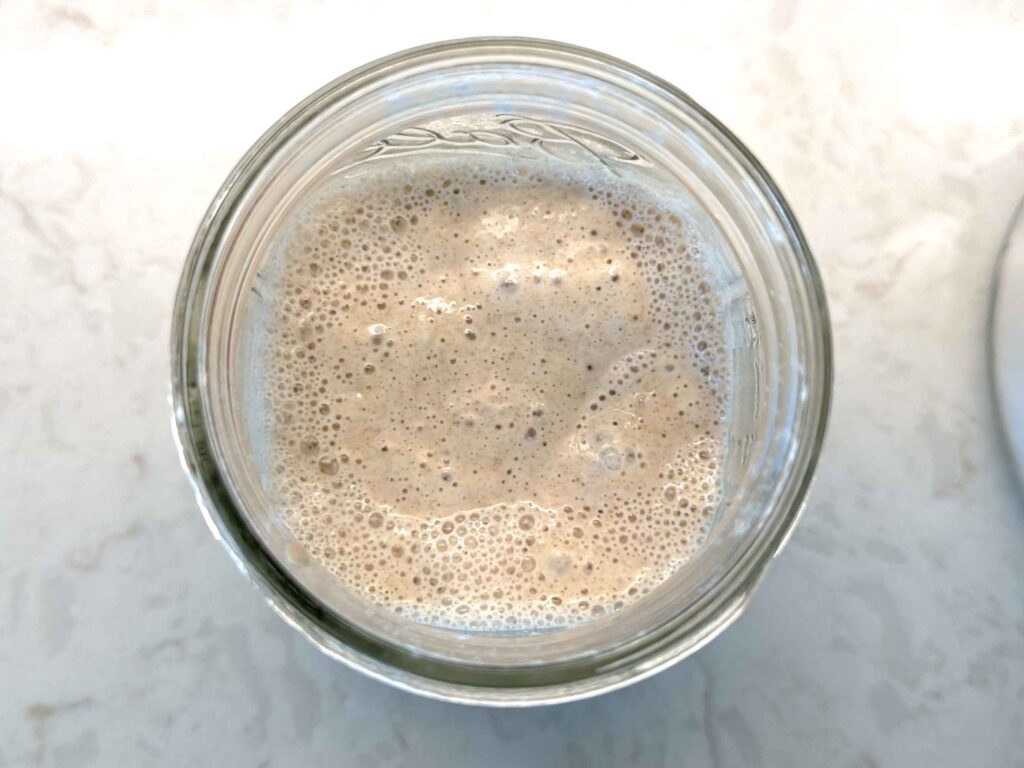
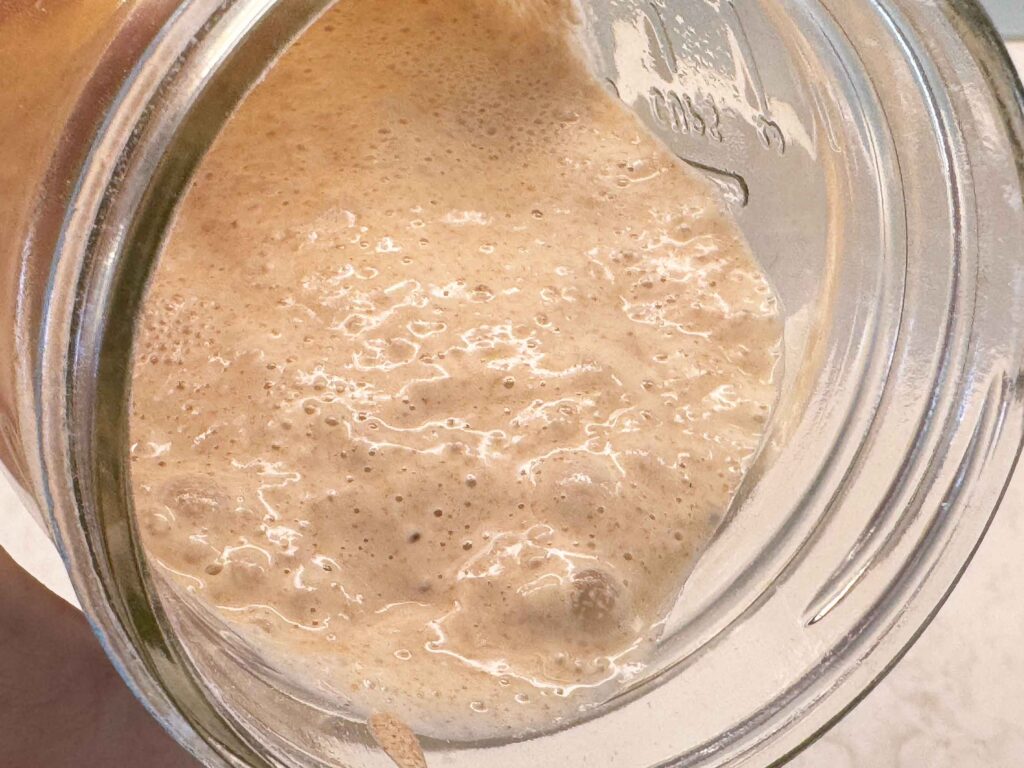
A sourdough starter is a living mixture of flour and water that captures natural wild yeast and beneficial bacteria from your environment. Instead of using store-bought yeast, this starter becomes what helps your bread rise. When it is active, bubbly, and recently fed, it is ready to use in your dough.
Sourdough Discard
Discard is the portion of starter you remove before feeding your sourdough starter again. This keeps the starter healthy and manageable in size. It is called “discard,” but it does not have to be thrown away. Many people use it in pancakes, crackers, muffins, biscuits, cinnamon rolls, pizza dough, and other recipes.
Autolyse
Autolyse is a resting period after mixing flour and water, before adding salt and starter. This short rest allows the flour to fully absorb the water and helps gluten begin developing naturally. It makes your dough easier to handle and improve the final texture of the bread.
Bulk Fermentation (Bulk Rise)
Bulk fermentation is the first major rise after all the ingredients are mixed together. During this stage, the dough ferments, develops flavor, and gains strength. This is usually the longest part of the sourdough process and often takes several hours, depending on the temperature of your kitchen.
Proofing
Proofing is the final rise after the dough has been shaped. During this stage, the dough relaxes and expands before baking. Proper proofing helps create good oven spring and a better crumb structure inside the finished loaf.
Score
Scoring means making shallow cuts in the top of the dough just before baking, usually with a sharp knife or bread lame. This gives the bread a controlled place to expand in the oven instead of cracking unpredictably. It also creates the beautiful rustic look many people love in sourdough bread.
Oven Spring
Oven spring is the quick burst of rising that happens during the first part of baking, when the dough hits the hot oven. The heat causes trapped gases inside the dough to expand rapidly, helping the loaf rise taller and develop a lighter texture. Good proofing, strong dough structure, and a properly preheated Dutch oven all help create better oven spring.
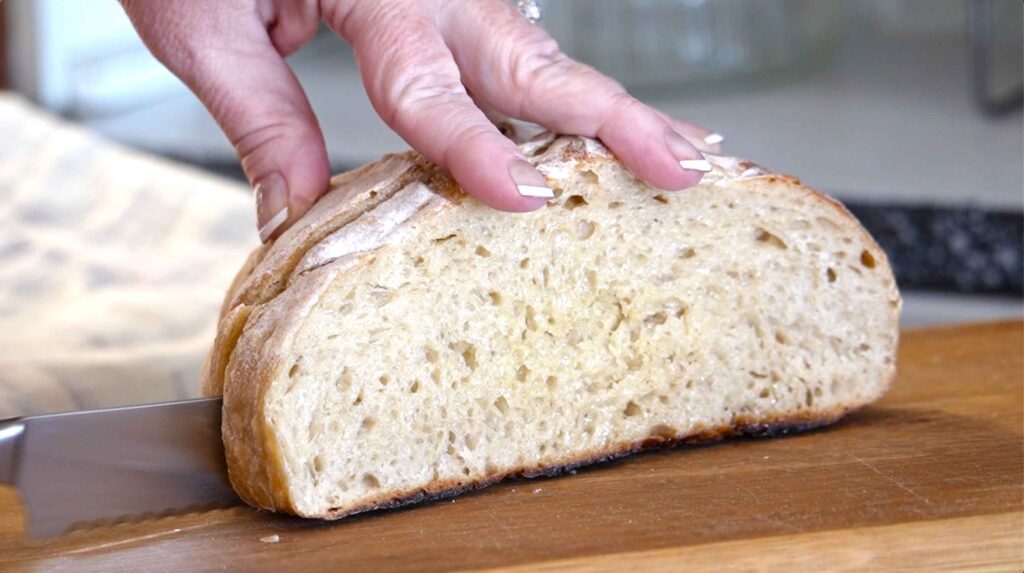
Crumb
Crumb refers to the inside texture of the bread once it is sliced open. It describes how tight or open the interior structure is, including the size and shape of the air pockets. A soft sandwich loaf usually has a tighter crumb, while artisan sourdough often has a more open crumb with larger holes. The crumb helps tell you a lot about how well the dough fermented and proofed.
How Long Does It Take For Sourdough Bread to Rise?
Bulk fermentation often takes 3 to 5 hours at room temperature, but cooler kitchens take longer. That can be confusing for beginners, and it certainly was for me. So instead, use dough cues (it will be puffy, airy, and slowly springing back when poked) instead of the clock, then do the overnight fridge proof I call for in my recipe for a more forgiving and reliable method.
Ingredients and Tools Needed
One of the things that stops many people from trying sourdough bread is the idea that it requires a lot of special tools. If you look online, you’ll see beautiful photos of baskets, scoring blades, proofing boxes, and all sorts of specialized equipment.
But sourdough bread was baked for hundreds of years with very simple tools. In fact, many home bakers start with nothing more than a bowl, a spoon, and a pot for baking.
If you’re just beginning, focus on the essentials. You can always add specialized tools later if you find that you enjoy baking sourdough regularly.
These are the only things you truly need to make a good loaf of sourdough bread.
Sourdough Starter
Your starter is the natural yeast that makes the bread rise. If you don’t have a starter yet, you can make one at home (it takes several days), get one from a friend, or buy one online. Before baking, feed your starter and use it when it doubles and looks bubbly and airy. Full guide: Active Sourdough Starter for Beginners.
Flour
Bread flour works best for beginners because it has higher protein, which helps create structure in the dough. All-purpose flour can also work.
Helpful Tip

Many people successfully bake sourdough with all-purpose flour, and the dough may simply feel a little softer. I use bread flour most of the time, however, as I prefer how it results in a chewier loaf of bread.
Water
Use filtered, bottled, or regular tap water. If your tap water has a strong chlorine smell, filtered water may work better, as it can weaken or even kill the yeast and beneficial bacteria needed for fermentation.
I also recommend you use warm water, not cold and not hot, but warm (ideally 80°F–90°F / 24°C–32°C) as it will aid in fermentation. Be careful not to go too hot, as water over 120°F will kill the yeast.
Salt
Salt strengthens the dough and enhances flavor. Most basic sourdough recipes use about 2% salt by weight of the flour. The best salt for sourdough bread are non-iodized, fine-grade salts, such as kosher salt or fine sea salt, as they will dissolve better.
Large Mixing Bowl
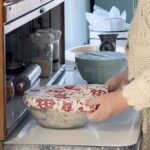
A sturdy glass, ceramic, or food-safe plastic bowl about 4-6 quarts will work for mixing and fermenting the dough. I do not recommend a metal bowl such as aluminum or copper as the acid in the dough can produce a metallic taste.
Kitchen Scale (Recommended)
Bread baking is most consistent when ingredients are measured by weight rather than volume. A simple digital kitchen scale makes this easy.
Baking Vessel
I bake sourdough in a Dutch oven because it traps steam and helps create a beautiful crust. I find the best size Dutch oven for this recipe to be 3.5 quarts, as it allows enough room for your bread to rise yet is small enough to trap the steam in the right places. If you don’t have a Dutch oven, you can use a covered oven-safe pot or even a baking sheet with a tray of water in the oven for steam.
Parchment Paper
This makes it easier and safer to transfer the dough into a hot baking vessel.
Helpful but Optional Tools
These tools can make the process easier, but they are not required to bake good bread.
Banneton (Proofing Basket)
This is a basket designed to hold shaped dough during its final rise. The ones made of a breathable material (like wood pulp, rattan, or cotton rope) also wick away moisture for a crispier crust. A bowl or colander lined with a smooth, thin, floured towel works almost as well.
Lame or Scoring Blade
A small razor blade used to score the dough before baking. A sharp knife can work too.
How to Make Sourdough Bread: A Step-by-Step Overview for Beginners
Making sourdough bread is a simple process built around time, fermentation, and a few basic ingredients. This two-page overview breaks the process into simple steps you can follow loaf after loaf. For more detail on each step, see the following pages.
Feed Sourdough Starter
Timing: Your sourdough starter should be active and bubbly before you begin mixing dough.
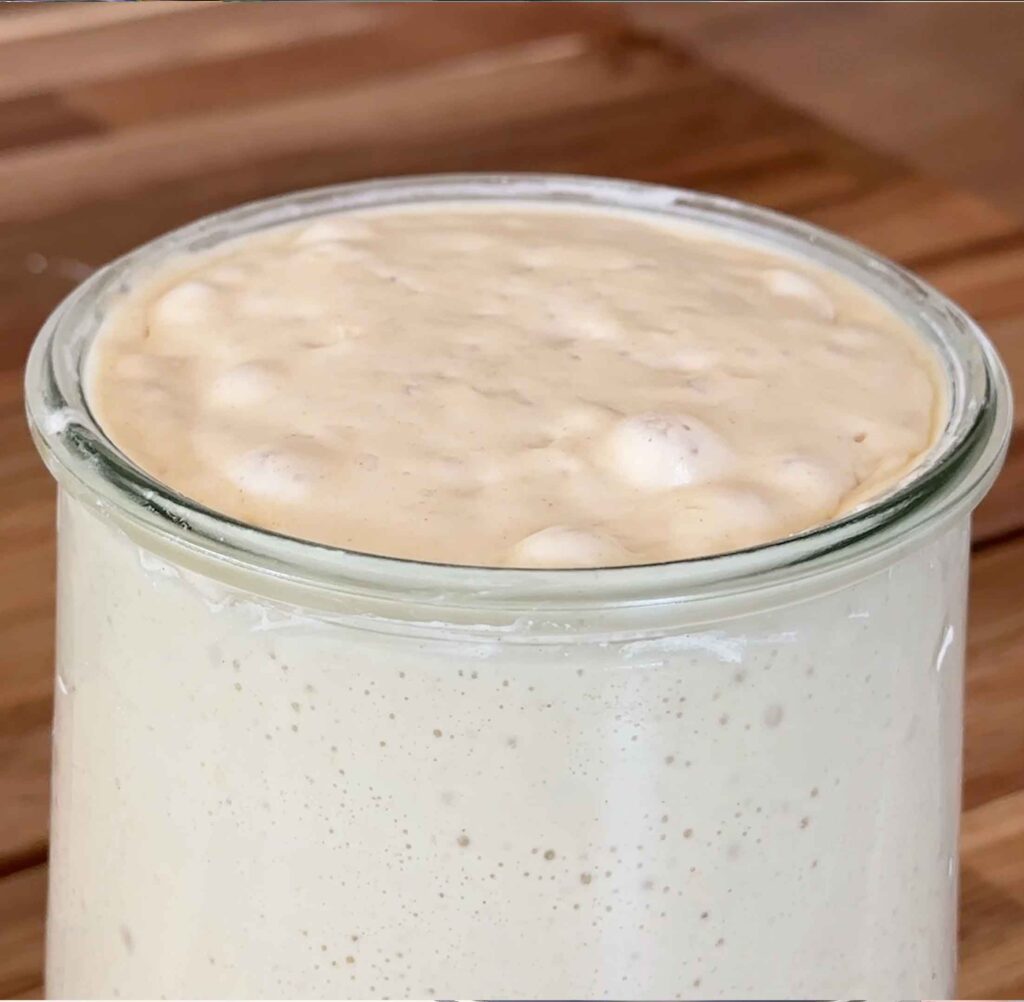
Feed your starter about 4–8 hours before baking so it has time to rise and become fully active. A ready starter will usually double in size and develop lots of small bubbles.
What to Remember: Your starter is the natural yeast that makes the bread rise. If the starter is weak, the dough will struggle.
Signs your starter is ready:
- Doubled in size
- Bubbly and airy (and if you stir it, you see a network of bubbles inside, not just on top)
- Passes the float test (a small spoonful floats in water)

Mix the Dough
Basic Ingredients:
- Active sourdough starter (best time to use it is right after it peaks)
- Water (should be warm, not cold and not hot)
- Flour (bread flour works well)
- Salt
Typical beginner ratio: 100 g starter / 350 g water / 500 g flour / 10 g salt
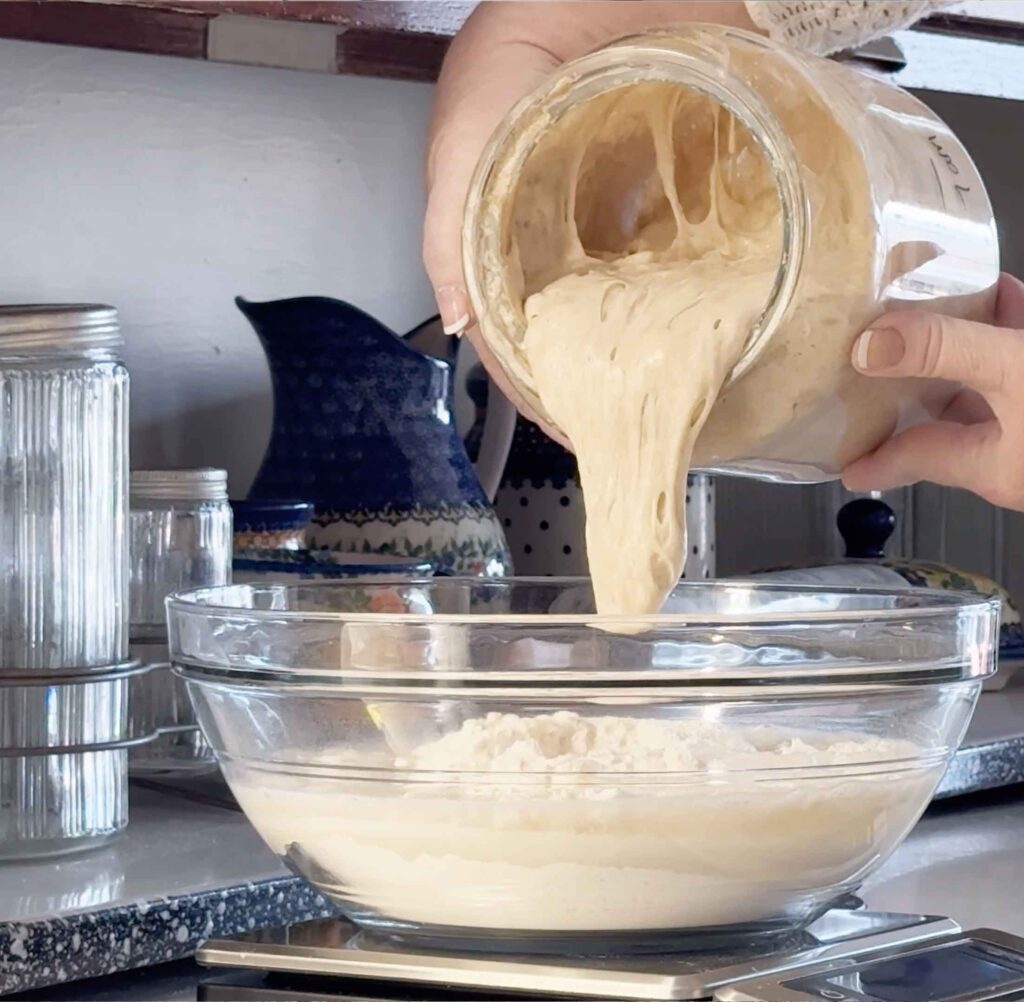
Process: Mix starter, water, flour, and salt together until no dry flour remains. Cover with a damp towel or plastic wrap, and let the dough rest for 30 minutes or less.
Why Autolyse Matters
This short rest helps the flour absorb water and begin forming gluten, and it also makes it easier to handle. This is like an autolyse stage, but we’re doing it with all ingredients mixed together at once to create a stronger dough.
Bulk Fermentation (with Stretch and Folds)
This is the main rising period for sourdough dough. Place the dough in a bowl in your kitchen at room temperature for 3–5 hours, depending on your kitchen temperature. During this time you will gently strengthen the dough using stretch and fold movements.
You do not need to knead this dough. The stretch-and-fold sets build strength over time.
Helpful Tip
To stretch and fold, lift one side of the dough and stretch it upward, then fold it back over the center. Rotate the bowl 90 degrees and repeat the stretch fold motion three more times. These gentle folds help the dough develop structure without heavy kneading.
Typical schedule: Stretch and fold every 30 minutes for the first 2 hours. After that, allow the dough to rest undisturbed.
What to look for:
- Dough becomes smoother and more elastic
- Dough increases in volume
- Surface becomes slightly puffy
Shape Dough
Once bulk fermentation is complete, gently turn the dough onto a lightly floured surface. Shape the dough by rolling it toward you, then folding the edges inward and tightening the outer surface so it holds its shape. This creates tension on the surface, which helps the loaf rise upward in the oven. Place the shaped dough seam-side up into a floured bowl lined with a tea towel, a banneton, or a proofing basket.
Final Proof
The shaped dough now rests again to finish rising.
Proofing options:
- Room temperature: 1–2 hours
- Refrigerator: overnight (8–12 hours) – this is my preference, and works really well
Cold proofing in the refrigerator slows fermentation and can improve flavor while making the dough easier to handle the next day.
What to remember: The dough should feel airy and slightly springy when gently pressed.
Bake the Bread
Preheat your oven to 450°F (232°C) with a Dutch oven inside, including the lid. The hot Dutch oven traps steam, which helps create the classic sourdough crust. I recommend at least one hour of pre-heating.
When ready to bake:
- Turn the dough onto a piece parchment paper. (If you did not do your final proof in the refrigerator, you may want to pop your dough into the refrigerator or even the freezer right for 30 minutes before you do this, as it will make it easier to score.)
- Score the top with a sharp blade or knife.
- Immediately, but carefully, place the dough into the hot Dutch oven.
Bake for 20 minutes covered, and then remove the lid and bake another 10–25 minutes uncovered.
The bread is done when the crust is deep golden brown and the internal temperature is around 205–210°F.
Cool the Bread
Allow the bread to cool completely before slicing. This step is important because the interior crumb (the texture inside) continues to set as the loaf cools. Cutting too soon can make the bread gummy.
Cooling time: At least 1 hour
Baking Schedule
Here’s what a typical sourdough baking day might look like — this is now my personal schedule (my times are in paretheses):
Early Morning (8:00 am): Feed your starter.
Midday (1:00 pm): Mix the dough once the starter is active and rest for 30 minutes
Early Afternoon (1:30 pm): Start three sets of stretch and folds, 30 minutes apart
Late afternoon (2:30 pm): Allow the dough to ferment
Evening (10 pm): Shape the loaf, then put in the refrigerator to proof.
The following day (anytime): Bake the bread.
Another common approach is to keep the shaped dough at room temperature in the afternoon and bake it that evening.
Beginner Sourdough Bread Recipe
Equipment
- 1 large mixing bowl
- 1 Dutch oven optional, but strongly recommended — use a 3.5 quart Dutch oven with a tight fitting lid for one loaf
- 1 digital scale optional, but strongly recommended
Ingredients
- 100 g active sourdough starter
- 350 g water
- 500 g bread flour
- 10 g salt
Instructions
- Feed your starter before you intend to bake by giving it an equal amount of bottled water and flour in a 1:1:1 ratio and use it soon after it doubles. You want to use it when it is bubbly and airy, and can pass a float test (a small spoonful floats in water).

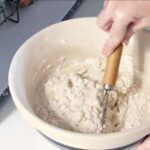
- Mix starter, flour, water, and salt until all combined, cover with a damp towel, and rest for 30 minutes for the flour to absorb the moisture.
- Stretch the dough upward from the bowl and fold the dough in toward the center, then rotate the bowl 90 degrees, and repeat. Do this a total of four times. Rest for 30 minutes.
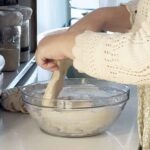
- Repeat the stretch and fold sets 2-3 more times, with 30 minutes in between.
- Cover the dough with a damp cloth or cover and allow it to rest at room temperature until puffy, which can take from 3-5 hours depending upon your room's temperature. If your room is too cool, it will take longer.
- Gently turn the dough onto a lightly floured surface and shape the dough by rolling it toward you, and then folding the edges inward and tightening the outer surface so it holds its shape. This creates tension on the surface, which helps the loaf rise upward in the oven. Place the shaped dough seam-side up into a floured bowl lined with a tea towel, a banneton, or a proofing basket.
- Cover the bread bowl/banneton/basket with plastic for its final proof. I HIGHLY recommend placing it in the refrigerator overnight for the best results, but you may also be able to leave it out at room temperature for a few hours instead. (Beginners, I recommend the refrigerator proofing step, as I think it is more forgiving.)
- Place your Dutch oven and lid into the oven and pre-heat to 450°F for at least one hour (this is really important for getting your bread to rise properly in the oven, so don't skip it). Keep the dough in the fridge until your Dutch oven is fully preheated.

- Place a piece of parchment paper on your work surface and turn your dough out onto it, seam side down. Dust it with flour (optional) and cut an expansion seam down the middle with a knife or lame. Immediately transfer the bread and parchment paper to the hot Dutch oven (carefully!!) and place the lid back on it and bake for 20 minutes.
- After 20 minutes, remove the lid and bake for another 10-15 minutes until the top is golden brown.
- Cool for at least one hour before slicing, as the bread will continue cooking as it cools and this is important.
Nutrition
Video
Notes
Frequently Asked Questions From Beginners
Sourdough baking can feel mysterious when you’re first getting started, but many of the questions beginners have are surprisingly common. Here are a few answers to the questions people ask most often when learning to bake sourdough bread.
When you do the float test, do you use cold or warm water?
Use room temperature or slightly warm water, not cold water. The float test is meant to check whether your sourdough starter is active enough to trap gas and help your bread rise. If you drop a small spoonful of starter into very cold water, it can sometimes sink even if the starter is ready, simply because the colder water is denser and can affect the result.
I usually use room temperature water from the tap. Gently drop in a small spoonful of starter – don’t stir it down. If it floats, it usually means the starter is full of air and ready to bake with. That said, the float test is only a guide, not a guarantee. I trust what I see more: if the starter has doubled after feeding, looks bubbly, and has a light, airy texture, it is usually ready whether it floats or not.
Is there any rule about using metal bowls or utensils?
Modern metal bowls and utensils are generally fine for sourdough. A lot of older advice warns against metal because people worried it could react with the acidity of the starter, but with modern stainless steel bowls and spoons, that is usually not a problem at all. The main thing to avoid is reactive metals like aluminum, cast iron, or copper for long-term contact with your starter, since the acid can react with them and affect both flavor and the container itself. Cast-iron Dutch ovens are just fine for baking, however.
For everyday mixing, feeding, and baking of sourdough, glass, ceramic, food-safe plastic, and stainless steel all work well. What matters most is keeping your tools clean and your starter healthy—not whether your spoon is metal.
Why is my dough “soupy” and spreads out when I go to bake it?
A runny or floppy dough usually means the dough has too much hydration for its structure, the gluten is underdeveloped, the flour is too weak, or the dough has been overproofed. Since I follow my recipe closely and use bread flour (which is a stronger flour with better gluten development, and why I recommend it in this recipe for beginners) this usually means I let the dough ferment too long, either on the counter or in the refrigerator.
Can you save overproofed, soupy dough?
Yes, usually, but it depends on how far it has gone. If your dough is very loose, sticky, and spreads like pancake batter, it may be overproofed or simply overhydrated. If the gluten structure has mostly broken down, you usually cannot turn it back into a tall artisan loaf with strong oven spring, but you can still make good bread from it. Here are a few ways to save it:
- Gently reshape it and place it in a loaf pan for support instead of baking it free-form
- Chill it in the refrigerator for a few hours to firm it up and make it easier to handle
- Turn it into focaccia, where a softer dough actually works beautifully
I encounter this when I leave extra dough in the refrigerator for a few days longer than planned. It may not rise as high, but it still bakes into perfectly good bread with great flavor. A loaf pan is usually the easiest rescue.
Why is the bottom too brown and hard to cut?
The most common reason is that the bottom of your Dutch oven got too hot during preheating. Cast iron holds heat extremely well, and when the dough sits directly on that very hot surface, the bottom can brown faster than the rest of the loaf. This can also happen if your oven runs hot, the rack is placed too low, or the bread bakes too long uncovered. A few easy fixes help:
- Move your oven rack to the center instead of the lower third
- Place a baking sheet on the rack underneath your Dutch oven to diffuse some of the direct heat
- Reduce the oven temperature by 15–25 degrees if your oven tends to run hot
- Try a dozen rice kernels under your parchment paper
- Shorten the uncovered baking time slightly if the crust is already well browned
I’ve found that putting a simple sheet pan under the Dutch oven is often the easiest fix. It helps protect the bottom without changing the rest of the recipe.
Why is my sourdough bread dense?
Dense sourdough bread usually means the dough didn’t ferment long enough or the starter wasn’t active enough. Make sure your starter doubles in size after feeding and shows plenty of bubbles before using it. Also allow enough time during bulk fermentation for the dough to become puffy and airy before shaping.
Why didn’t my bread rise in the oven?
If your loaf spreads instead of rising upward, a few things could be happening. The starter may have been weak, the dough may not have developed enough strength during fermentation, or the dough may have fermented too long and lost structure. Good shaping and a hot oven also help improve oven spring. For example, I left some shaped dough in the refrigerator for seven days (because I had to go out of town) and when I baked it, it was a bit flatter because it fermented too long.
Why does sourdough bread taste sour?
The sour flavor comes from natural acids created during fermentation. Longer fermentation usually produces a stronger sour flavor. If you prefer a milder loaf, shorten fermentation slightly or bake the dough the same day rather than proofing it overnight in the refrigerator. My seven-day-old dough was definitely more sour tasting than the fresh dough, due to the longer fermenting time.
Why does my sourdough bread taste mild?
This can happen if you underproof your bread. Be sure to give it enough time during the bulk fermentation phase. I highly recommend putting it in the refrigerator overnight for the best results. Those times I didn’t put it in the refrigerator it always tasted milder and also seemed softer, but we prefer to actually taste the sourdough flavor and have a more structured loaf.
Do I have to bake sourdough every day to keep a starter?
No. If you bake frequently, you can keep your starter on the counter and feed it daily. If you bake only occasionally, you can store it in the refrigerator and feed it about once a week. Simply remove it from the refrigerator and feed it once or twice before baking to restore activity. I keep mine in the refrigerator, then take it out to feed it, using it to mix and shape three dough loaves, which I then keep in the refrigerator and bake throughout the week as needed.
How do I know when my dough is ready to bake?
Well-fermented dough usually looks slightly puffy and airy. If you gently press the dough with a finger, the indentation should slowly spring back rather than collapsing immediately. With experience, these visual cues become easier to recognize. It took me a few loaves before I got the hang of this!
Why do I have to let the bread cool before slicing?
Fresh bread continues to finish cooking inside after it comes out of the oven. If you cut it too soon, the crumb can become gummy or compressed. Allow the loaf to cool for at least an hour so the interior structure has time to set properly. I know it can be hard to resist, but it’s worth the wait.
How can I get a more open crumb?
A more open crumb usually comes from a combination of stronger gluten development, proper fermentation, and gentle handling. A few things help most:
- Use bread flour instead of all-purpose flour for stronger structure
- Make sure your starter is very active and bubbly before mixing the dough
- Allow enough bulk fermentation so you get a good dough rise, but don’t let it overproof
- Use stretch-and-folds during bulk fermentation to build strength
- Handle the dough gently when shaping so you do not press out all the trapped air
- Bake in a fully preheated Dutch oven so you get strong oven spring
Higher hydration dough can also create a more open crumb, but it is harder to handle and easier to overproof. I usually tell beginners to focus on fermentation and dough strength first, because that makes a bigger difference.
Sometimes people chase giant holes, but for everyday bread, I care more about a loaf that rises well, slices nicely, and still has a soft, airy interior.
What should I do with extra sourdough starter?
Extra starter can be used in many recipes such as sourdough cinnamon rolls, pancakes, waffles, crackers, soft buttery biscuits, and pizza dough. Many bakers, including yours truly, keep a small container of starter discard in the refrigerator and use it in these recipes throughout the week.
Will my first loaf be perfect?
Probably not, and that’s completely normal. While my first loaf was really good, I’m sure an experienced baker could have found issues … but I did not care. I was over the moon excited about my first loaf!
Sourdough baking improves quickly with practice. Each loaf helps you learn more about how your starter behaves, how your kitchen temperature affects fermentation, and how the dough should look and feel at each stage.
With a little patience, most beginners find that sourdough becomes easier and more enjoyable with every loaf they bake. I certainly have! Here is my 8th loaf, and the best one yet.
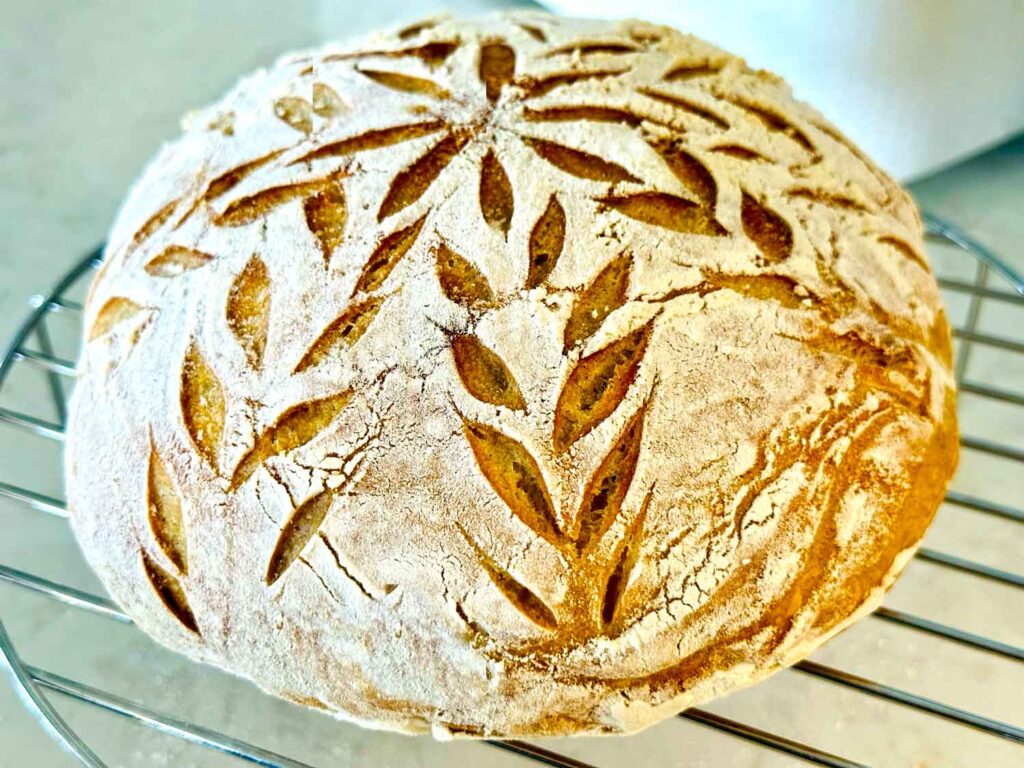
I was so excited about this one that I sent a photo of it to my mom, my aunt, and my sister!
And here is my 12th loaf … this one I am actually taking to family gathering so they can taste it themselves.

What else do I need to know?
As it turns out, sourdough bread baking is a deep subject. But it’s best to stick with the basics when you are learning, and then when you feel confident, you can try new things and new tools!


Want to Save This Recipe?
Enter your email below and we’ll send it straight to your inbox! Plus you’ll get new recipes each week!
")

")

Meet Jennifer
Jennifer cooks and experiments in the kitchen at Maker Farm, where she focuses on simple pantry cooking, homemade staples, and practical recipes that make everyday meals easier. Over the years she has tested many ways to make cooking simpler and more dependable, and shares the methods that work best in her own kitchen, occasionally showing them on her Heart to Home at Maker Farm vlog.
I used this recipe and my husband isn’t a sourdough fan. LOL I told him the rolls he takes two of on cruises are sourdough. He ate a slice yesterday and said it was good.
Happy to hear he liked it. 🙂
Thank you so much for the detailed instructions, it is so helpful for beginners just like myself! Can you tell me if my 3 quart Dutch oven is too small, or my 5 quart is too large for this sourdough bread recipe? Of course, I do not have a 3.5 quart, lol!
A 3-quart Dutch oven is usually a little too small for a full sourdough boule, while a 5-quart Dutch oven is completely fine and actually what many people use.
For this recipe, I’d choose the 5-quart over the 3-quart every time.
A 3-quart pot can work for a smaller loaf, but with this recipe, the dough may not have enough room to expand properly. It can crowd the sides, limit oven spring, and sometimes create a taller but denser loaf.
A 5-quart Dutch oven gives the bread enough space to rise while still trapping the steam that helps create that crisp crust. It is not too large at all.