A mild yet hearty bean chili made from pantry staples, with deep flavor from spices and a secret ingredient: coffee! This is a no-meat chili that’s filling, comforting, and surprisingly rich without needing anything fancy.

Why Add Coffee to Chili?
I know this sounds unusual (even weird), so let’s talk about it. Strong coffee adds:
- depth
- a slight bitterness (in a good way!)
- a richer overall flavor
Coffee helps because chili has:
- tomatoes (which are acidic)
- beans (which are mild)
And coffee bridges that gap. It rounds everything out so it doesn’t taste sharp or flat.
You will NOT taste coffee directly. You’ll just notice that the chili tastes more complete, more complex.
And once you try it, it’s hard to go back. I’m serious. Just try it and you’ll see!

Want to Save This Recipe?
Enter your email below and we’ll send it straight to your inbox! Plus you’ll get new recipes each week!
How This Coffee Chili Came to Be
If you had told me I’d be putting coffee into chili, I probably would have looked at you a little funny.
And yet… here we are.
I made this during my $50 meal challenge, when I was trying to stretch simple ingredients into real meals that actually tasted good. Beans, tomatoes, onions… that part was easy.
But I couldn’t afford ground meat in my budget this week, and I was concerned it would be boring … I wanted it to taste like more than just beans.
So I started experimenting. (I do a lot of that when I’m puttering around the kitchen.)
And when I added coffee?
Everything changed.
Not in a “this tastes like coffee” way. Don’t worry about that. No, it made the chili taste deeper, richer, more like something that had been cooking all day… even when it hadn’t.

What Kind of Coffee You Need
This part matters more than you might think, so let’s keep it simple.
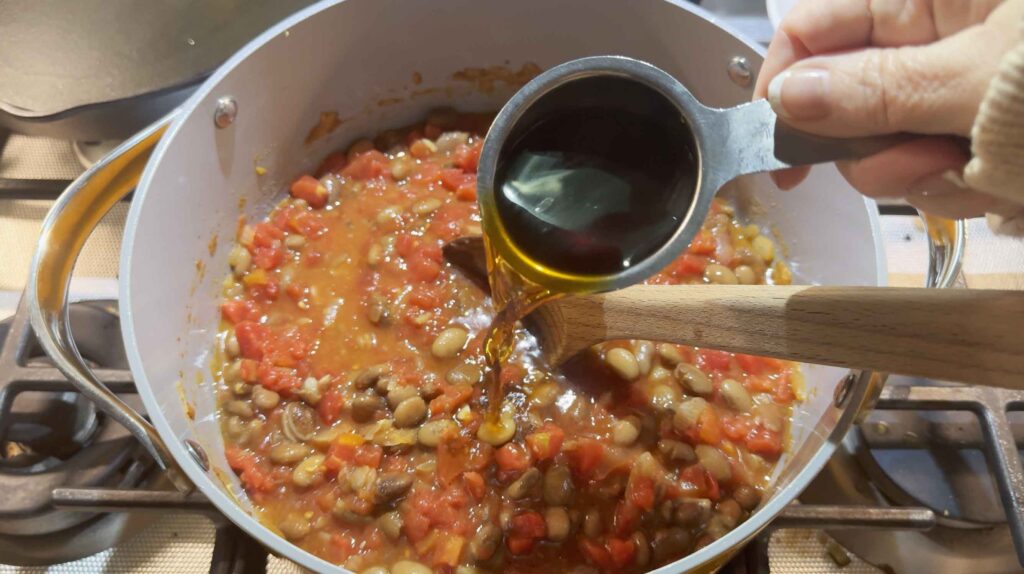
Use brewed coffee, not grounds
Let me repeat that for clarity: You’ll want to use brewed coffee, not coffee grounds.
Make sure you don’t add dry grounds directly to the chili. That won’t dissolve properly and will give you a gritty texture. (Ask me how I know…)
Go with strong coffee
I recommend using strong coffee here. This helps because the flavor needs to stand up to:
- tomatoes
- spices
- beans
If the coffee is too weak, you won’t get the depth you’re looking for.
What type works best?
You don’t need anything fancy.
- Regular ground coffee you already drink works perfectly
- A medium or dark roast tends to work best
- Avoid flavored coffees
I think darker coffee blends better into the chili and gives you those deeper, slightly earthy flavors.
COFFEEEEE!

I use coffee brewed from Café el Morro ground coffee, which is a dark-roast espresso coffee. It is perfect (and also inexpensive). But any strong coffee will do!
How much to use
Start with:
- ½ cup brewed coffee
Then taste it.
You can go up to:
- 1 cup per batch of chili
Don’t worry if you’re unsure. Just start smaller and adjust. This is totally normal when you’re working with a “secret ingredient” like this. (I know it’s not really secret, but if you don’t tell anyone and they just rave about your chili, then it is a secret for you!)
Chili Recipe with Coffee
Equipment
- 1 large pot
Ingredients
- 4-5 cups cooked beans, drained and rinsed (pinto, kidney, or black beans are all good — canned or cooked is also fine)
- 1 onion (chopped)
- 2 cloves garlic (minced)
- 1 can 28 oz petite diced tomatoes, undrained
- 2 tablespoons butter or oil
- 2 cups chicken stock or broth
- 1/2 cup strong coffee, brewed (can use up to 1 cup)
- 2 tablespoons ketchup (optional but helpful)
- 1½ teaspoons chili powder (increase if you want more heat)
- 1 teaspoon cumin
- ¾ teaspoon paprika
- ¼ teaspoon oregano
- ¼ teaspoon black pepper
- ⅛ teaspoon cinnamon
- 1 teaspoon salt to taste
- 1 bay leaf
- 1 chopped chili pepper (optional, if you want heat)
- 1/2 teaspoon crushed red pepper (optional, if you want heat)
Instructions
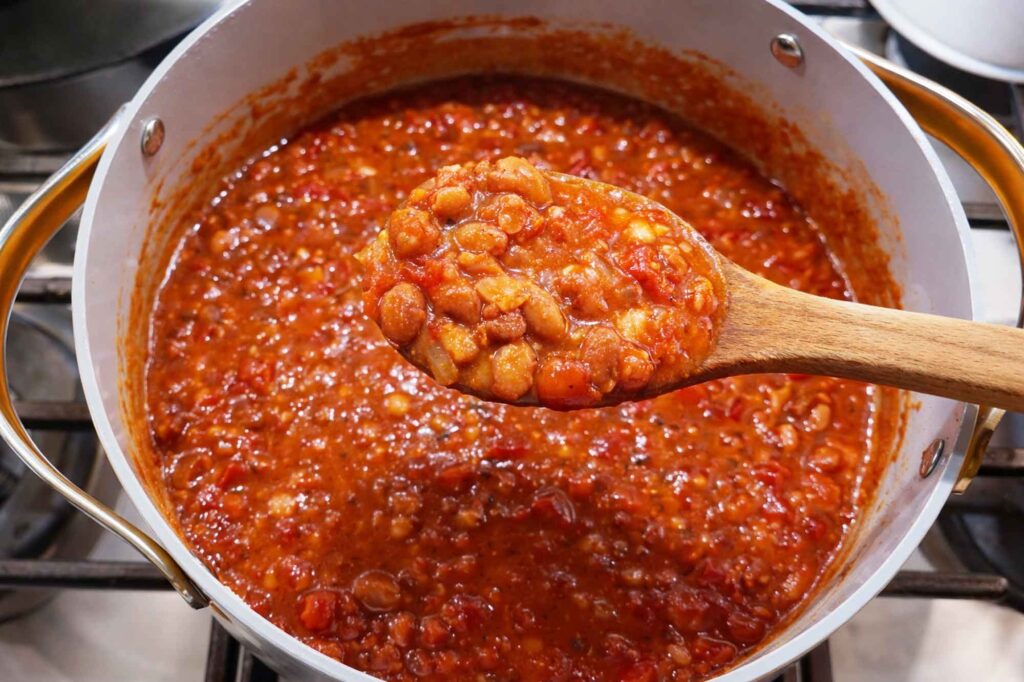
- Build the baseIn a pot: Melt butter and cook onion for 5–7 minutes. Add garlic, cook 1 minute.
- Bloom the spicesAdd all spices and stir for 1–2 minutes. This step matters as it wakes everything up
- Add everything elseStir in: cooked beans, tomatoes, broth, coffee, ketchup, and a bay leaf.
- SimmerLet simmer 30 minutes, stirring occasionally. You can continue cooking for 60 minutes total if you get busy. Mash a few beans if you want it thicker.
- Taste and adjustNeeds depth → tiny bit more coffeeToo acidic → pinch of sugarToo thick → add waterToo thin → simmer longer
- Serve and enjoy!Remove bay leaf before serving.
Nutrition
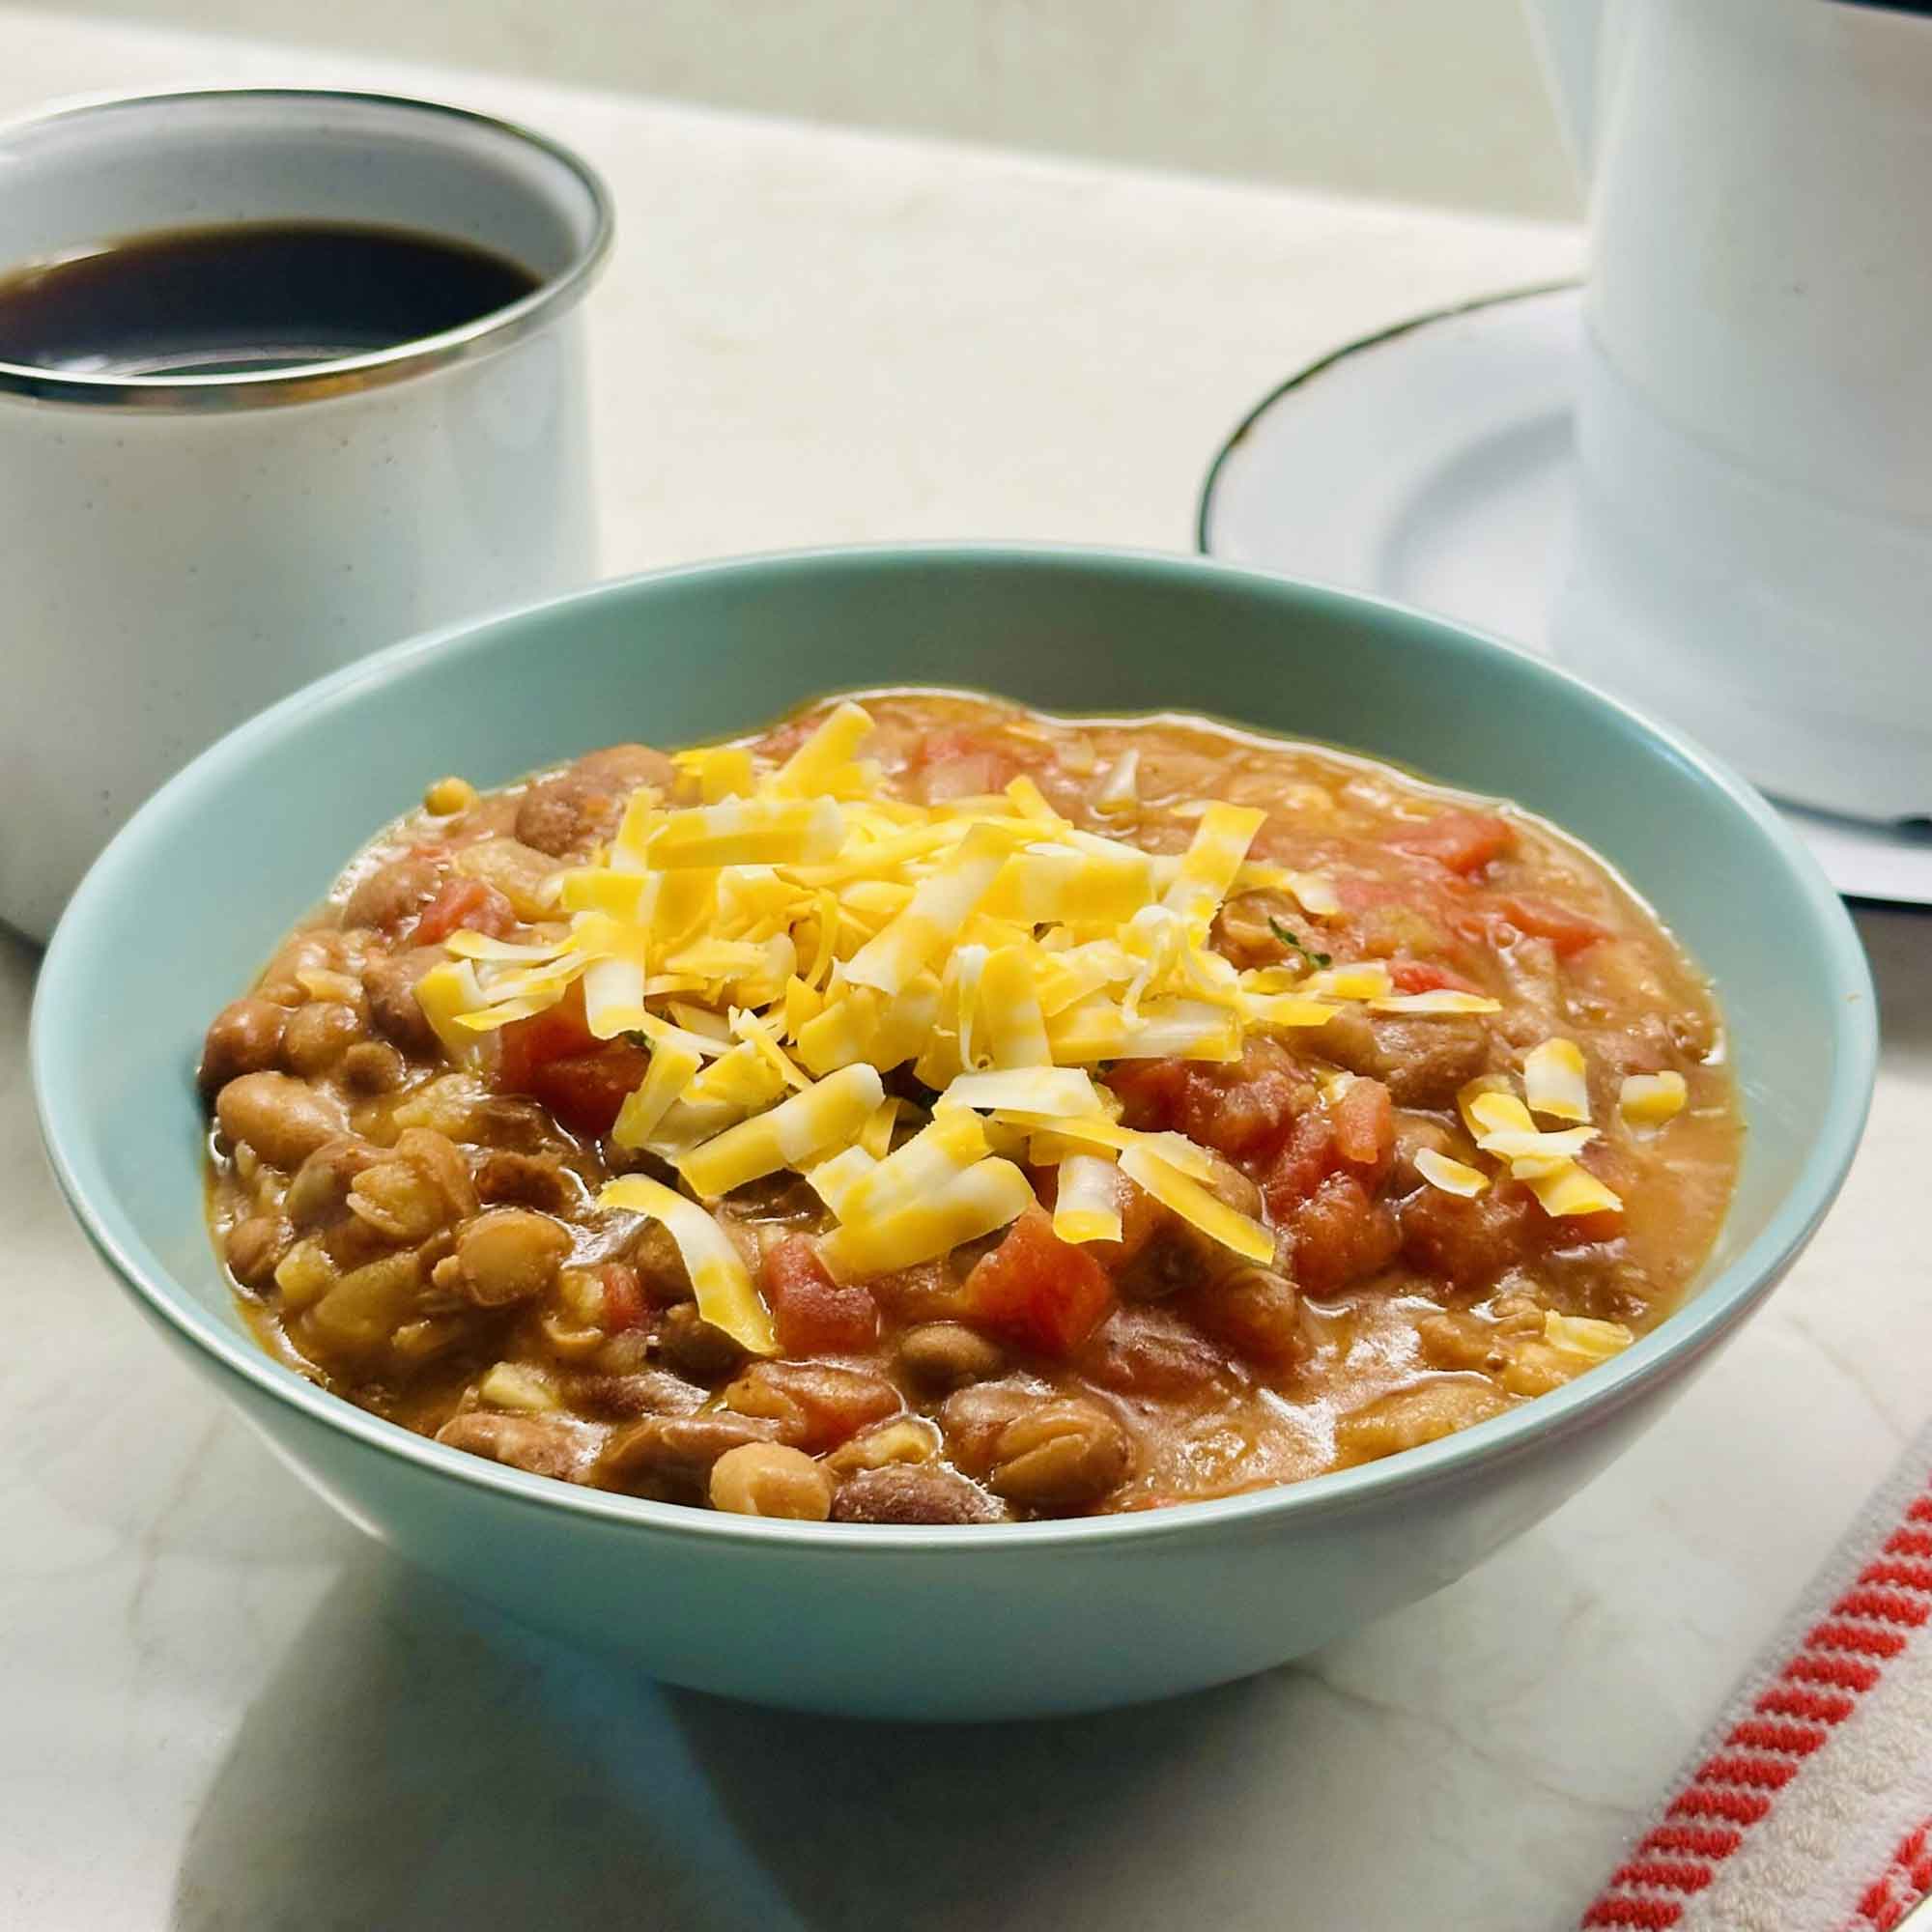
What This Chili Tastes Like
This chili is rich, hearty, and slightly smoky and warm. SO GOOD.
The coffee doesn’t stand out on its own, but it makes everything else taste stronger and more balanced.
It tastes like something that took more effort than it actually did. That’s always my favorite part!
Helpful Tip

One common mistake is adding too much coffee right away. Make sure you don’t pour in a full cup unless you’ve made this before.
Start with ½ cup, let it simmer, then decide if you want more.
This helps because coffee is powerful. A little goes a long way, and it’s much easier to add than to take away.
Can You Use Instant Coffee Instead?
Yes, you can use instant coffee instead of brewed coffee, you’ll just want to dissolve it first so it blends smoothly.
Stir 1–2 teaspoons instant coffee into ½ cup hot water until fully dissolved, then add it to your chili as you would brewed coffee.
I recommend starting with 1 teaspoon and adjusting to taste, since instant coffee is more concentrated and can taste a bit sharper. If the flavor feels too strong, you can balance it with a splash of water or a tiny pinch of sugar.
How About Espresso Powder in Chili?
Yes, espresso powder works really well here, and it’s actually one of the easiest options. Because it’s concentrated and dissolves smoothly, you only need a small amount.
Start with ½ teaspoon espresso powder for the whole pot, then taste and go up to 1 teaspoon if you want a deeper flavor.
You can stir it directly into the chili with your liquid or dissolve it in a little warm water first.
Don’t worry, it won’t make your chili taste more like coffee, it just deepens everything and brings out those richer, slightly earthy flavors.

Variations You Can Try
One of the things I like about this chili is how flexible it is. Once you understand the base, you can adjust it to whatever you have on hand. Here are a few easy variations you can try:
Add meat (if you want it)
If you’re not keeping this meatless, you can absolutely add:
- ground beef
- ground turkey
Just be sure to brown it in your large pot before adding the onions. This helps because it builds flavor right from the start. I personally prefer to add one pound of ground meat in my chili, and the only reason I didn’t include it in this recipe is because of my $50/week challenge right now and no ground meat in the house!
Change up the beans
I used pinto beans here (from the same batch I turned into my old-fashioned brown beans recipe), but you can totally swap or combine:
- black beans
- kidney beans
This is a really simple way to use what you already have without changing the recipe much.
Make it in a slow cooker
You can turn this into a slow cooker chili pretty easily. After sautéing the onion, garlic, and spices:
- transfer everything to your slow cooker
- cook on low heat for 6–8 hours or high for 3–4 hours
Don’t worry if it seems a little thin at first, it will thicken as it cooks.
Add a little something extra
If you want to experiment just a bit more, you can try:
- a spoonful of tomato paste for deeper flavor
- a small pinch of cocoa powder (very much like Cincinnati chili, but just a touch) — I love to put cocoa powder in my turkey chili
- a squeeze of lime juice at the end to brighten it
These are all optional, but they can shift the flavor in interesting ways.
Make it your own
You can also adjust:
- the spice level (I’m a mild spicy girl, but add all the heat you want!)
- the thickness
- the balance of beans to liquid
Whatever works for you. This is one of those recipes where a little experimenting really pays off!
How to Serve It
You can serve this:
- on its own
- over rice
- with bread
I’ve even had it over a baked potato, which was really good. Whatever works for you.
Best Chili Toppings
I added a little shredded Colby Jack to my bowl of chili, but there are so many more delicious things to try:
- Sour cream (the classic)
- Shredded cheese – in addition to Colby Jack, I like Pepper Jack and sharp cheddar, too!)
- Fresh cilantro
- Diced onions
- Green onions or scallions
- Tortilla chips
- Saltines
- Jalapeños
- Diced avocado
- Lime wedges
- Crumbled cornbread
- Pickled red onion
- Hot sauce
- French fried onions
- Pico de gallo
- Guacamole
How to Store Your Chili
This chili stores really well, which is one of the reasons I like making a full pot of it.
Before you store it, you’ll want to let the chili cool down a bit.
Don’t worry if it’s still slightly warm, that’s okay. Just make sure it’s not piping hot when you put it away. This helps prevent condensation, which can water it down.
Transfer your chili to an airtight container and place it in the refrigerator. It will keep well for 3 to 4 days
Make sure the lid is sealed well. This helps because chili can absorb other flavors in the fridge, and we don’t want that.
It’s even better the next day!
This is one of those meals that gets better with time.
The next day, the flavors have had more time to blend together, and the chili usually tastes richer and more balanced. I’ve found this is when it’s at its best.
Reheating
To reheat:
- warm it in a saucepan over low heat, stirring occasionally
- or microwave in short intervals, stirring in between
If it thickens too much (which it probably will), just add a small amount of water to loosen it up.
Can you freeze it?
Yes, you can! Let the chili cool completely, then store it in an airtight, freezer-safe container. It will keep for up to 3 months.
When you’re ready to use it, thaw in the refrigerator overnight and reheat gently.
One More Thing
This is one of those recipes that came out of necessity, but turned into something I’ll keep making.
It uses simple ingredients. It stretches well. And it actually tastes good.
If you try it, I’d love to know what you think. And if you decide to go all the way to a full cup of coffee, definitely tell me how that turns out… because I’m still experimenting, too.
Tried this recipe?
Tap the stars in the recipe card to leave a quick rating. Your rating helps other home cooks know this recipe works in a real kitchen, not just mine. And as a thank-you for your feedback, you will immediately receive a free printable copy of my cookbook, featuring my most popular recipes, each one formatted on a SINGLE, easy-to-use page, a perfect kitchen companion for easy meal prep.
More Recipes From My $50/Week Challenge
")

")

Meet Jennifer
Jennifer cooks and experiments in the kitchen at Maker Farm, where she focuses on simple pantry cooking, homemade staples, and practical recipes that make everyday meals easier. Over the years she has tested many ways to make cooking simpler and more dependable, and shares the methods that work best in her own kitchen, occasionally showing them on her Heart to Home at Maker Farm vlog.
This recipe was easy and tasted delicious!
So happy to hear it, Cheryl!
Love, love, love this chili.