
My cheeseburger slider recipe combines browned beef, melty cheddar, a pickle, and a tangy burger sauce, all baked into one pan of soft Hawaiian rolls. They taste like real little cheeseburgers instead of mini sloppy joes, and the bottoms stay sturdy instead of soggy. One skillet and one baking dish feeds a crowd.
Cheeseburger Sliders At A Glance
Prep
15 min
COOK
15 min
BAKE
12 min
TOTAL
45 min
MAKES
12 sliders
Main ingredients: Ground beef, Hawaiian rolls, cheddar cheese, dill pickle chips, onion
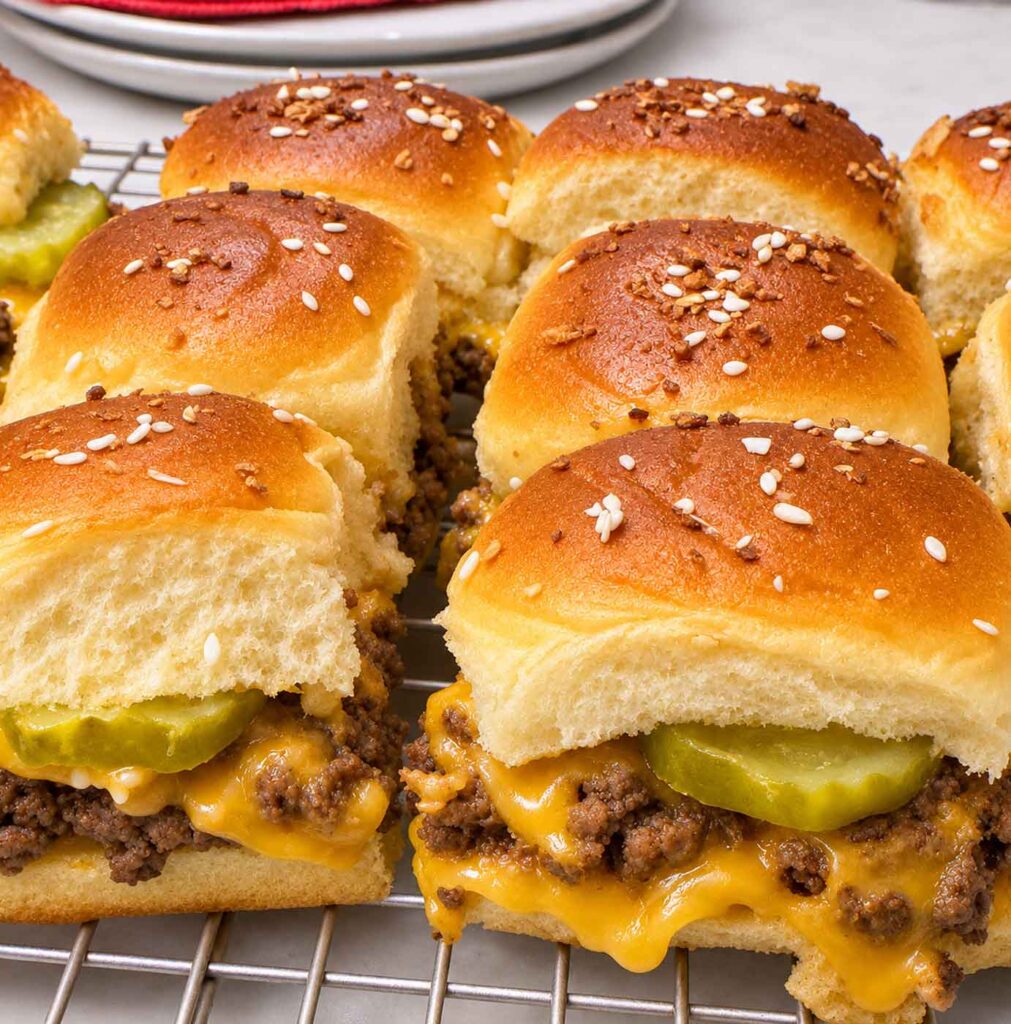
How I Made a Better Cheeseburger Slider

Most of the cheeseburger slider recipes I’ve tried have the same problem. The beef gets crumbled, cooked until it’s gray, and piled onto the rolls, so the sliders end up tasting more like a sloppy joe than a burger. And a lot of people complain about soggy bottom buns.
So I made three changes in my recipe. I browned the beef hard so it got a real crust, I stirred some burger sauce into it to hold it together, and I toasted the bottom buns before building anything on them.
It totally works!
The bottoms aren’t soggy at dinner OR the next day and every slider comes out of the pan in one piece. The leftovers are just amazing.
Let’s dig in!

Tips and Notes Before You Start
- A crust on the beef is the flavor. Those dark, crispy bits are what make these taste like a cheeseburger.
- Don’t skip the sauce. The sauce holds the burger together so it isn’t all crumbly!
- Toasted buns plus a cheese layer means no soggy bottoms. The dry bun and the cheddar keep the beef juices out of the bread.
- Foil goes on early. Sweet rolls brown fast, so cover them as soon as the tops are golden.

Want to Save This Recipe?
Enter your email below and we’ll send it straight to your inbox! Plus you’ll get new recipes each week!
What You’ll Need for Cheeseburger Sliders
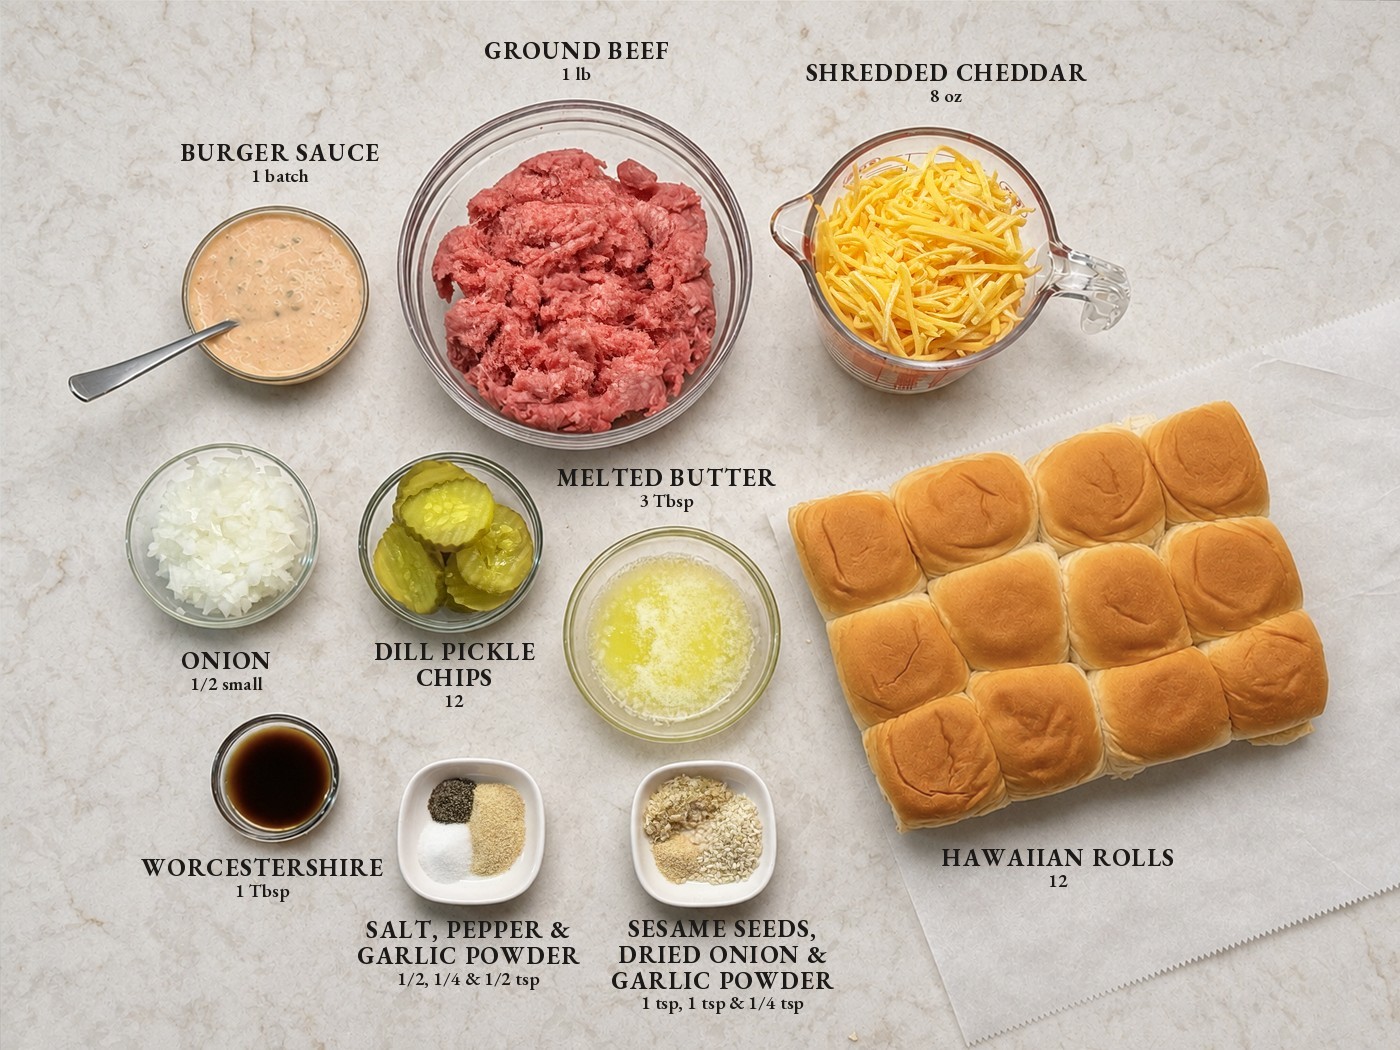
Hawaiian rolls. Any soft slider roll works. I used a 12-count slab of King’s Hawaiian rolls, cut from the 24-pack. Just be sure to keep them attached, if you can. Slider buns that come already split work too: set the bottoms in the pan touching each other, build the same way, and give each slider its own top before you butter them.
Ground beef. 80/20 or 85/15. The fat helps it brown, and you’ll pour off the extra.
Cheddar. Sharp or medium, shredded. Grating it from a block melts a little smoother, but bagged is fine.
Dill pickle chips. One per slider. Pat them dry so they don’t drip onto the buns.
Onion, Worcestershire, and seasonings. Half a small onion, finely diced, plus Worcestershire sauce, garlic powder, salt, and pepper. The Worcestershire adds that deep, savory burger flavor.
Garlic butter topping. Melted butter with a little garlic powder, brushed over the tops, then sprinkled with sesame seeds and dried minced onion. The dried onion toasts in the oven and smells like a burger joint.
The Burger Sauce
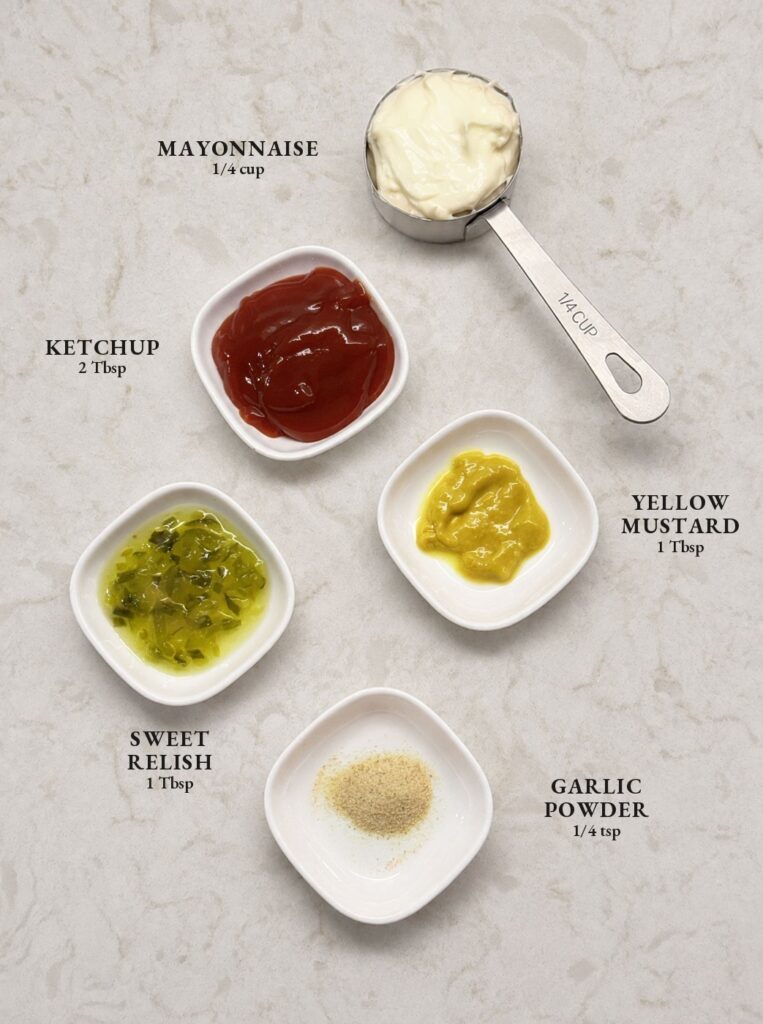
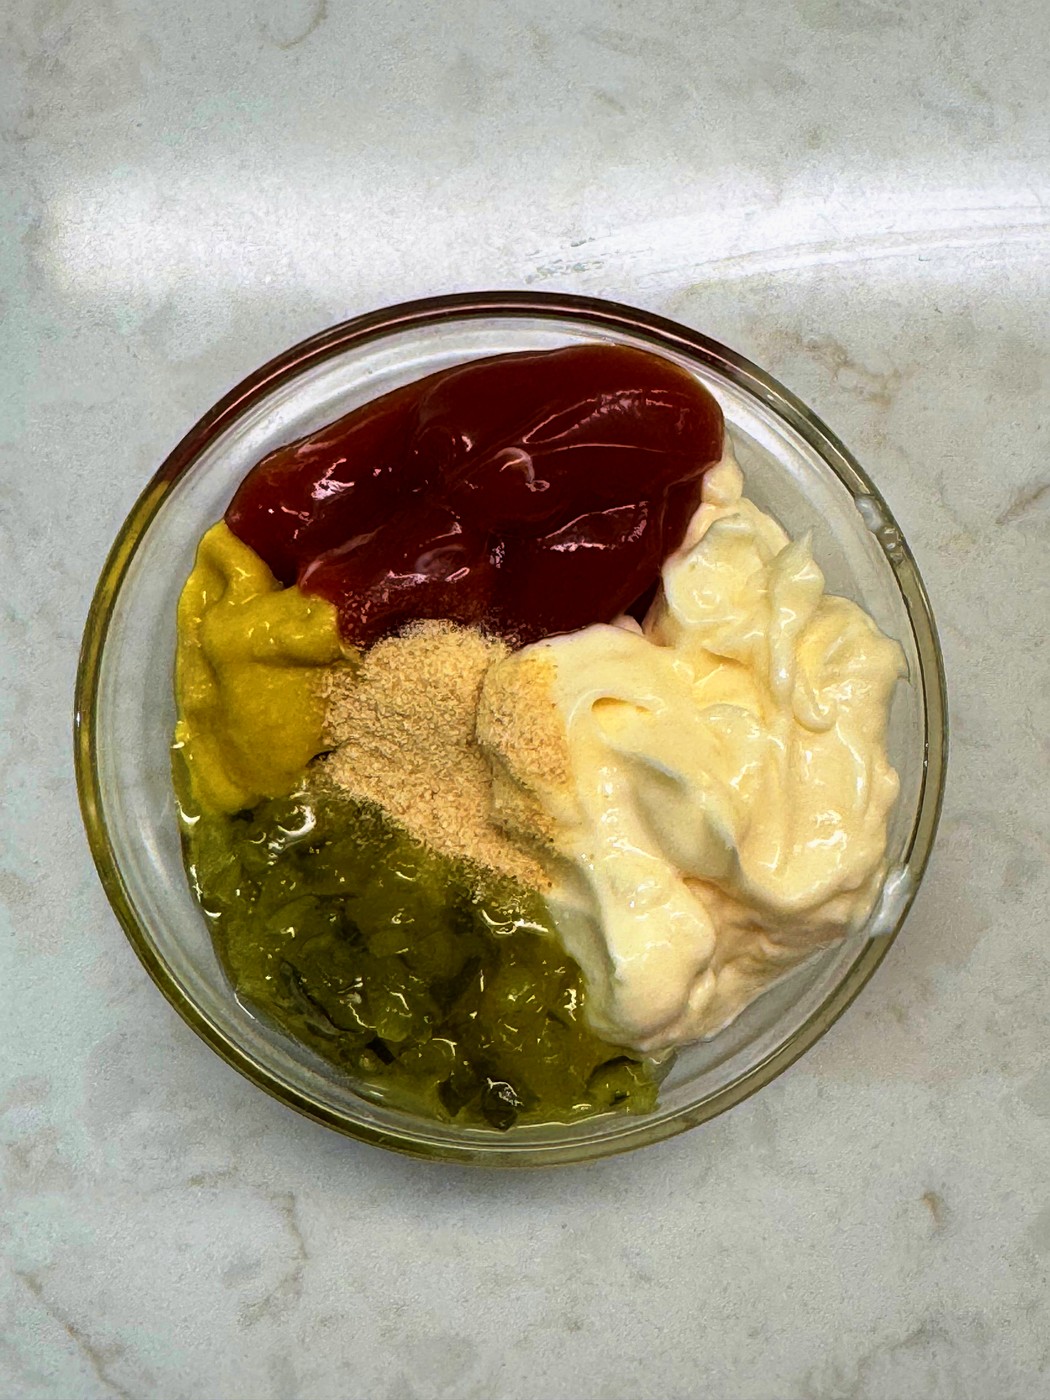
It’s just mayo, ketchup, yellow mustard, sweet pickle relish, and a pinch of garlic powder. I use my own homemade sweet pickle relish, but store-bought is fine. Don’t worry about the mustard taking over. There’s only a tablespoon, and next to the cheese and sweet rolls it just reads as a little tang. Part of the sauce gets stirred into the beef, and the rest is spread on the top buns.
Can I Make Cheeseburger Sliders Lactose Free?
Yes. Aged cheddar is naturally very low in lactose, and lactose-free shredded cheese is easy to find. For the topping, use lactose-free butter or a little olive oil. Most Hawaiian rolls contain milk and butter, so check the label or use a dairy-free slider roll if you need to avoid it completely.
LACTOSE FREE TIP
A member of my community (Rose B.) asked me recently how I make my recipes lactose free. In addition to using lactose free ingredients whenever I can find them, I use a lactase enzyme, which you’ll find in the digestive health aisle or online. Just add the drops to a carton of milk, cream, or half-and-half (follow the amount on the package, since brands vary), give it a gentle shake, and let it sit in the fridge for about 24 hours. The enzyme breaks the lactose down into simple sugars your body can digest, so the milk will taste a little sweeter. That’s totally normal! Drops only work on liquid dairy before you cook with it. They can’t treat cheese, butter, or a dish that’s already made. For those, lactase tablets taken with your first bite are the easier option.
How to Make Cheeseburger Sliders
Heat your oven to 350°F with a rack in the middle, and line a 9×13 baking dish with parchment. We’re really making these in two stages: crusty, saucy beef in the skillet, and then a buttery tray of sliders in the oven.
Step 1: Slice the rolls and toast the bottoms
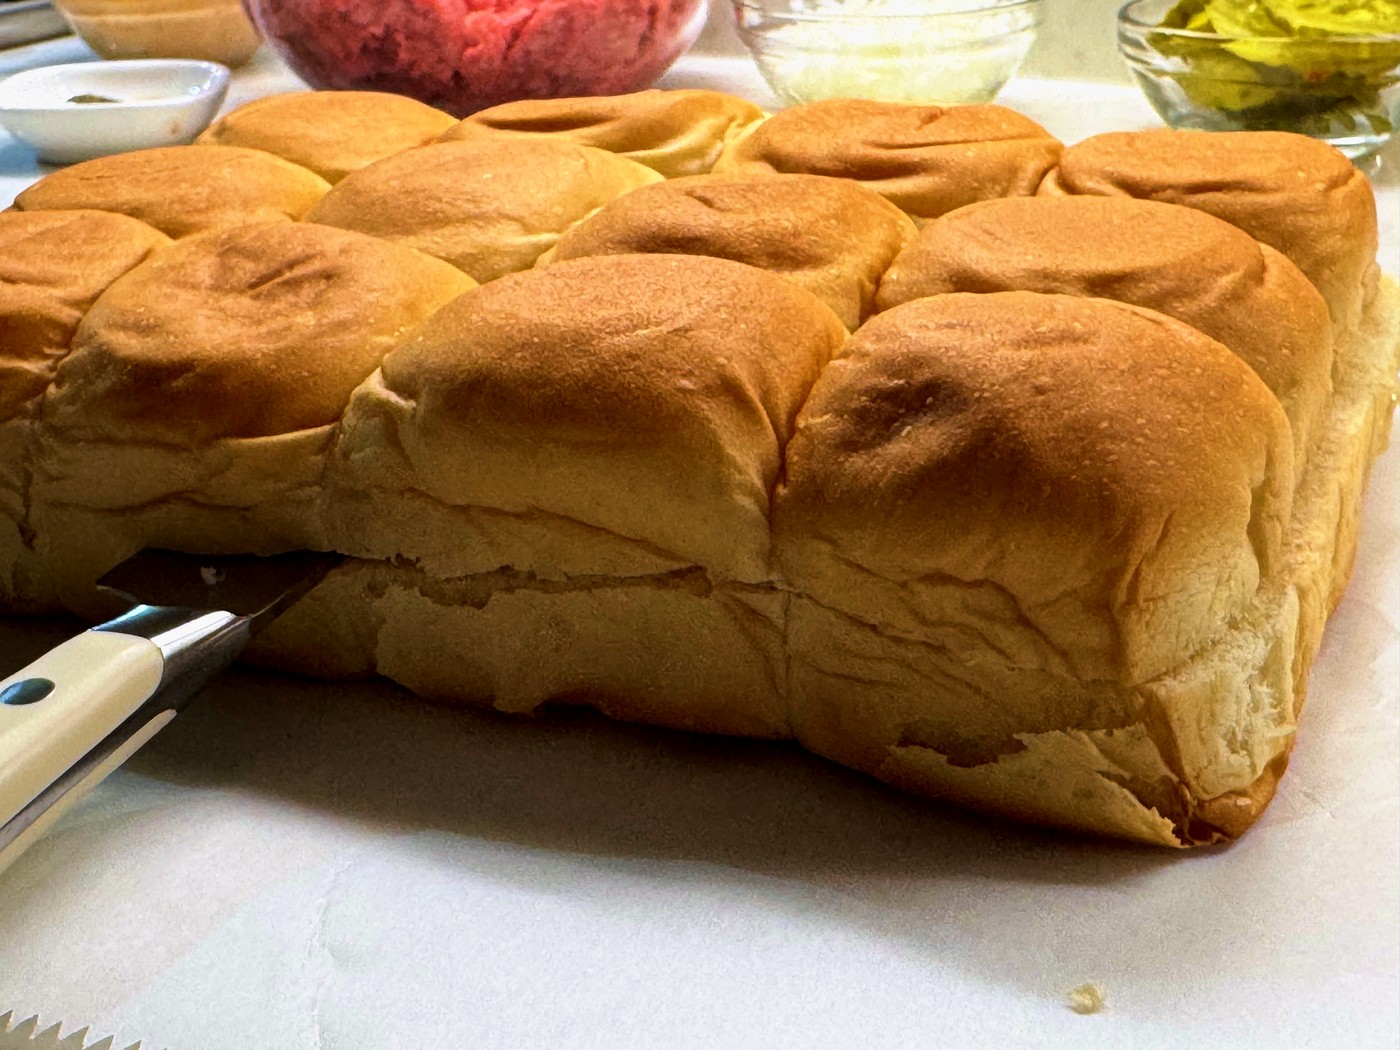
Without pulling the rolls apart, slice the whole slab in half horizontally with a long serrated knife. Use a gentle sawing motion and keep the knife level. If it wanders a little, that’s totally okay, since the cheese hides everything.
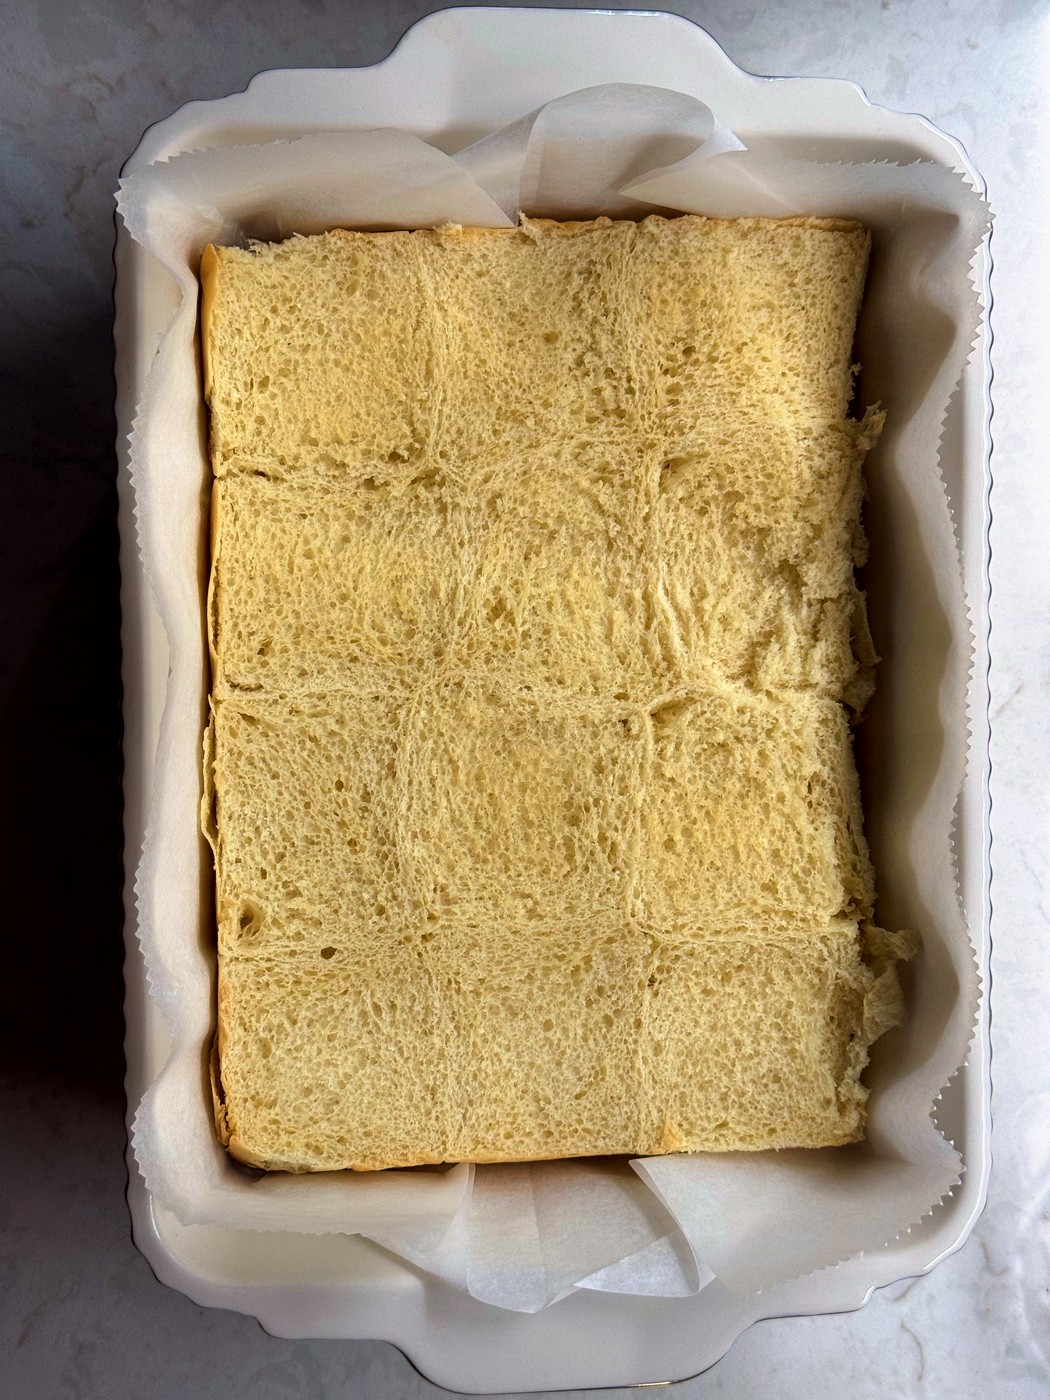
Set the bottom slab in the dish, cut side up, and toast it for 5 minutes, just until the cut side feels dry. This helps because the dry surface doesn’t soak up juice from the beef.
Step 2: Brown the beef hard
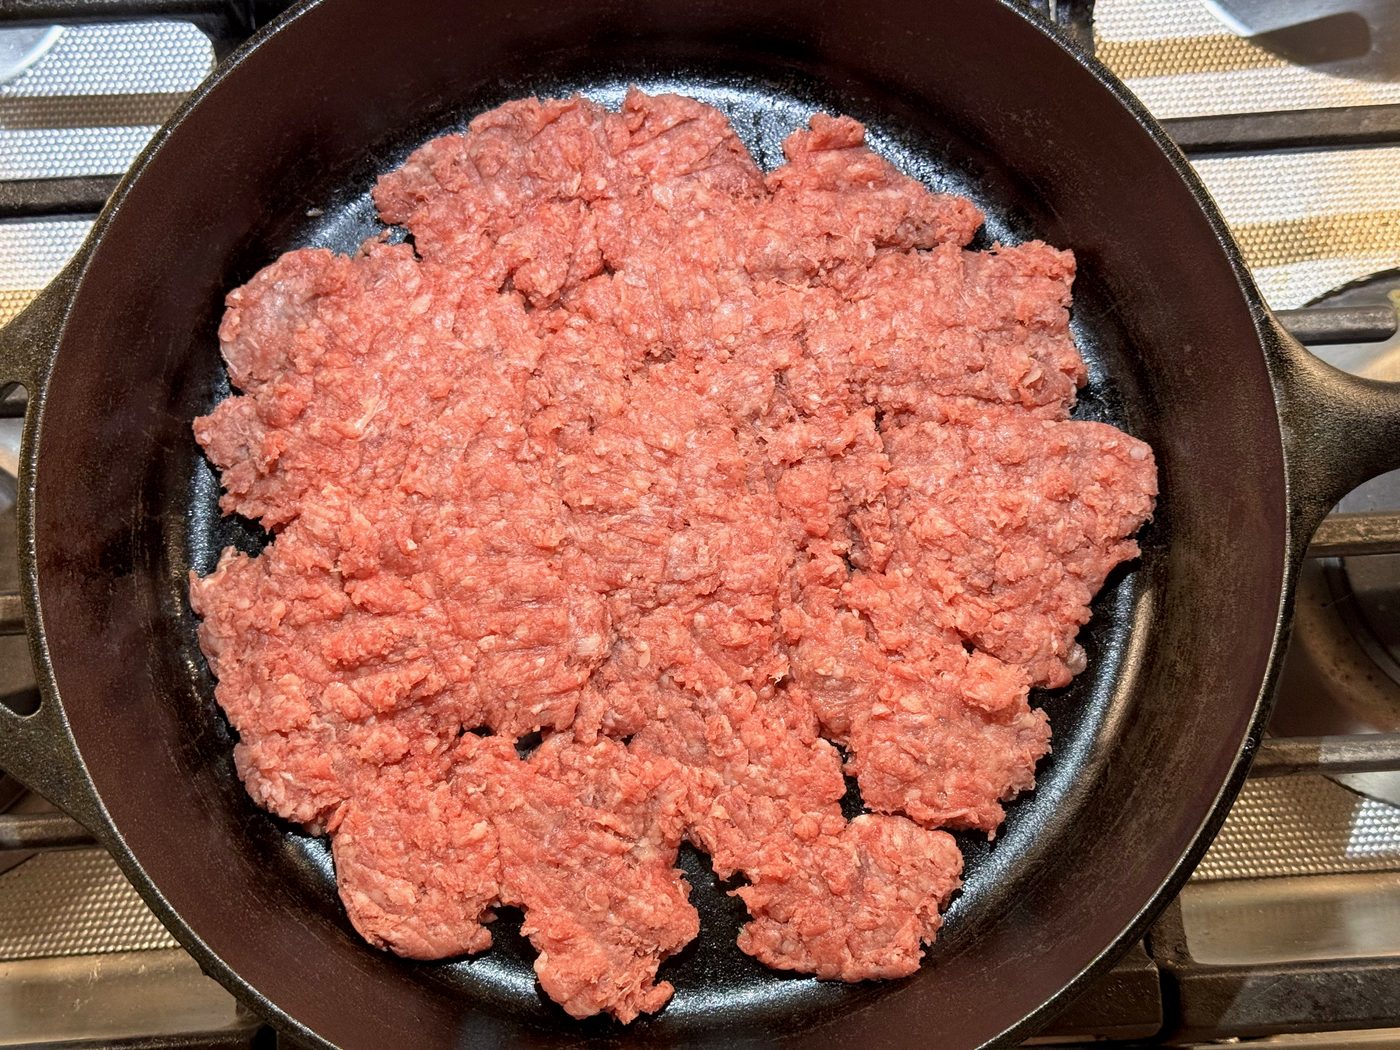
Heat a large skillet over medium-high heat. Cast iron is my favorite here. Add the beef and press it into one flat layer, then leave it alone for 4 to 5 minutes. One common mistake is stirring it right away, which steams the beef instead of browning it. You want the bottom to get a deep brown crust.
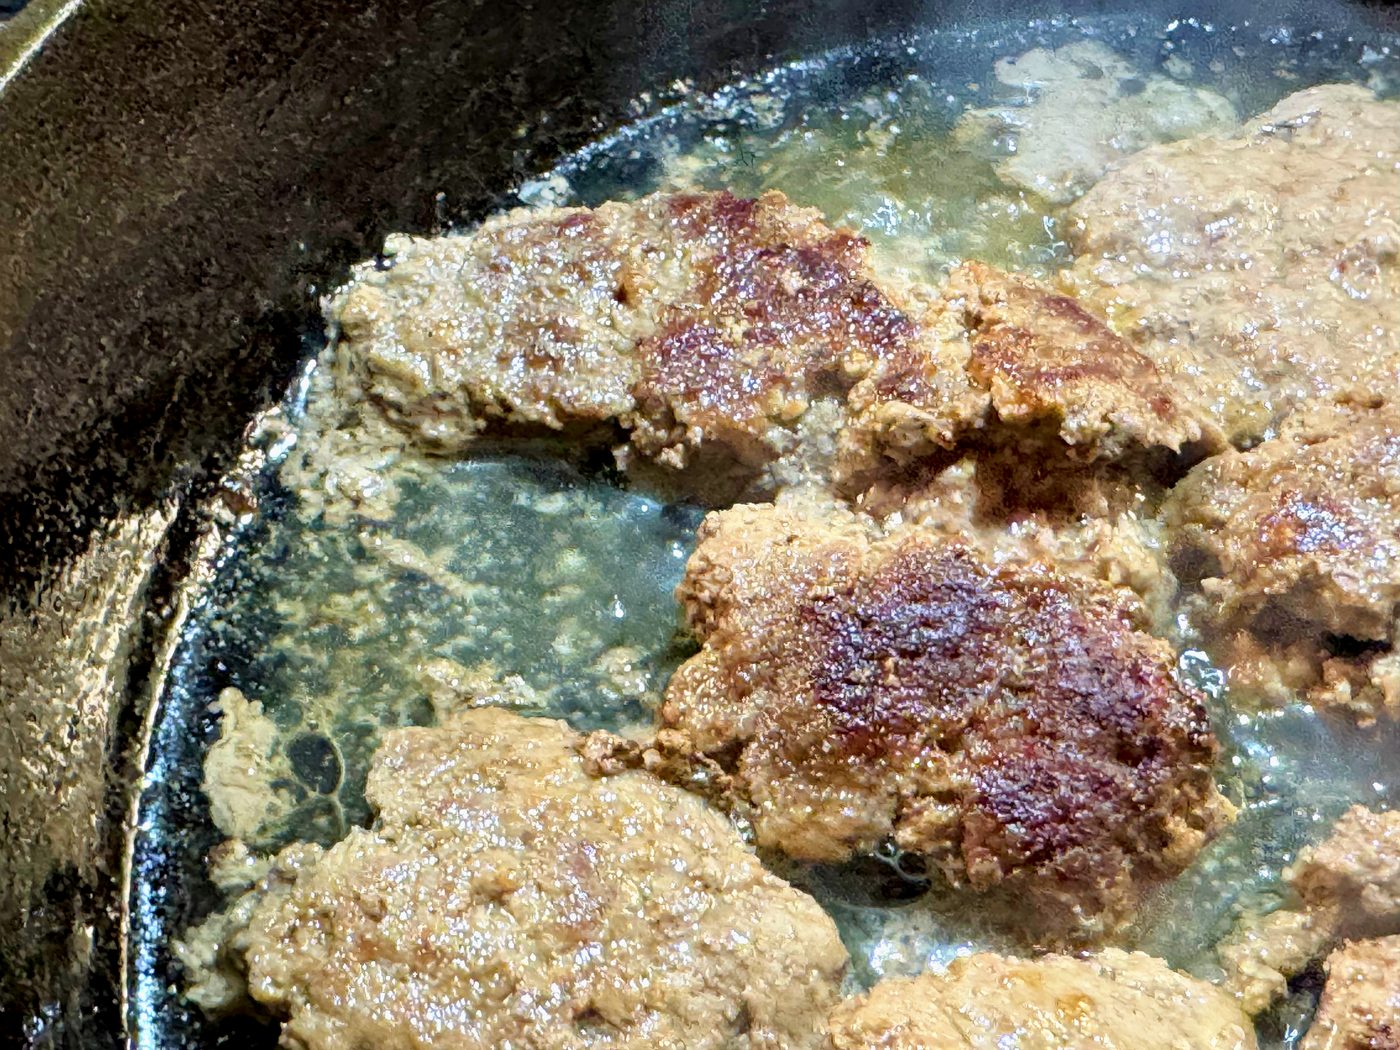
Flip it in big pieces, then break it into small crumbles and add the onion. Keep cooking for 3 to 4 minutes, letting it sit between stirs so more bits brown, until no pink is left and the onion is soft. Don’t worry about all the liquid in the pan. This is totally normal. Tip the skillet and spoon off the fat, or blot it with paper towels.
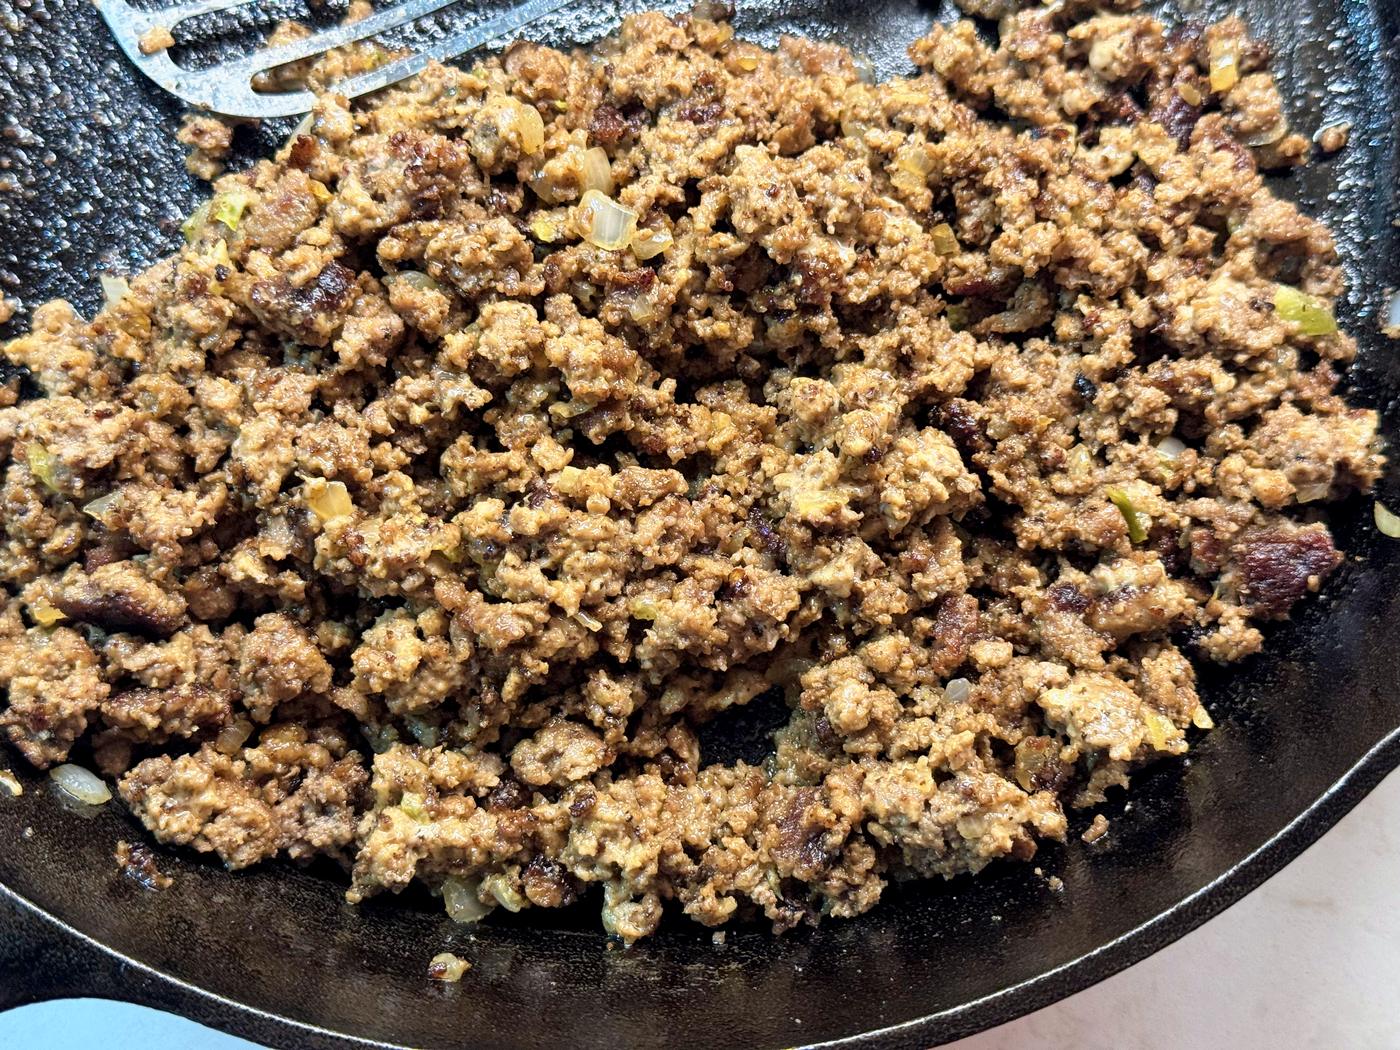
Take the skillet off the heat and stir in the Worcestershire, garlic powder, salt, pepper, and a few spoonfuls of the burger sauce. The sauce seasons the beef and helps the crumbles stick together, so each slider comes out in one piece.
Step 3: Layer the cheese, beef, and pickles
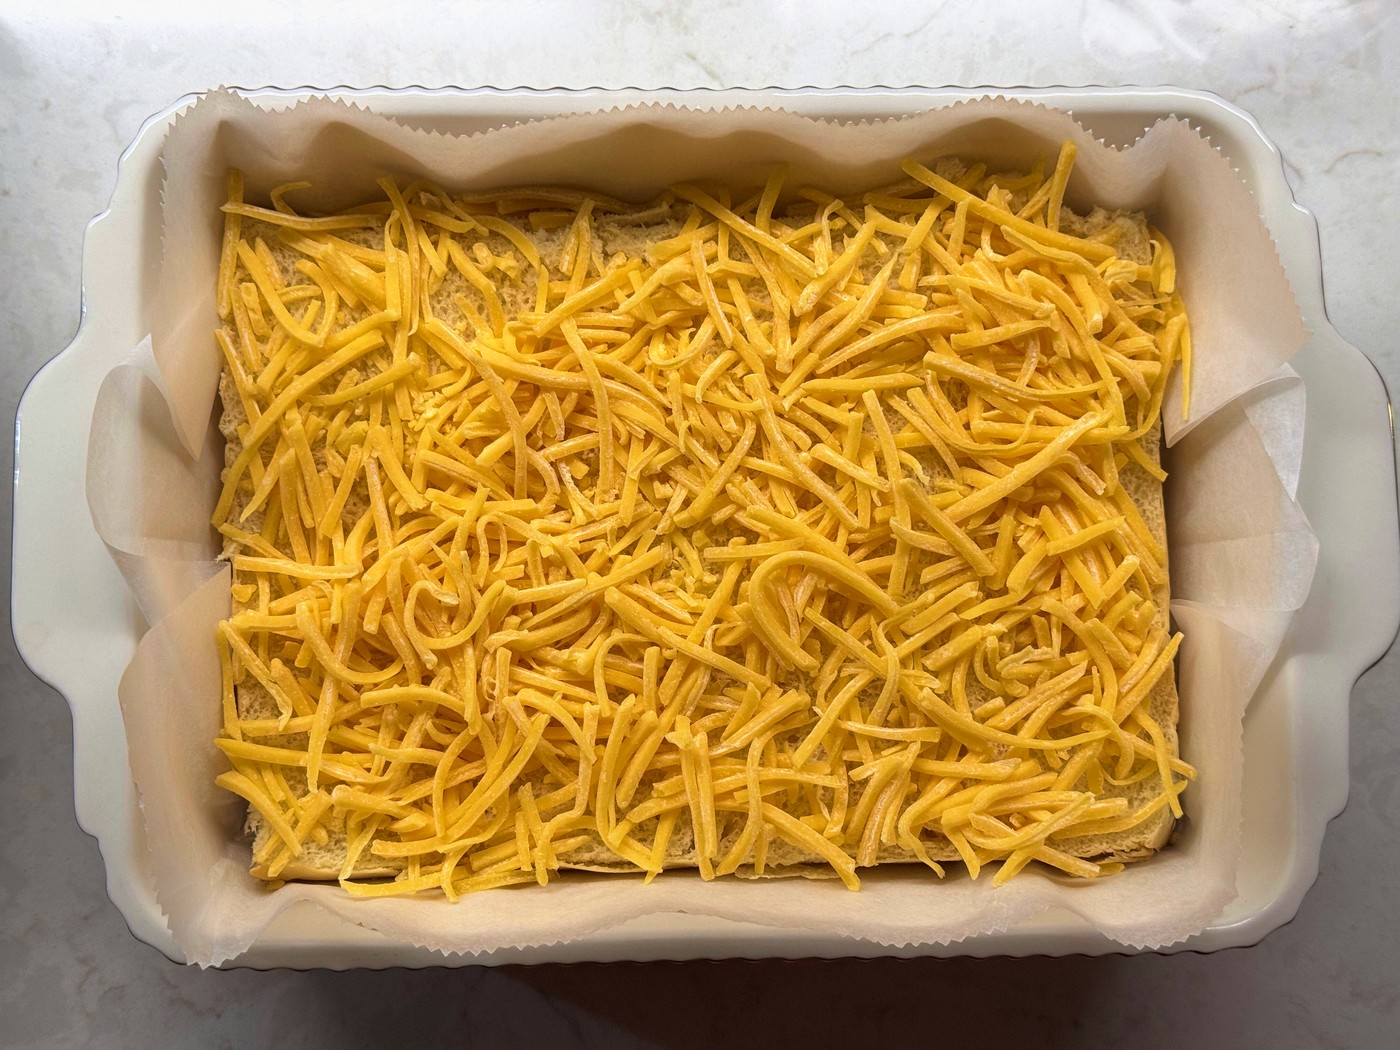
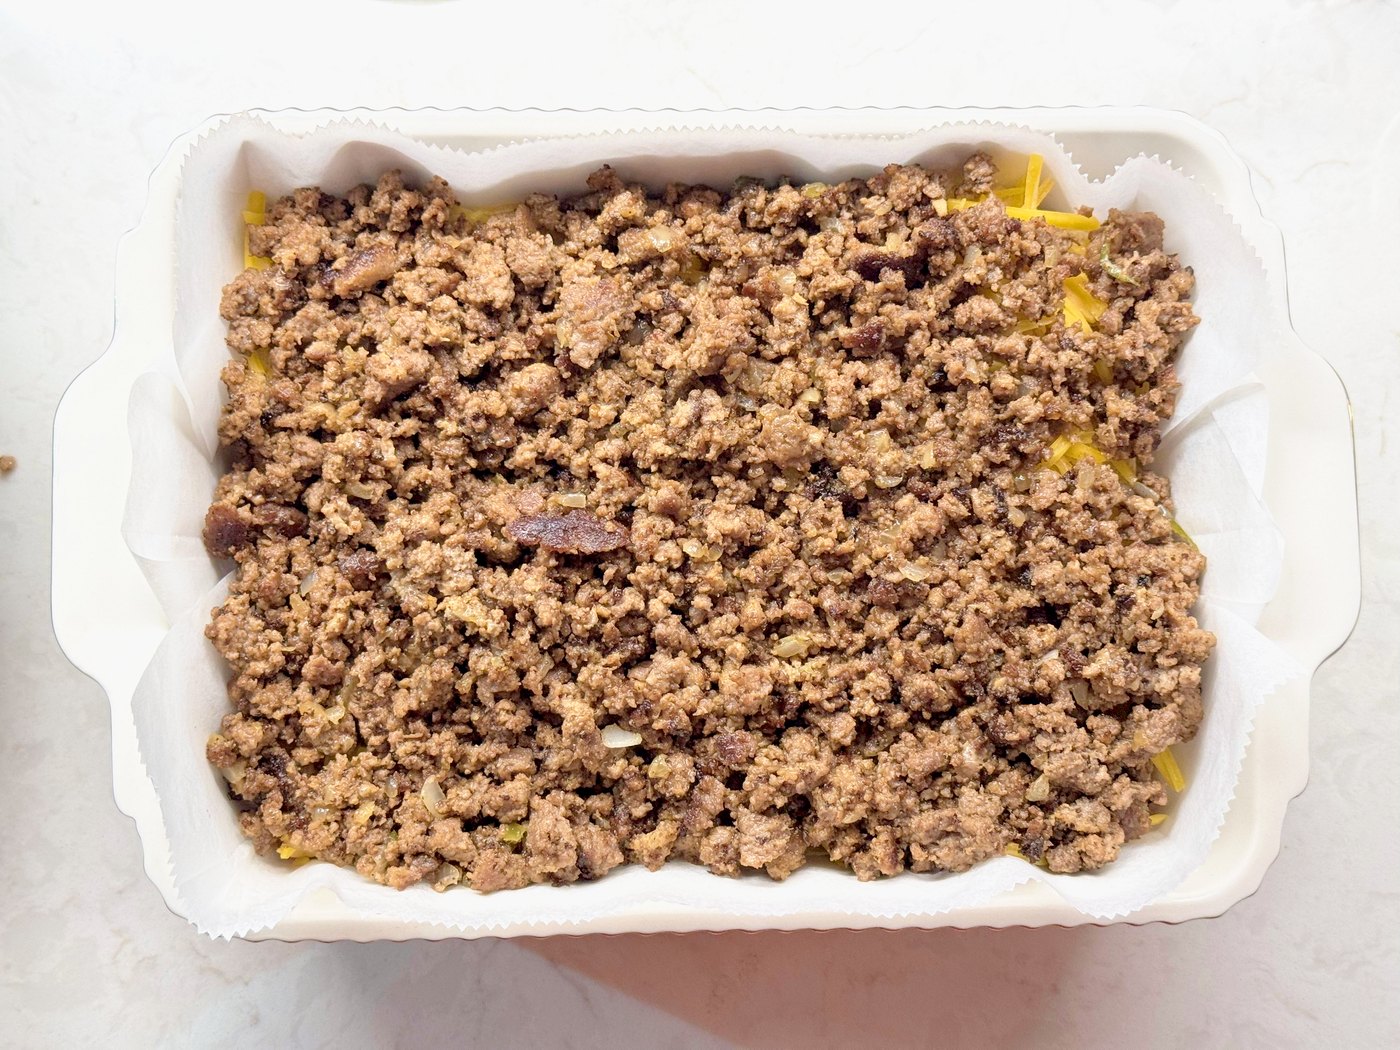
Sprinkle half the cheddar over the toasted bottom buns. Spread the beef over it in an even layer all the way to the edges, and press it down firmly. Pressing it down helps the beef hold together when you cut the sliders apart.
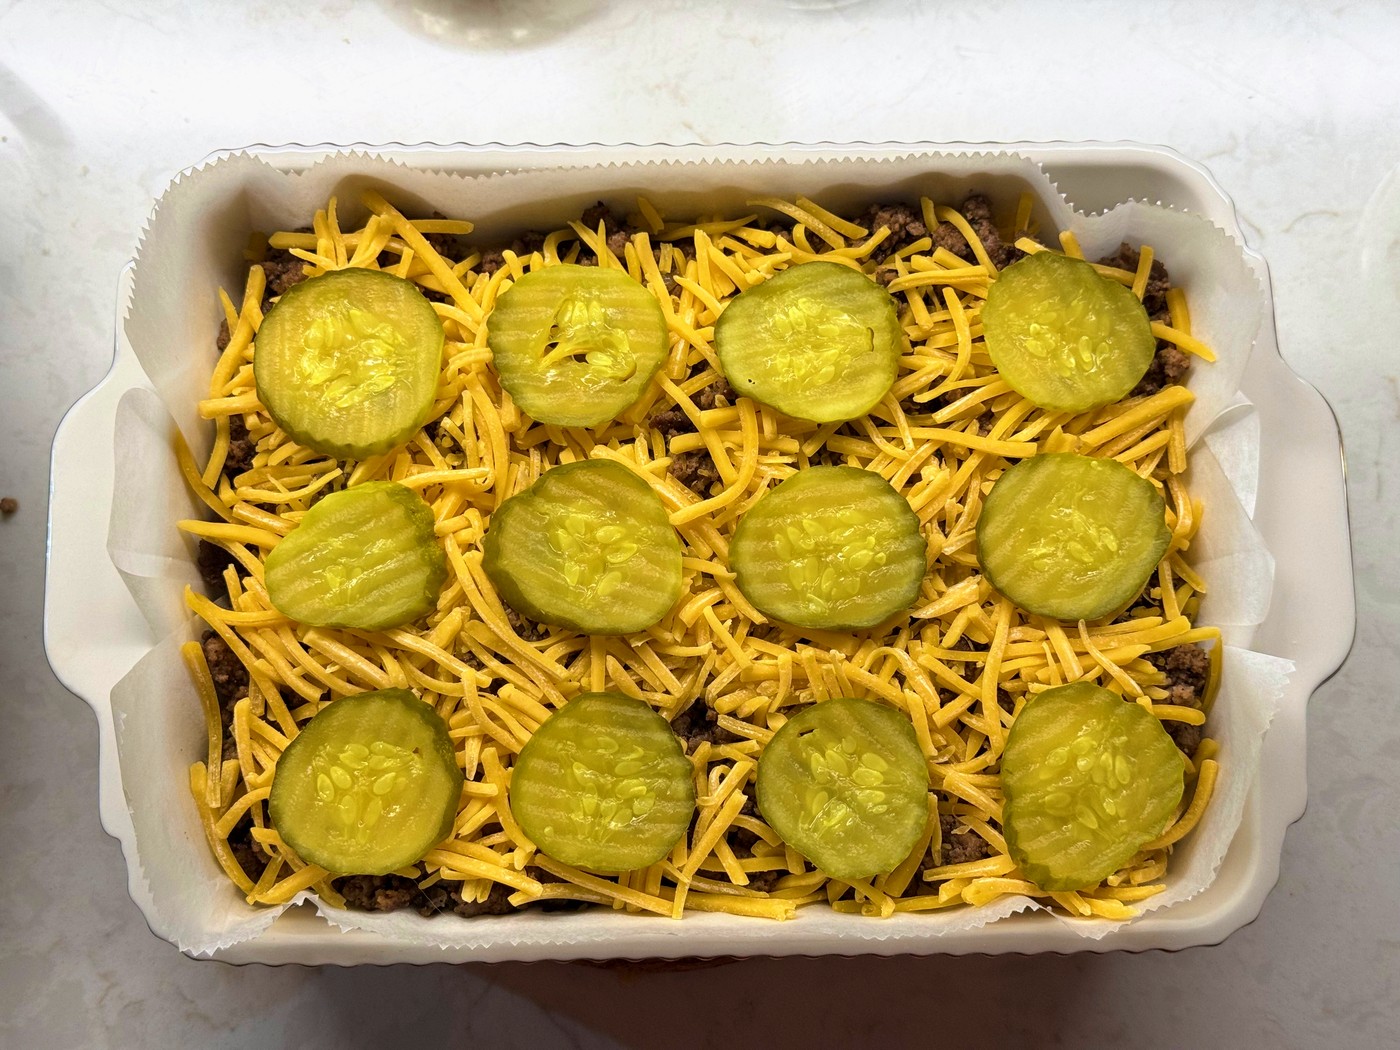
Top with the rest of the cheddar, then lay a pickle chip where the middle of each slider will be. It’s easy to look at the line of the rolls on the side of the pan to see where each one goes.
Step 4: Sauce the top buns and put them on
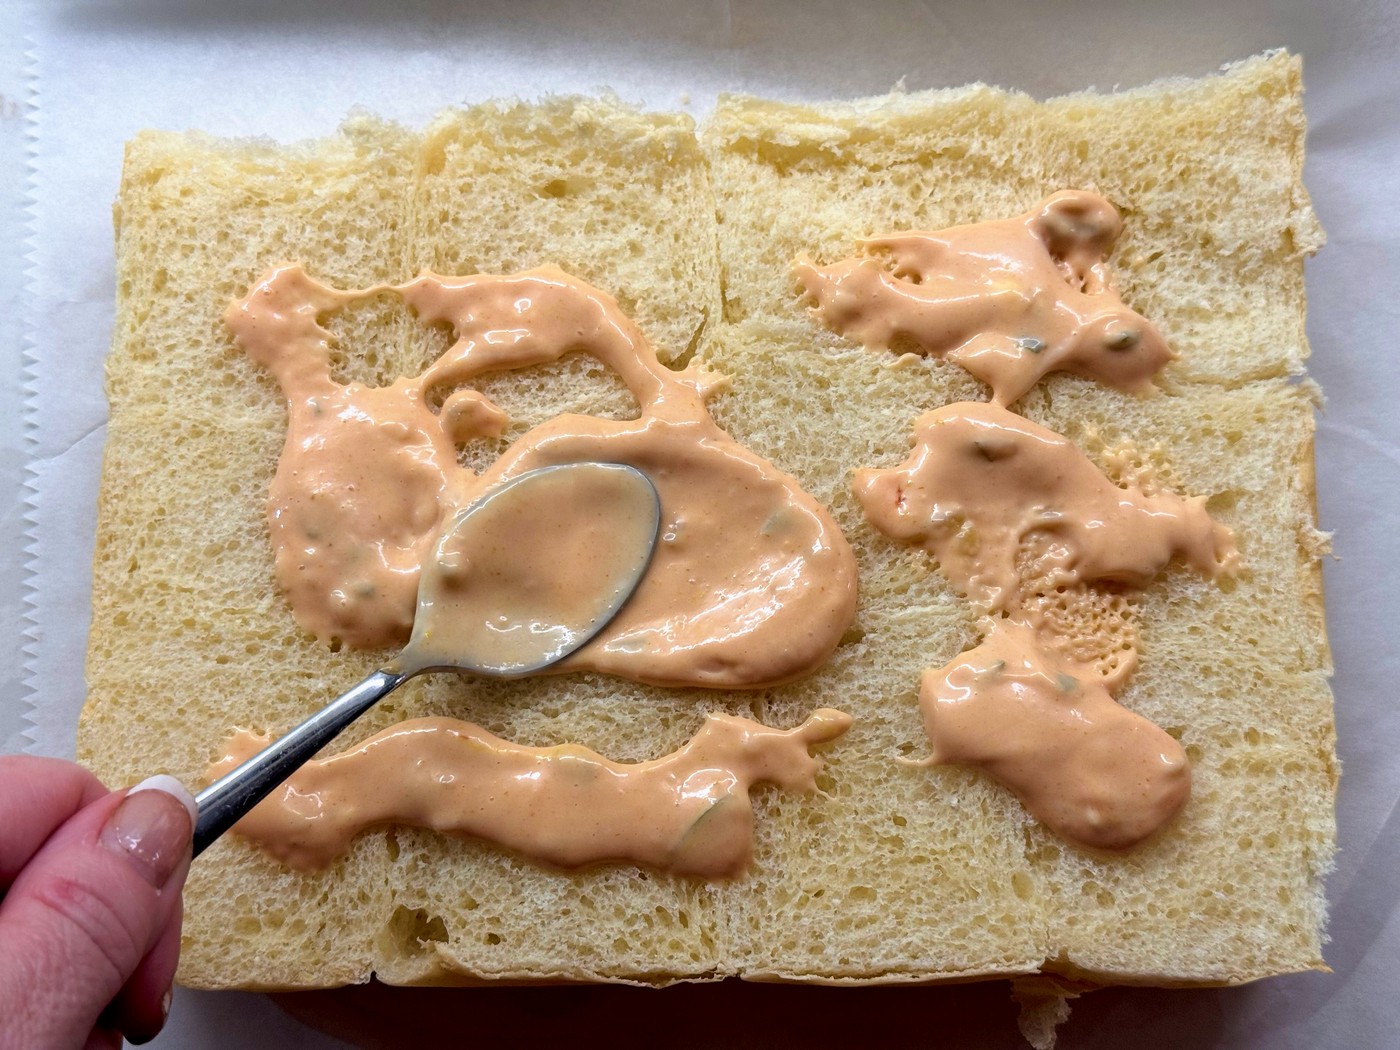
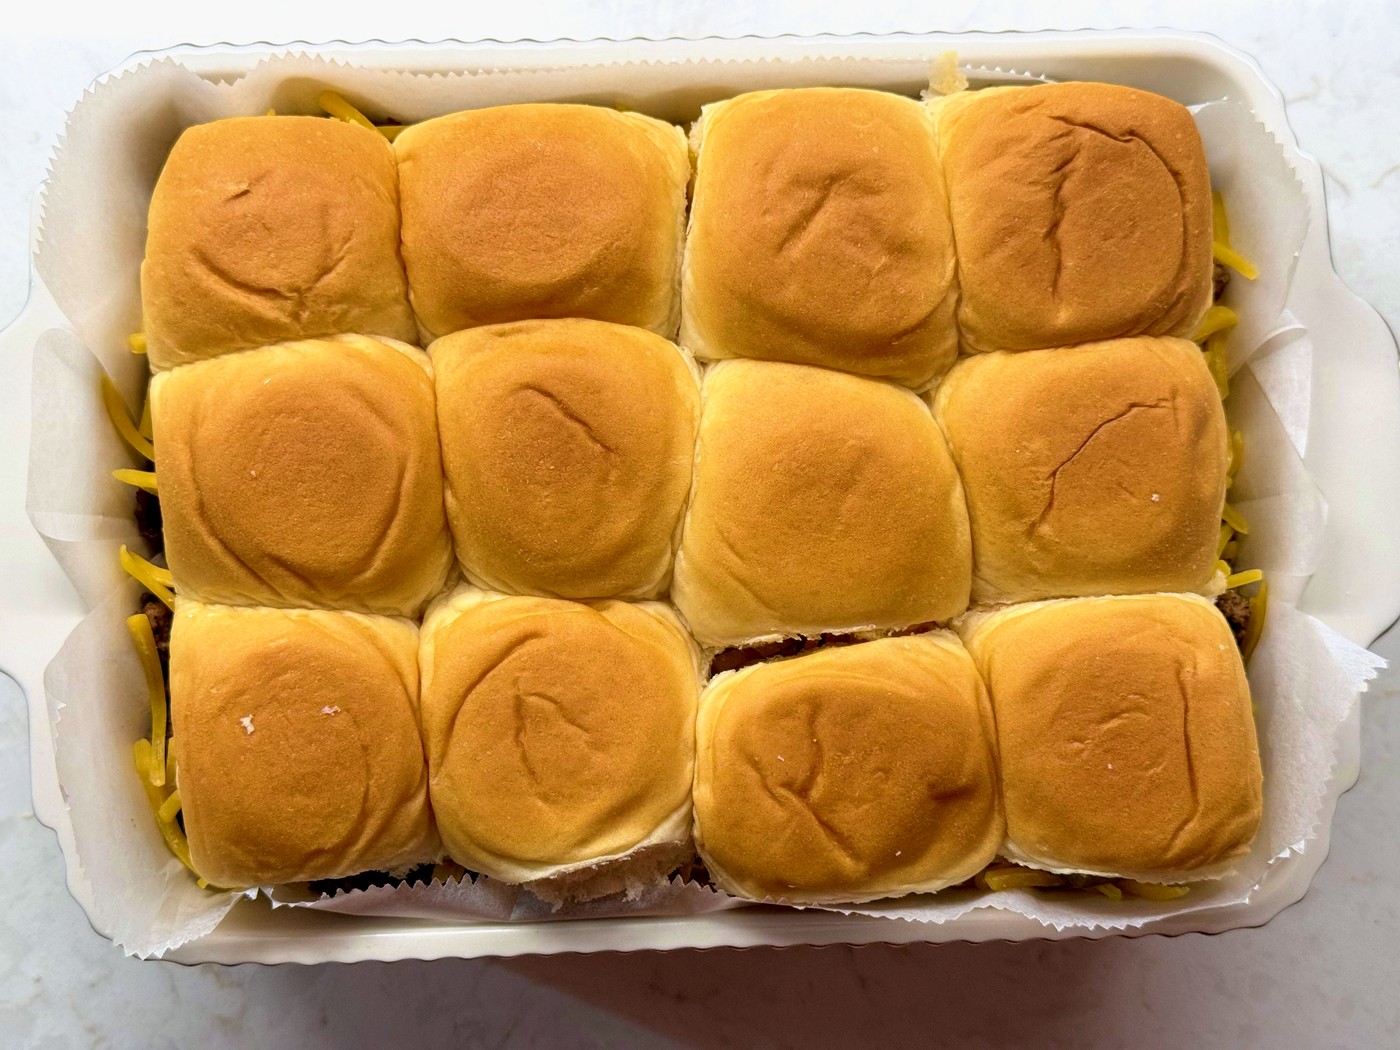
Spread the remaining burger sauce over the cut side of the top slab. Then flip it over and set it on the pickles, sauce side down.
Step 5: Brush with garlic butter
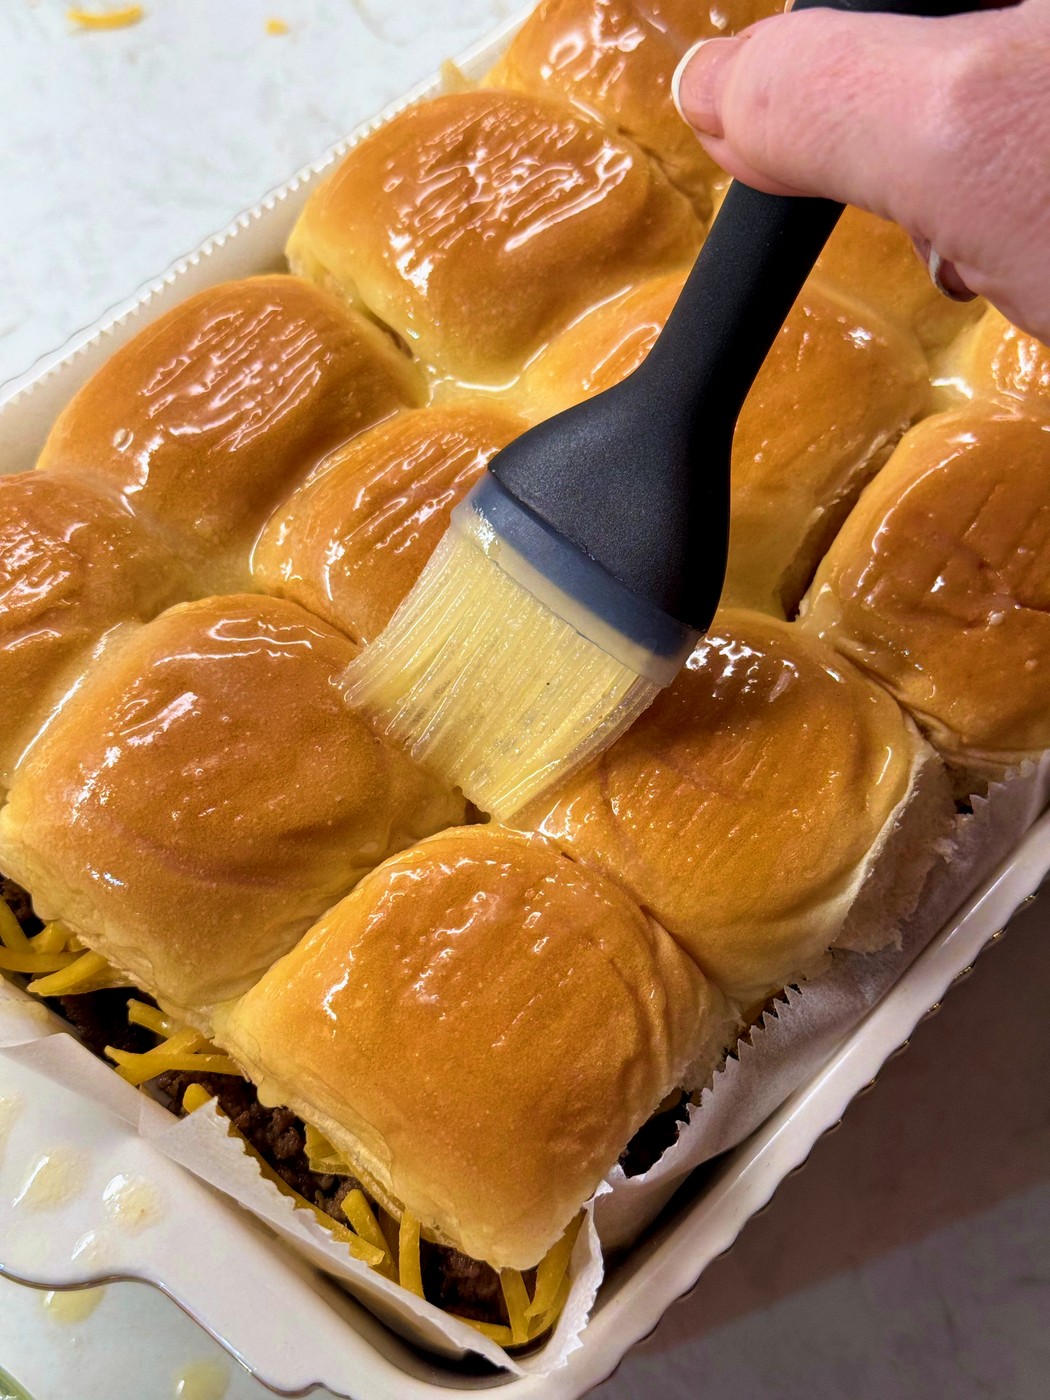
Stir the garlic powder into the melted butter and brush it all over the tops, letting some run down into the cracks between the rolls. Sprinkle with the sesame seeds and dried minced onion right away, while the butter is wet, so they stick.
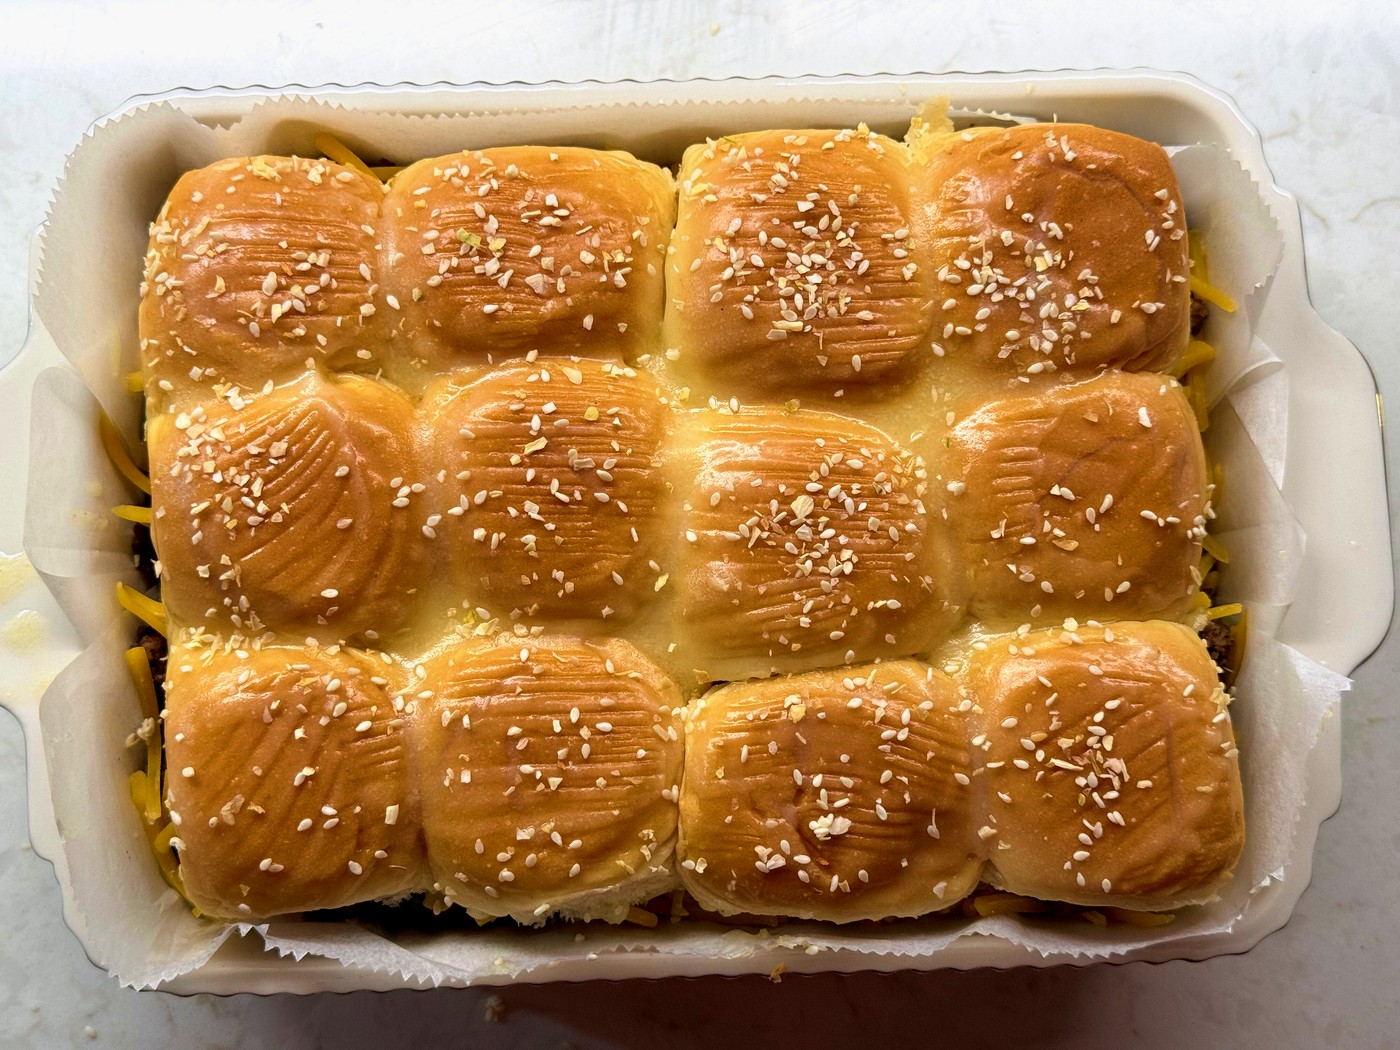
Step 6: Bake, and cover the tops early
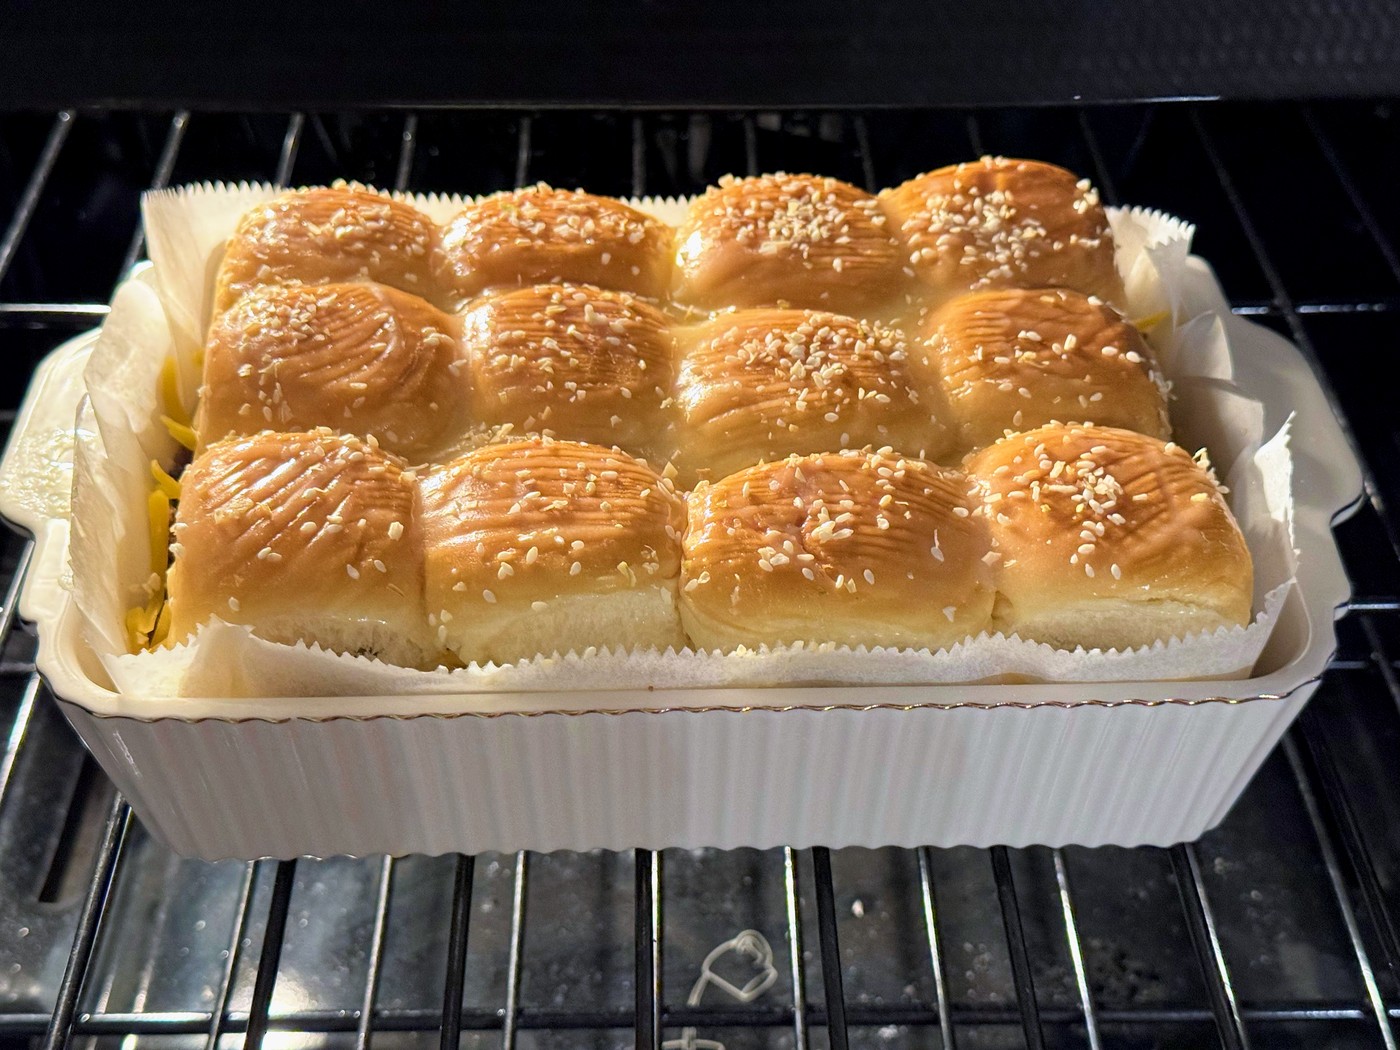
Center the dish on the middle rack and bake uncovered for 6 to 8 minutes, just until the tops turn golden. Then lay a sheet of foil loosely over the top and bake 4 to 6 minutes more, until the cheese is melted at the edges.
Be careful not to wander off during those first few minutes. Sweet rolls brown much faster than you’d expect. I covered mine at 9 minutes, and the corner rolls were already darker than I wanted. They still tasted great!
Step 7: Cut and serve
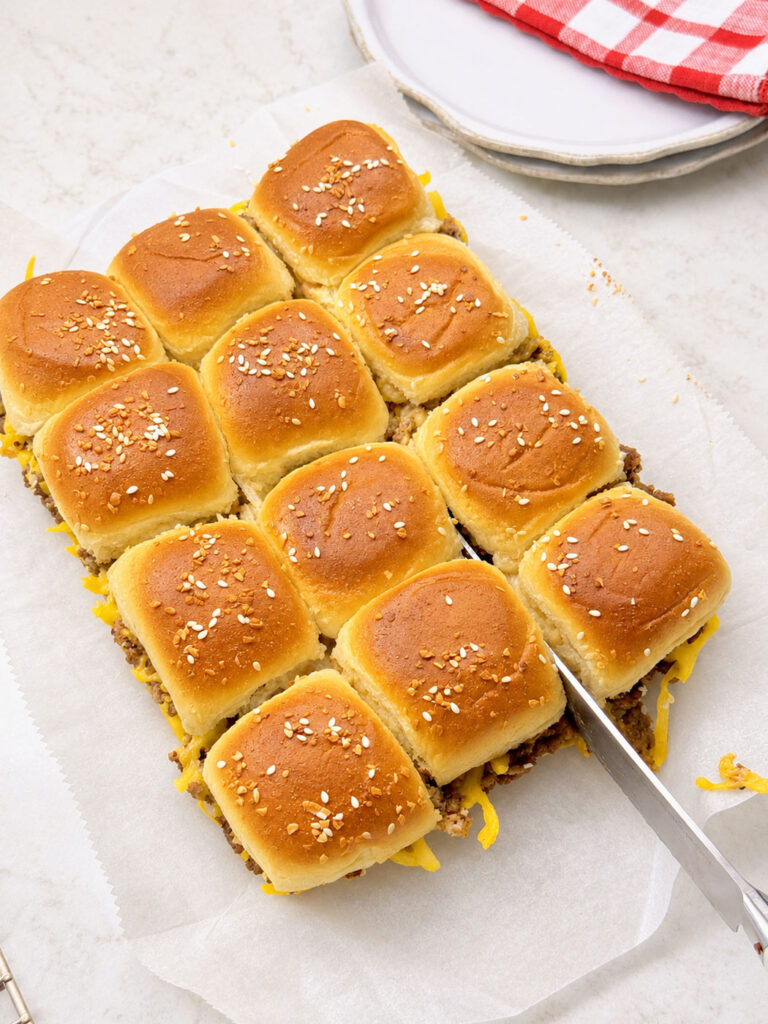
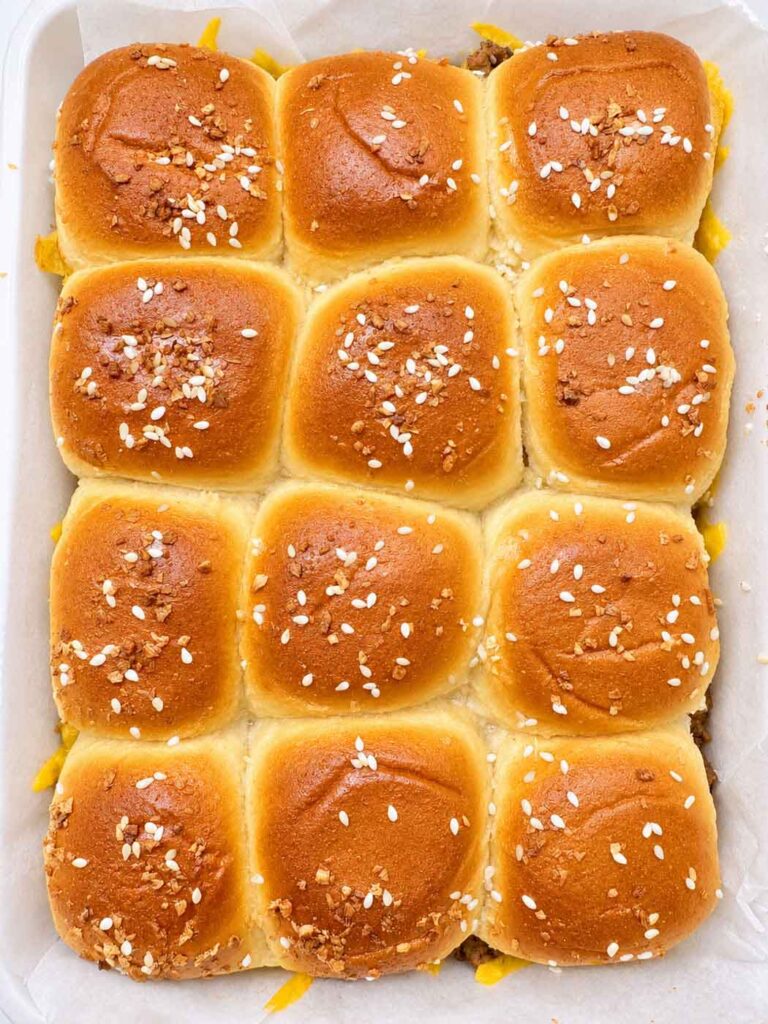
Let them rest for about 5 minutes so the cheese sets a little. Then lift the whole tray out by the parchment and cut along the lines of the rolls with a sharp knife. Serve them hot.
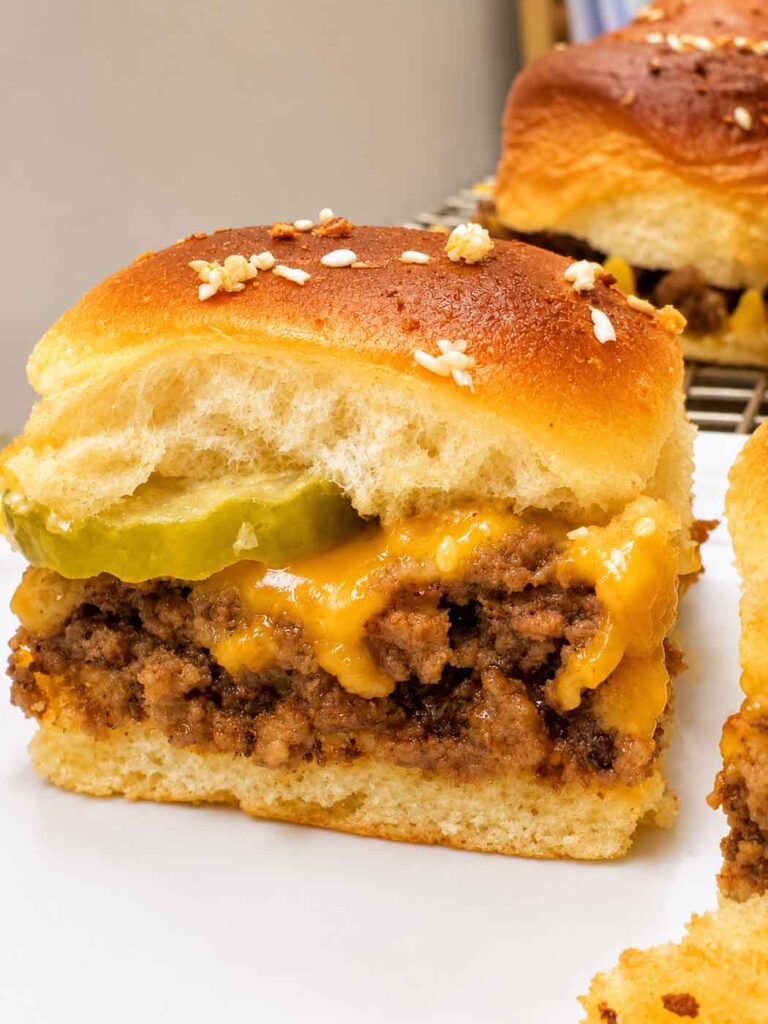
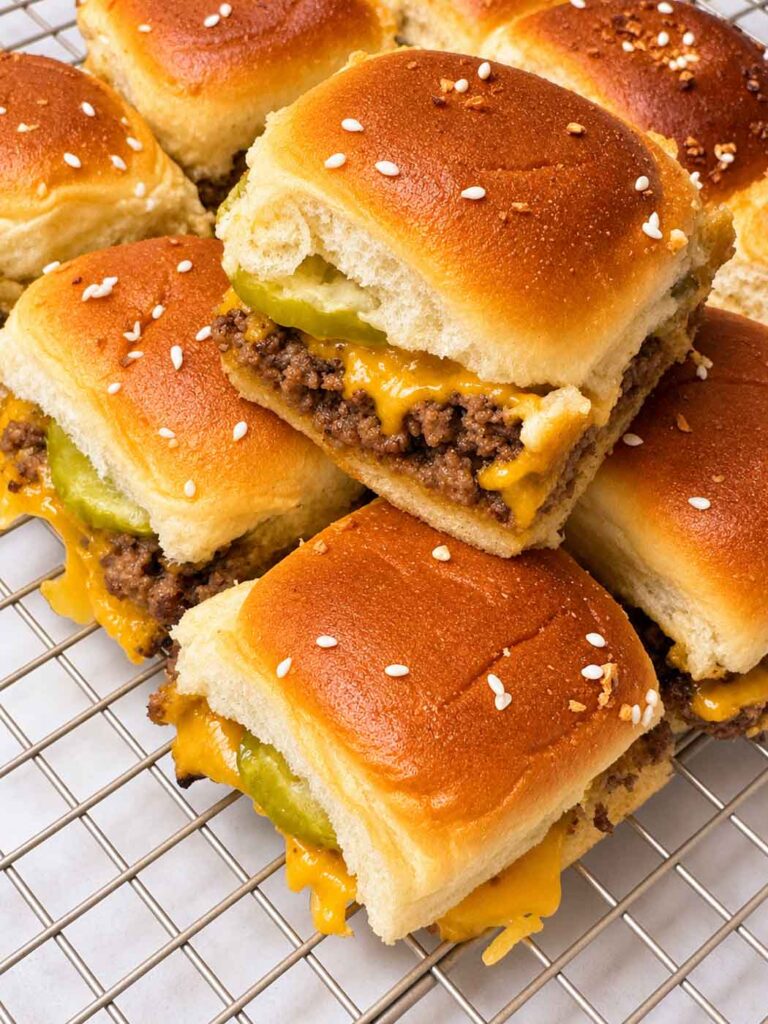
Can I Make Them Ahead?
You can cook and season the beef up to 2 days ahead and keep it in the fridge. Build and bake the sliders right before serving, though. If they sit assembled, the buns soak up moisture and get soft. Add a few extra minutes under the foil if the beef goes in cold.
How to Store and Reheat Cheeseburger Sliders
Keep leftovers in an airtight container in the fridge for up to 3 days. See my guide to storing leftovers for the best results here.
To reheat, set them on a baking sheet, cover loosely with foil, and warm them in a 350°F oven for about 10 minutes. The microwave works in a hurry, about 30 seconds per slider, but the buns can turn soft and chewy.
And, honestly, these are also good as leftovers cold from the refrigerator!
Cheeseburger Slider FAQs
Can I use sliced cheese instead of shredded?
Yes. Use about 8 slices of cheddar or American, half under the beef and half over it. American melts the smoothest.
Can I make 24 sliders?
Yes. Double everything and use a half sheet pan or two 9×13 dishes. Brown the beef in two batches so it has room to get a crust.
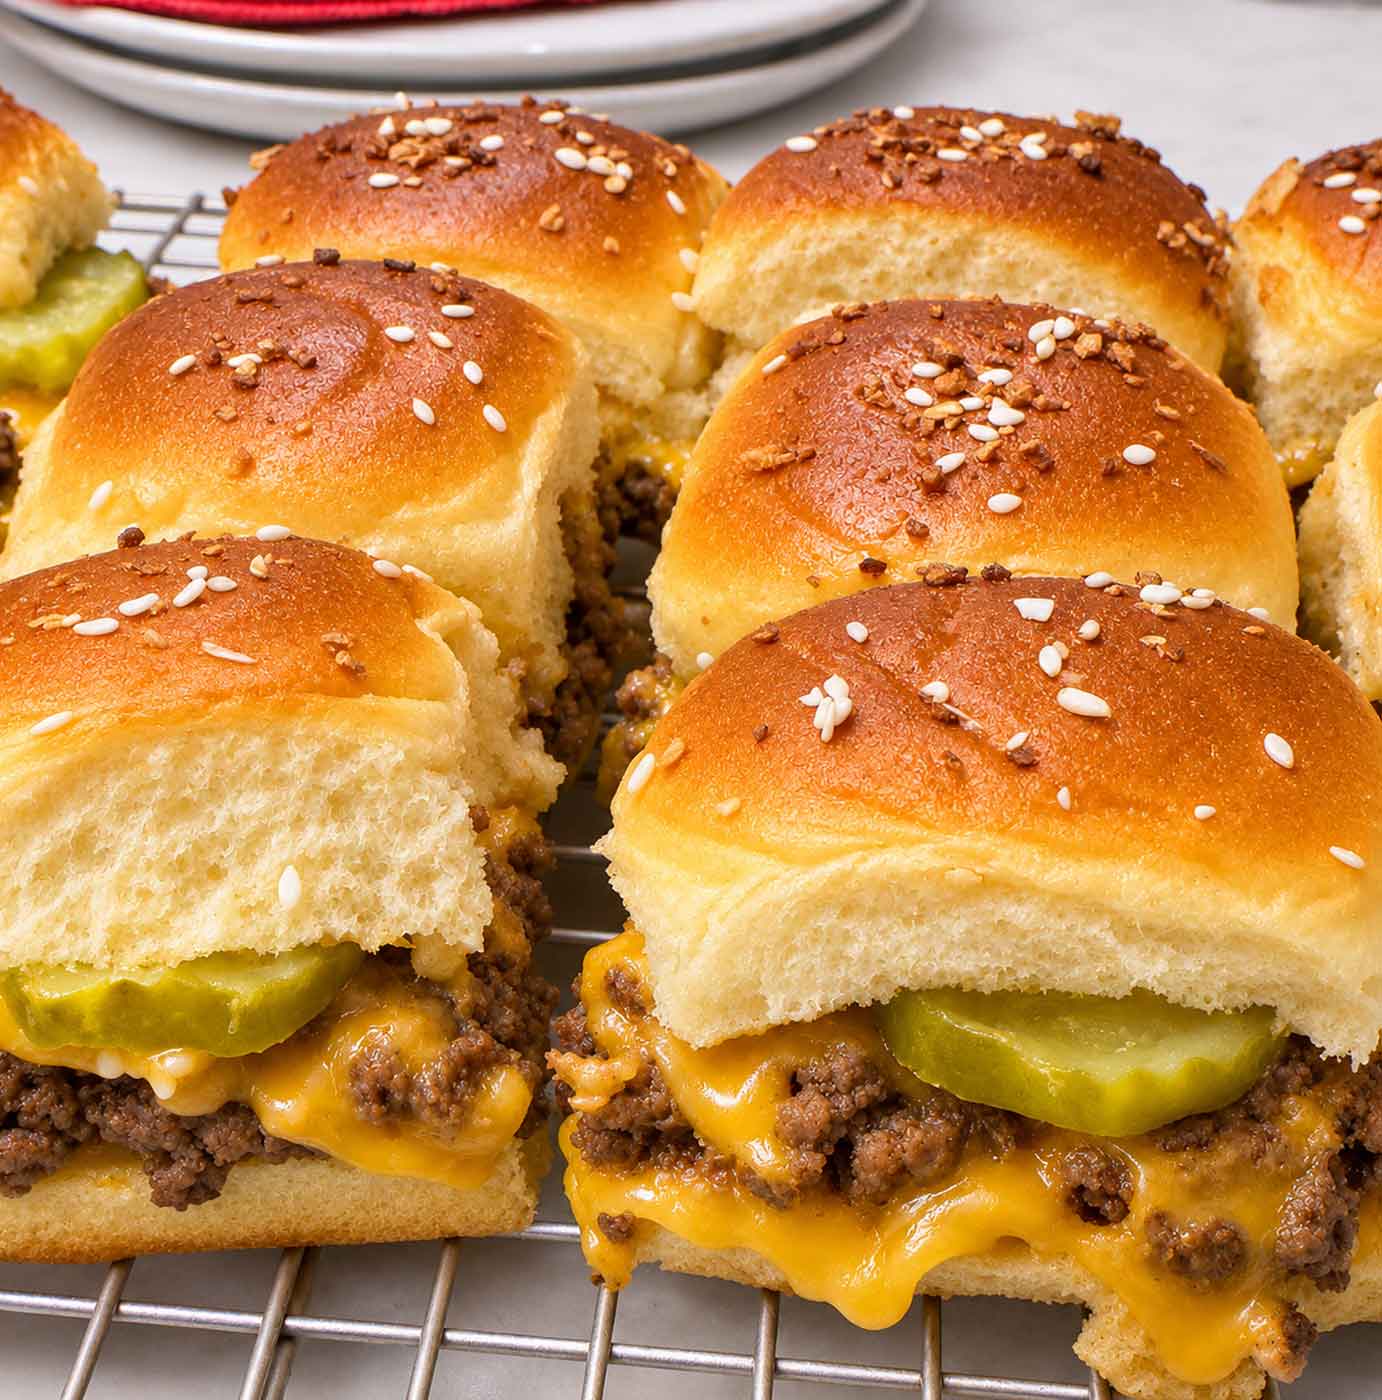
Easy Cheeseburger Sliders on Hawaiian Rolls
Equipment
- 9×13-inch baking dish
- parchment paper
- large skillet cast iron if you have one
- Long serrated knife
- Pastry brush
Ingredients
Burger Sauce
- 1/4 cup mayonnaise
- 2 tablespoons ketchup
- 1 tablespoon yellow mustard
- 1 tablespoon sweet pickle relish
- 1/4 teaspoon garlic powder
Beef
- 1 pound ground beef 80/20 or 85/15
- 1/2 small yellow onion finely diced
- 1 tablespoon Worcestershire sauce
- 1/2 teaspoon garlic powder
- 1/2 teaspoon table salt
- 1/4 teaspoon black pepper
Sliders
- 12 Hawaiian rolls still attached
- 8 ounces cheddar shredded
- 12 dill pickle chips patted dry
Garlic Butter Topping
- 3 tablespoons butter melted
- 1/4 teaspoon garlic powder
- 1 teaspoon sesame seeds
- 1 teaspoon dried minced onion
Instructions
- Heat the oven to 350°F with a rack in the middle. Line a 9×13-inch baking dish with parchment.
- Stir the burger sauce ingredients together in a small bowl.
- Without pulling the rolls apart, slice the slab in half horizontally with a serrated knife. Set the bottom slab in the dish, cut side up, and toast 5 minutes, until the cut side feels dry.
- Heat a large skillet over medium-high heat. Add the beef, press it into one flat layer, and cook without stirring 4 to 5 minutes, until the bottom is deep brown.
- Flip the beef in large pieces, break it into small crumbles, and add the onion. Cook 3 to 4 minutes more, stirring only now and then, until no pink remains and the onion is soft. Drain off the fat.
- Off the heat, stir in the Worcestershire, garlic powder, salt, pepper, and about a third of the burger sauce.
- Sprinkle half the cheddar over the toasted bottom buns. Spread the beef evenly to the edges and press it down firmly. Top with the remaining cheddar and a pickle chip for each slider.
- Spread the remaining burger sauce on the cut side of the top slab and set it over the pickles, sauce side down.
- Stir the garlic powder into the melted butter. Brush it over the tops and into the cracks, then sprinkle with the sesame seeds and dried onion.
- Center the dish on the middle rack and bake uncovered 6 to 8 minutes, until the tops are golden. Cover loosely with foil and bake 4 to 6 minutes more, until the cheese melts.
- Rest 5 minutes. Lift out by the parchment, cut along the roll lines, and serve hot.
Nutrition
Notes
- Rolls: Any soft slider roll works. Pre-split slider buns work too: set the bottoms in the dish touching, toast, and build the same way.
- Browning: Sweet rolls brown quickly. Check at 6 minutes and add the foil as soon as the tops are golden.
- Cheese: Sliced cheddar or American works in place of shredded. Use half under the beef and half over it.
- For 24 sliders: Double everything, use a half sheet pan or two 9×13 dishes, and brown the beef in two batches.
- Bacon cheeseburger sliders: Add crumbled crisp bacon over the beef before the top layer of cheese.
- Lactose free: Use aged cheddar or lactose-free cheese, lactose-free butter or olive oil in the topping, and a dairy-free roll if needed.
- Make ahead: Cook and season the beef up to 2 days ahead and refrigerate. Build and bake just before serving, adding a few minutes under the foil.
- Storage: Refrigerate leftovers in an airtight container for up to 3 days.
- Reheating: Cover loosely with foil and warm in a 350°F oven for about 10 minutes, or microwave about 30 seconds per slider.
How to Trust This Recipe
Is it real, or is it fake? That’s the question these days, right? If you’re new here, you may need reassuring. To help you feel confident that this is real food made by a real person in a real kitchen, I like to take and share a special unedited photo at the end of my posts. This is a photo of my plate of cheeseburger sliders and some onion rings for dinner on the counter in my kitchen, with no retouching … it’s a bit blurry and the lighting isn’t great, but this is real life food and these things didn’t make it taste any less amazing.
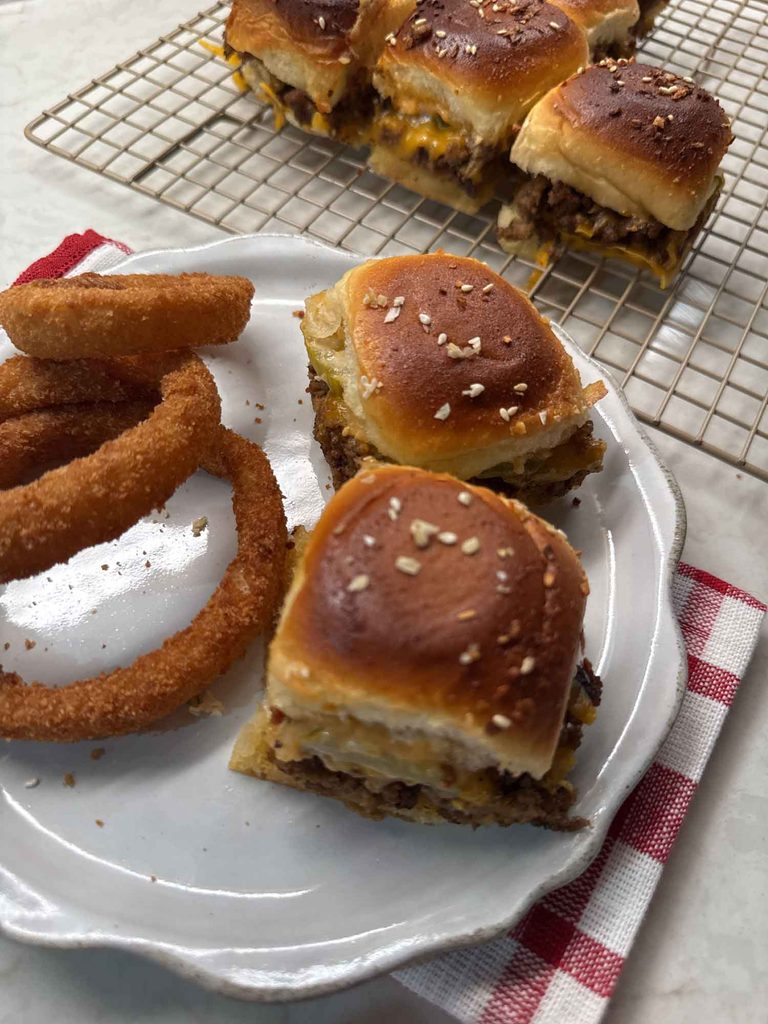
The above photo was taken with ProofMode, which attaches Content Credentials (the C2PA standard) to the image, so anyone can check that it’s a real photo taken by my iPhone on my farm on a particular date and place. You can download the proof files here and learn how to verify them.
If you make these, I’d love to hear what kind of rolls you used and whether yours made it to leftovers.
Happy cooking!
Love,
Jennifer
Tried this recipe?
Tap the stars in the recipe card to leave a quick rating. Your rating helps other home cooks know this recipe works in a real kitchen, not just mine.
And as a thank-you for your feedback, you will receive a free printable copy of my Maker Home Companion Cookbook, featuring my most popular recipes, each one formatted on a SINGLE, easy-to-use page, a perfect kitchen companion for easy meal prep. Click here to learn more about this cookbook and how you can get your copy!
More Burger Recipes You’ll Like


Meet Jennifer
Jennifer cooks and experiments in the kitchen at Maker Farm, where she focuses on simple pantry cooking, homemade staples, and practical recipes that make everyday meals easier. Over the years she has tested many ways to make cooking simpler and more dependable, and shares the methods that work best in her own kitchen, occasionally showing them on her Heart to Home at Maker Farm vlog.