
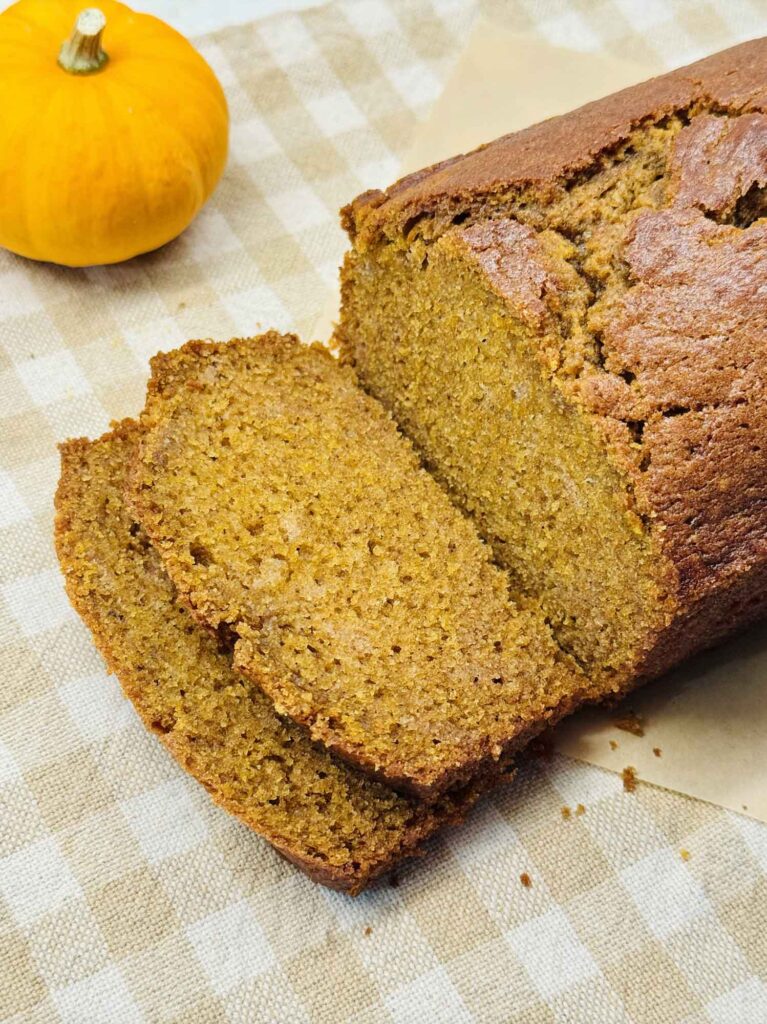
This is my best pumpkin bread recipe … moist, warmly spiced, and with a toasted depth underneath. The secret is browning the butter first. Two bowls, one loaf pan, no mixer, and it slices even better on day two.
PUMPKIN BREAD At A Glance
Prep
20 min
Bake
60 min
COOL
1 HOUR 15 MINUTES
TOTAL
2 HOURS 35 MINUTES
Pan
9×5 metal loaf pan
Still Waiting on My Mom’s Pumpkin Bread Recipe

Fall is almost here, and pumpkin bread is the thing I start thinking about first. My mom makes it every single year, and hers is the one in my head when I say “pumpkin bread.” I asked her for the recipe, but I am still waiting.
So in the meantime, I went ahead and came up with this version because I just really needed a slice. The brown butter was my addition, and once I tasted the crumb it came out with, I stopped tinkering. It’s REALLY good!
Let’s dig in!

Tips and Notes Before You Start
- Use canned pumpkin puree, not pumpkin pie filling. The filling already has sugar and spices in it, so it will throw off everything below. And canned is better than fresh, in this case, since it is more consistent.
- Brown the butter in a light-colored pan if you have one. You are judging this step by color, and a dark pan hides it until it is too late.
- This pumpkin bread freezes well, whole or sliced, so this is a good one to make ahead.

Want to Save This Recipe?
Enter your email below and we’ll send it straight to your inbox! Plus you’ll get new recipes each week!
What You Need to Make Pumpkin Bread
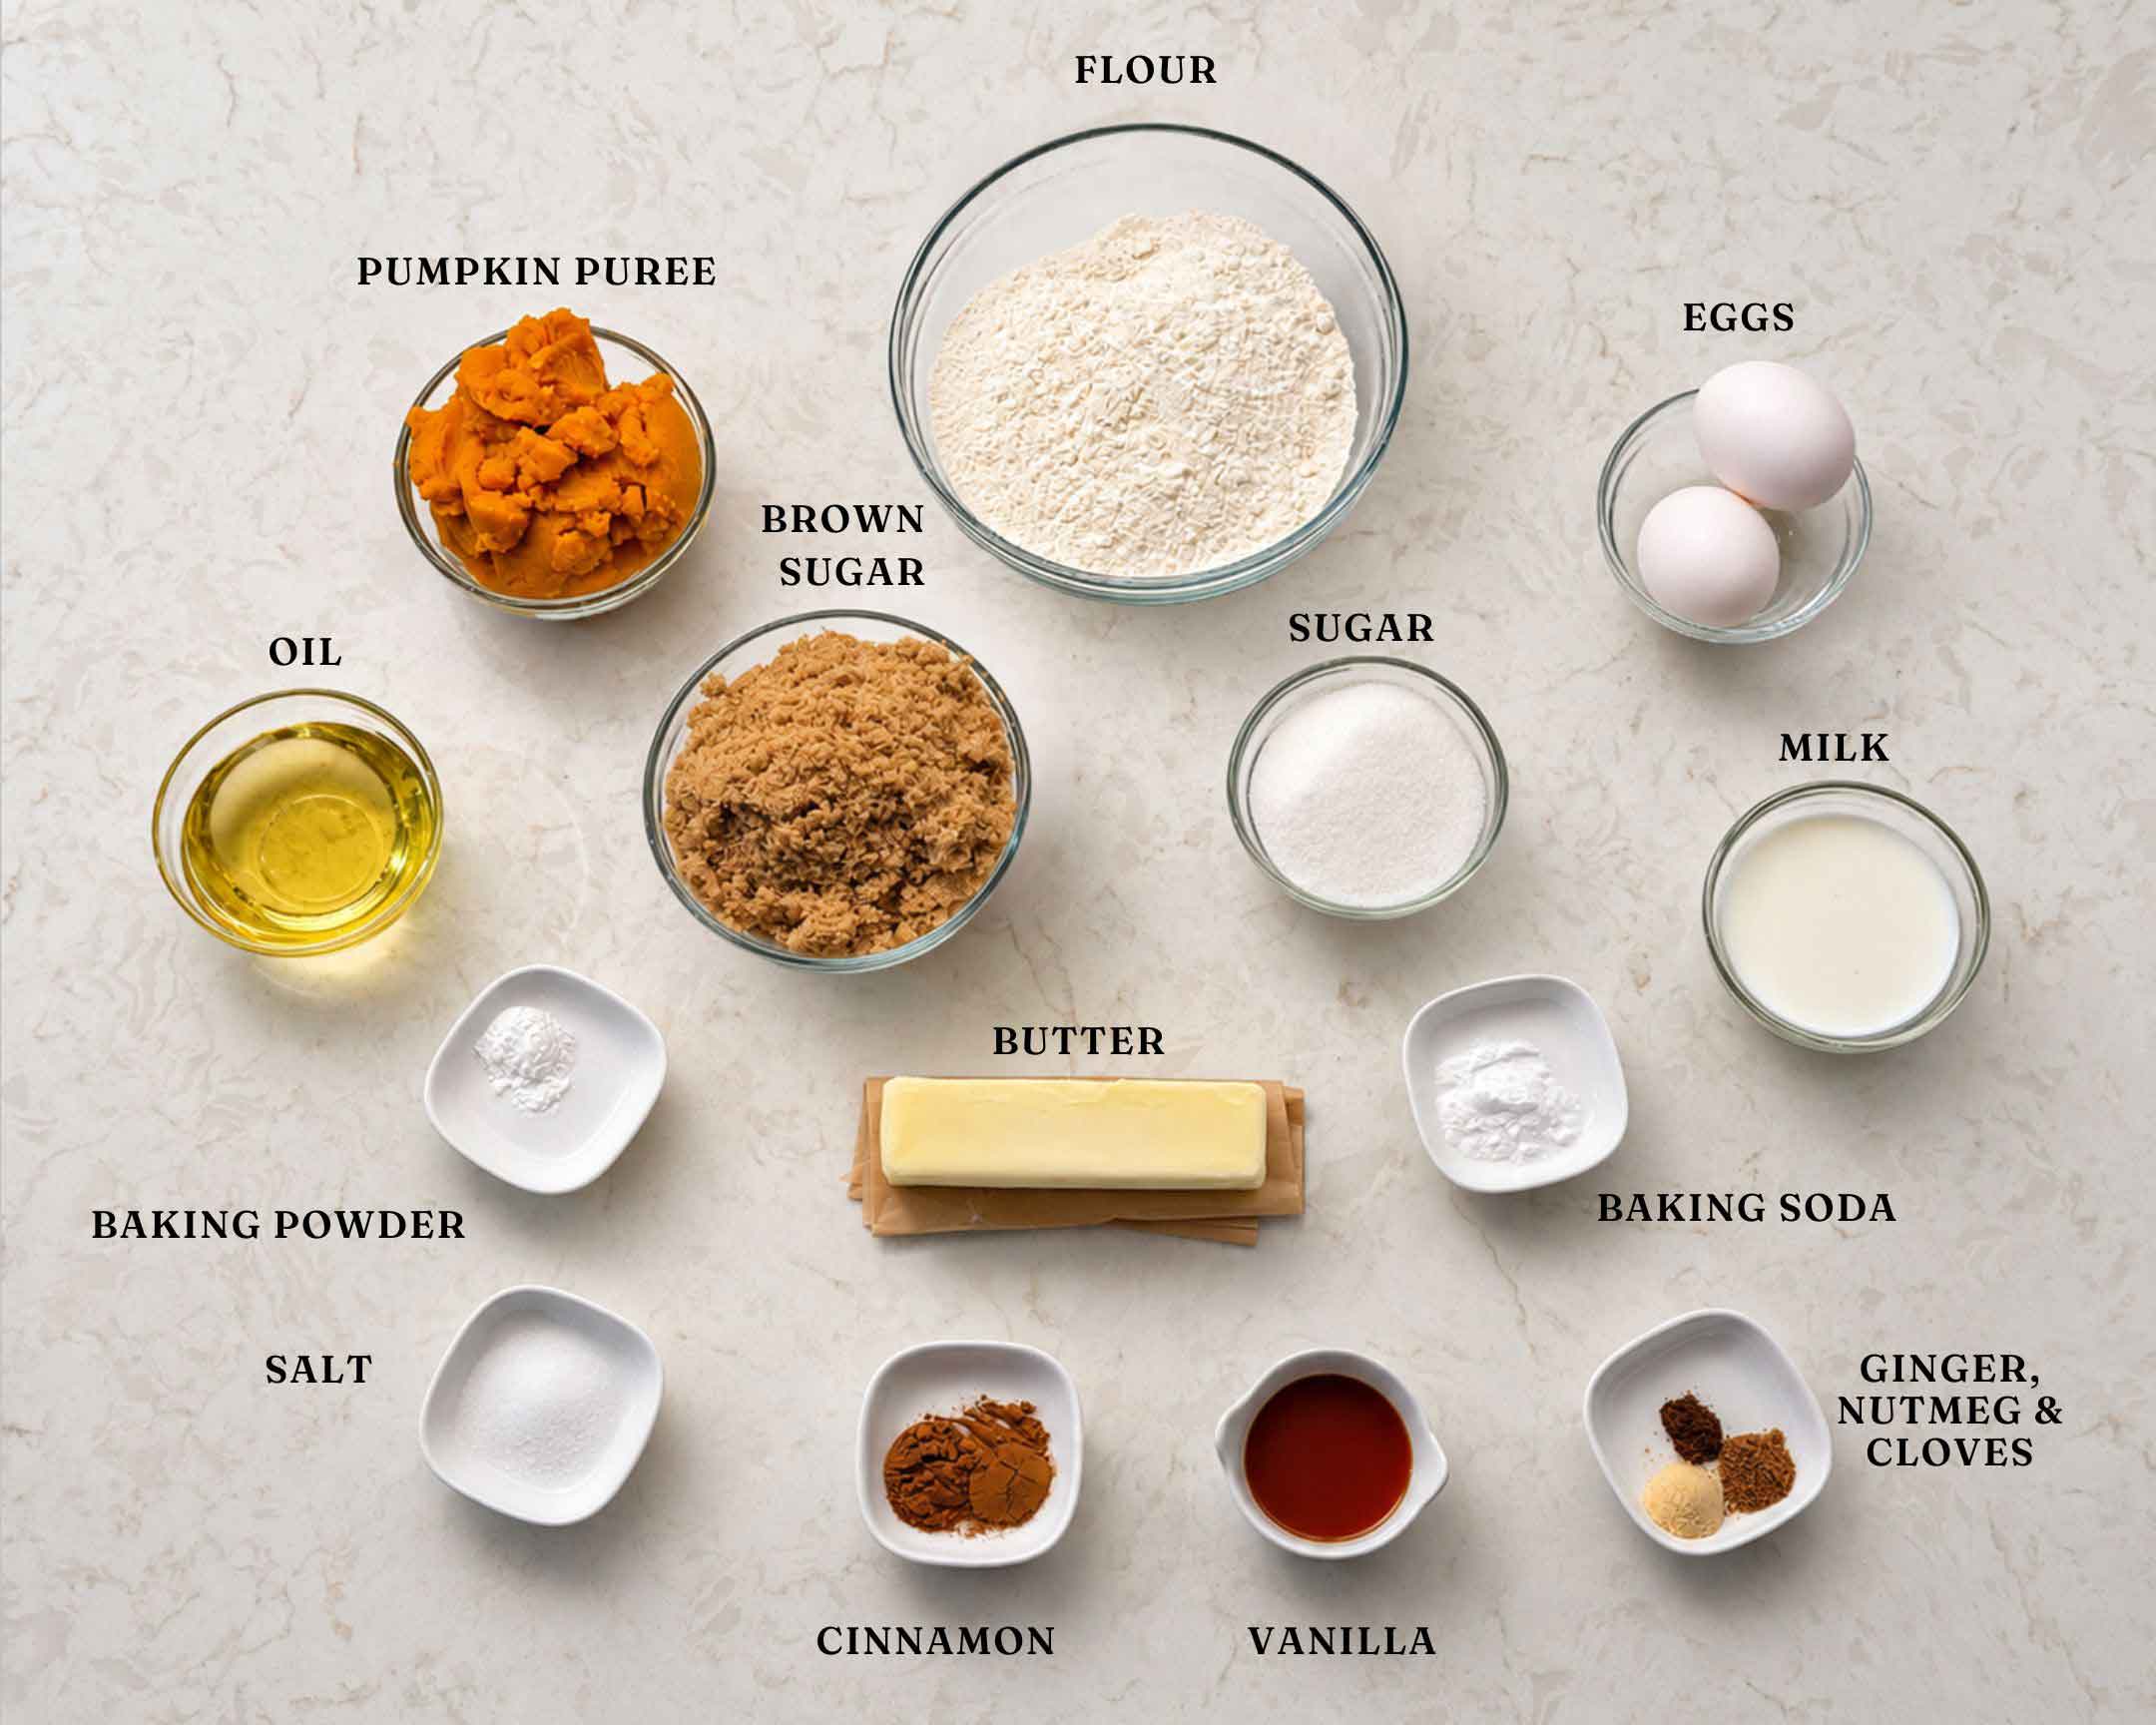
Butter and oil, both. The butter is flavor, especially once you brown it. The oil is what keeps the loaf soft on day three, because oil stays liquid at room temperature and butter does not. Use a neutral one like avocado, sunflower, or canola so it does not compete with the spices.
Brown sugar does most of the work. A full cup of packed light brown sugar goes in, against just 1/3 cup of granulated. The molasses in the brown sugar is what gives pumpkin bread that darker, slightly caramel taste, and it holds onto moisture too.
Four spices, not a blend. Cinnamon, ginger, nutmeg, and cloves, measured separately. You can absolutely use 1 tablespoon of pumpkin pie spice instead if that is what you have, and I will not think less of you for it. But measuring them yourself lets you lean on the cinnamon, which is what I did.
Milk. Pumpkin puree is thick, and without milk the batter is stiff enough to fight you when you fold it.
Why Brown the Butter?
Butter is about 16% water, plus a small percentage of milk solids. When you melt it and keep going, the water cooks off and those milk solids toast against the bottom of the pan and turn deep and nutty. That is the whole trick. Nothing goes in, something comes out, and what is left gets toasted.
In pumpkin bread it matters more than usual, because pumpkin itself is pretty mild. The spices bring the warmth, and the browned butter lays a savory, roasted note underneath so the whole loaf does not read as just sweet. It is the difference between good pumpkin bread and pumpkin bread people ask you about.
Don’t worry if you have never done it before. I’ll walk you through exactly what it looks like at each stage.
How to Make Pumpkin Bread
Here’s an overview with notes. The full measurements are in the recipe card below.
1. Get the pan and oven ready
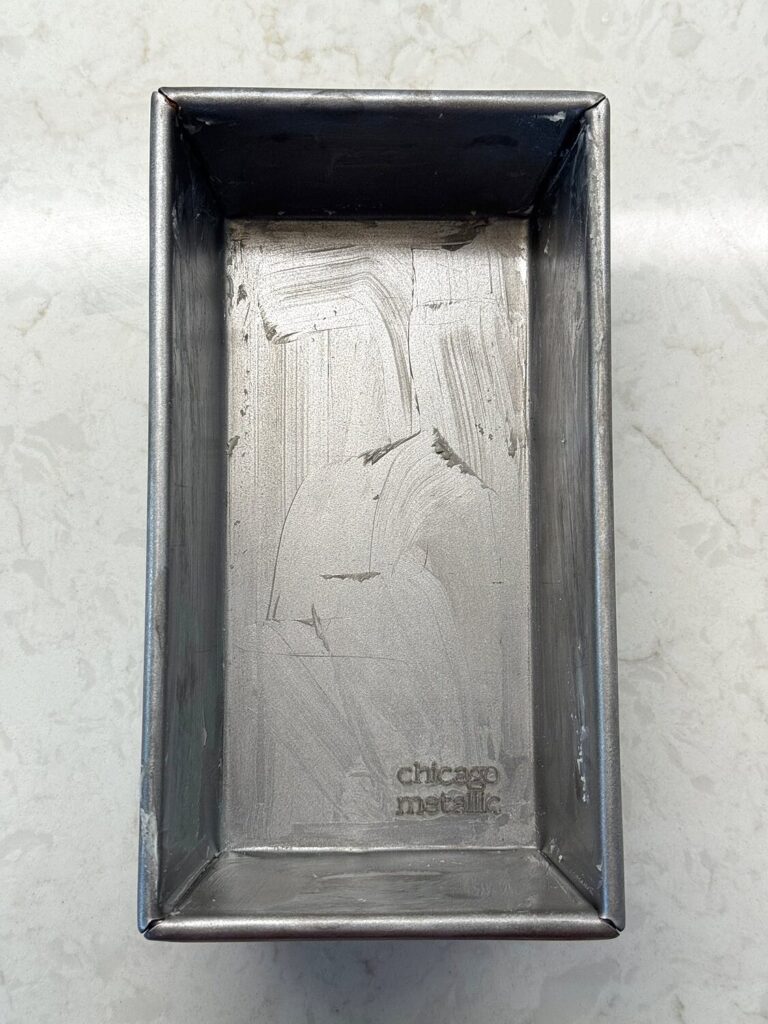
Heat the oven to 350°F and grease a 9 x 5-inch metal loaf pan, bottom and sides, right up over the rim a little. I meant to line mine with parchment and completely forgot: the loaf came out clean anyway, so a good greasing is genuinely enough. If you would rather have the insurance, lay in a strip of parchment long enough to hang over the two long sides and use it as a sling.
2. Brown the butter
Put the butter in a light-colored saucepan over medium heat. It will melt, and then it will foam up, and that is the water cooking out of it. Keep swirling the pan or stirring gently so the solids on the bottom do not sit in one spot.
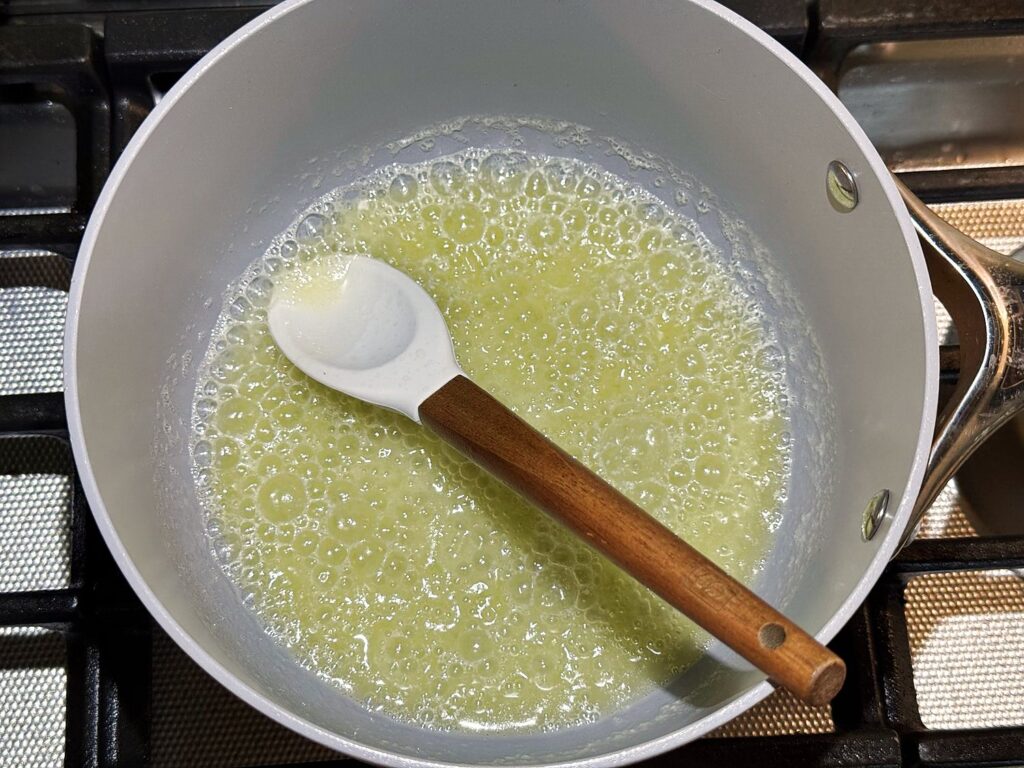
Somewhere around 5 to 8 minutes in, the foam settles down, the bits on the bottom go a deep golden brown, and the whole kitchen smells toasty. Mmmm, love that scent. That is your cue. Pour it straight into a large mixing bowl right away, browned bits and all, because those specks are the entire point of the step. Be careful not to leave it in the hot pan longer, because the residual heat will take it from browned to burnt faster than you think it would.
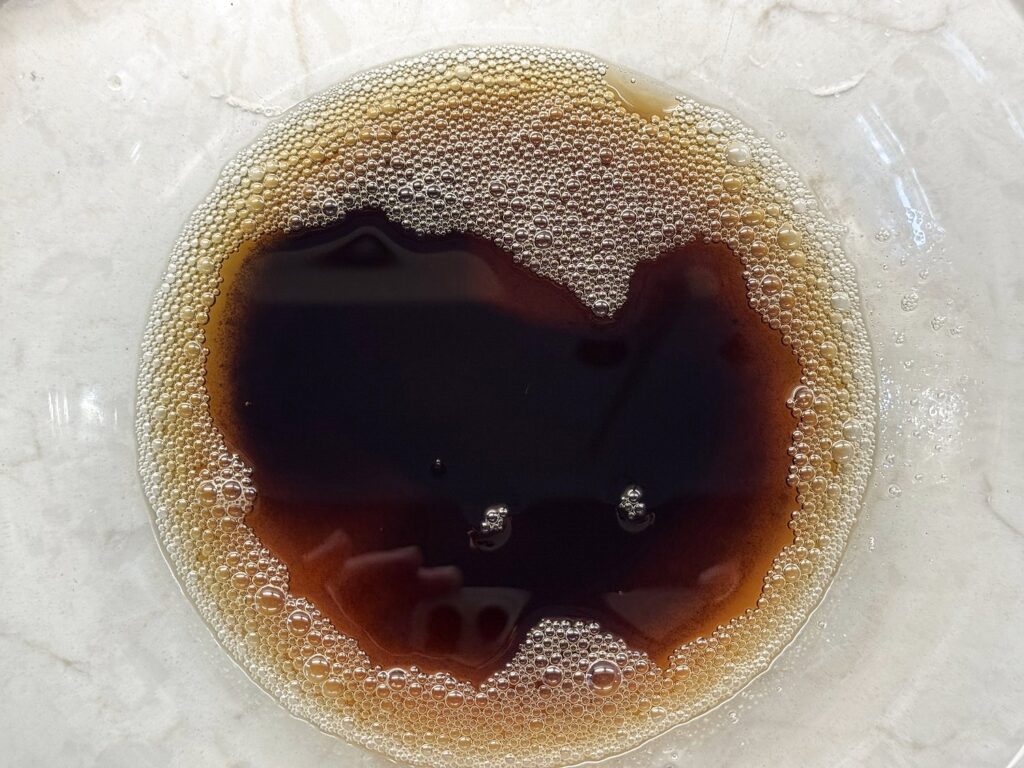
Let it cool for about 10 minutes before anything else goes in. You are about to add eggs, and eggs hitting hot butter will scramble on you.
3. Whisk the dry bowl, sugars included
In a separate bowl, whisk together the flour, baking soda, baking powder, salt, and all four spices. Then add both sugars right into that same bowl and whisk again until the whole thing is an even tan color with no brown sugar lumps hiding in it. It will look and feel like damp sand.
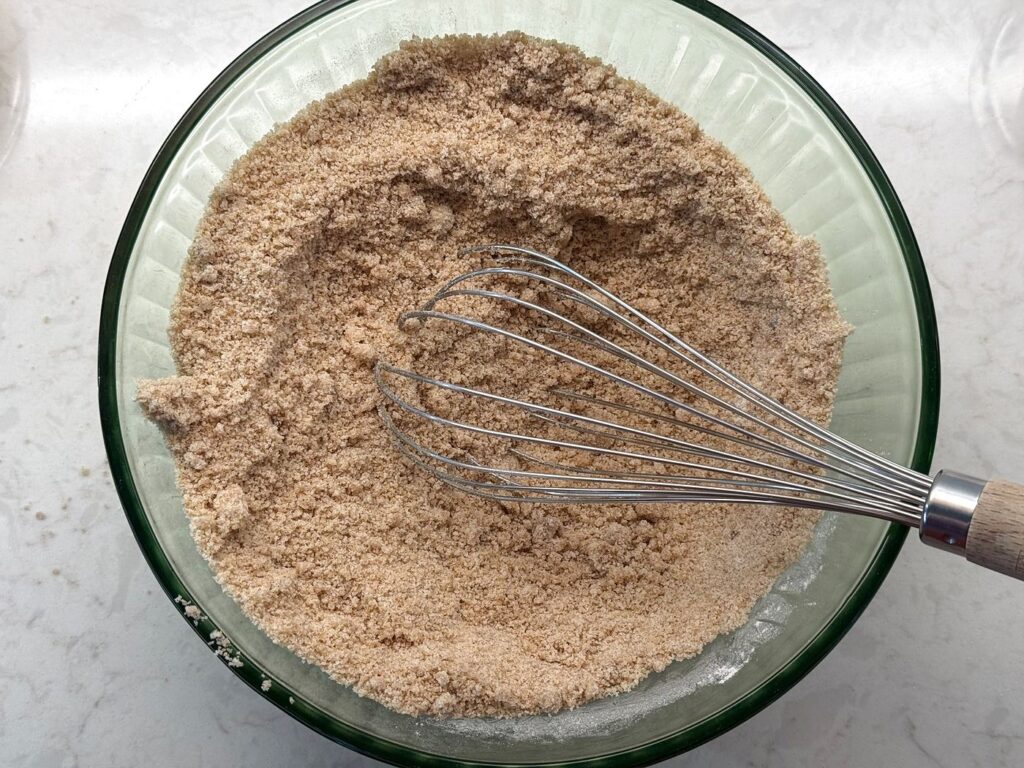
One common mistake is leaving a pea-sized lump of brown sugar in there. It will not dissolve once the batter comes together, and you will find it as a damp spot in a finished slice. Press any lumps against the side of the bowl with the whisk.
4. Finish the wet bowl
Into your cooled browned butter goes the oil first, whisked in. Then the eggs, one at a time, whisking until smooth. Then the pumpkin puree, the milk, and the vanilla. It will look a little thin and strange at this point, which is fine.
Give the butter its full 10 minutes before you start, though. One common mistake here is getting impatient and cracking the eggs into butter that is still hot, and you end up whisking little cooked flecks of egg through your batter. If you are unsure, touch the side of the bowl… warm is fine, hot is not.
5. Fold, do not beat
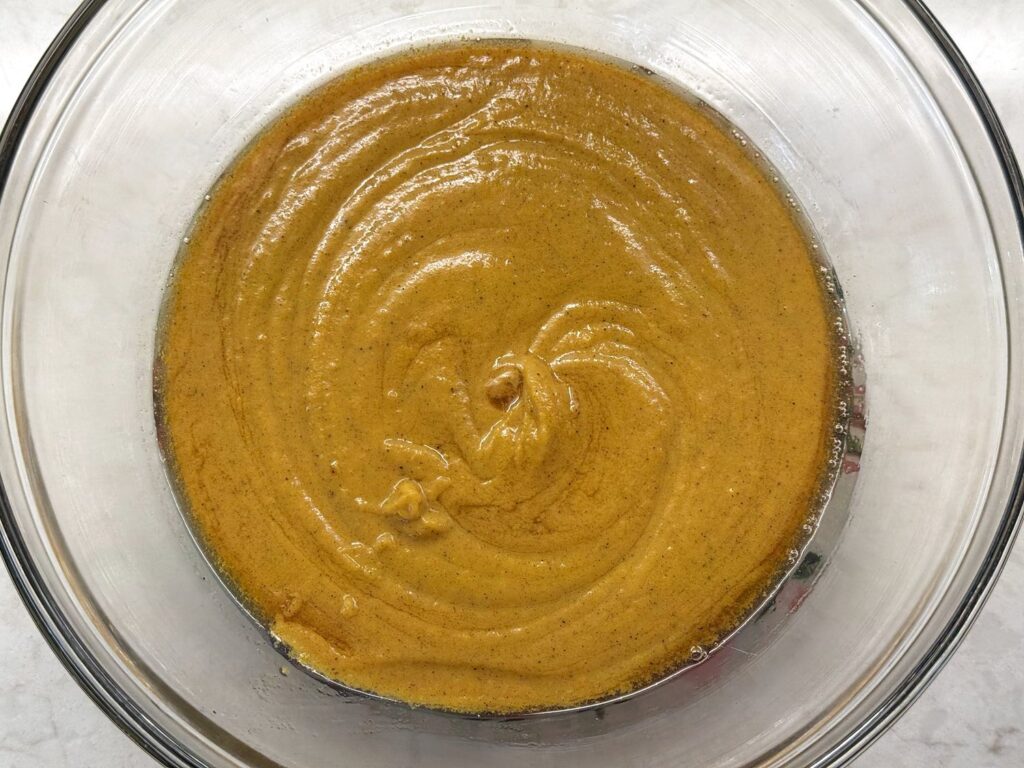
Add the dry mixture to the wet and fold gently, just until you stop seeing dry flour. A few streaks are better than a smooth batter that has been stirred forty times. Quick breads get tough when the flour develops gluten, and gluten develops when you keep mixing.
6. Bake it
Pour the batter into the greased pan and smooth the top. It will come a little over halfway up the sides, which leaves it room to climb.
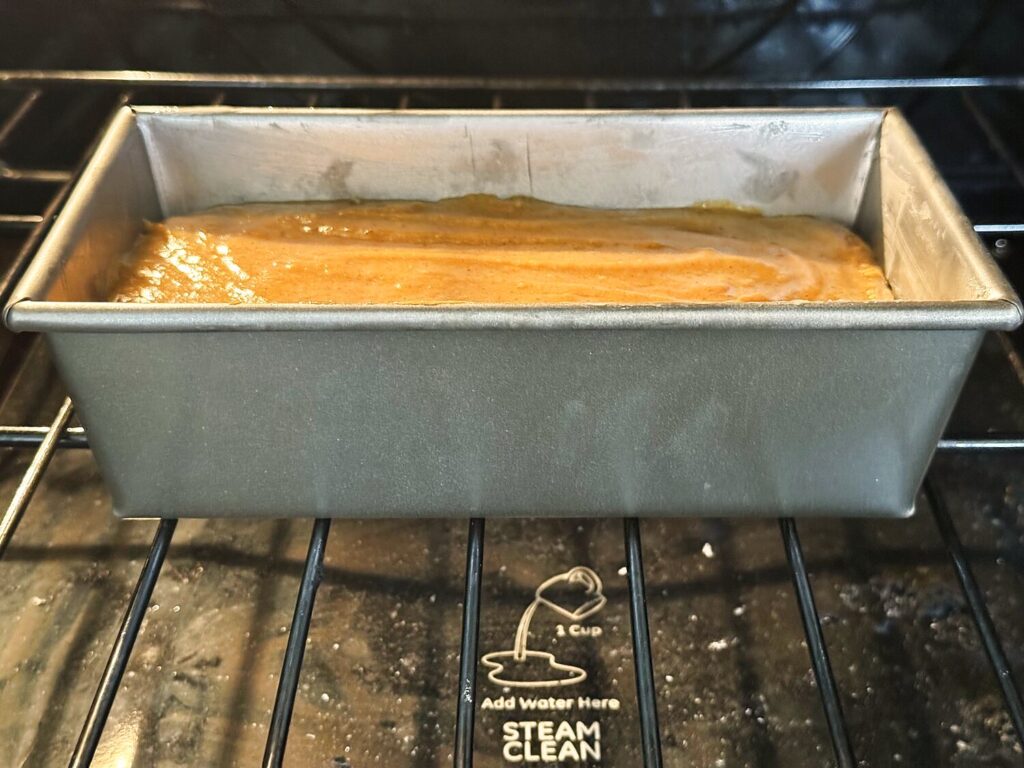
Start checking at 55 minutes. Mine came out at exactly 60, and I would plan on somewhere in that window. You are looking for a toothpick in the very center to come out with moist crumbs clinging to it, not wet batter. If the top is getting darker than you want before the center is done, lay a piece of foil loosely over it and keep going.
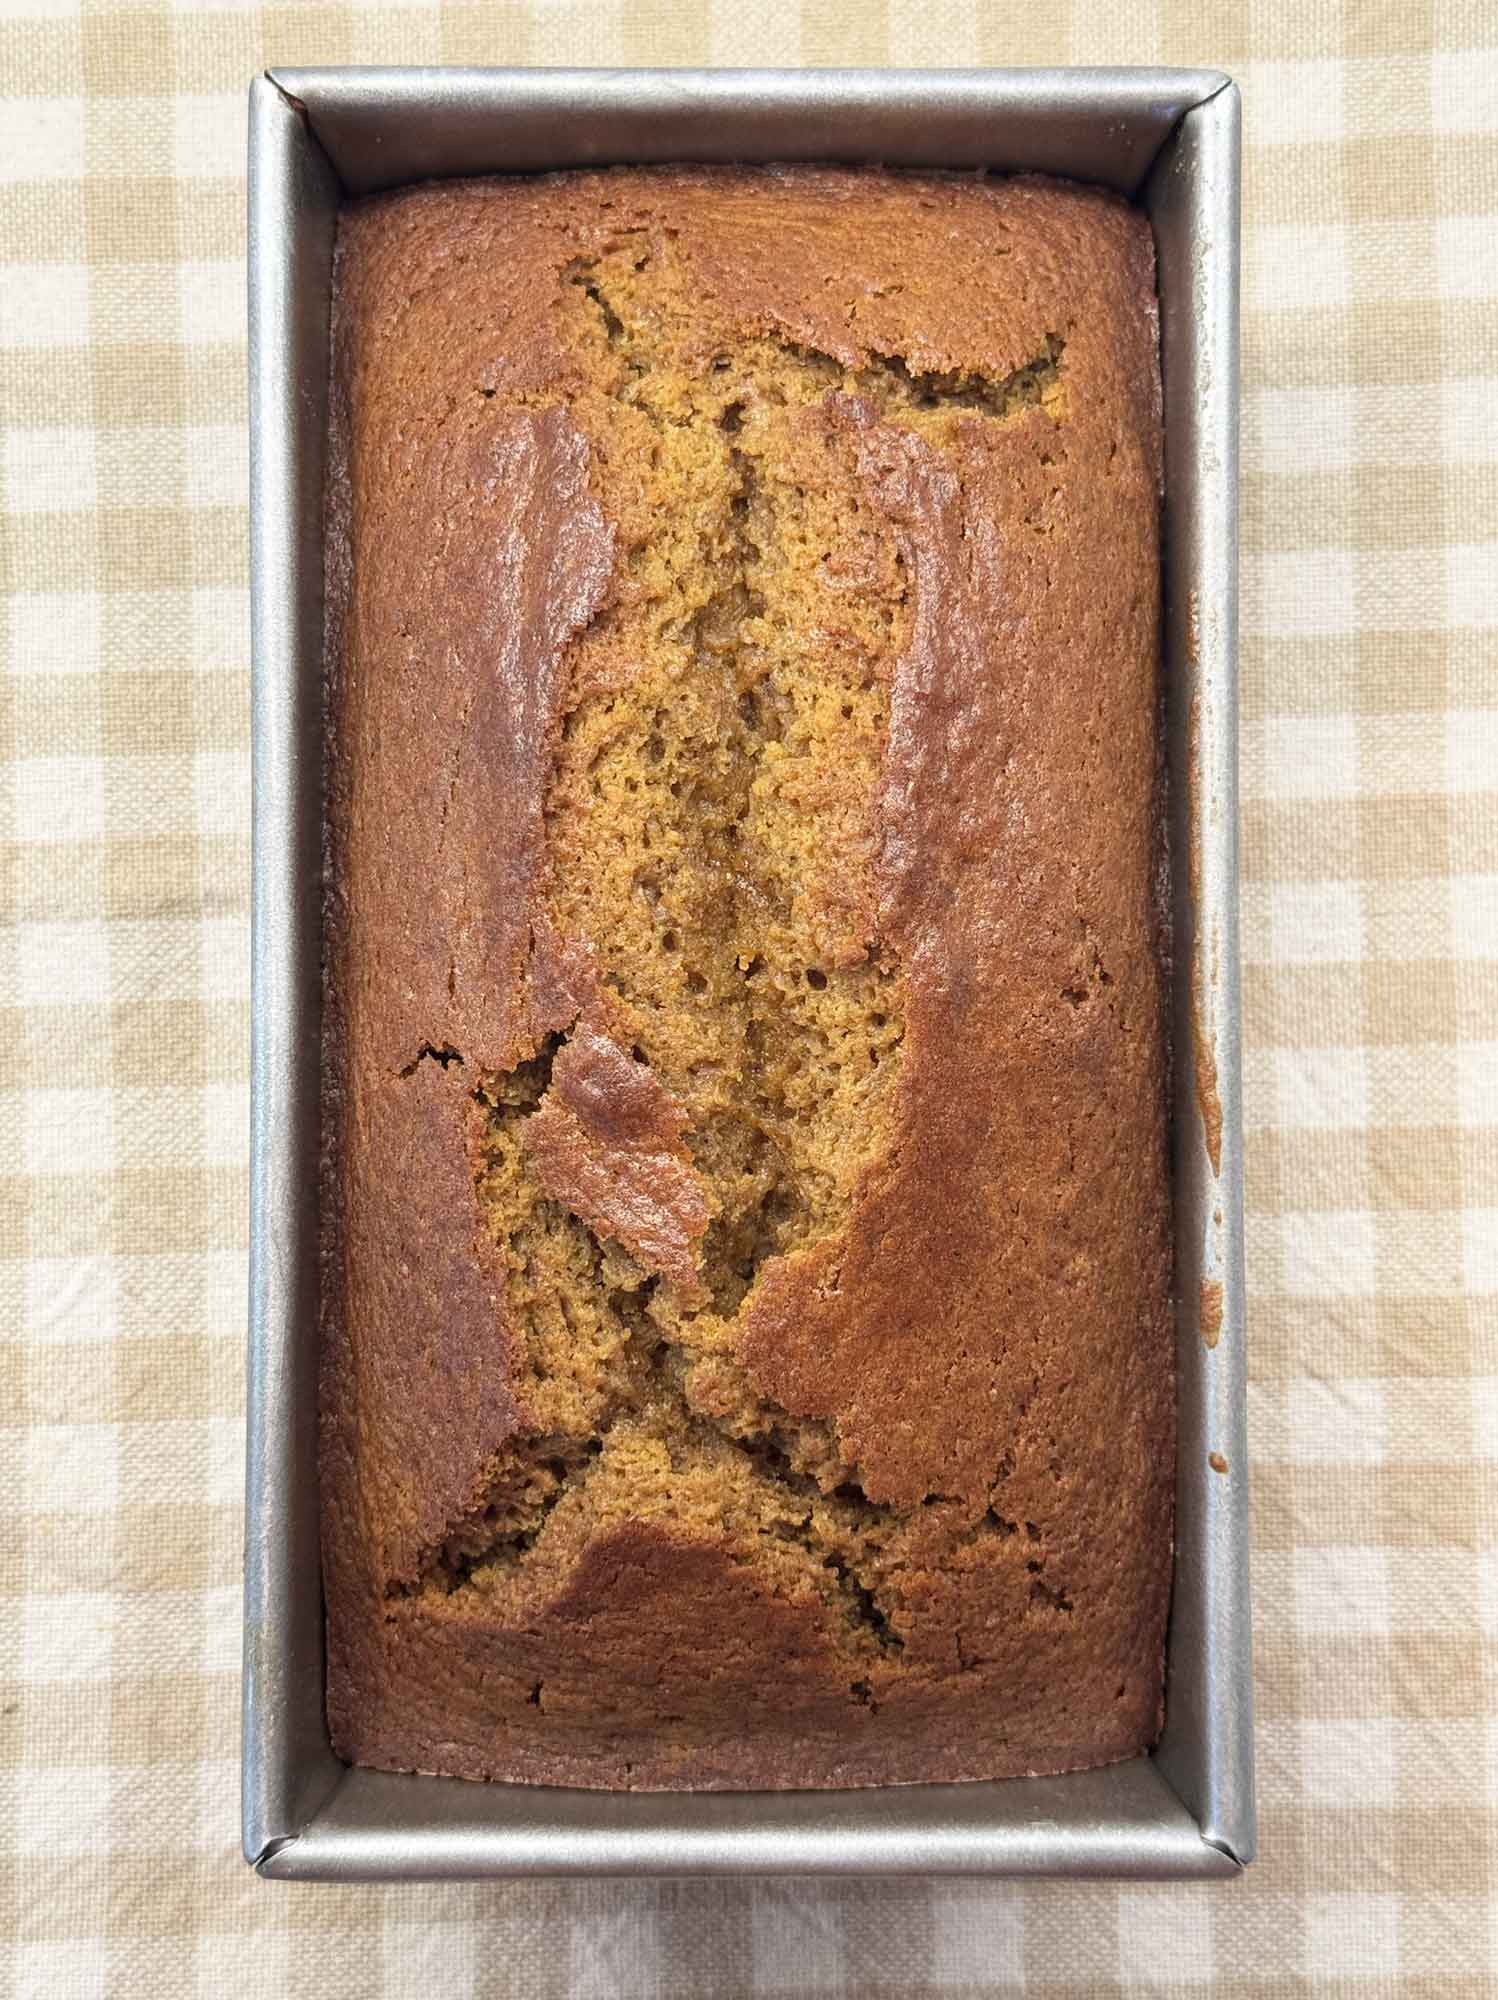
7. Cool it (yes, really)
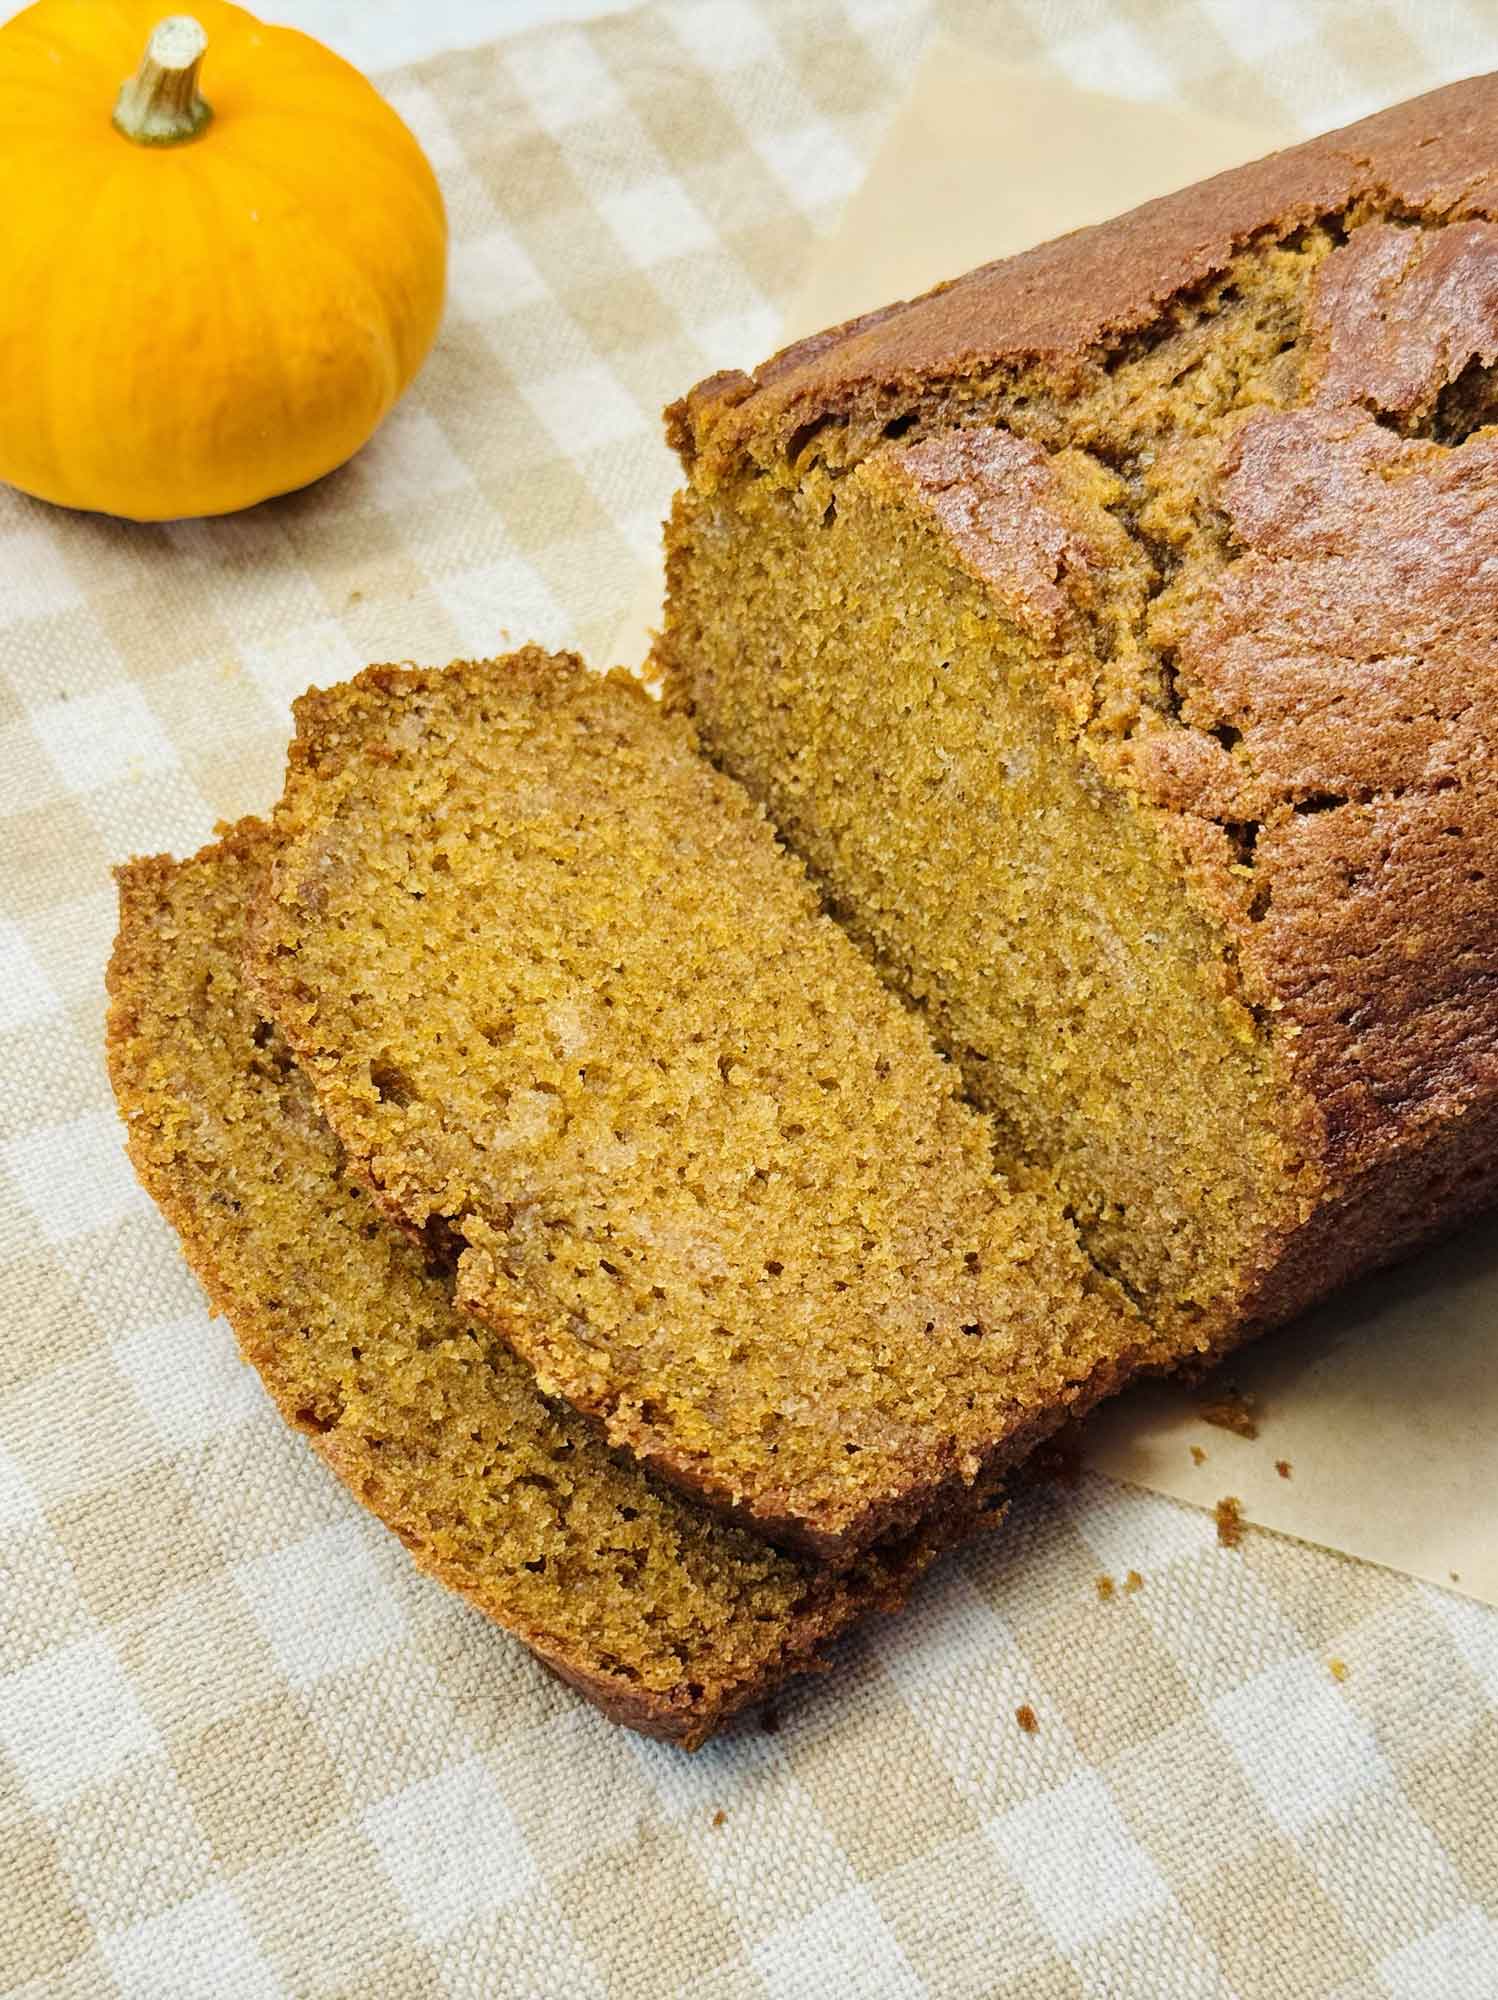
Let the loaf sit in the pan for about 15 minutes, then turn it out onto a rack and let it cool the rest of the way. I know. It smells incredible and you want a slice immediately. But a hot quick bread is still setting, and cutting it early gives you a gummy, squashed slice instead of the crumb you worked for.
Pumpkin Bread Recipe
Equipment
- 9 x 5-inch metal loaf pan
- Light-colored saucepan
- Two mixing bowls and a whisk
Ingredients
- 1/2 cup (113 g) butter unsalted
- 1/4 cup neutral oil, such as avocado, sunflower, or canola
- 1 3/4 cups (220 g) all-purpose flour
- 1 tsp baking soda
- 1/2 tsp baking powder
- 3/4 tsp fine salt
- 2 tsp ground cinnamon
- 1/2 tsp ground ginger
- 1/4 tsp ground nutmeg
- 1/8 tsp ground cloves
- 1 cup (200 g) light brown sugar packed
- 1/3 cup (67 g) granulated sugar
- 2 large eggs
- 1 cup (240 g) pumpkin puree (not pumpkin pie filling)
- 1/4 cup milk
- 2 tsp vanilla extract
Instructions
Instructions
- Heat the oven to 350°F. Grease a 9 x 5-inch metal loaf pan well on the bottom and sides.
- Place the butter in a light-colored saucepan over medium heat. Cook, swirling or stirring frequently, as the butter melts, foams, and begins to brown. Continue until the milk solids at the bottom are deep golden brown and smell nutty, about 5 to 8 minutes. Immediately pour the butter, including all the browned bits, into a large mixing bowl. Let it cool for about 10 minutes.
- In a separate bowl, whisk together the flour, baking soda, baking powder, salt, cinnamon, ginger, nutmeg, and cloves. Add the brown sugar and granulated sugar and whisk again until the mixture is an even tan color with no lumps of brown sugar remaining.
- Whisk the oil into the cooled browned butter. Add the eggs and whisk until smooth.
- Whisk in the pumpkin puree, milk, and vanilla.
- Add the dry mixture to the wet and fold gently, just until no dry flour remains. Avoid overmixing.
- Pour the batter into the prepared pan and smooth the top.
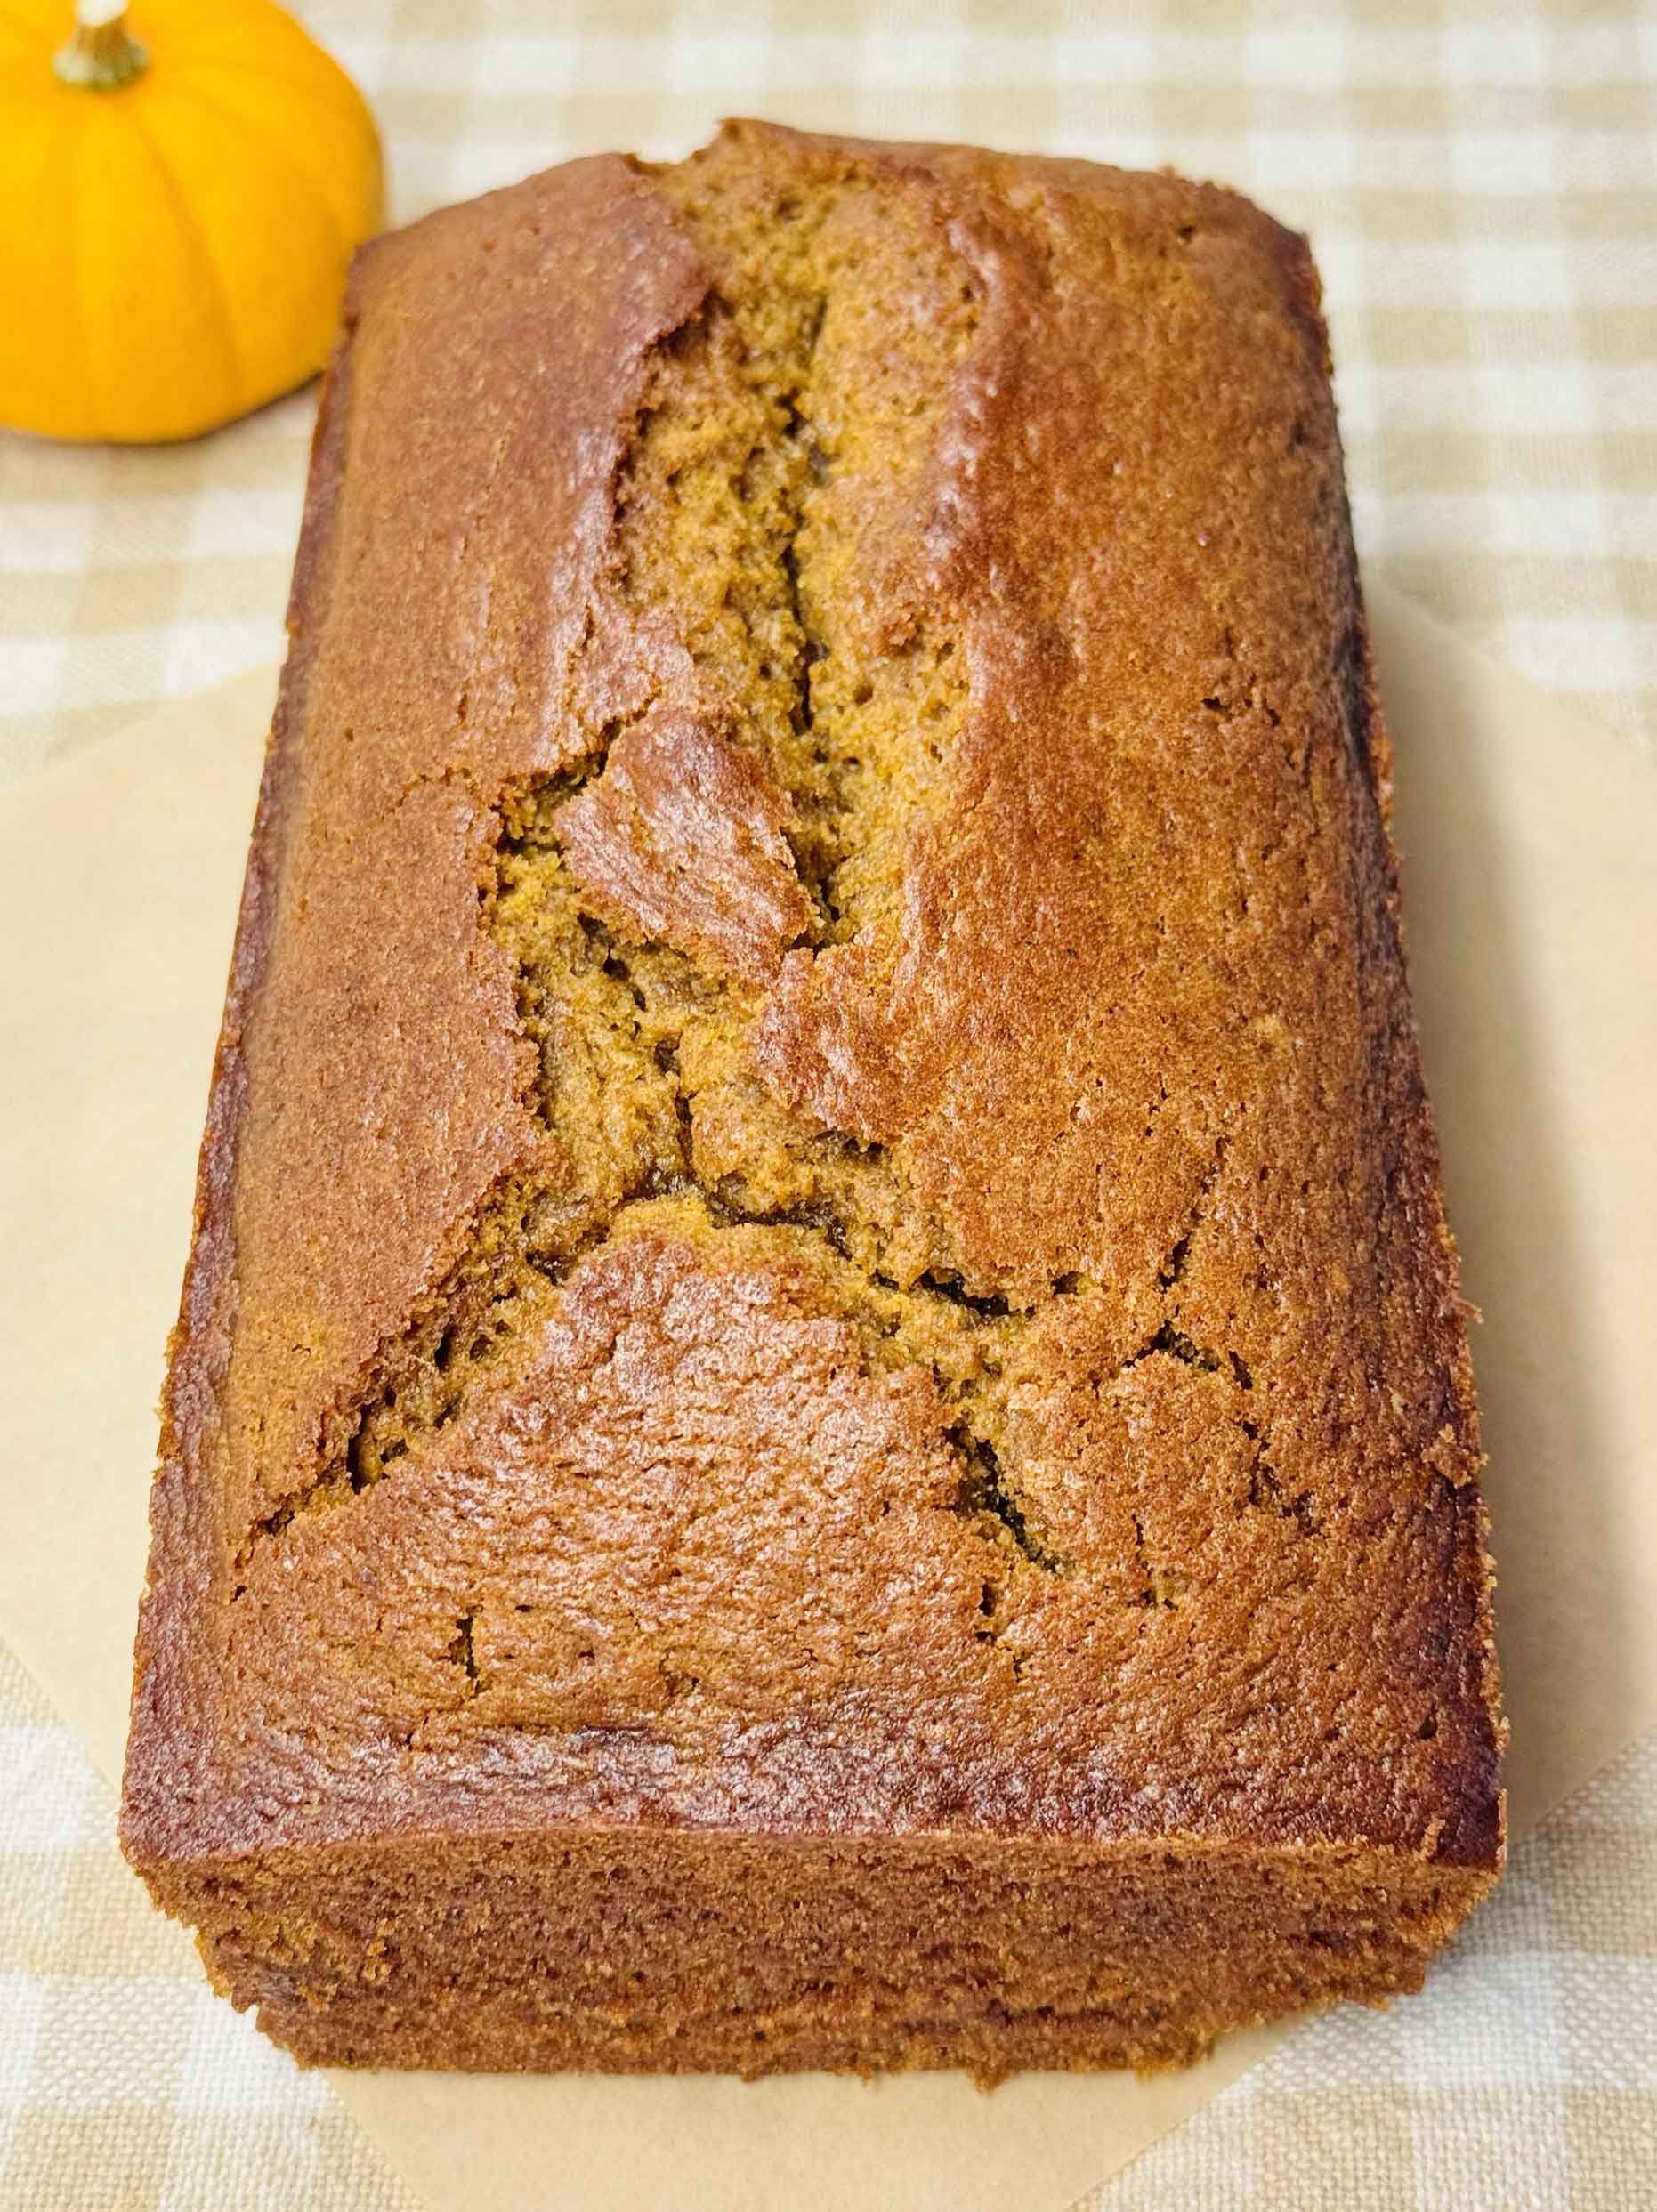
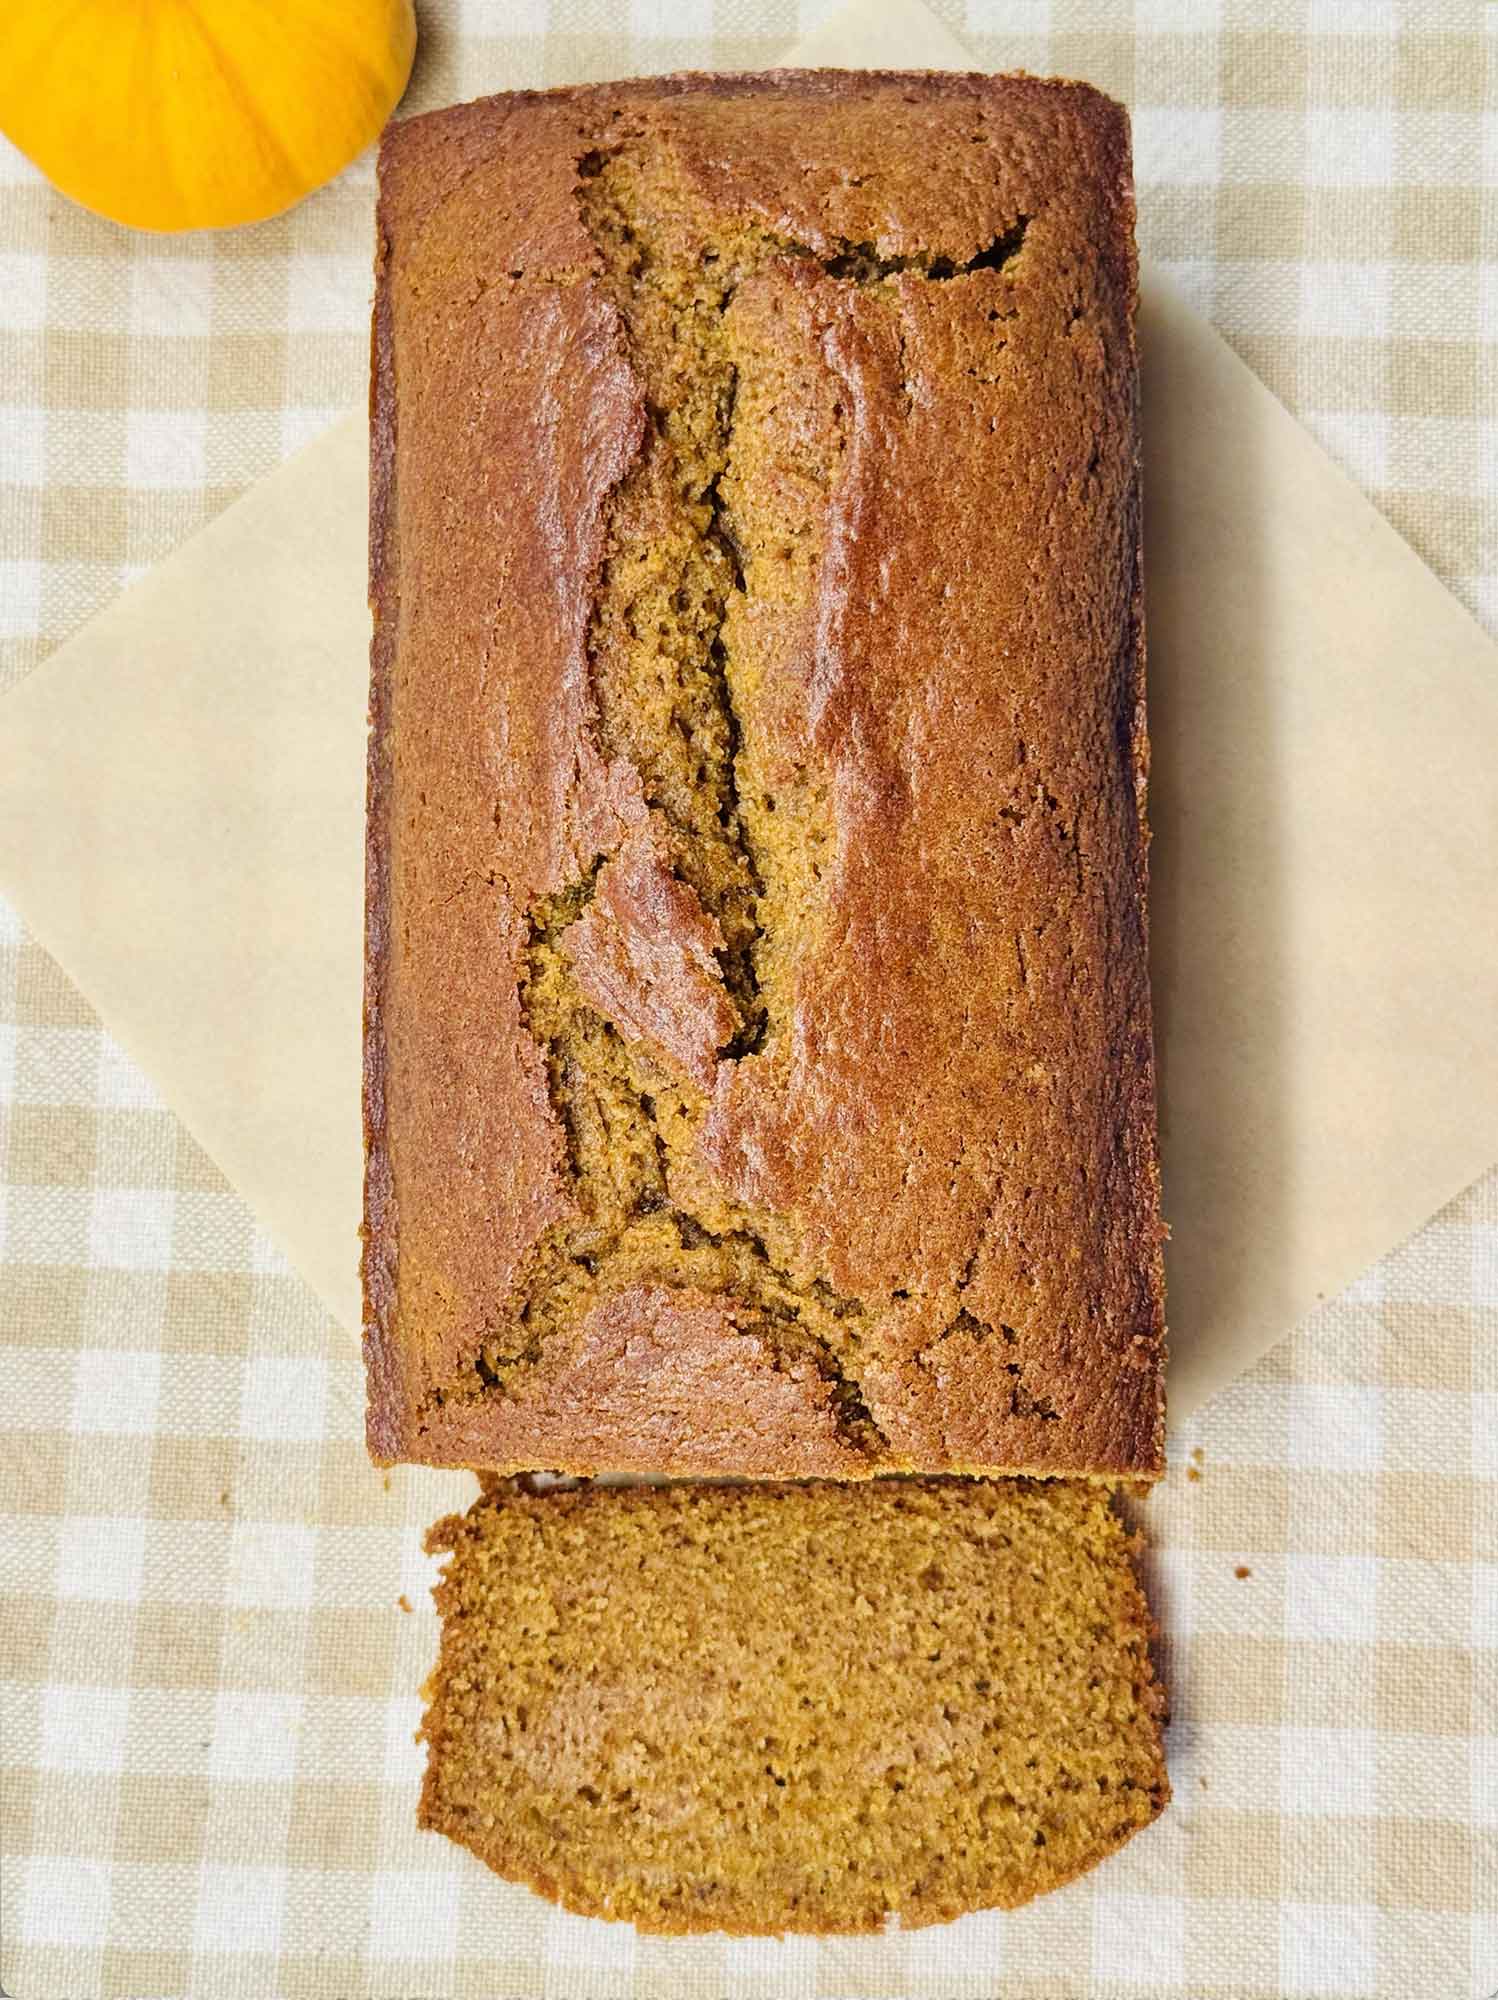
- Bake for 55 to 65 minutes, about 60 in my oven, until a toothpick inserted into the center comes out with moist crumbs rather than wet batter. The top will split down the center as it bakes. If the loaf browns faster than the center finishes baking, cover it loosely with foil.
- Cool in the pan for about 15 minutes, then turn out onto a rack and cool completely before slicing.
Nutrition
Notes
How to Store Pumpkin Bread
Let the loaf cool completely first, because wrapping a warm loaf traps steam and gives you a damp, sticky top. Once it is cool, wrap it tightly in plastic wrap or foil and leave it on the counter. It holds for about four days that way, and I think day two is the best it gets… the spices settle and the crumb evens out overnight.
In the refrigerator it will keep closer to a week, though cold does firm up the crumb. A slice comes back nicely with about 10 seconds in the microwave.
For the freezer, wrap the cooled loaf in plastic and then foil, or slice it first and freeze the slices with parchment between them so you can pull out one at a time. It keeps about 3 months. Thaw at room temperature still wrapped, which lets the condensation land on the wrapping instead of on your bread.
Pumpkin Bread Questions
Why did my pumpkin bread crack down the middle?
Because it is supposed to. The outside of the loaf sets before the middle does, and the middle keeps rising and has to break through the crust to do it. If yours does not crack at all, your oven may be running cool.
Can I use fresh pumpkin instead of canned?
You can, but drain it first. Homemade puree from a roasted sugar pumpkin holds a lot more water than canned, and that extra water will make the loaf dense and slow to bake through. Let it sit in a fine strainer or a cloth for a half hour and you will be much closer to canned.
Do I have to brown the butter?
No, and nothing else about the recipe has to change. Melt the butter, let it cool the same 10 minutes, and carry on from there.
What you are trading away is the toasted note underneath the spices, which for me is the whole point of making this version. The loaf is still good, just sweeter and more straightforward. One small thing to expect: browning boils off most of the water in the butter, so a plain melted stick puts a couple more tablespoons of liquid into the batter. It will not hurt anything, but your loaf may want an extra minute or two in the oven, so go by the toothpick rather than the clock.
My loaf sank in the middle. What happened?
Usually it came out a touch early. The center was still setting and collapsed once the support of the oven heat was gone. Next time, leave it in a few more minutes and check that the toothpick comes out with crumbs rather than batter.
Can I add chocolate chips or nuts?
Go for it. About a cup of either, tossed with a spoonful of the dry mixture first so they do not all sink, folded in at the very end with the last few strokes.
More Fall Baking from the Farm
If you are in a pumpkin mood, my baked pumpkin doughnut recipe uses the same spice cupboard and does not need a doughnut pan. There is also homemade pumpkin spice coffee creamer, which is very good next to a slice of this, and my slow cooker apple butter for when you are ready to move on from pumpkin to apples.
If you make this one, come back and tell me how it went. And when my mom shares her recipe (it includes chocolate!), you will be the first to know.
Happy baking!
Jennifer
Tried this recipe?
Tap the stars in the recipe card to leave a quick rating. Your rating helps other home cooks know this recipe works in a real kitchen, not just mine.
And as a thank-you for your feedback, you will receive a free printable copy of my Maker Home Companion Cookbook, featuring my most popular recipes, each one formatted on a SINGLE, easy-to-use page, a perfect kitchen companion for easy meal prep. Click here to learn more about this cookbook and how you can get your copy!

Meet Jennifer
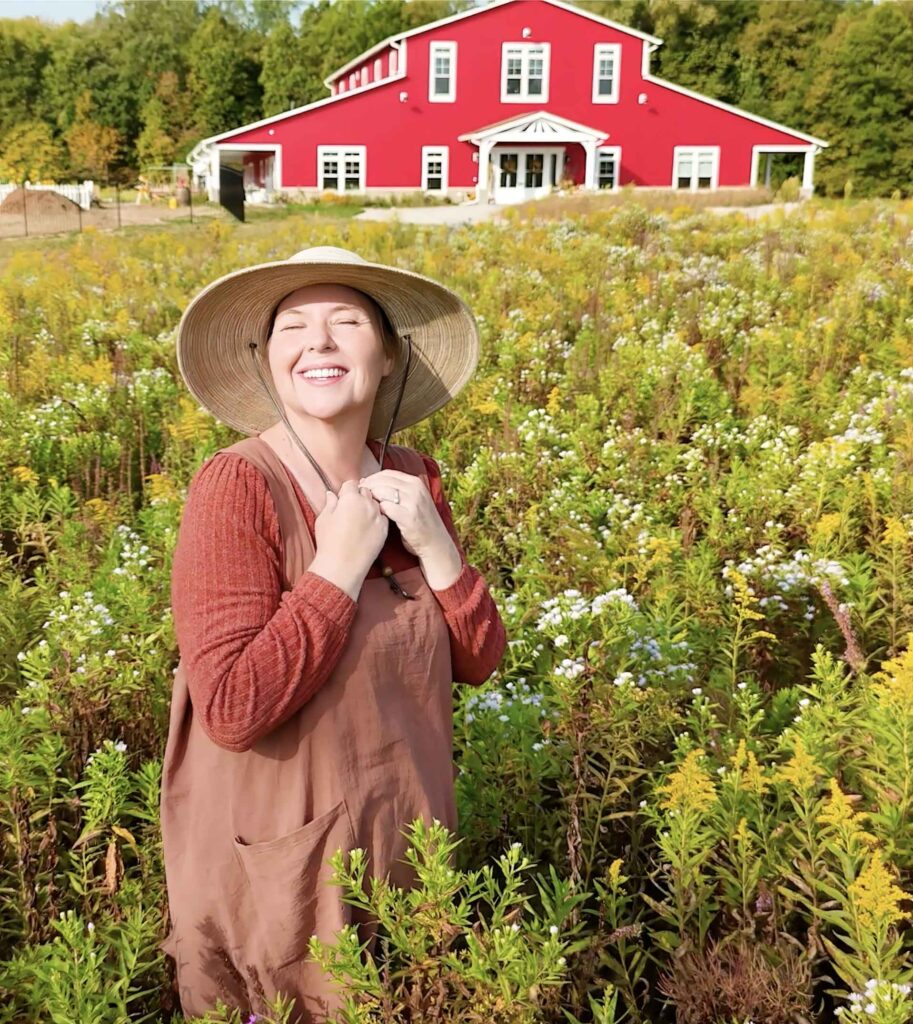
Jennifer cooks and experiments in the kitchen at Maker Farm, where she focuses on simple pantry cooking, homemade staples, and practical recipes that make everyday meals easier. Over the years she has tested many ways to make cooking simpler and more dependable, and shares the methods that work best in her own kitchen, occasionally showing them on her Heart to Home at Maker Farm vlog.