

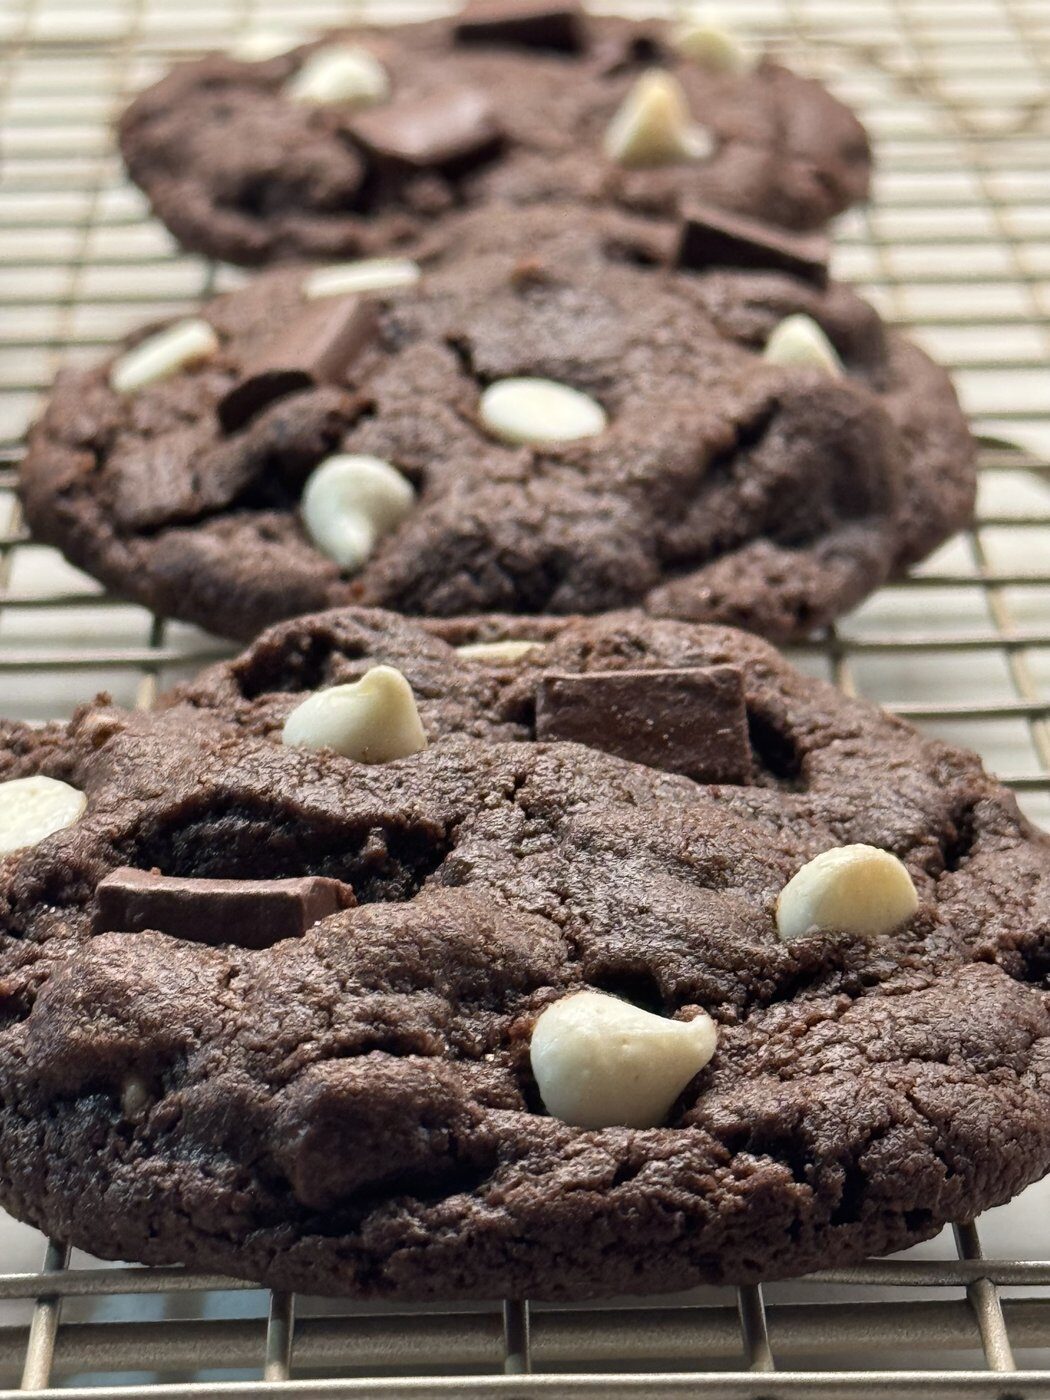
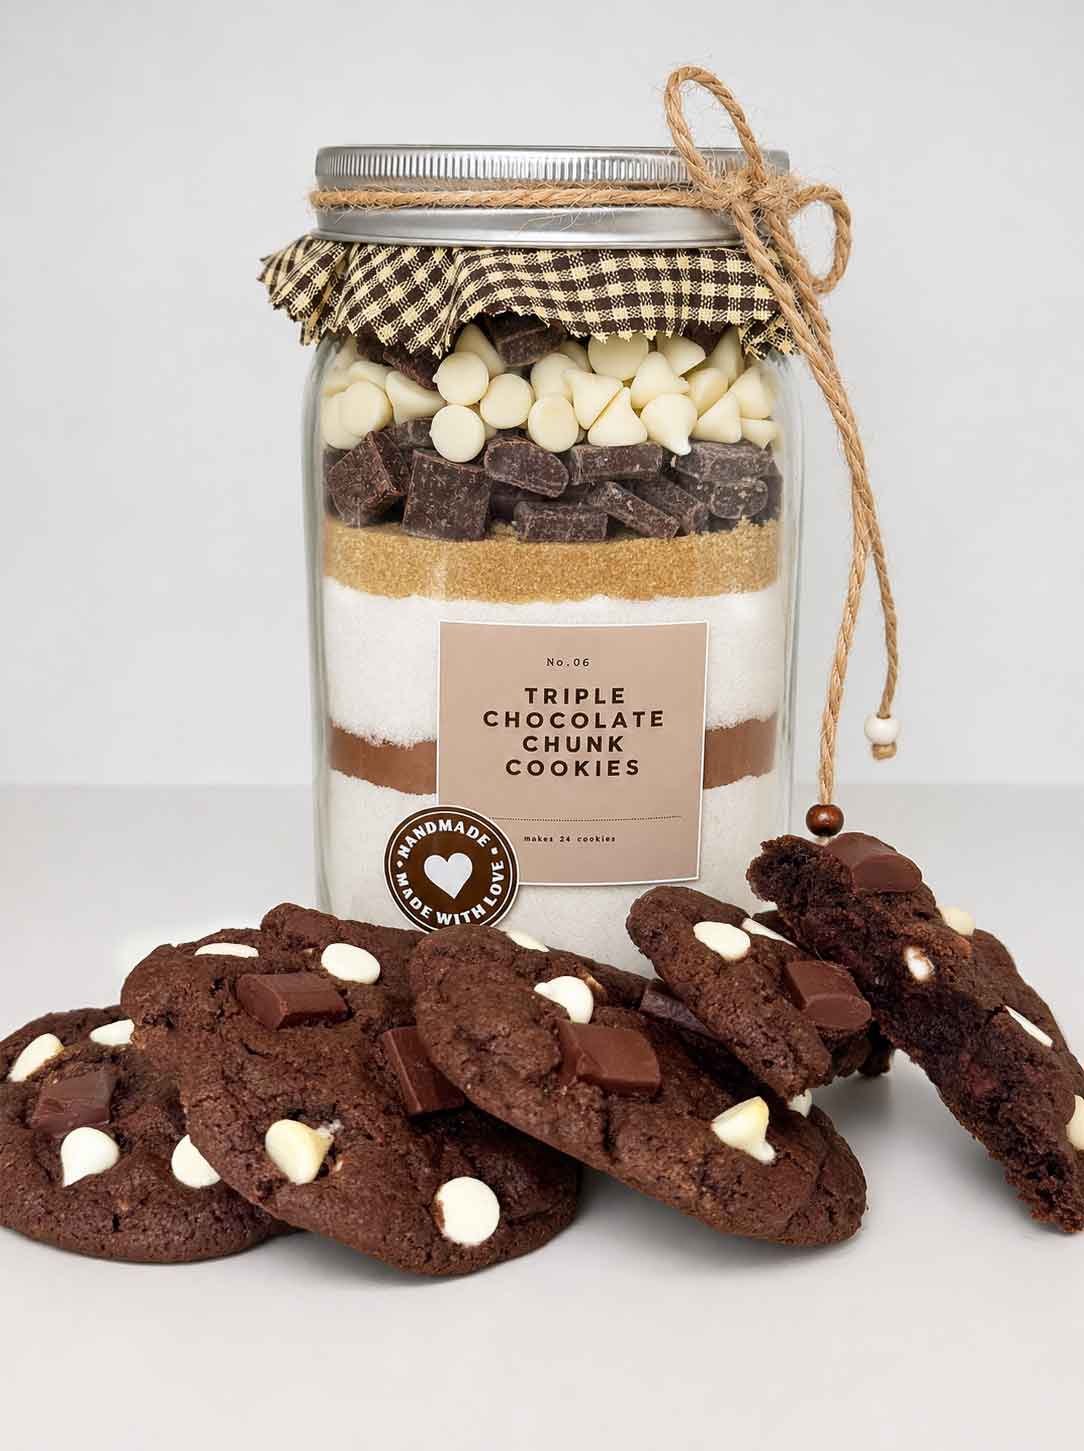
These easy triple chocolate cookies are thick, chewy, and bakery-style, with a dark Dutch-process cocoa dough, big semi-sweet chocolate chunks, and creamy white baking chips. You just mix butter, eggs, and vanilla into the dry ingredients and bake! Make a whole batch tonight or fill up a jar, tie on a bow, and give them as a gift.
Triple Chocolate Chunk Cookies At A Glance
Prep
15 min
Bake
10 to 11 min
Total
46 min
Makes
18 large cookies
Pan
Parchment-lined baking sheet
Main ingredients: Dutch-process cocoa, semi-sweet chocolate chunks, white baking chips, butter, all-purpose flour
My Favorite Cookie Recipe for Chocolate Lovers

I’ve been building a little family of cookie mixes in jars, and I adore these chocolatey cookies! They are so simple to make, and the cookies come out of my oven thick, round, and dotted with chunks.
And in case you’re wondering about the name, there are three chocolates in here: the cocoa, the semi-sweet chunks, and the white chips. (Okay, white baking chips aren’t technically white chocolate. Nobody at my house complained.)
Let’s dig in!

Tips and Notes Before You Start
Here’s what’s worth knowing before you pull out the mixing bowl:
- Soften the butter, but don’t melt it. Cut it into tablespoon-size pieces and it will be soft in about 15 minutes. Melted butter makes the cookies spread thin.
- The dough looks too dry at first. That’s normal. Keep mixing, and if necessary, finish it with your hands once the spoon stops helping.
- Line the pan with parchment. These don’t stick to an ungreased pan, but parchment keeps the pan clean between batches.
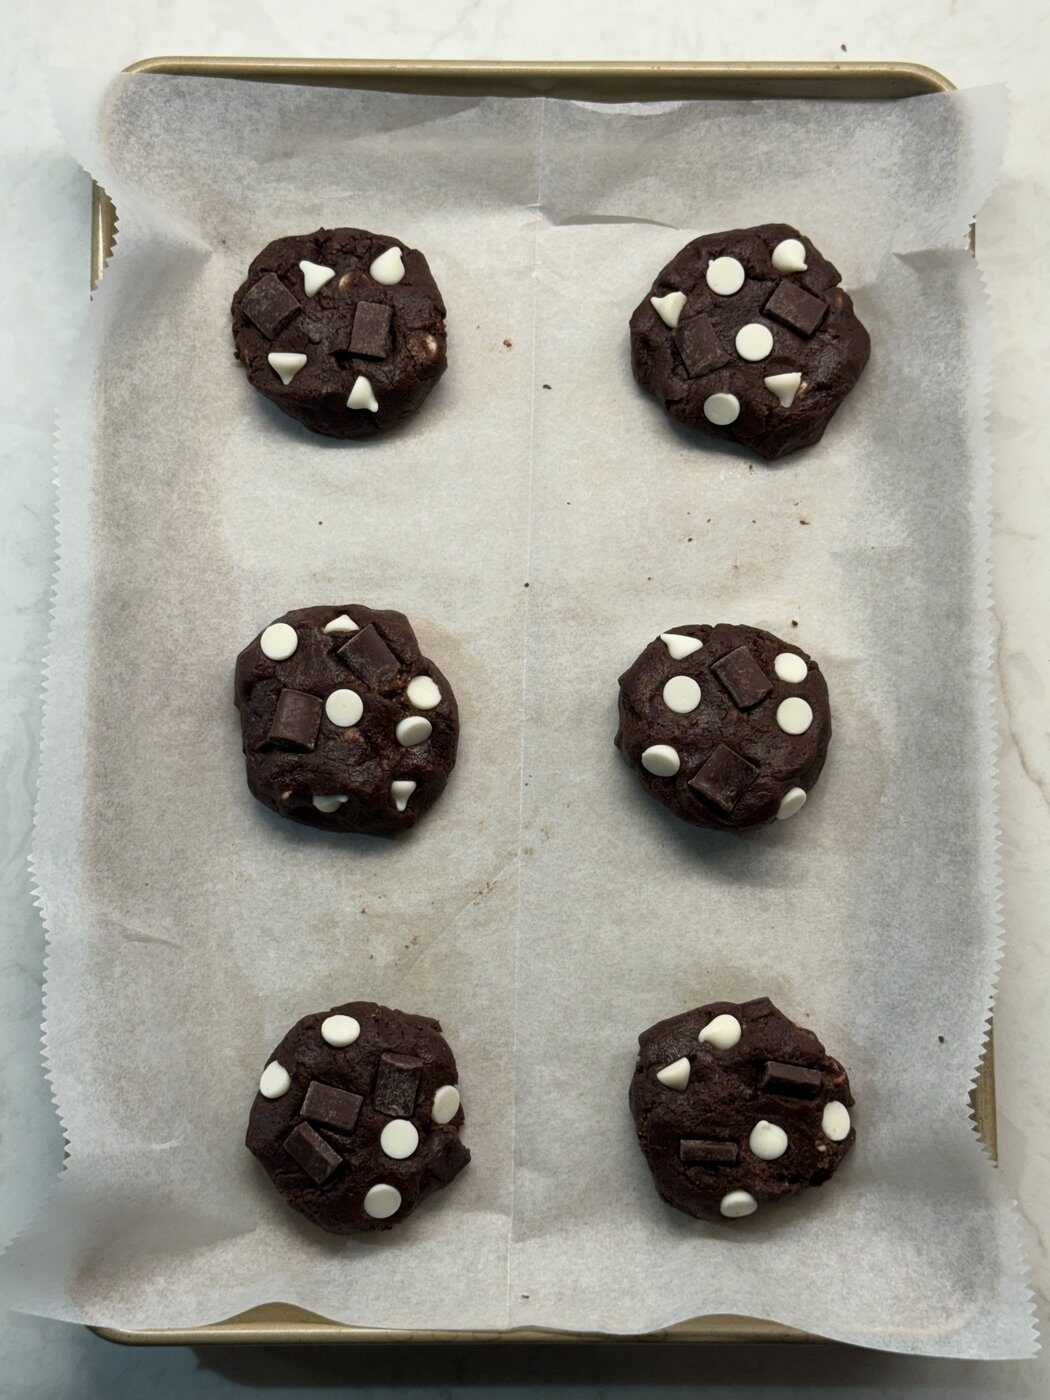
- Save a few chunks and chips for the tops. Pressing them on before baking is what gives these the bakery look.
- Flatten the dough a little. This is a thick dough that doesn’t spread much, so a gentle press with the back of a spoon helps it bake through evenly.
- Don’t wait for them to brown. Dark dough hides browning, so look for matte, set edges and cracked tops instead.
- Let them cool 5 minutes on the pan. The centers are soft when they come out and need a few minutes to set.

Want to Save This Recipe?
Enter your email below and we’ll send it straight to your inbox! Plus you’ll get new recipes each week!
What You’ll Need for Triple Chocolate Cookies
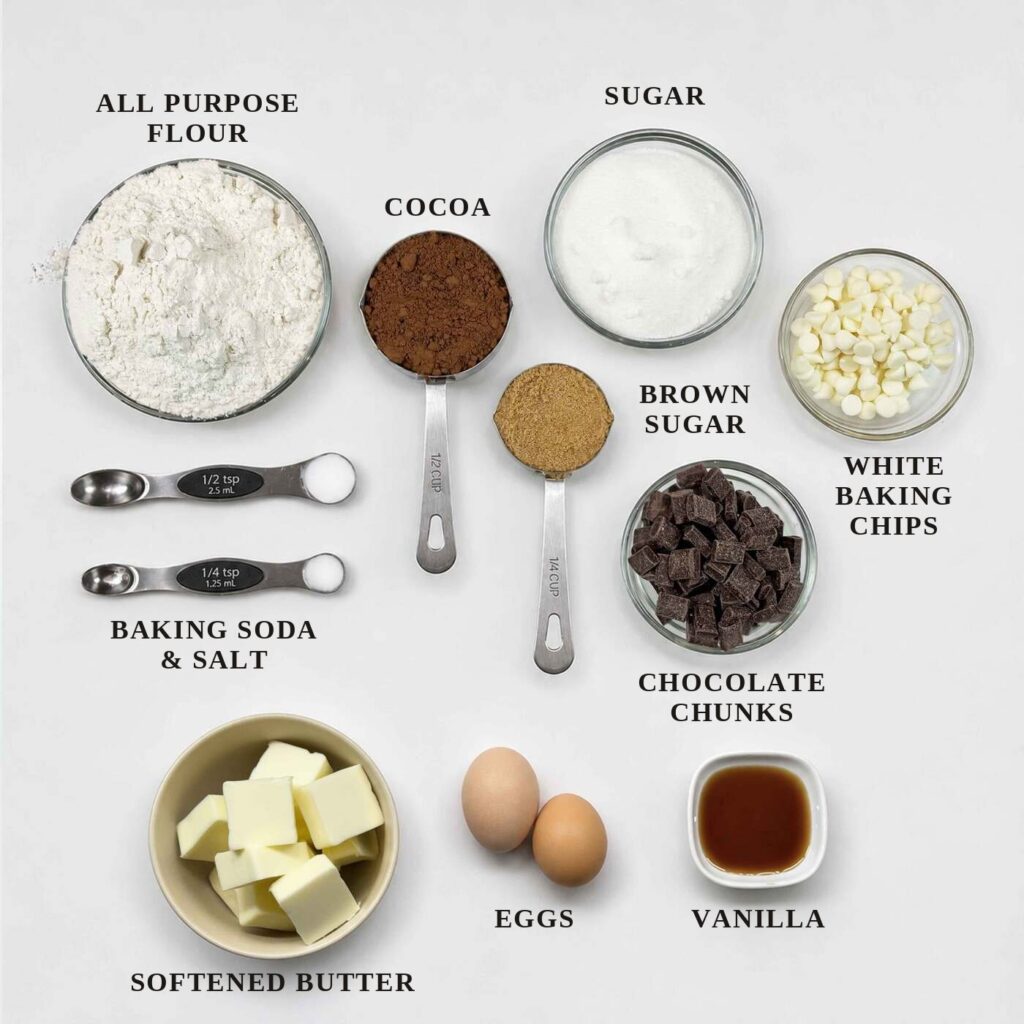
All-purpose flour. Spoon it into the measuring cup and level it off with a knife instead of scooping straight from the bag. This helps because scooping packs the flour down, and too much flour makes a dry, cakey chocolate cookie.
Baking soda and salt. Whisk it into the flour so they’re spread evenly.
Dutch-process cocoa. This is the cocoa that makes these cookies so dark. Dutch-process cocoa has been treated to take the edge off its natural acidity, so it bakes up darker with a smoother, rounder chocolate flavor than regular unsweetened cocoa. Look for “Dutch-process” or “dutched” on the label.
Granulated sugar and brown sugar. Most of the sweetness comes from white sugar; a little brown sugar adds a little chew and a hint of caramel. Pack the brown sugar firmly when you measure it. If you run out, it’s easy to stir up a batch of homemade brown sugar from white sugar and molasses.
Semi-sweet chocolate chunks. Chunks give you those big melty pockets of chocolate, but regular semi-sweet chips work too. Keep a small handful extra for pressing onto the tops.
White baking chips. My stores sell “white baking chips” or “white morsels” instead of white chocolate chips, so that’s what I used and what the recipe calls for. Either one works the same way here.
Butter. Any regular butter works here, including homemade butter. It’s soft enough when a finger leaves a dent. If it looks shiny or greasy, it’s too warm, so pop it back in the fridge for a few minutes.
Eggs and vanilla. The basics for cookies!
How to Make Triple Chocolate Chunk Cookies
The method is the same whether your dry ingredients came out of a jar or you’re measuring them from scratch into a bowl. We’ll mix the wet ingredients first, then add everything else at once.
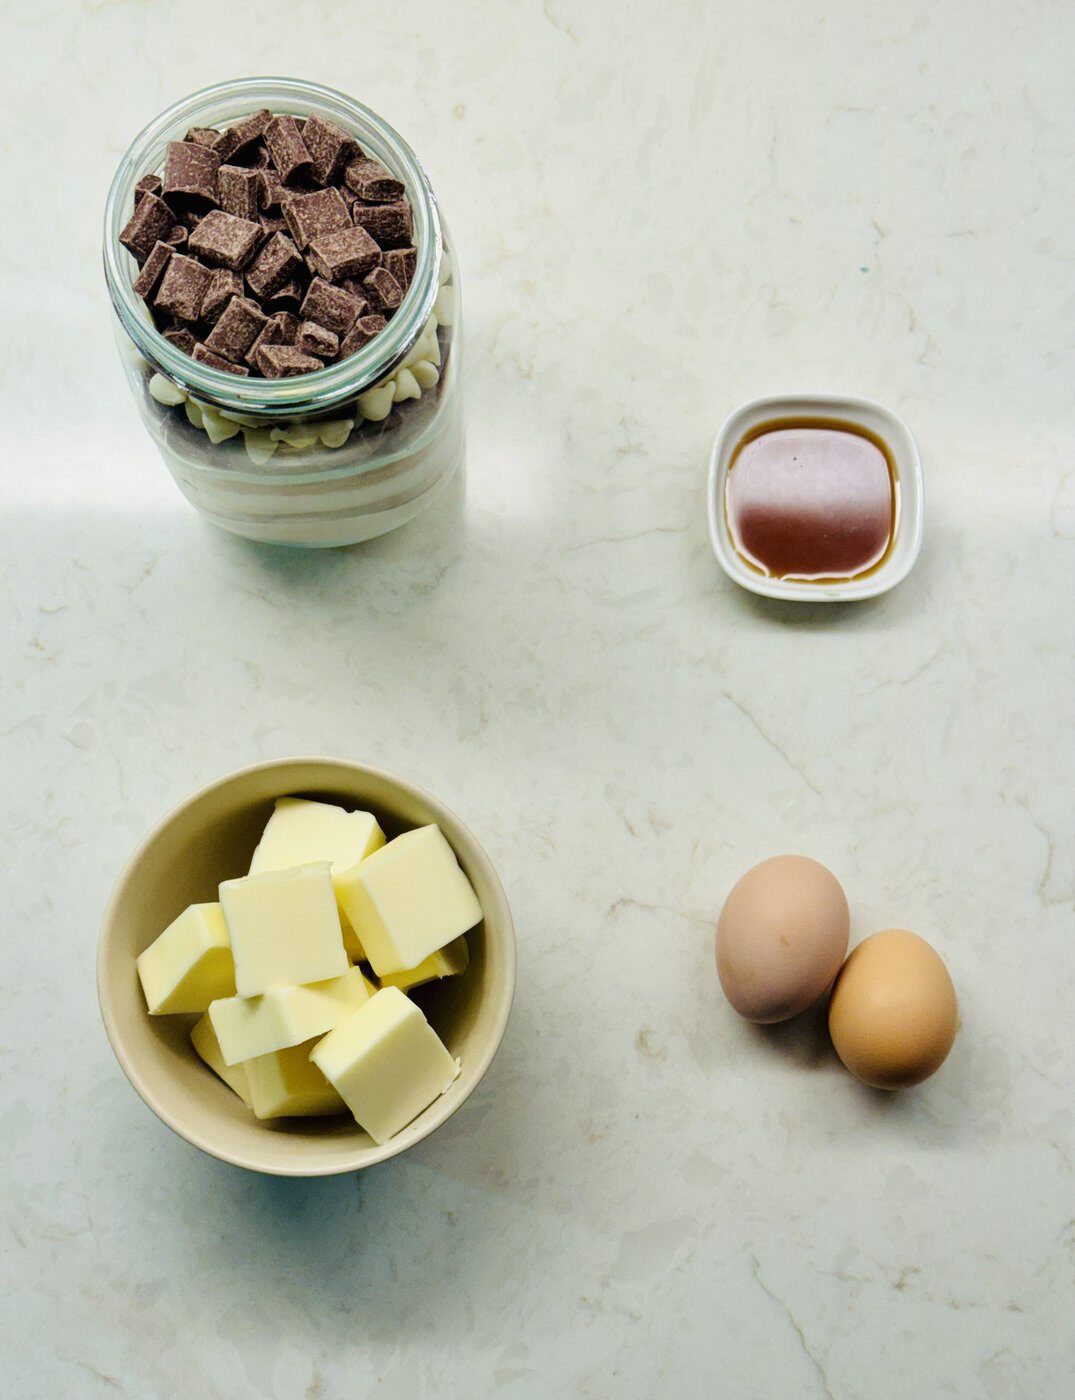
Start by heating the oven to 350°F and optionally lining a baking sheet with parchment paper. Then put the softened butter, eggs, and vanilla in a large bowl and beat them together (you can do this by hand). Don’t worry if it looks lumpy and a little curdled, like mine did. Butter and eggs don’t fully blend until the dry ingredients go in, and this is totally normal.
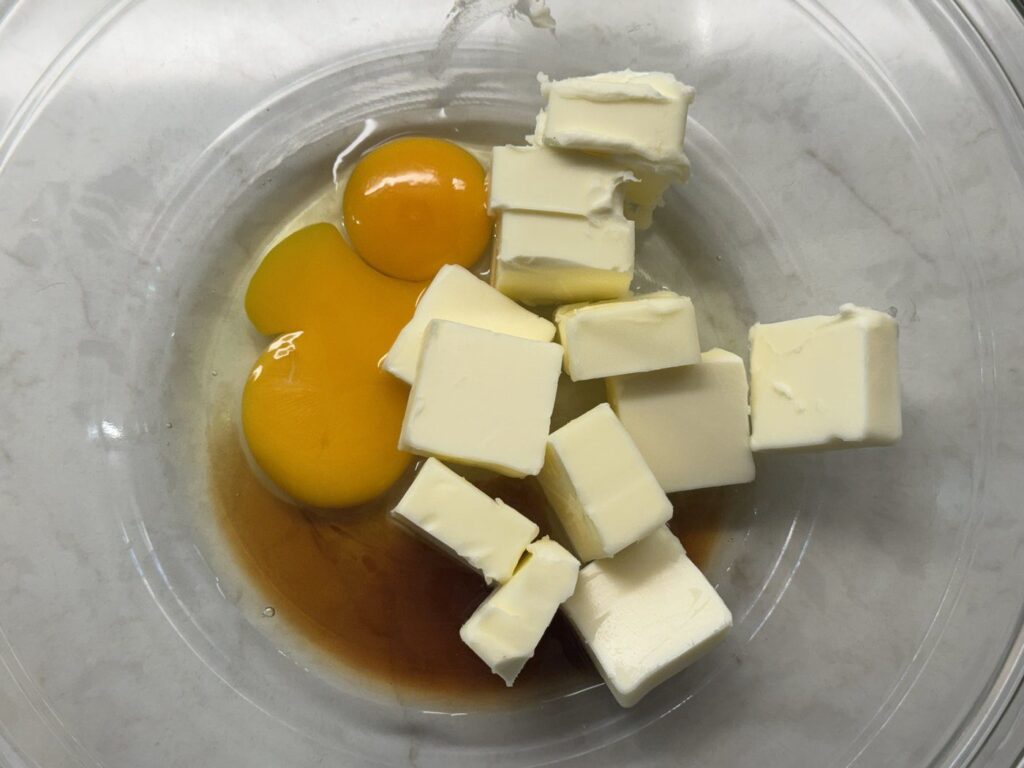
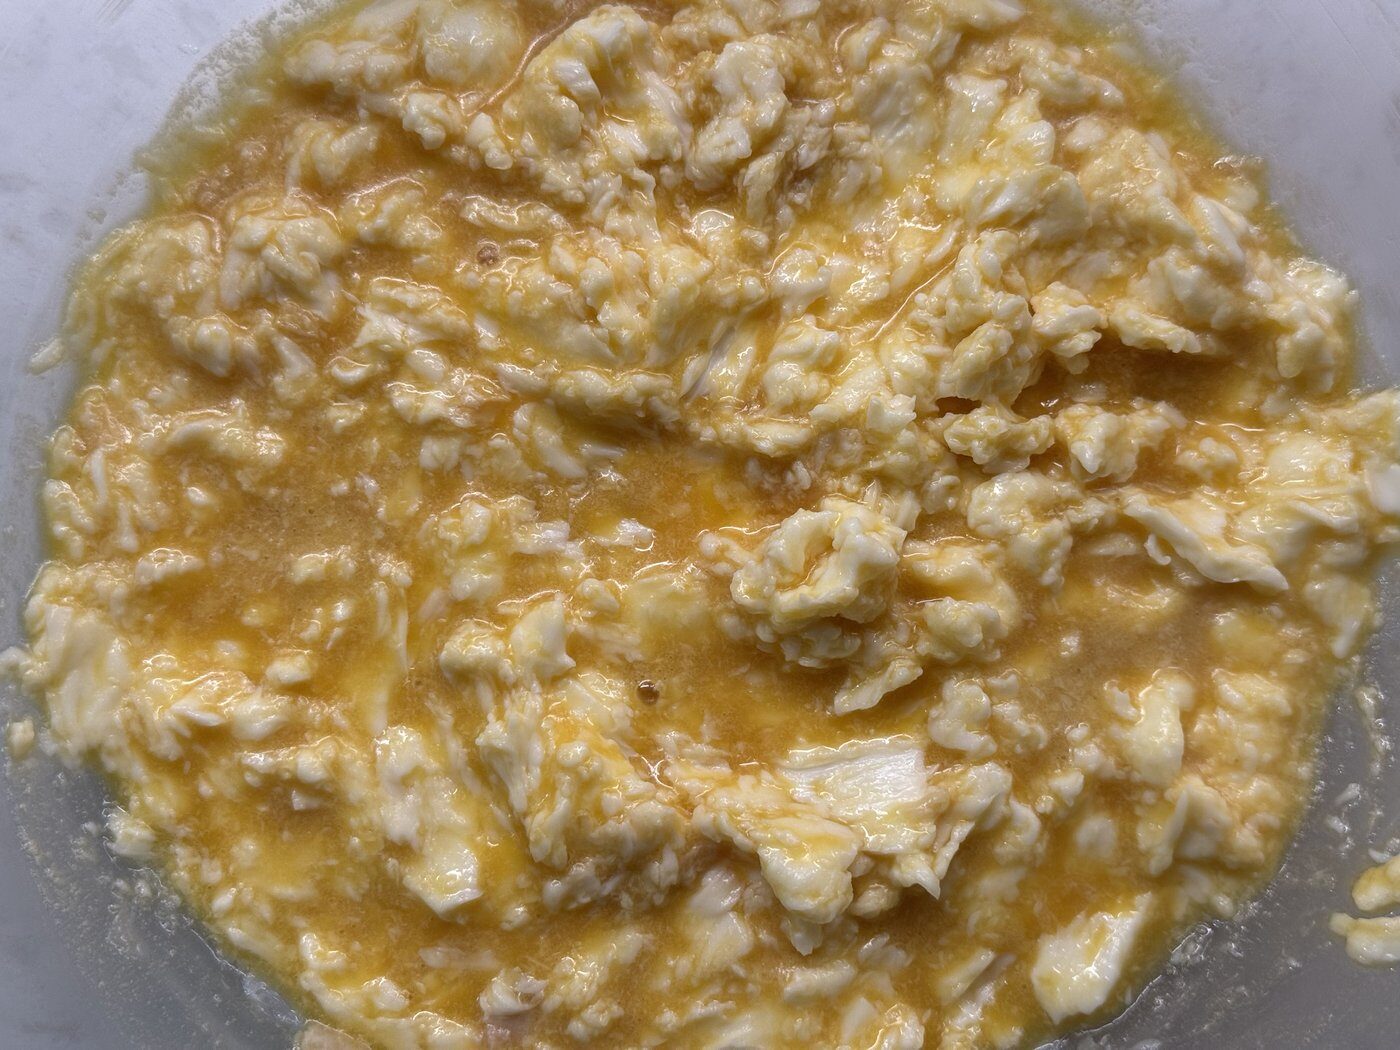
Why Is My Cookie Dough So Crumbly?
Pour all of the dry ingredients into the bowl. It will look like there’s WAY too much dry mix sitting on top of a little puddle of butter. Stir anyway. After a minute or so you’ll have something that looks like chocolate sand with chunks in it.
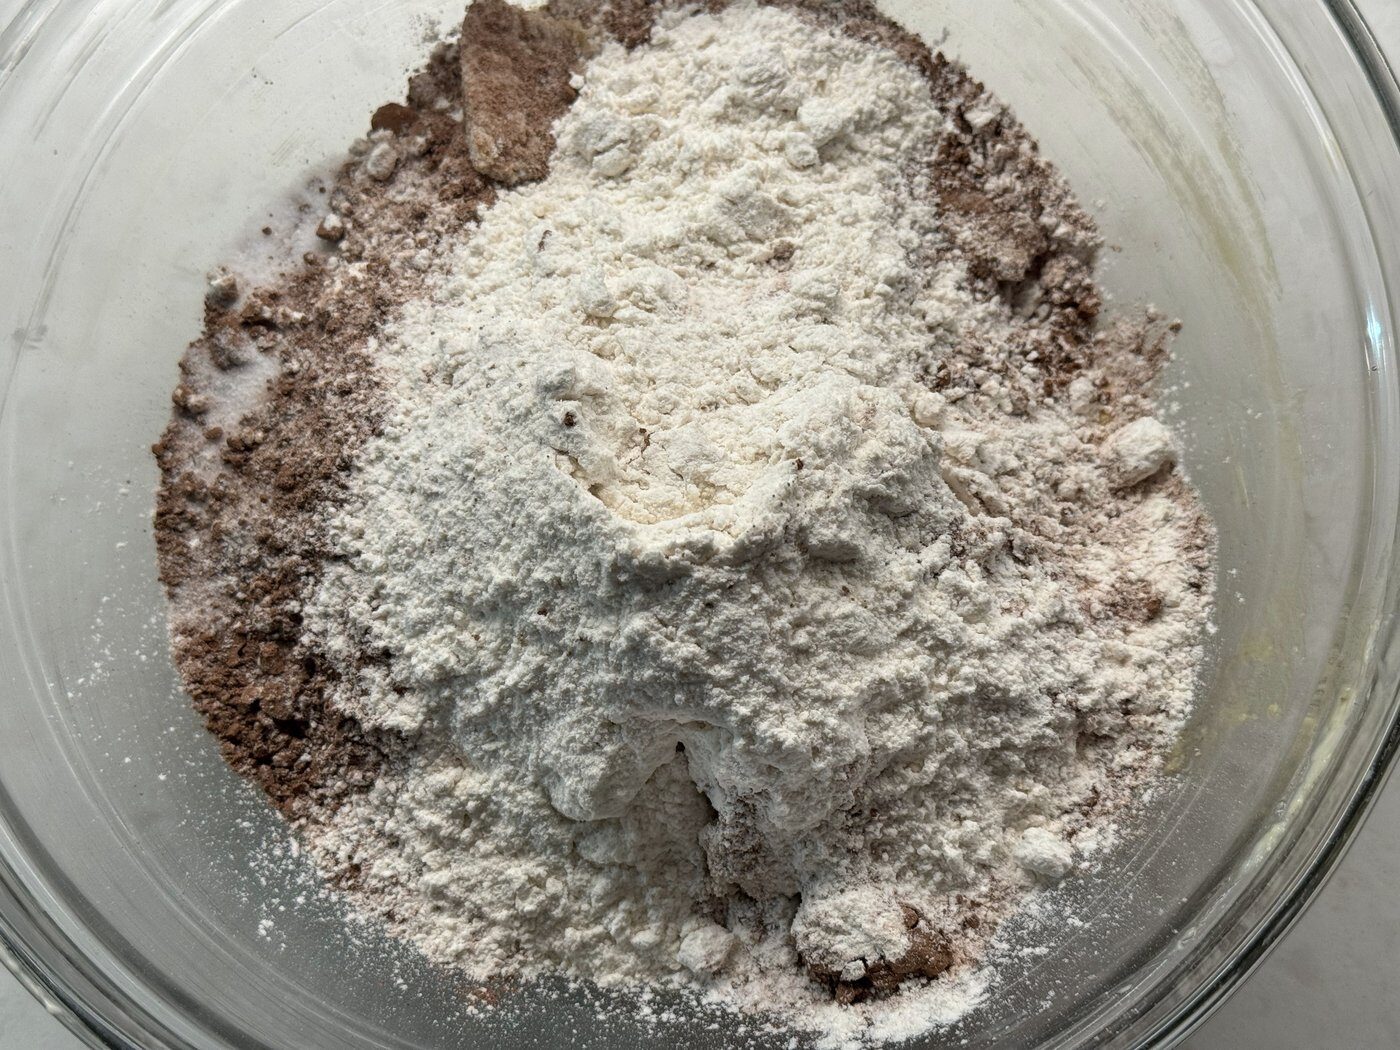
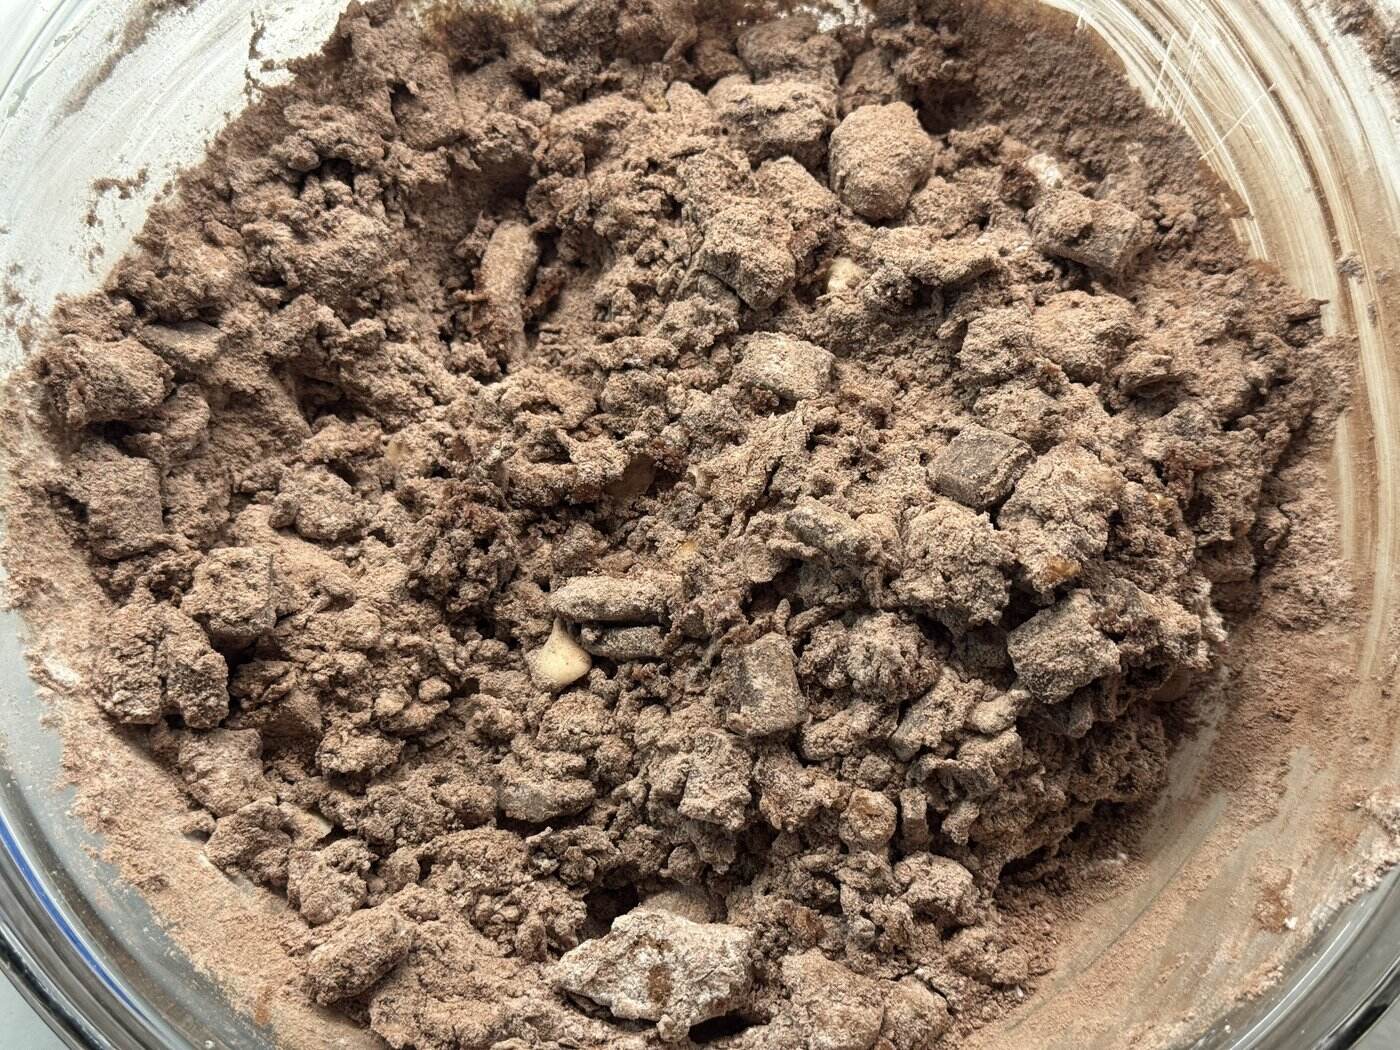
That’s the point where it’s tempting to add a splash of milk. Be careful not to, because extra liquid makes the cookies spread and lose that thick, chewy middle. If you can’t get it to mix well enough beyond this, switch to your hands and squeeze and mix the dough right in the bowl. The warmth of your hands softens the butter just enough to pull everything into one smooth ball. I wear disposable gloves for this, because cocoa dough gets everywhere. You do you, no judgment here.
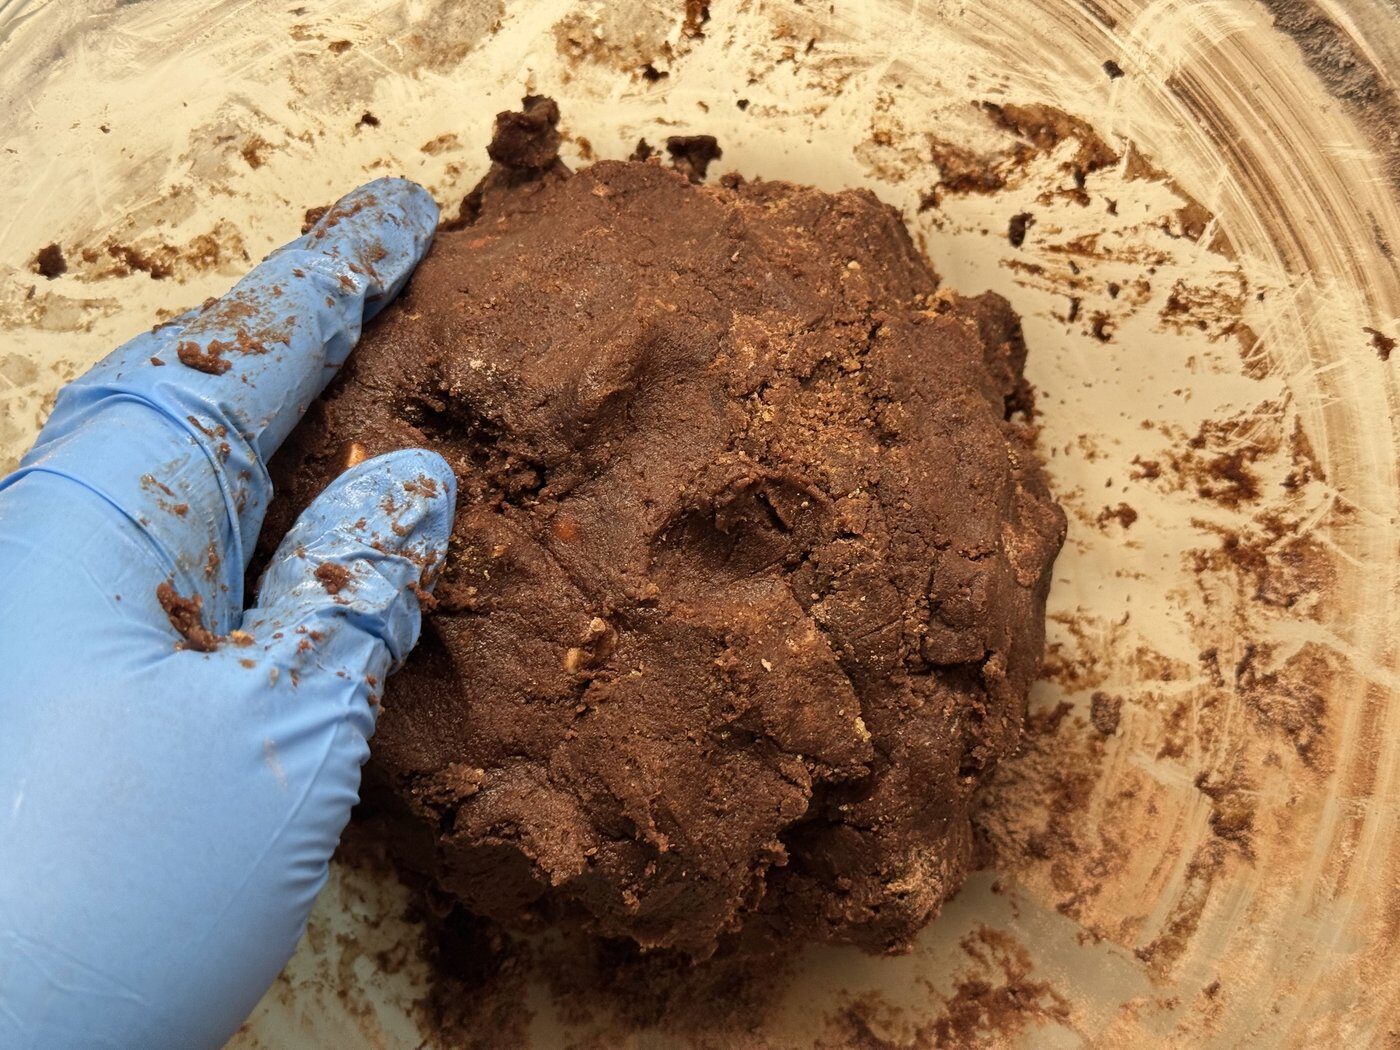
Here’s the test: squeeze a small handful. If it holds together without crumbling, it’s ready.
How Big Should I Make the Cookies?
These are big, bakery-size cookies. Scoop about 2 heaping tablespoons of dough per cookie, roll it into a ball, and set the balls 2 inches apart on the parchment. Six fit on my baking sheet, so you’ll bake three pans to get all 18.
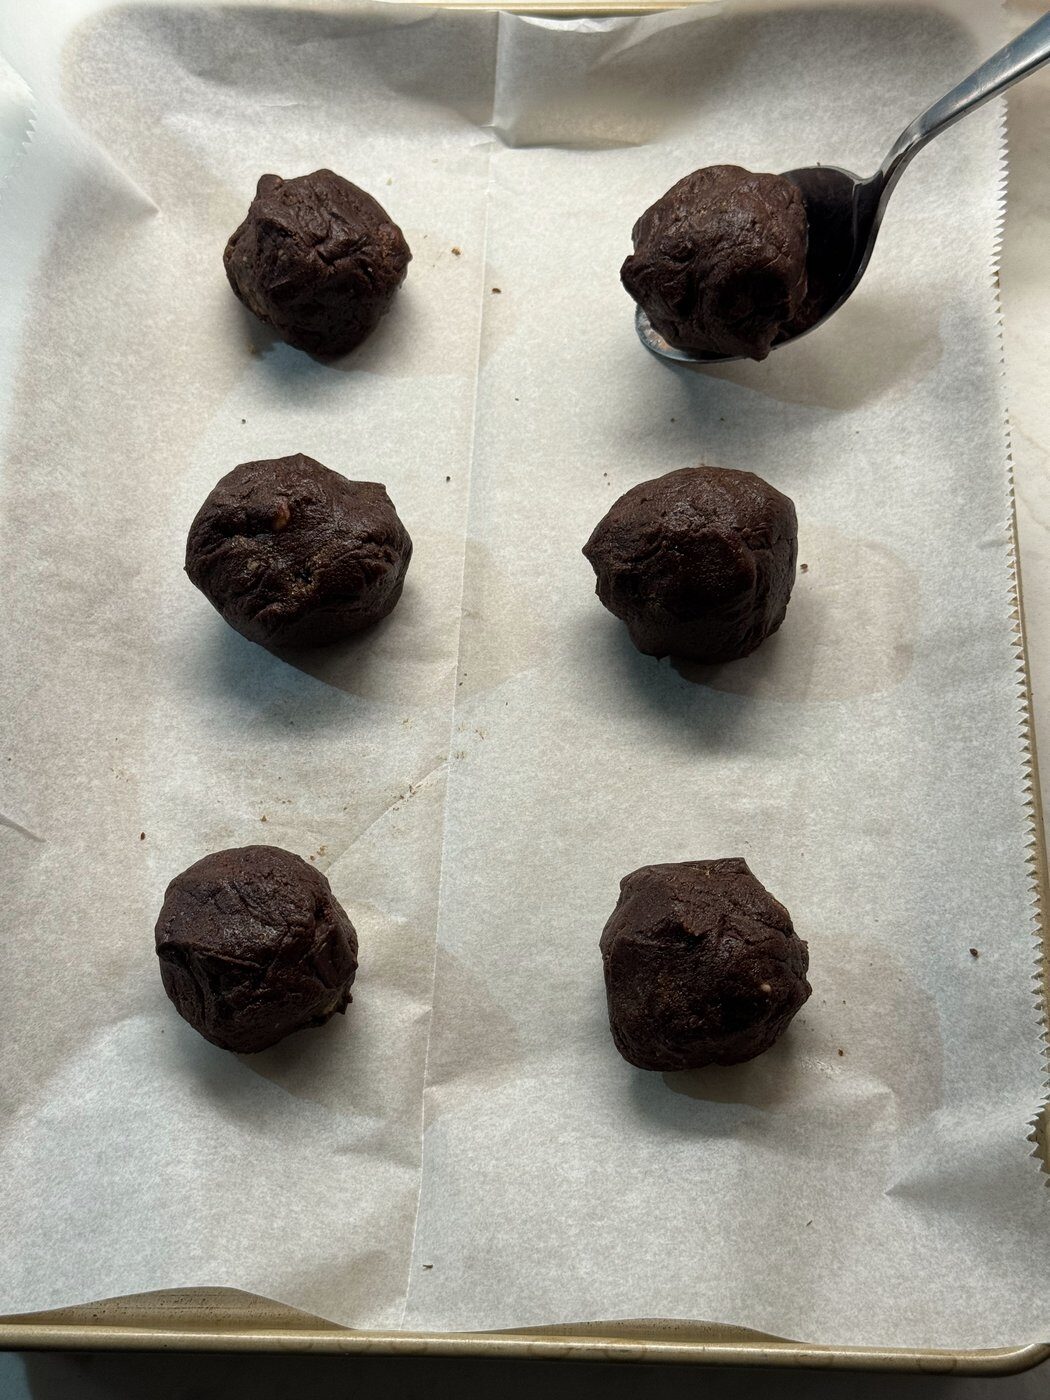
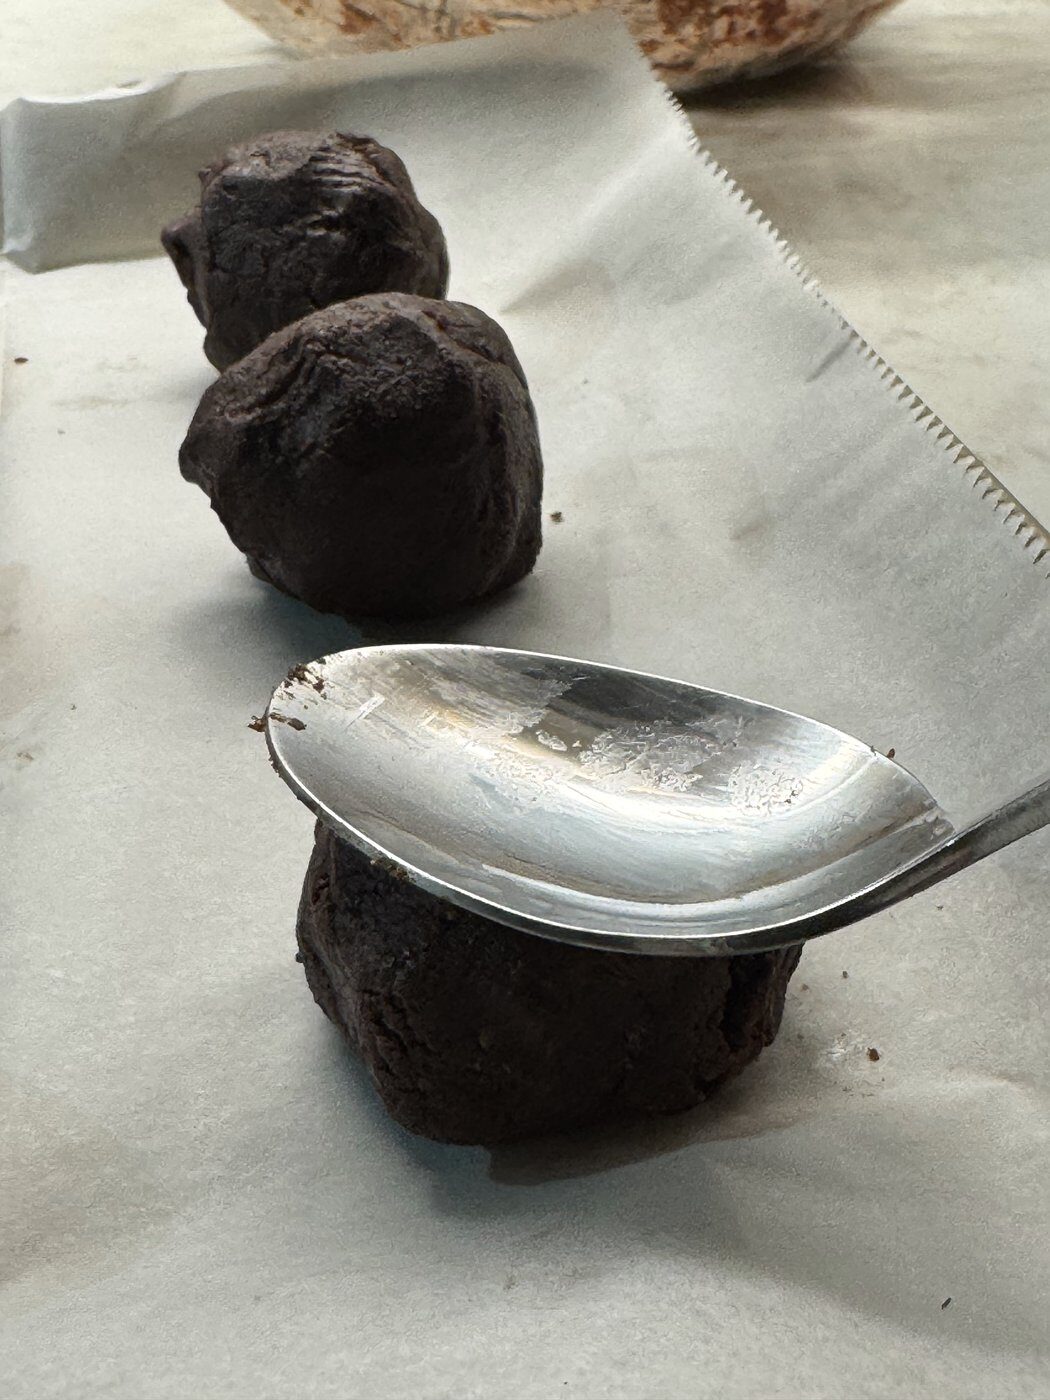
Next, press each ball down gently with the back of a spoon until it’s about an inch thick. This dough is thick and doesn’t spread much in the oven, so flattening it a little helps the middles bake through before the edges get too firm. Don’t squash it into a pancake, though. You want a fat little disk.
Now for the fun part. Press 2 or 3 chocolate chunks and a few white chips into the top of each one. The chunks inside the dough mostly disappear under that dark cocoa, so the ones on top are what make these look like they came from a bakery.
How Do I Know When Chocolate Cookies Are Done?
This is the tricky part with any dark dough. You can’t wait for golden edges, because chocolate cookies are brown before they ever go in the oven. If you bake them until they look “done,” they’ll be dry and crunchy by the time they cool.
Instead, look for three things. The edges should look set and matte instead of shiny. The tops should be cracked. And the very centers can still have a little gloss to them. That gloss is what you want, because the cookies keep baking on the hot pan and the centers set up chewy instead of hard.
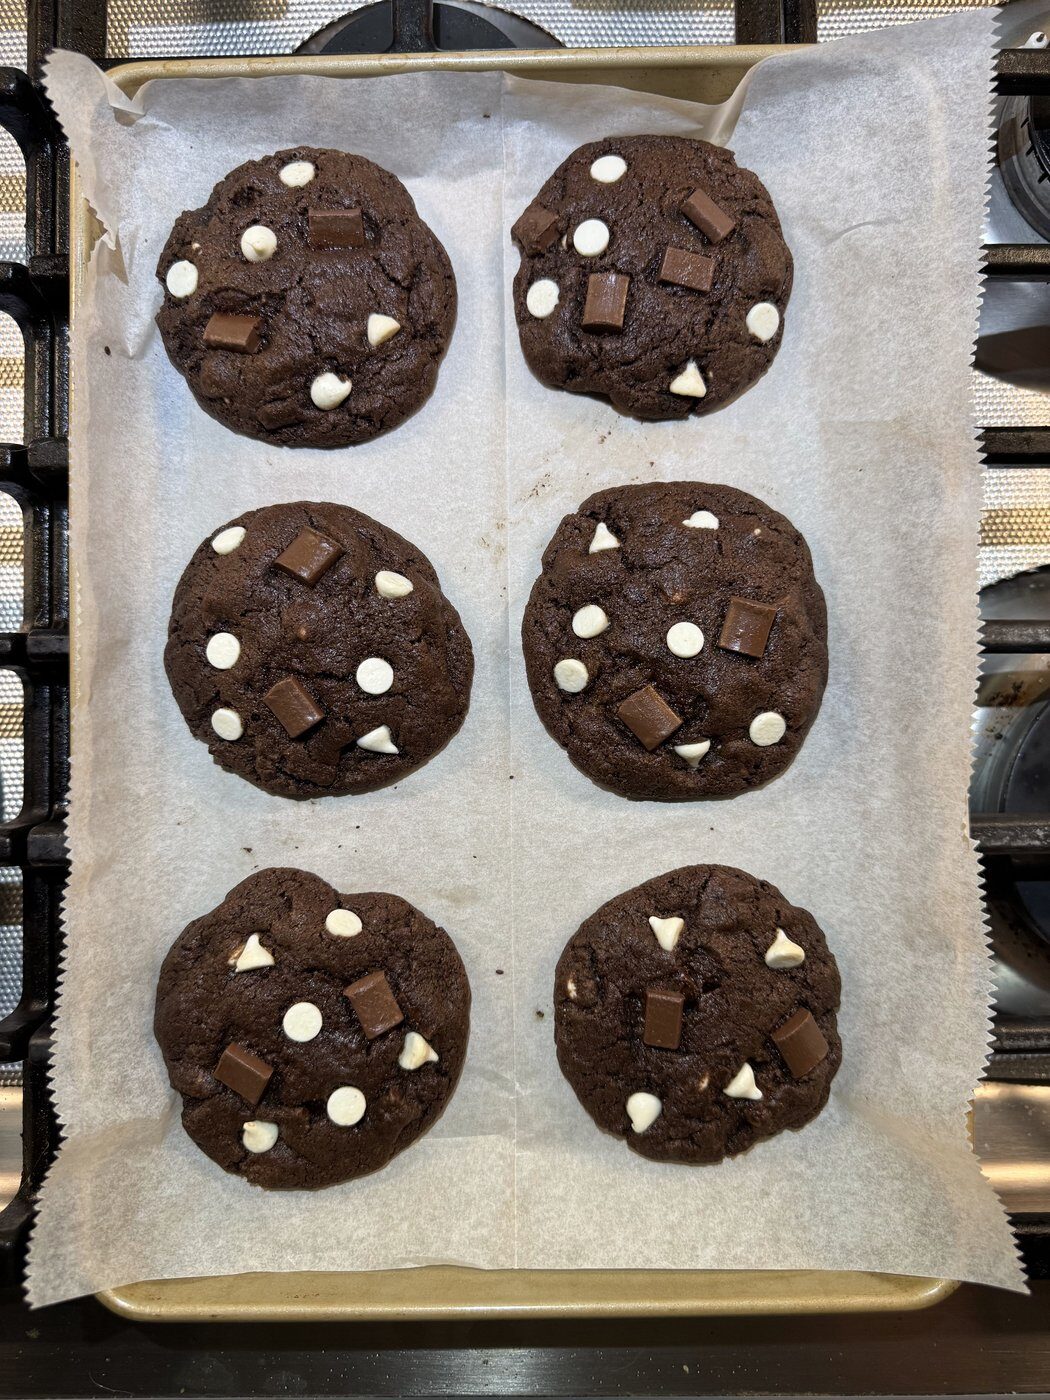
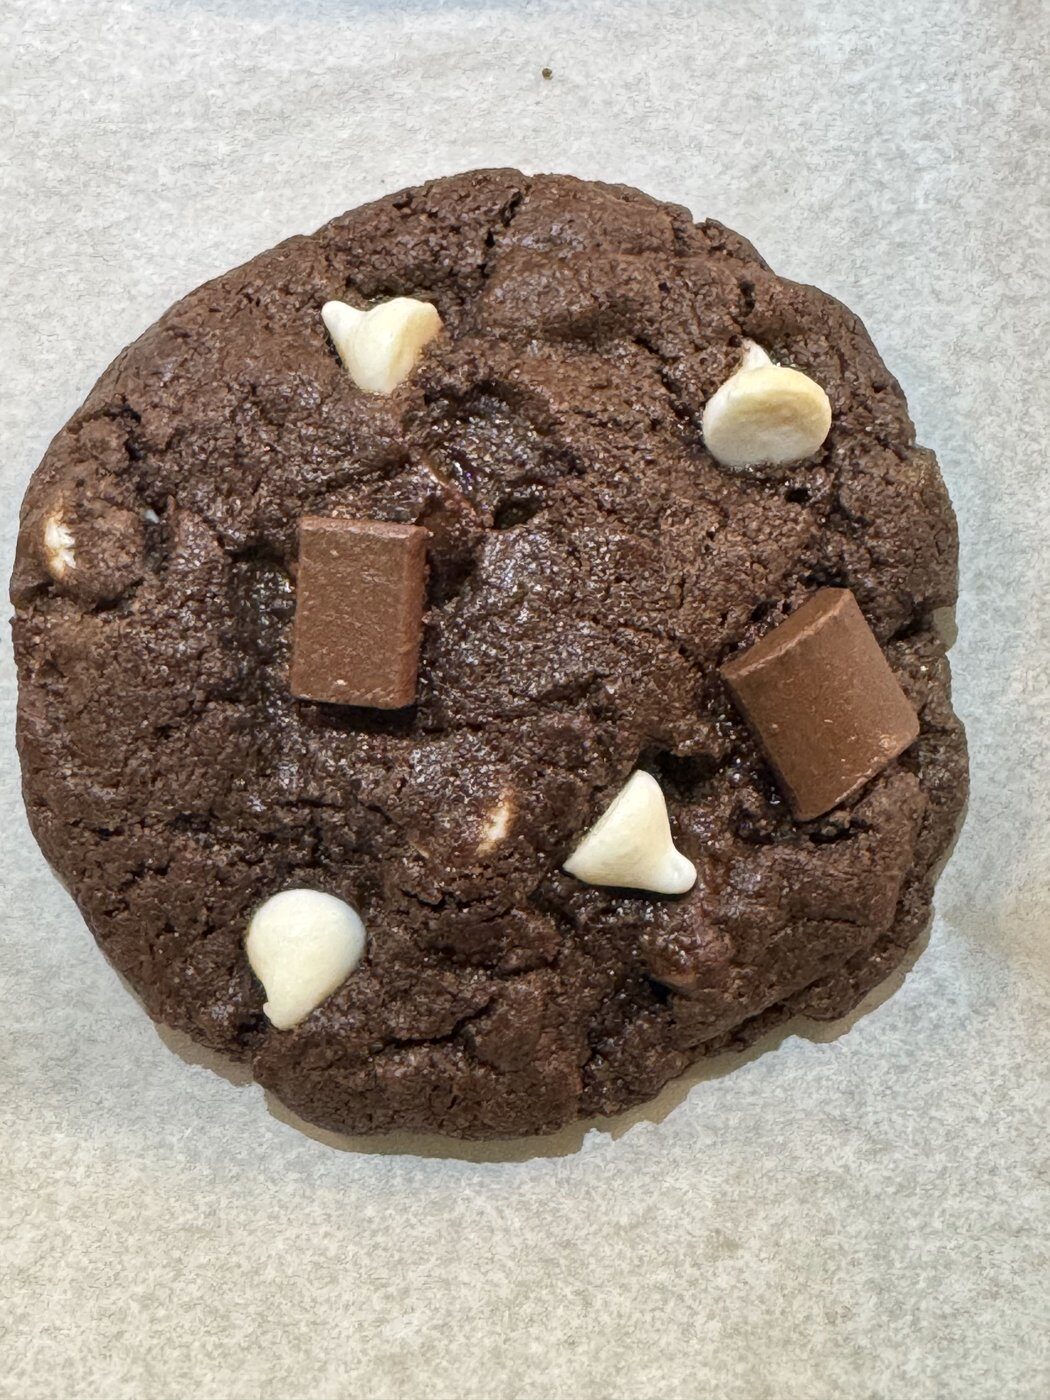
Mine took 10 1/2 minutes, because I made them pretty big. Smaller cookies will be done closer to 9 minutes, so start checking a little early.
Why Let Them Cool 5 Minutes on the Pan?
Right out of the oven, the butter is still melty and those glossy centers haven’t set yet, so the cookies bend and tear if you try to lift them. Leave them alone on the hot pan for 5 minutes. As they sit, the bottoms finish baking and the middles firm up.
After 5 minutes, slide a spatula under each one and move it to a wire rack to cool the rest of the way. Be careful not to stack them until they’re completely cool, or the steam will make them soggy. Then reline the pan (or let it cool down) before the next batch goes on.
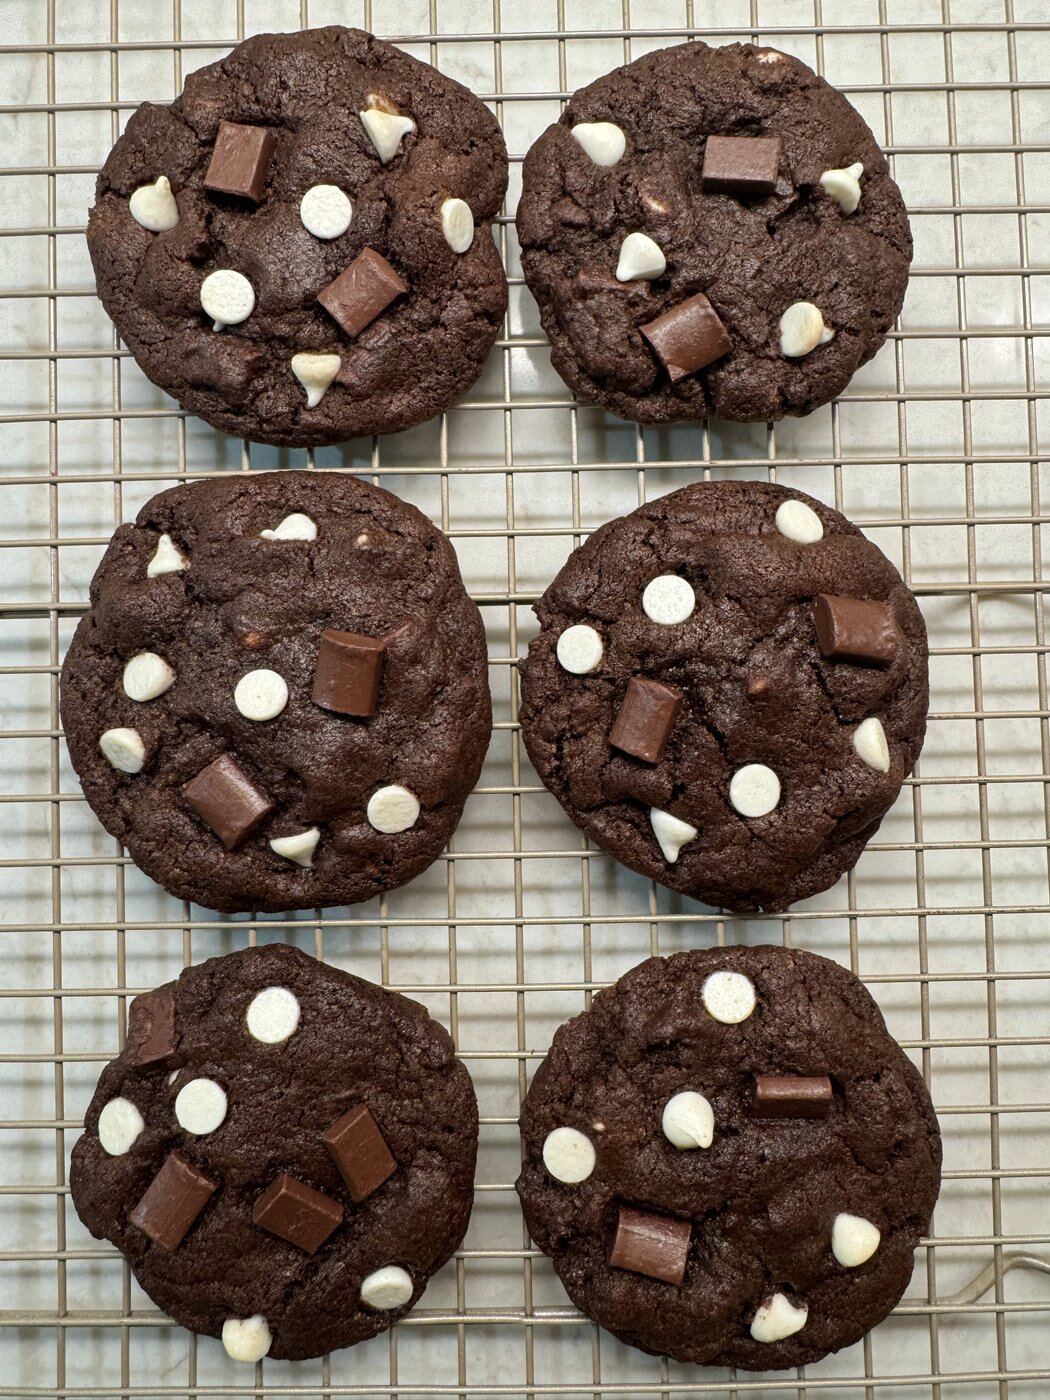
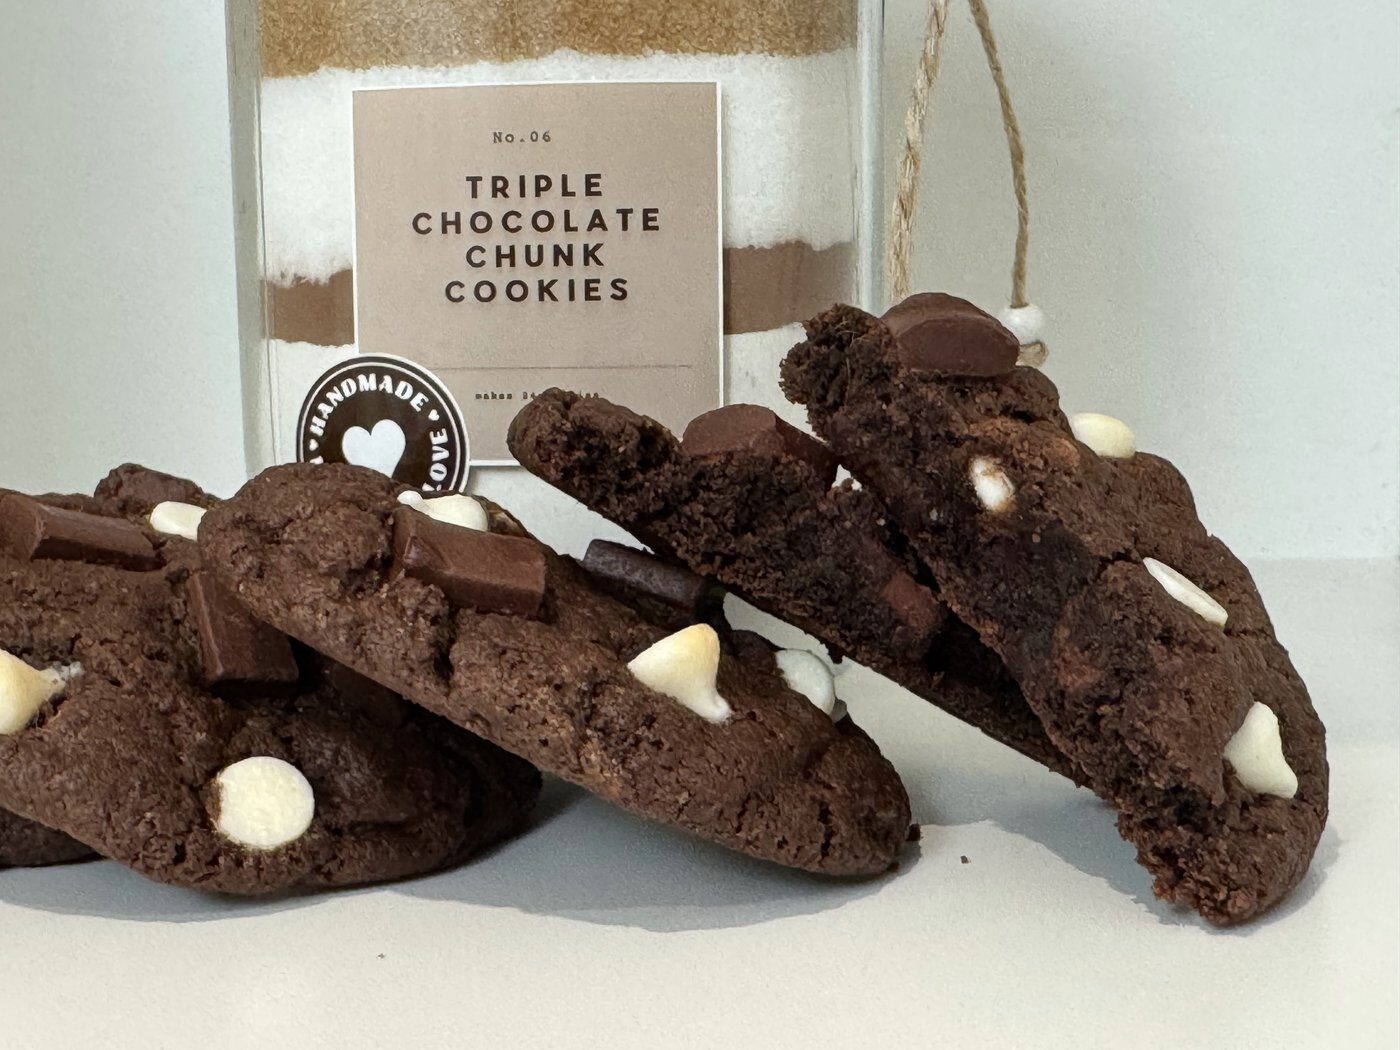
Once they’re cool, break one open. The middle should be soft, dense, and fudgy, almost like a brownie.
Can I Make Triple Chocolate Cookies Less Sweet?
Yes, and the jar layers stay exactly the same. The easiest swap is to replace the white baking chips with more semi-sweet chunks, since the white chips are the sweetest thing in here. You can also use bittersweet or dark chocolate chunks instead of semi-sweet for a deeper, less sugary chocolate flavor.
How to Make Triple Chocolate Cookie Mix in a Jar
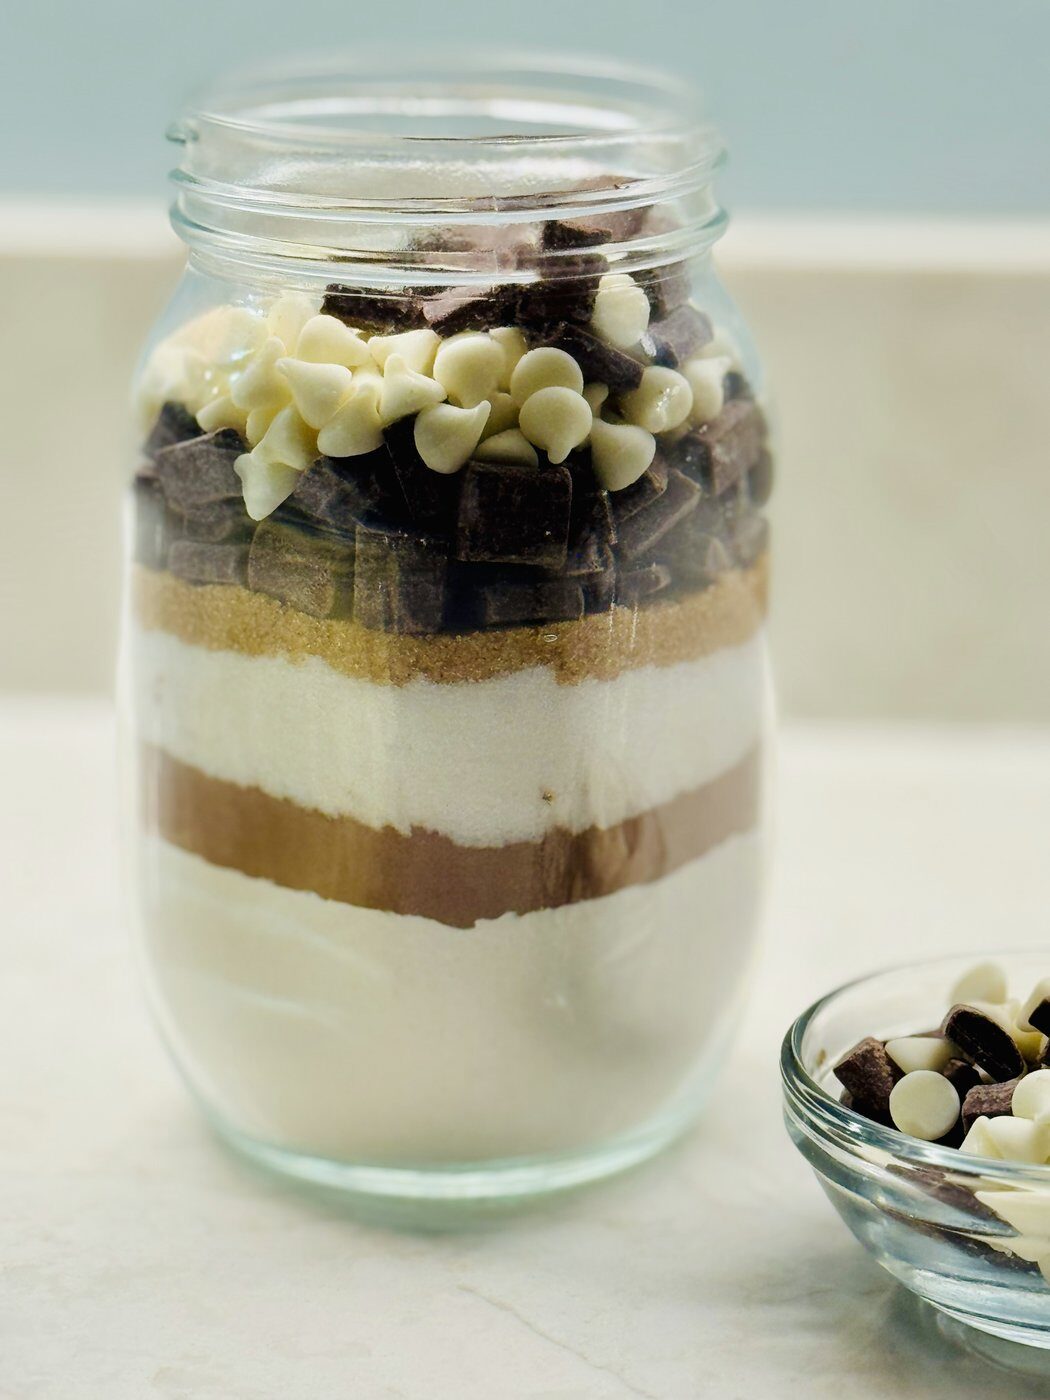
This is where the recipe does double duty. The jar holds all the dry ingredients, and whoever gets it just adds butter, eggs, and vanilla. You’ll want a 1 quart wide-mouth mason jar, since the wide mouth makes layering SO much easier and pours out cleanly later. A canning funnel helps keep the glass clean as you go.
We’ll layer from the bottom up in this order, packing each layer down before adding the next:
| Layer | Ingredient |
|---|---|
| 1 (bottom) | 1 1/2 cups all-purpose flour, 1/2 tsp baking soda, and 1/4 tsp salt, whisked together right in the jar with a fork, then packed down well |
| 2 | 1/2 cup Dutch-process cocoa |
| 3 | 3/4 cup granulated sugar |
| 4 | 1/4 cup packed brown sugar |
| 5 | 1/2 to 1 cup semi-sweet chocolate chunks |
| 6 (top) | 1/4 cup white baking chips, plus extra chunks or chips to fill the jar to the brim |
The reason we whisk the flour mixture right in the jar is that nobody will whisk it later. It all gets dumped into the bowl together, so this is the only chance to spread the baking soda and salt evenly. Packing each layer matters too. Loose layers settle on the way to wherever the jar is going, and the stripes slump together.
The cocoa layer is the showstopper. Sitting between the white flour and white sugar, it makes a dark stripe you can see from across the room. Pack it gently with a flat tamper or the bottom of a small glass, and don’t worry if the line isn’t perfectly level… a slightly wavy line looks homemade in the best way. A full jar keeps everything from shifting, so if there’s space after the white chips, add more chunks or chips until it’s full to the brim.
What to Write on the Gift Tag
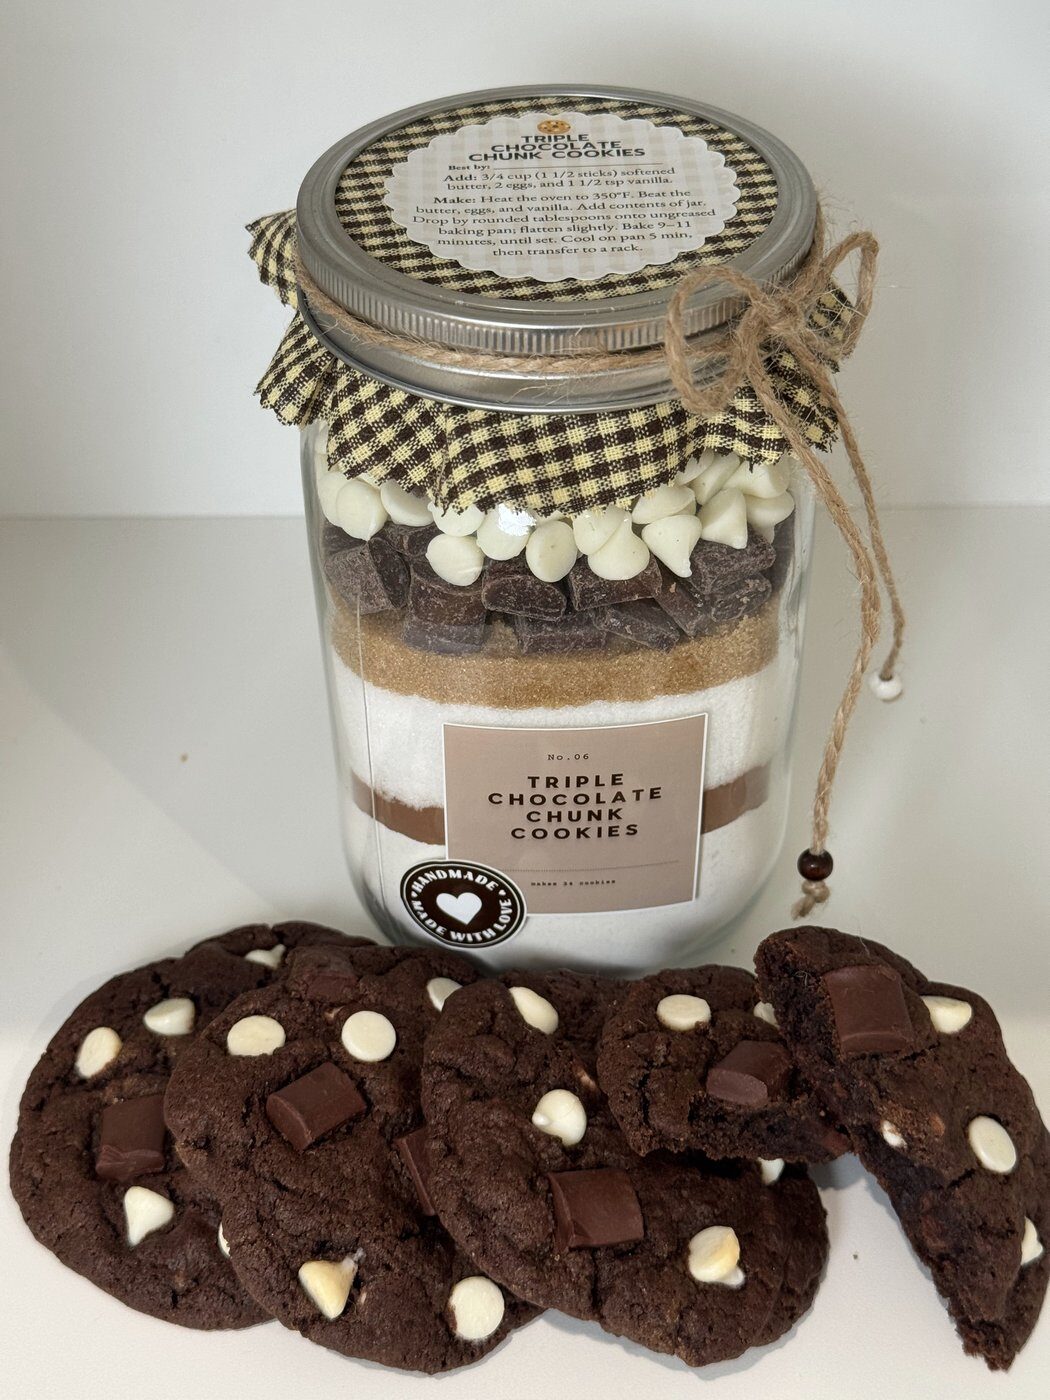
I put the baking directions on a round label right on the lid, but a tag tied on with twine works just as well. Here’s what it says:
TRIPLE CHOCOLATE CHUNK COOKIE MIX
Best by: (3 months from the day you fill the jar)
Add: 3/4 cup (1 1/2 sticks) softened butter, 2 eggs, 1 1/2 tsp vanilla
Make: Heat the oven to 350°F. Beat the butter, eggs, and vanilla. Mix in the entire jar until a handful holds together. Scoop large mounds 2 inches apart; flatten slightly. Bake about 10 1/2 minutes, until set. Cool 5 minutes on the pan.
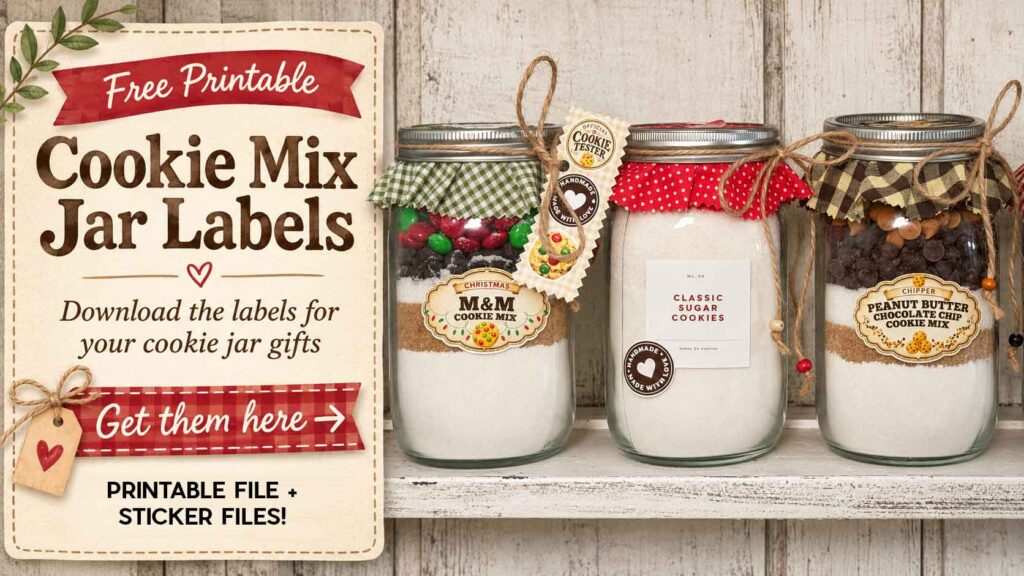
If you’d rather not write labels by hand, I made free printable cookie mix labels to go with this whole series of jars.
How Long Does Cookie Mix in a Jar Last?
The mix keeps for about 3 months in a cool, dark pantry with the lid on tight. After that, the brown sugar starts to harden. Fill in the best-by date before the jar leaves your house so whoever gets it doesn’t have to guess.
If you’re giving these away or selling them at a craft fair, please list the allergens on the tag. This mix contains wheat, and chocolate chunks and white baking chips usually contain milk and soy. Check your bags for any “may contain” warnings too. Many states also have cottage food rules for labels, so look up yours before you sell.
How to Store Triple Chocolate Cookies
Once they’re completely cool, keep the cookies in an airtight container at room temperature for up to 4 days, or freeze the baked cookies for up to 3 months. To bring one back to that just-baked softness, warm it in the microwave for about 10 seconds. For more on keeping food fresh, here’s my guide to storing leftovers for the best results.
Triple Chocolate Cookie FAQs
Can I use regular unsweetened cocoa instead of Dutch-process?
It should work in a pinch, but I haven’t tested it. Expect a lighter brown cookie with a slightly sharper chocolate flavor.
Can I freeze the dough?
I haven’t frozen this one yet, but frozen dough balls worked great for my Christmas M&M Cookies. Freeze the flattened, topped rounds on a pan until solid, bag them, and plan on an extra minute or two in the oven.
Why did my cookies come out dry?
Usually they baked a minute too long, or the flour was scooped instead of spooned. Pull them while the centers are still a little glossy.
Do I need a mixer?
No. A sturdy spoon gets you started, and your hands finish the dough better than any mixer would.
Triple Chocolate Chunk Cookies
Equipment
- baking sheet
- parchment paper
- large mixing bowl
- sturdy spoon
- tablespoon or large cookie scoop
- spatula
- wire rack
- 1 quart Mason Jar wide-mouth, for jar mix
- canning funnel for jar mix
Ingredients
Dry ingredients
- 1 1/2 cups all-purpose flour
- 1/2 tsp baking soda
- 1/4 tsp salt
- 1/2 cup Dutch-process cocoa
- 3/4 cup granulated sugar
- 1/4 cup brown sugar packed
- 1/2 to 1 cup semi-sweet chocolate chunks plus a few extra for the tops
- 1/4 cup white baking chips plus a few extra for the tops
Wet ingredients
- 3/4 cup (1 1/2 sticks) butter softened
- 2 large eggs
- 1 1/2 tsp vanilla extract
Instructions
- Heat the oven to 350°F. Line a baking sheet with parchment paper (or leave it ungreased).
- In a large bowl, beat the butter, eggs, and vanilla together. It will look lumpy and curdled, and that’s fine.
- If you aren’t using a jar, whisk the flour, baking soda, and salt together in a medium bowl, then add the cocoa, granulated sugar, brown sugar, chocolate chunks, and white chips.
- Add the dry ingredients (or the entire jar) and stir until crumbly, then knead the dough with your hands until a squeezed handful holds together. Don’t add any liquid.
- Scoop about 2 heaping tablespoons of dough per cookie, roll into balls, and set them 2 inches apart on the baking sheet. Flatten each one slightly with the back of a spoon, to about 1 inch thick.
- Press 2 or 3 chocolate chunks and a few white chips onto the top of each cookie.
- Bake 10 to 11 minutes, until the edges are set and matte and the tops are cracked. The centers may still look slightly glossy.
- Cool 5 minutes on the pan, then move the cookies to a wire rack to cool completely. Repeat with the remaining dough.
Nutrition
Notes
If you make a few of these jars this year, I’d love to hear who’s getting one. And if you want more mixes to line up next to it, my Peanut Butter Chocolate Chip Cookies, Cranberry Chocolate Chip Oatmeal Cookies, and Easy Sugar Cookies all fill a jar the same way. Or if you just want more chocolate in a pan, try my Fudgy Homemade Brownies.
Happy baking!
Love,
Jennifer
Tried this recipe?
Tap the stars in the recipe card to leave a quick rating. Your rating helps other home cooks know this recipe works in a real kitchen, not just mine.
And as a thank-you for your feedback, you will receive a free printable copy of my Maker Home Companion Cookbook, featuring my most popular recipes, each one formatted on a SINGLE, easy-to-use page, a perfect kitchen companion for easy meal prep. Click here to learn more about this cookbook and how you can get your copy!


Meet Jennifer
Jennifer cooks and experiments in the kitchen at Maker Farm, where she focuses on simple pantry cooking, homemade staples, and practical recipes that make everyday meals easier. Over the years she has tested many ways to make cooking simpler and more dependable, and shares the methods that work best in her own kitchen, occasionally showing them on her Heart to Home at Maker Farm vlog.