This homemade pie crust is an easy all-butter dough made with flour, butter, sugar, salt (optional), and ice water. Mix, chill 2 hours, then roll for a flaky crust with just 5 minutes of prep. When you pull this golden, flaky pie crust from the oven, knowing you made it yourself, it’s so satisfying. Not from a box, not from the freezer section, but from your own two hands and a handful of simple ingredients that are probably already in your kitchen.
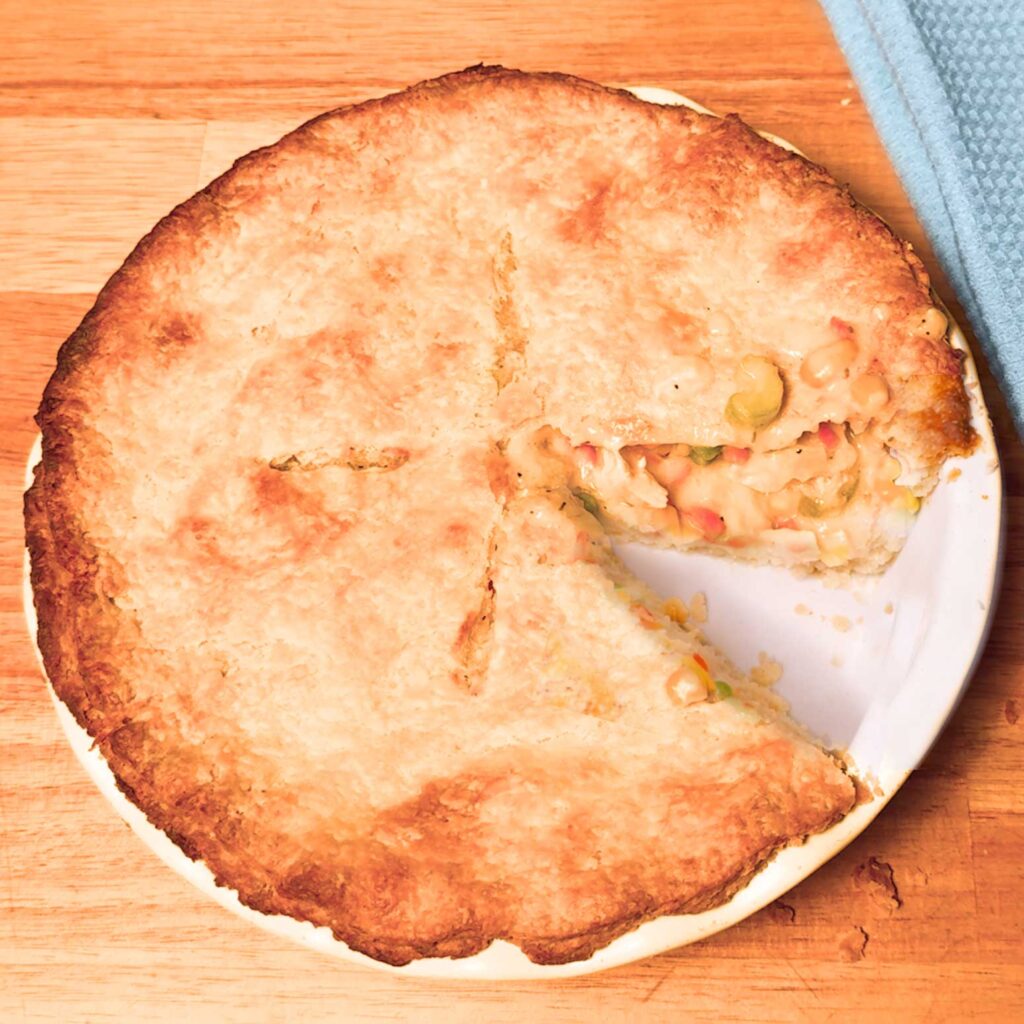
I’ve made a lot of pie crusts over the years, and I’ll be honest… some of them were disasters. But this recipe? This one has become my go-to, my reliable friend, the one I reach for whether I’m making a sweet apple pie or, like I did recently, a chicken pot pie that had my husband asking for seconds.
Pie crust has a reputation for being finicky. People get nervous about it. But I’ve learned that if you keep a few simple principles in mind… mainly keeping everything cold and not overthinking the process… you’ll end up with a crust that’s tender, flaky, and absolutely delicious. This isn’t fancy pastry school technique. This is real-life kitchen baking that actually works.

Want to Save This Recipe?
Enter your email below and we’ll send it straight to your inbox! Plus you’ll get new recipes each week!
Why This Pie Crust Recipe Works
So what makes this pie crust different from the dozens of recipes out there? It’s all butter, no shortening, no vodka, no fancy tricks. Just butter, flour, and a little ice water, the way pie crust has been made forever. I kept the ratios simple and beginner-proof, so you don’t have to weigh anything or memorize a formula to get it right. There’s nothing here you’d see on a baking show, no laminating, no folding and turning a dozen times. If you can stir a bowl and press dough into a disk, you can make this. That’s really the whole idea: a crust that’s sturdy enough to hold a hearty filling, tender enough to melt in your mouth, and forgiving enough that a nervous first-timer can still pull it off.

Ingredients
Flour
All-purpose flour gives the crust its structure, sturdy enough to hold a filling but still tender and flaky once it bakes. I’ve stuck with plain all-purpose flour for every crust I make. It’s easy to find, and I have always gotten reliable results, so I’ve never felt the need to fuss with pastry flour or anything fancier.
Butter
Cold butter is the real secret to a flaky pie crust, so this is the one place I want you to fuss a little. As those little cubes of cold butter hit the hot oven, they melt and release steam, and that steam is what puffs the dough apart into all those tender, flaky layers everyone loves. Warm butter just blends into the flour and gives you a denser, tougher crust instead. So the whole game is keeping that butter cold from start to finish. If the dough ever starts to feel soft while you’re working, just pop it back in the fridge for a few minutes before you keep going.
I use all butter here because it gives the crust a rich flavor that’s hard to beat, and I usually reach for unsalted so I can control the salt myself (that’s why the salt below is optional). Salted butter works too if that’s what you keep on hand… just skip the added salt.
Salt
A little salt enhances the flavor of the crust and keeps it from tasting bland. Even in sweet pies, salt helps bring out the buttery flavor.
Sugar
A small amount of sugar adds subtle flavor and encourages the crust to brown beautifully in the oven. It won’t make the crust taste sweet, but it does help create a more flavorful finished pie.
Ice Water
Ice water is what brings the dough together, and the ice part genuinely matters. The colder the water is when it hits the flour and butter, the better your dough behaves. So don’t just reach for cold water from the tap… take the extra few seconds to get it truly icy, and the butter stays firm right up until it goes in the oven.
How to Make Homemade Pie Crust
Before you start, here’s a quick picture of what you’ll see at each stage, so nothing catches you off guard.
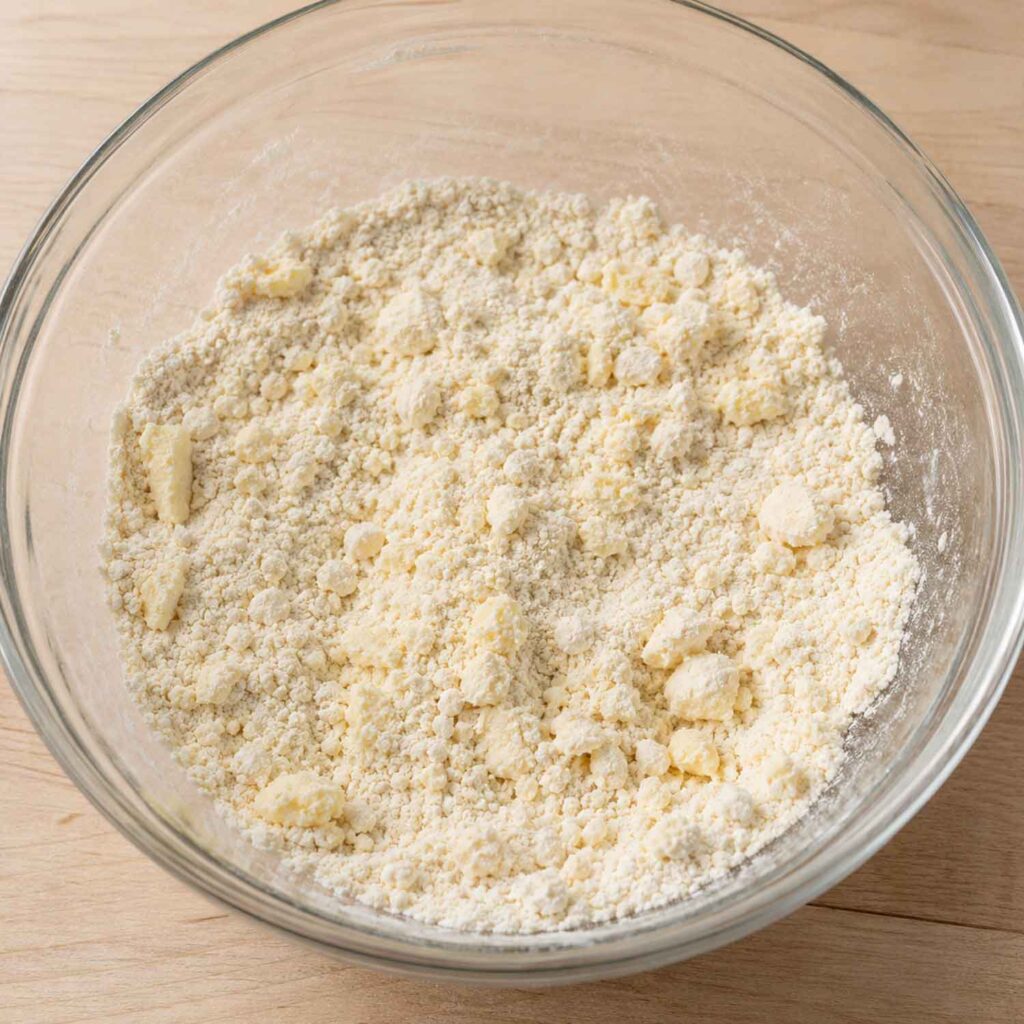
When you cut the butter into the flour, you’re watching for a crumbly, sandy mixture with little bits of butter about the size of peas scattered through it.
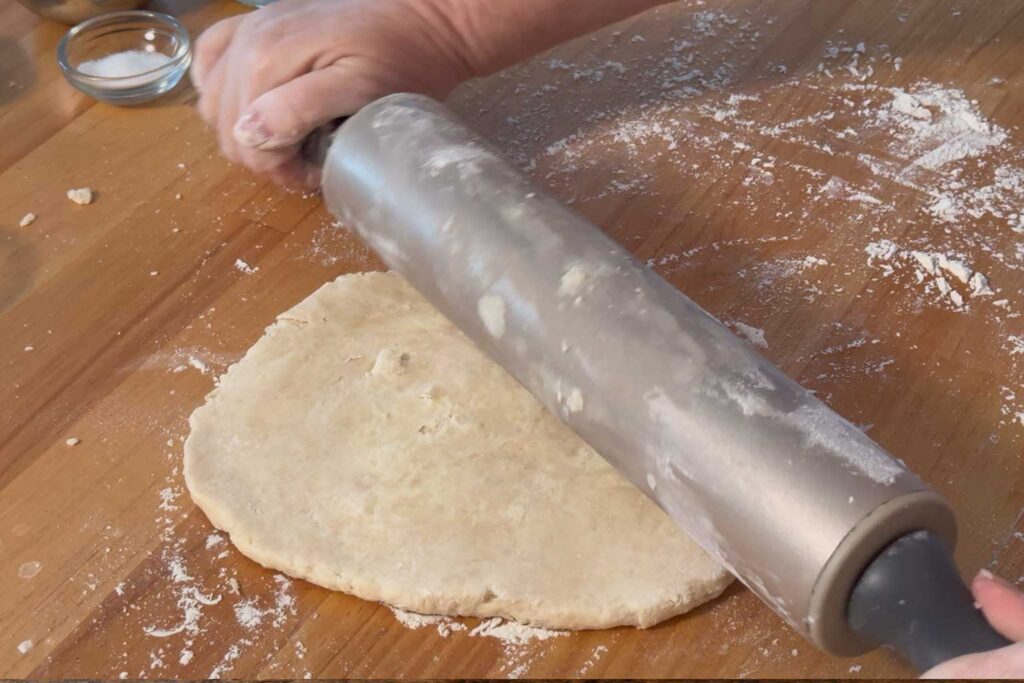
As you add the ice water, the dough shifts from dry and floury to a shaggy, uneven pile… it won’t look smooth or pretty, and that’s exactly right. When you gather it up, it should just hold together when you squeeze a handful. Then it rests in the fridge to firm up. And when you roll it out later, you’re looking for an even round, about ¼ inch thick, that lifts off the counter without sticking. That’s the whole journey. The step-by-step details are all in the recipe card below, so here you just get to know what each stage feels like before you’re standing at the counter with floury hands.
Troubleshooting Tips
- The dough is too dry and crumbly: Add additional ice water, one teaspoon at a time, until the dough holds together when squeezed.
- The dough is sticky: Sprinkle in a small amount of flour and chill the dough before continuing.
- The butter is getting soft: Refrigerate the dough or ingredients for 10 to 15 minutes before proceeding.
- The dough shrinks while rolling: Let it rest for a few minutes to relax the gluten before continuing.
- The dough tears when transferred: Patch small tears with scraps of dough and gently press them into place.
Remember, pie dough is more forgiving than it looks. In most cases, keeping the butter cold and avoiding too much water are the two biggest keys to a flaky, successful crust.
What to Make with This Pie Crust
This crust is incredibly versatile. I’ve used it for sweet pies like apple and cherry, savory pies like the chicken pot pie I mentioned, and quiches loaded with farm-fresh vegetables. It holds up beautifully to wet fillings, bakes up golden and crisp, and tastes like the kind of homemade goodness that makes people think you spent hours in the kitchen… even though the hands-on time is actually pretty minimal.

Pie Crust Dough Recipe
Equipment
- 1 whisk
- 1 Rolling Pin
- 1 plastic wrap
- 1 pie dish I recommend a ceramic pie plate, as glass can shatter in the oven
Ingredients
- 1 1/4 cups all-purpose flour
- 1/2 teaspoon granulated sugar (white sugar)
- 1/2 teaspoon salt only use this if you're using unsalted butter
- 1/2 cup cold butter unsalted or salted, either is okay
- 3-6 tablespoons ice water
Instructions
- Step 1: Prep Your ButterCut your cold butter into small cubes and put them in the freezer for about 30 minutes before you start. You want that butter as cold as possible without being completely frozen solid. This step makes a real difference, so don't skip it.
- Step 2: Mix Your Dry IngredientsIn a large mixing bowl, whisk together the flour, sugar, and optional salt if you're using it. This takes maybe thirty seconds, but it ensures everything is evenly distributed before you add the butter.
- Step 3: Cut in the ButterTake your cold butter cubes and add them to the flour mixture. Using a fork and a knife, or a pastry cutter if you have one, start cutting the butter into the flour. You're aiming for pea-sized pieces. This will take a few minutes, and your arms might get a little tired, but keep going. You'll see the mixture start to look crumbly and the butter will break down into small bits coated with flour. It's a bit of a workout, but it's also kind of satisfying in a hands-on, old-fashioned way. If you have a food processor, you could use that on a gentle pulse.
- Step 4: Add the Ice WaterHere's where you need to pay attention. Add the ice water one tablespoon at a time, using a fork to gently pull the dough together into a crumbly pile. You might need three tablespoons, you might need six… it depends on your flour, your humidity. Add just enough water so the dough starts to come together. It should look shaggy and hold together when you press it, but it shouldn't be wet or sticky.
- Step 5: Form and Chill the DoughTurn the pie dough out onto a clean surface and bring it together with your hands. If you're making more than one crust, divide the dough now. Wrap each portion in plastic wrap and flatten it into a disc. This disc shape makes it easier to roll out later. Pop the wrapped dough into the refrigerator for at least two hours. I know waiting is hard, but this is important because chill time lets the gluten relax and the butter firm back up, which means a more tender, flakier crust.
- Step 6: Roll Out the DoughWhen you're ready to use your dough, take it out of the refrigerator immediately before. Flour a clean surface and your rolling pin. Unwrap the dough and place it on your floured surface. Roll dough from the center outward, turning the dough as you go. Your goal is to get it about ¼ inch thick. I flip my dough over several times while I'm rolling to keep it from sticking, and I add a little more flour to the surface and rolling pin as needed.If the dough feels too hard and resistant when you first take it out, or just sort of breaks away from itself, don't panic. Keep working with it gently, and as it warms up just a bit, it will become more pliable. If it's too soft or sticky, pop it back in the refrigerator for a few minutes to firm up.
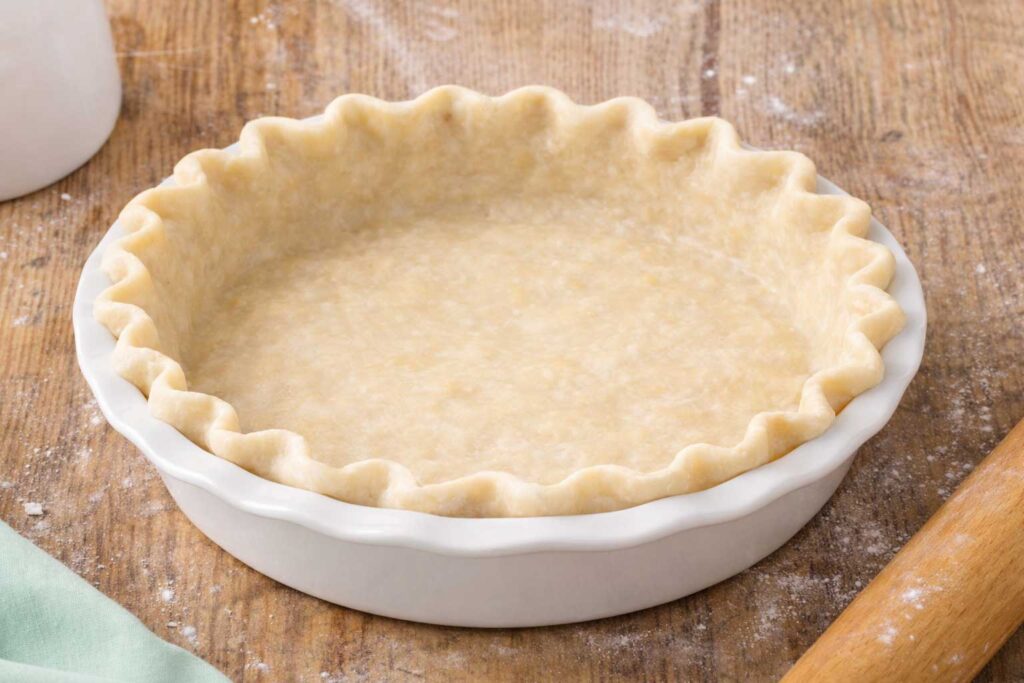
- Step 7: Use Your Beautiful CrustOnce your dough is rolled out, you can transfer it to your pie pan, trim the edges with a knife, crimp them however you like (with fingers or the tines of a fork), and fill it with whatever your heart desires. Note: If you are using this pie crust for blind baking (baking it empty or partially baked for a filling like quiche or cream pie), use a fork to poke holes (dock) the bottom of the pie crust, as this allows steam to escape, preventing puffing and sogginess. But, if you're using this crust for liquid fillings like pumpkin, fruit, or chicken pot pie, where the filling itself holds the crust down, do not poke or dock it as holes would let the filling leak through. For a double-crust pie, repeat the rolling process with your second disc of dough. For a single-crust pie like a quiche or a pot pie, you're already done with the hard part.Baking guidance: Follow your pie recipe’s bake temperature and time. For blind baking, use pie weights (or dry beans/rice on top of parchment paper) to weigh the crust down and prevent puffing, then continue baking as needed for your filling.
Nutrition
Notes
My Tips for Pie Crust Success
Keep Everything Cold
If your kitchen runs warm, especially in the summer, this is the tip that saves your crust. Work quickly, and don’t be afraid to stop and chill things partway through… the bowl, the dough, even your hands under cold water for a second. If the butter starts looking shiny or smeary instead of staying in firm little bits, it’s gotten too warm, so slide everything into the fridge for ten minutes and pick up where you left off. Cold dough is happy dough.
Don’t Overwork the Dough
You’re not kneading bread here. Handle the dough just enough to bring it together. Overworking develops gluten, which makes your crust tough instead of tender.
Use Ice Water
Fill a glass with ice and water and measure your tablespoons straight from that glass, leaving the ice in so it stays cold the whole time. It’s a tiny habit, but it keeps everything cold and helps the dough come together beautifully.
Give It Time to Rest
Give the wrapped dough at least two hours in the fridge before you roll it. Longer is fine too… overnight works great, so this is an easy one to make ahead.
Flour as You Go
Don’t be shy about adding a little extra flour to your work surface and rolling pin. A light dusting keeps things from sticking without making the dough heavy.
Avoid Shrinkage
Be careful not to stretch the dough to reach the edges of the pan, because it’ll just spring back and shrink as it bakes. Ease it in gently instead, chill the shaped crust before it goes in the oven, and resist the urge to keep patting and reworking it. Anytime I’ve had a crust shrink on me, it was because I rushed and pulled the dough… slowing down really does fix it.
Make Ahead and Storage
Homemade pie crust is a great make-ahead recipe. The unbaked dough can be wrapped tightly in plastic wrap and stored in the refrigerator for up to 3 days before rolling out. For longer storage, wrap the dough well and place it in a freezer-safe bag; it will keep in the freezer for up to 3 months. Thaw frozen dough overnight in the refrigerator before using. You can also roll the dough into your pie dish ahead of time and refrigerate it for a day or two before filling and baking. If your recipe calls for a blind-baked crust, that can be made in advance as well. Once completely cooled, cover it loosely and store it at room temperature for up to 24 hours, or refrigerate it for up to 3 days. This flexibility makes it easy to spread the work over several days, especially when preparing pies for holidays or special occasions.
Answers to Questions
Q: Can I substitute vegan butter or margarine?
A: Yes. For the best results, use a firm stick-style vegan butter and keep it very cold. Margarine will work, but the crust may be less flaky and slightly softer than one made with butter.
Q: Can I use this pie crust for butter tarts?
A: Yes. Roll the dough a bit thinner than you would for a standard pie and fit it into tart cups. Chilling the shells before baking can help them hold their shape.
Q: Can I use this crust for sweet and savory pies?
A: Yes. The small amount of sugar enhances browning and flavor but is not enough to make the crust noticeably sweet, making it suitable for everything from fruit pies to chicken pot pie.
Q: How do I prevent a soggy bottom crust?
A: For particularly wet fillings, chill the crust before baking and consider blind-baking it first. Baking the pie on a preheated baking sheet can also help crisp the bottom.
Final Thoughts from the Farm
Every time I pull a golden, homemade crust out of the oven, I still get a little jolt of pride… the same feeling I had the very first time one actually worked. Pie crust used to intimidate me, and now it’s the thing I reach for without a second thought. That’s the part I hope you get to feel too.
If you make this crust, I’d love to hear how it went, lumpy edges, proud moments, and all. Tap the stars in the recipe card and leave me a comment, or share a photo with me. It genuinely makes my day.
Love,
Jennifer
Tried this recipe?
Tap the stars in the recipe card to leave a quick rating. Your rating helps other home cooks know this recipe works in a real kitchen, not just mine. And as a thank-you for your feedback, you will immediately receive a free printable copy of my cookbook, featuring my most popular recipes, each one formatted on a SINGLE, easy-to-use page, a perfect kitchen companion for easy meal prep.
")
")


Meet Jennifer
Jennifer cooks and experiments in the kitchen at Maker Farm, where she focuses on simple pantry cooking, homemade staples, and practical recipes that make everyday meals easier. Over the years she has tested many ways to make cooking simpler and more dependable, and shares the methods that work best in her own kitchen, occasionally showing them on her Heart to Home at Maker Farm vlog.