

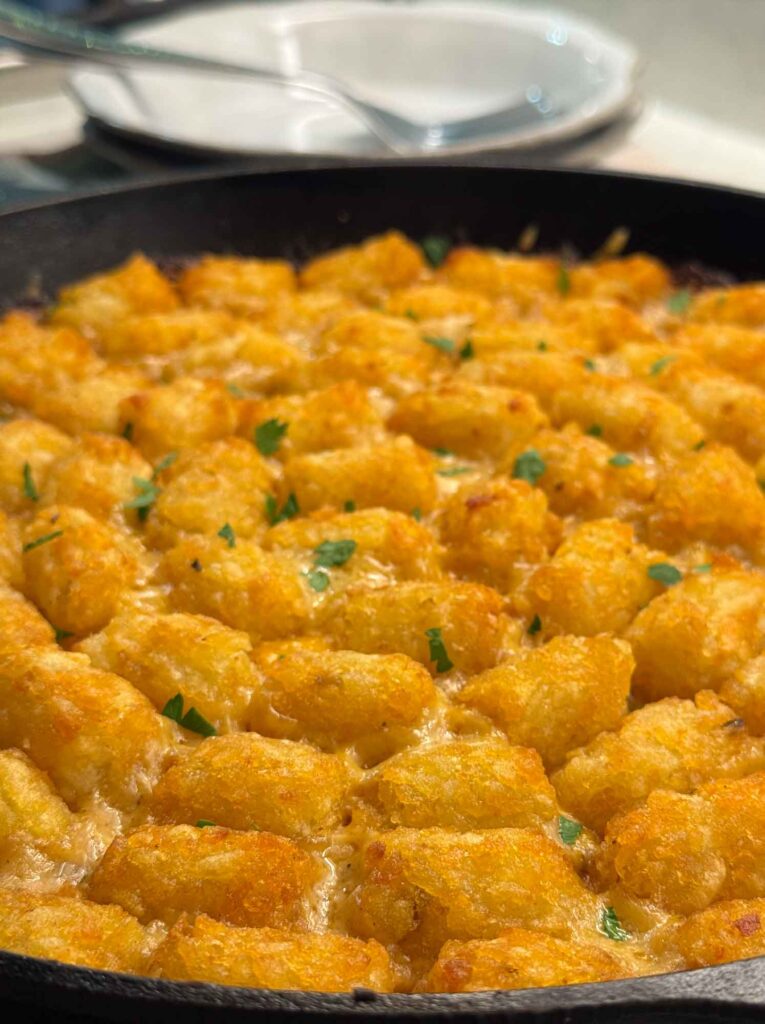
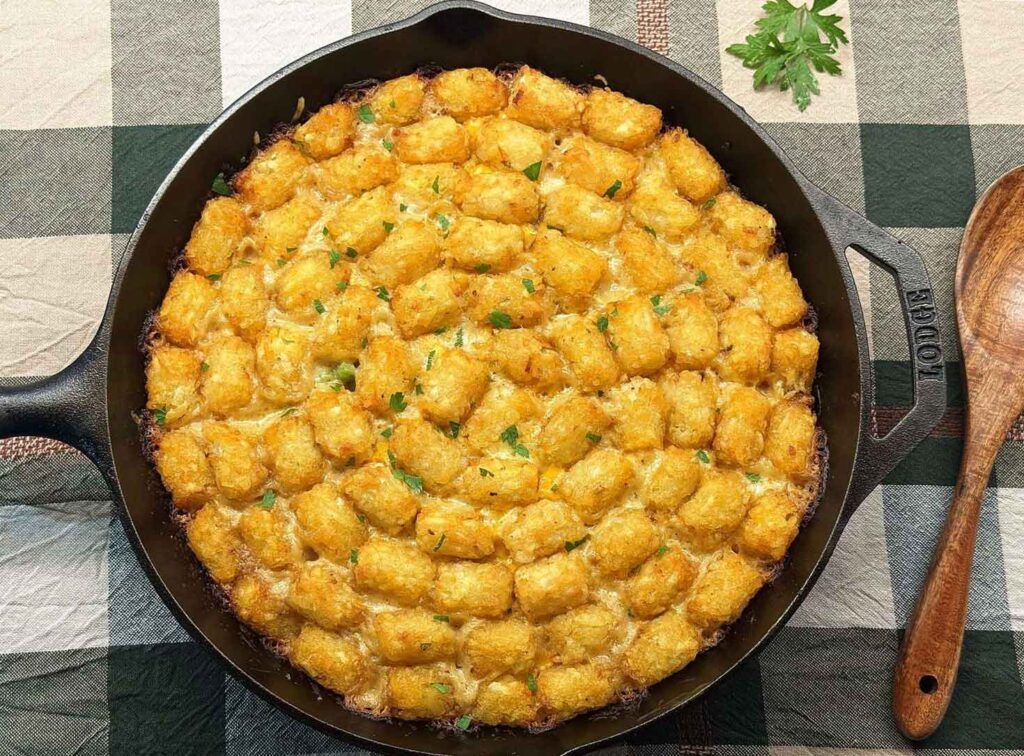
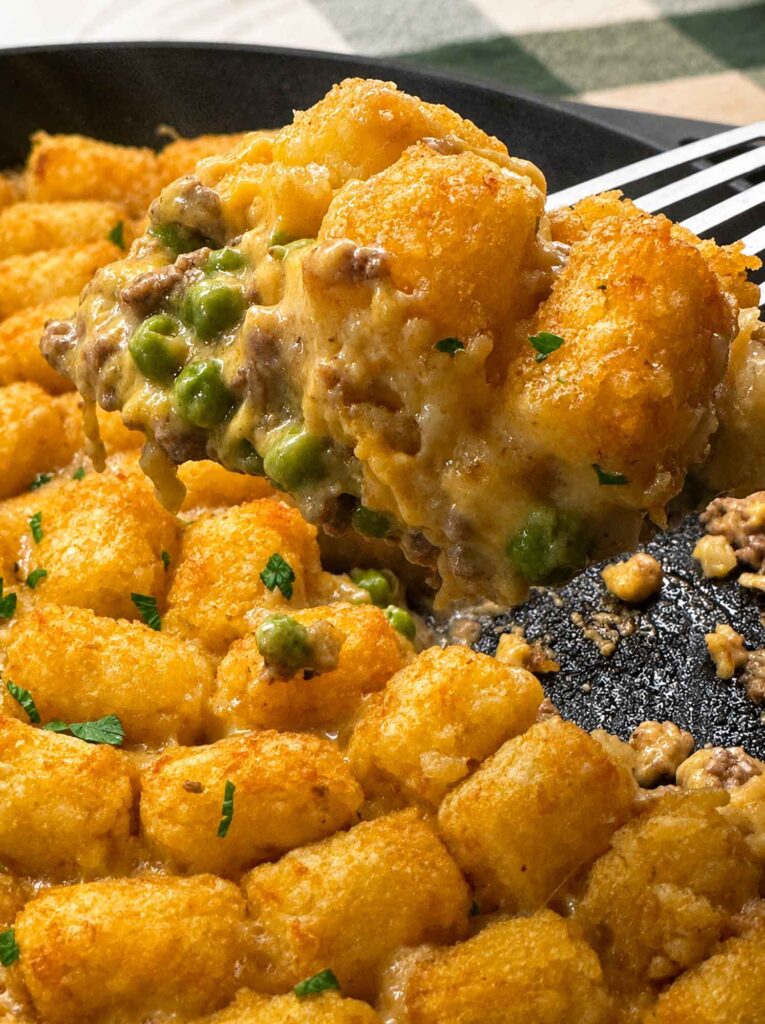
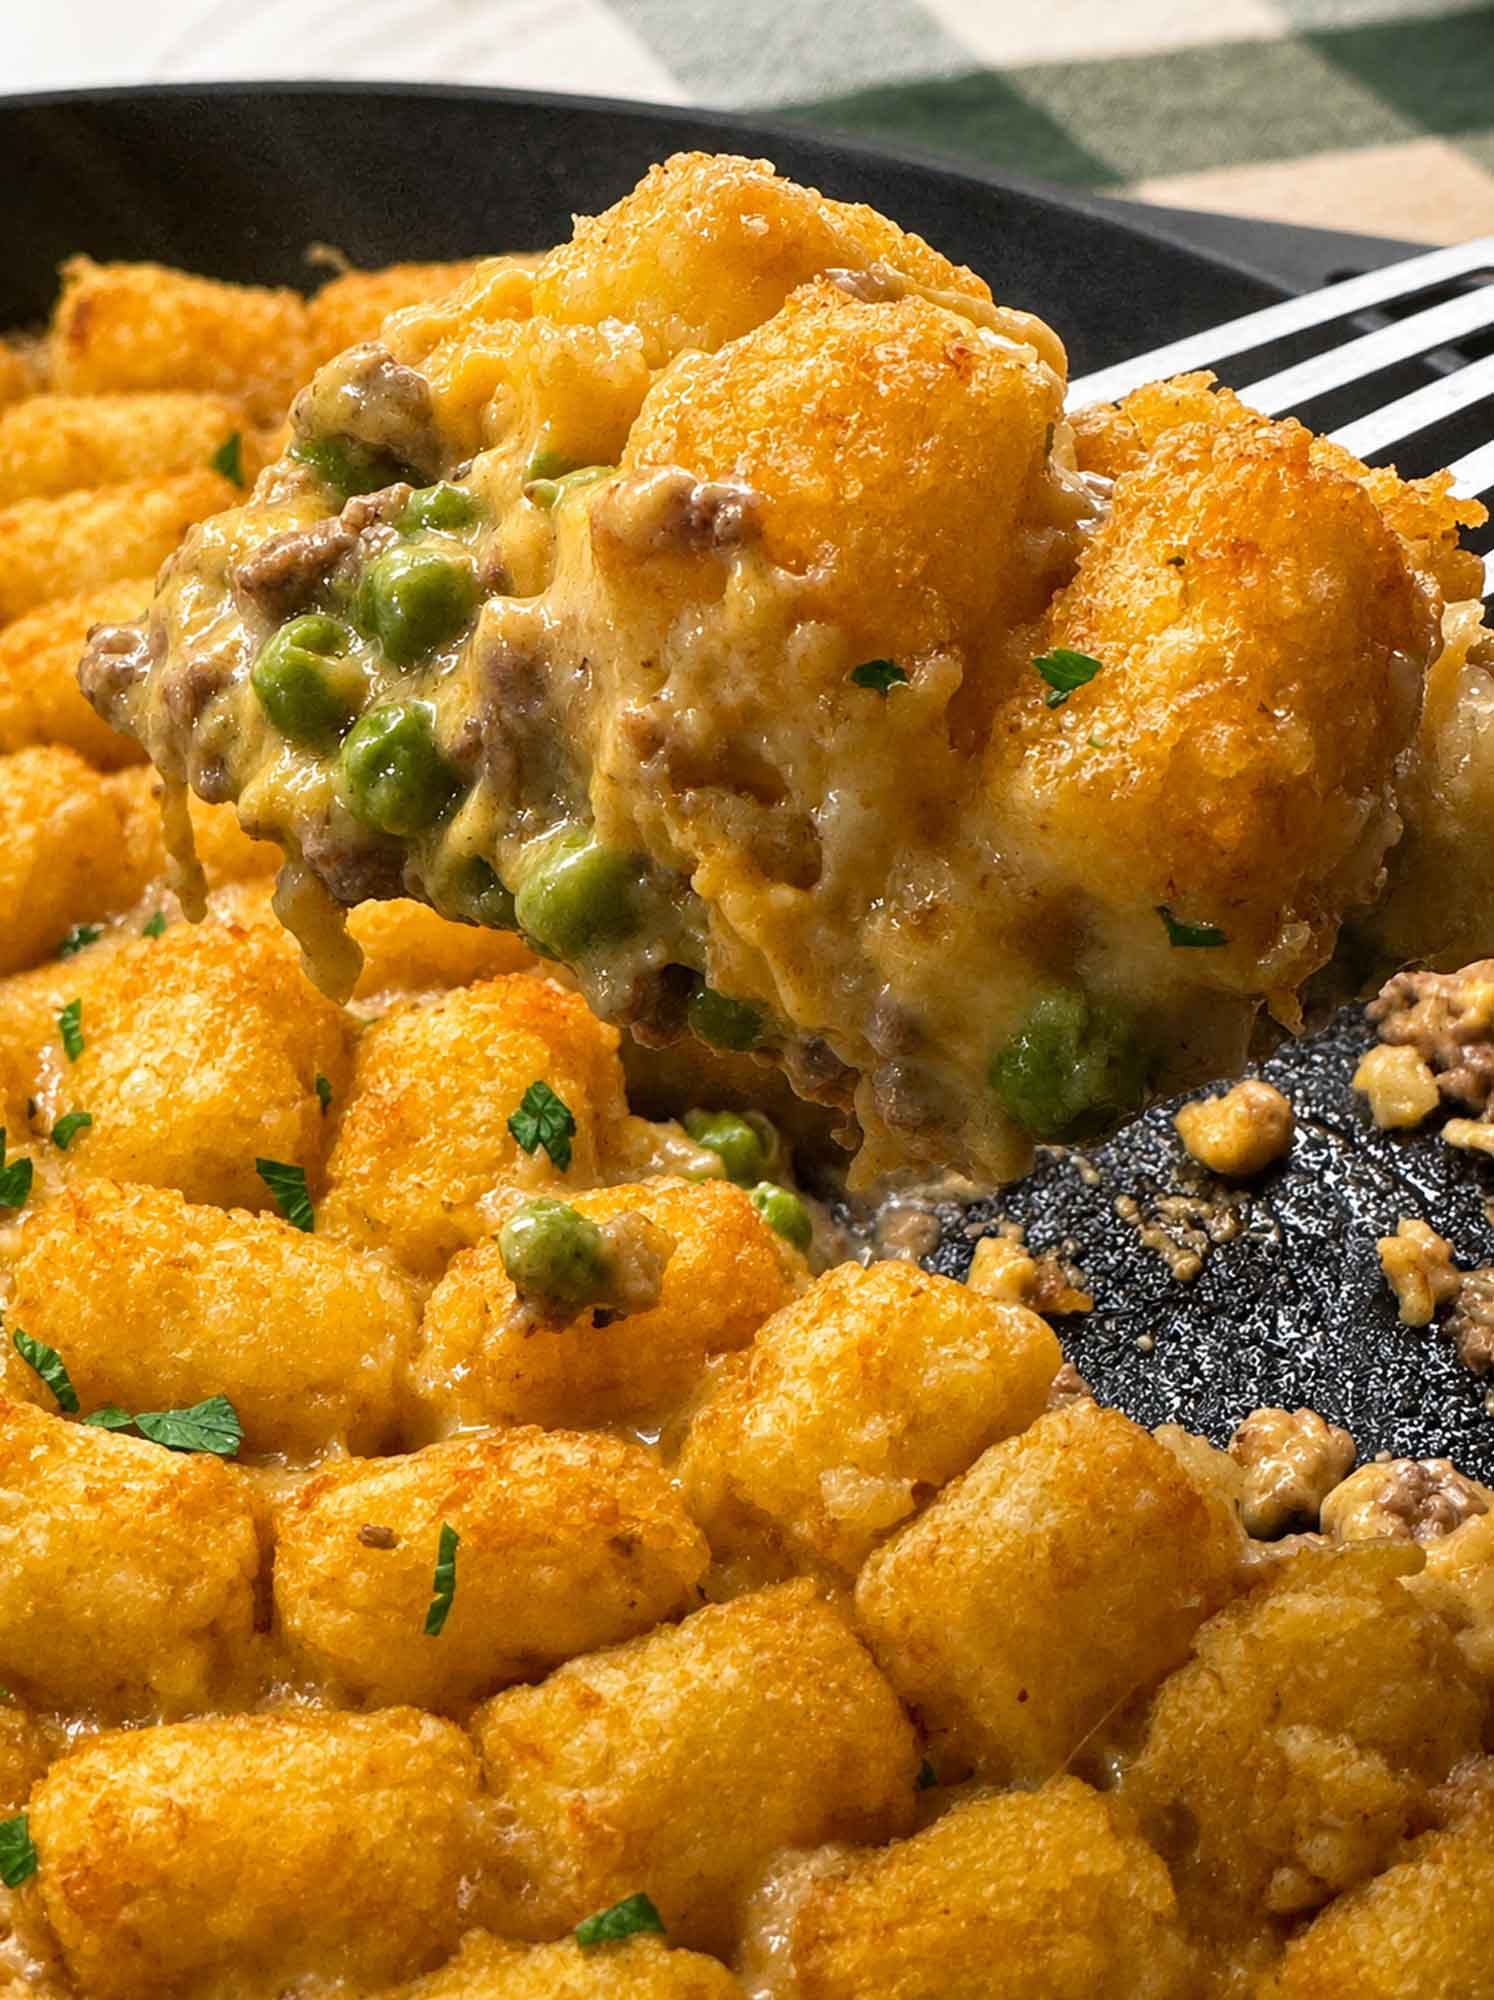
This tater tot casserole recipe is seasoned ground beef in a creamy sauce of soup, sour cream, and milk, folded with sharp cheddar and peas, then covered edge to edge with frozen tater tots and baked at 400°F until the top is crisp and golden. I make the whole thing in one 12-inch cast iron skillet that goes straight from the stove to the oven. It takes about 20 minutes of hands-on work and 40 in the oven, and feeds 8!
TATER TOT CASSEROLE At A Glance
Prep
20 min
Bake
40 min
Total
1 hour
Serves
8
Pan
Large cast iron skillet or 13×9 baking dish
Why I Make Tater Tot Casserole in Cast Iron

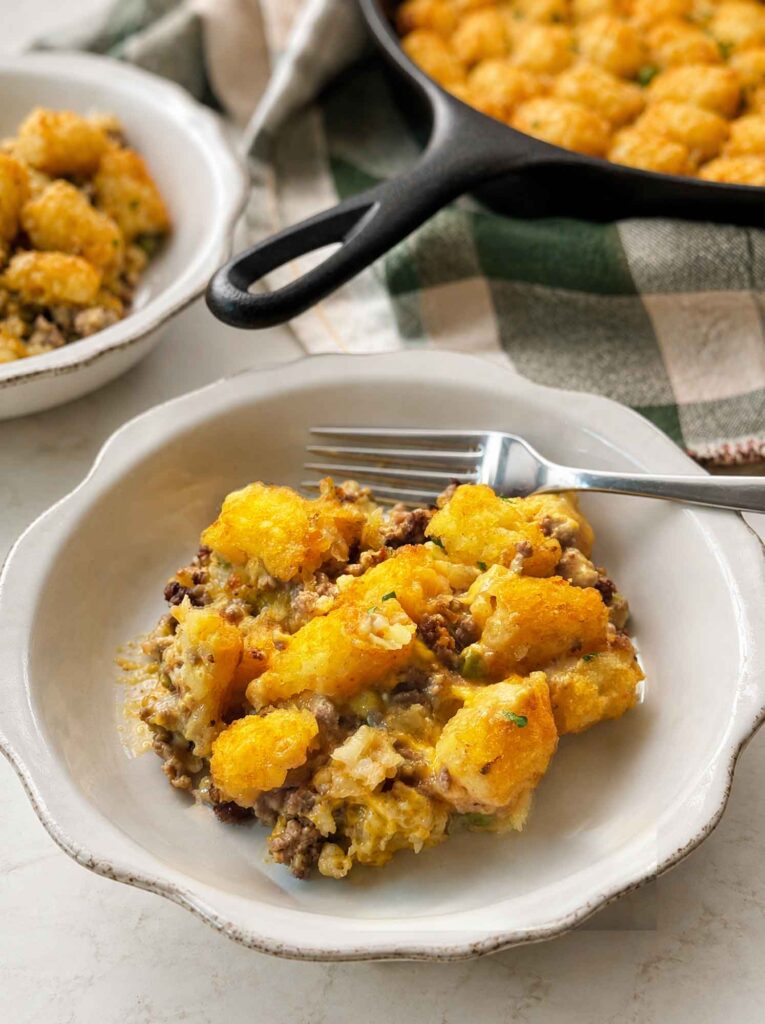
My husband Greg has been working outside and hitting the gym a lot lately, and requested “yummy calories” for dinner last night…. and this tater tot casserole hits all the right spots and was just SO good. I browned the beef in my cast iron, built the creamy filling in the same pan, laid the tots on top, and slid the whole skillet into the oven. One pan. That’s it. When it came out I set it right on a folded towel in the middle of the table and we ate out of it, which is my favorite kind of dinner on a weeknight.
Greg is a meat-and-potatoes man through and through, so a dish that’s literally beef and potatoes was never going to be a hard sell here. What surprised me most, though, was the leftovers. Some casseroles go a bit soggy by day two, and this one doesn’t. The tots crisp right back up in the oven, and the filling underneath actually tastes better after a night in the fridge. I’ve been reheating it for lunch and so looking forward to it.
If you only have a 9×13 baking dish, don’t worry, that still works beautifully and I’ll tell you exactly how below. But if you have an oven-safe skillet sitting on your stove, I think you’ll like this way better.
Let’s dig in!

Tips and Notes Before You Start
- Skillet size matters. If you want to use a cast-iron skillet, you’ll want a 12-inch size. A 10-inch one will overflow, and the tots won’t fit in a single layer.
- Pick your soup. Chicken or mushroom, your choice. Canned condensed soup is the easy way to go. If you’d rather skip the can, my cream of anything soup mix subs in for it.
- Frozen tots go on frozen. They sit on top of the filling rather than down in it. Keep them in a single layer.
- Get your veggies in. Peas or corn are optional, but I always add them. It makes this feel like a whole dinner instead of just beef and potatoes.
- Leftovers are genuinely good. They reheat best in the oven.
What You Need to Make This
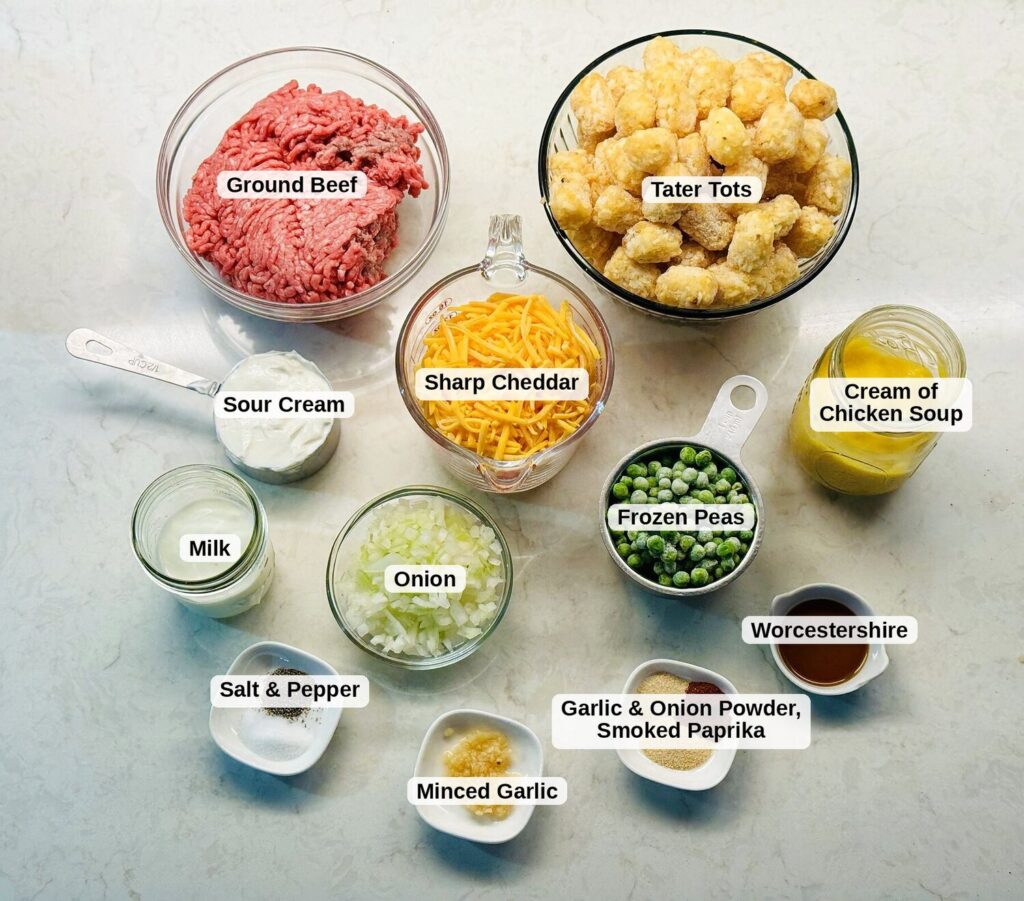
- Ground beef. I use 85/15. Leaner than that and the filling loses some of its richness, since there’s no other fat in the pan doing that job. You’ll drain most of the grease, but leave a little behind for flavor.
- Onion and garlic. The onion goes in with the raw beef so it softens while the meat browns. The garlic waits until the very end, because it only needs about 30 seconds and it turns bitter fast if you rush it in early.
- Condensed cream of chicken soup. This is the backbone of the sauce. Cream of mushroom works too and tastes a little earthier. Store-bought is completely fine here, or make your own.
- Sour cream and milk. The sour cream brings the tang that keeps the sauce from tasting flat, and the milk loosens everything so it pours around the beef instead of sitting on it in clumps.
- Seasonings. The Worcestershire and the smoked paprika are the two that make people ask what’s in this. The paprika is listed as optional, but I put it in every time.
- Cheddar. One cup melts into the filling and the other half cup goes on top of the beef, right under the tots, where it turns into a golden layer that glues everything together. Sharp beats mild here, since there’s a lot of creamy mildness to cut through.
- Frozen peas or corn. I used peas. They go in frozen and cook through in the oven.
- Frozen tater tots. That’s most of a large bag. You want however many it takes to cover the top in one snug single layer, and the amount changes a little depending on your pan and your brand of tots.
Can I make this without frozen tater tots?

You can, though there isn’t a true one-for-one swap for them, since a tater tot comes out of the bag already shredded, bound, and par-fried. The closest thing to what you may have on hand is plain shredded potato. Shred about 2 pounds of russets, then squeeze them hard in a clean towel until they stop dripping. That squeeze is really important, because wet potato steams instead of browns. Toss the tater shreds with 2 tablespoons of melted butter and a little salt, scatter them loosely over the prepared filling so steam can escape, and give it longer in the oven, closer to 50 to 60 minutes at 400°F. What you get is a hash brown crust rather than tidy little tots, but it is still delicious. Frozen hashbrowns and frozen crinkle fries cut into thirds work too, if those are what you keep in the freezer instead.
How to Make Tater Tot Casserole in One Skillet
First we brown the beef, then we make it creamy, and then top it and bake. Go ahead and heat your oven to 400°F now so it’s ready when you are.
Step 1: Brown the beef and onion
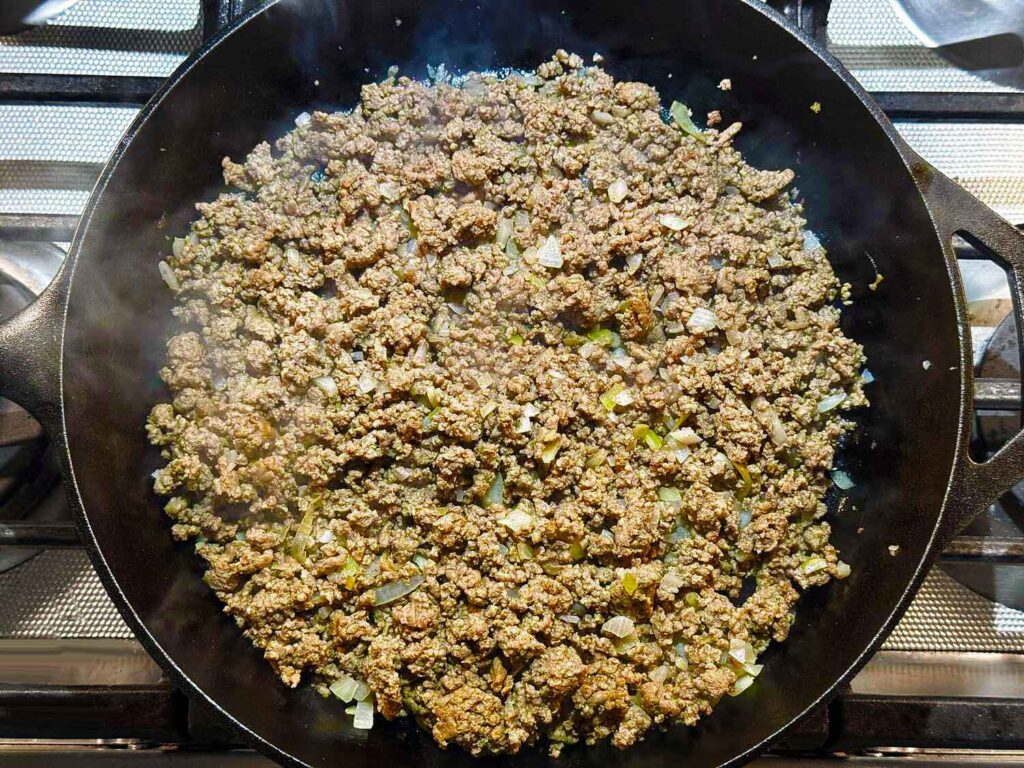
Set your 12-inch cast iron skillet over medium-high heat and add the ground beef and diced onion together. Break the beef up into crumbles as it cooks, about 8 minutes, until there’s no pink left and the onion has gone soft and translucent. Tip the pan and spoon off the excess grease, but leave a thin slick behind. Then stir in the garlic and cook it for just 30 seconds, until you can smell it.
Cast iron is doing you a favor at this stage. It holds heat hard, so the beef actually browns instead of steaming, and all those brown bits stay in the pan and end up in the sauce instead of going down the drain with a dish you rinsed out.
Step 2: Season it and make it creamy
Stir in the Worcestershire sauce, salt, pepper, garlic powder, onion powder, and smoked paprika, and give it a minute to coat everything. Now turn the heat down to low. This part matters, because sour cream will break and go grainy if you stir it into a screaming hot pan (ask me how I know). Add the condensed soup, the sour cream, and the milk, and stir until it’s smooth and creamy. Fold in the peas and 1 cup of the cheddar.
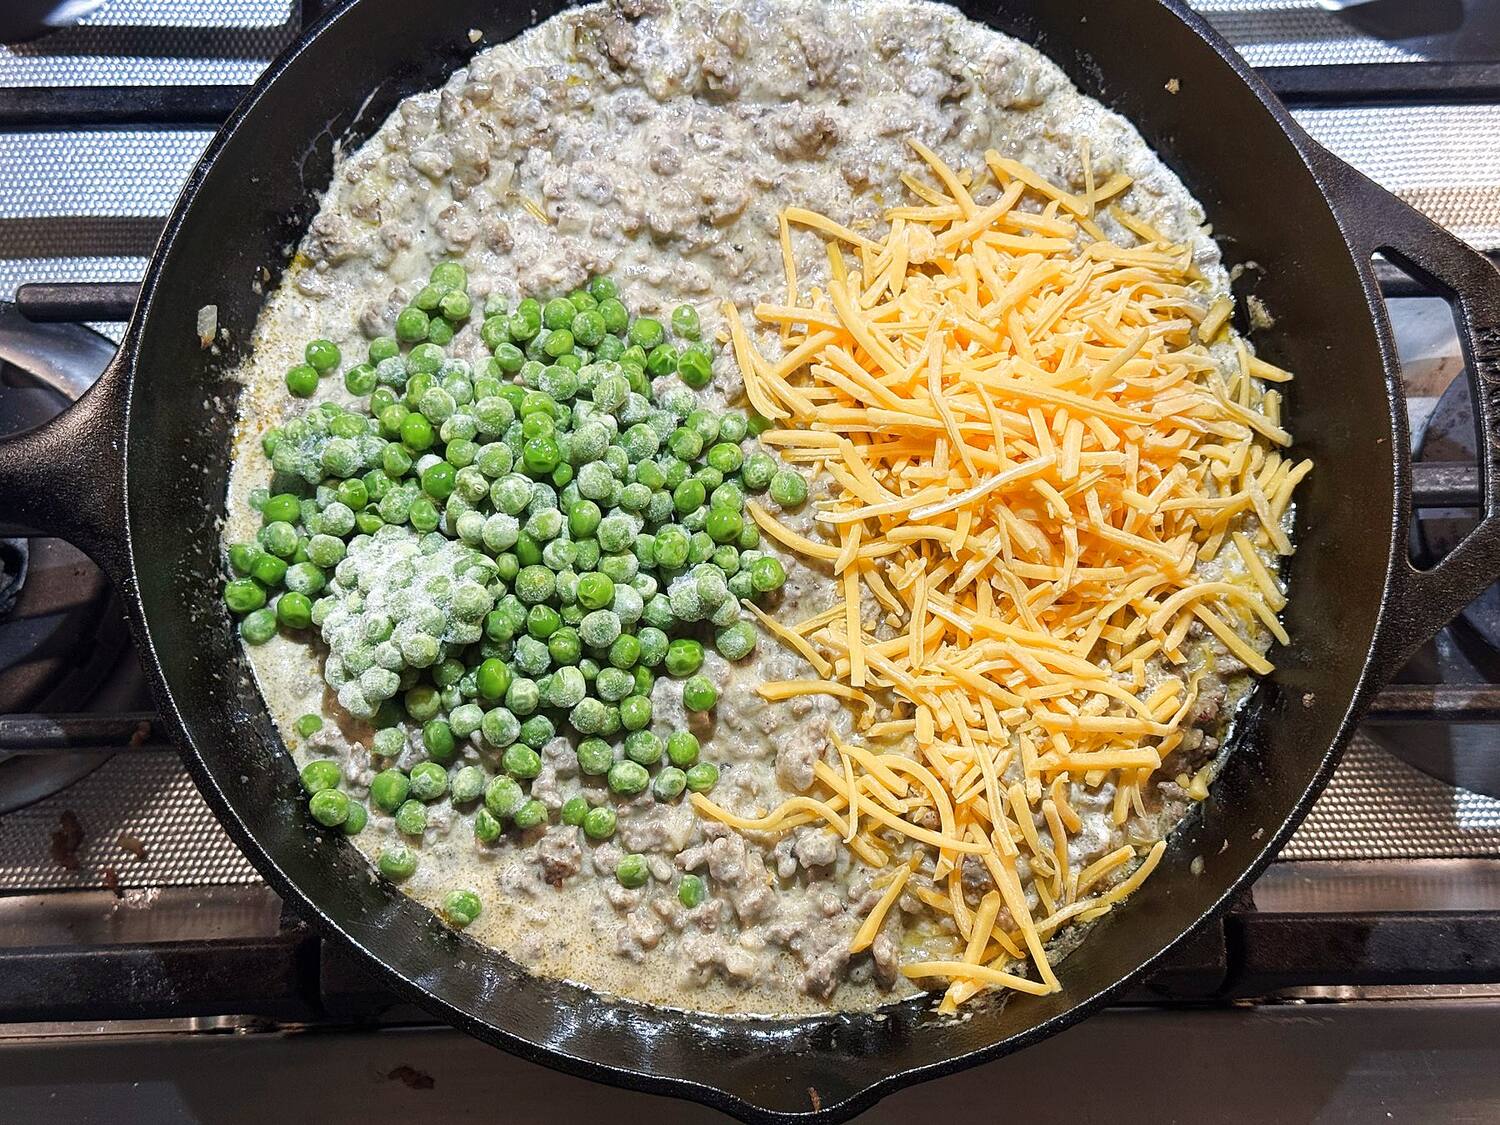
Take a look at it and don’t panic. It’s going to seem loose and a little soupy compared to the casserole you’re picturing. That’s exactly right. The tots sitting on top will absorb some of that moisture as they bake, and it firms up into a proper scoopable casserole in the oven. If you thicken it now, you’ll end up with something pasty later.
Step 3: Top with tots and bake
Level the filling out in the skillet with the back of your spoon and scatter the remaining 1/2 cup of cheddar over it. Then start laying the frozen tots on top, working from the outside edge in, standing them close together in a single layer. Be careful not to press them down into the filling. Keeping them fully exposed is the whole reason the tops come out crisp instead of soft, and it’s the one thing I’d fuss over if I were standing there with you. (Yes, I placed each tater tot into place neatly like this. You don’t have to be so neat, but it does give you the best coverage!)
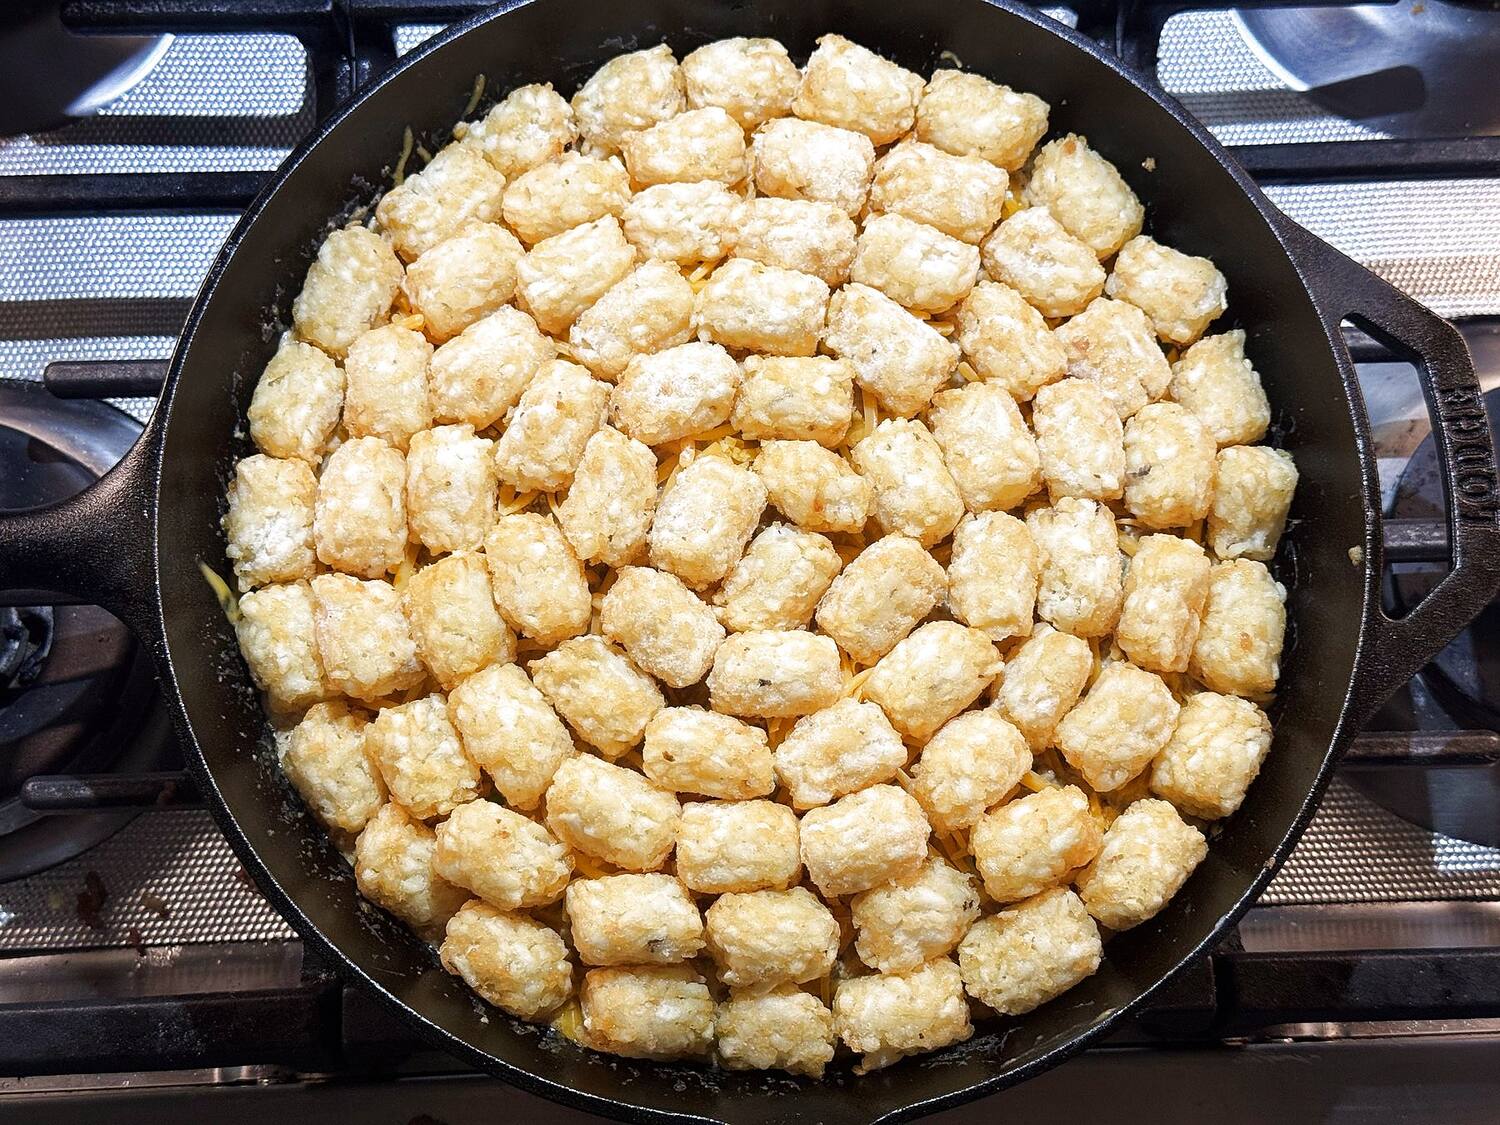
Slide the skillet into the 400°F oven, uncovered, for 35 to 45 minutes. You’re looking for two things at once: the filling bubbling up around the edges, and the tots turned crisp and golden brown. Start checking at 35 minutes, since your pan goes in already hot from the stove and can run a touch faster than a cold baking dish would. If you want the tops even crisper, run it under the broiler for 2 to 3 minutes, but stand right there and watch it, because broilers go from golden to gone in a blink.
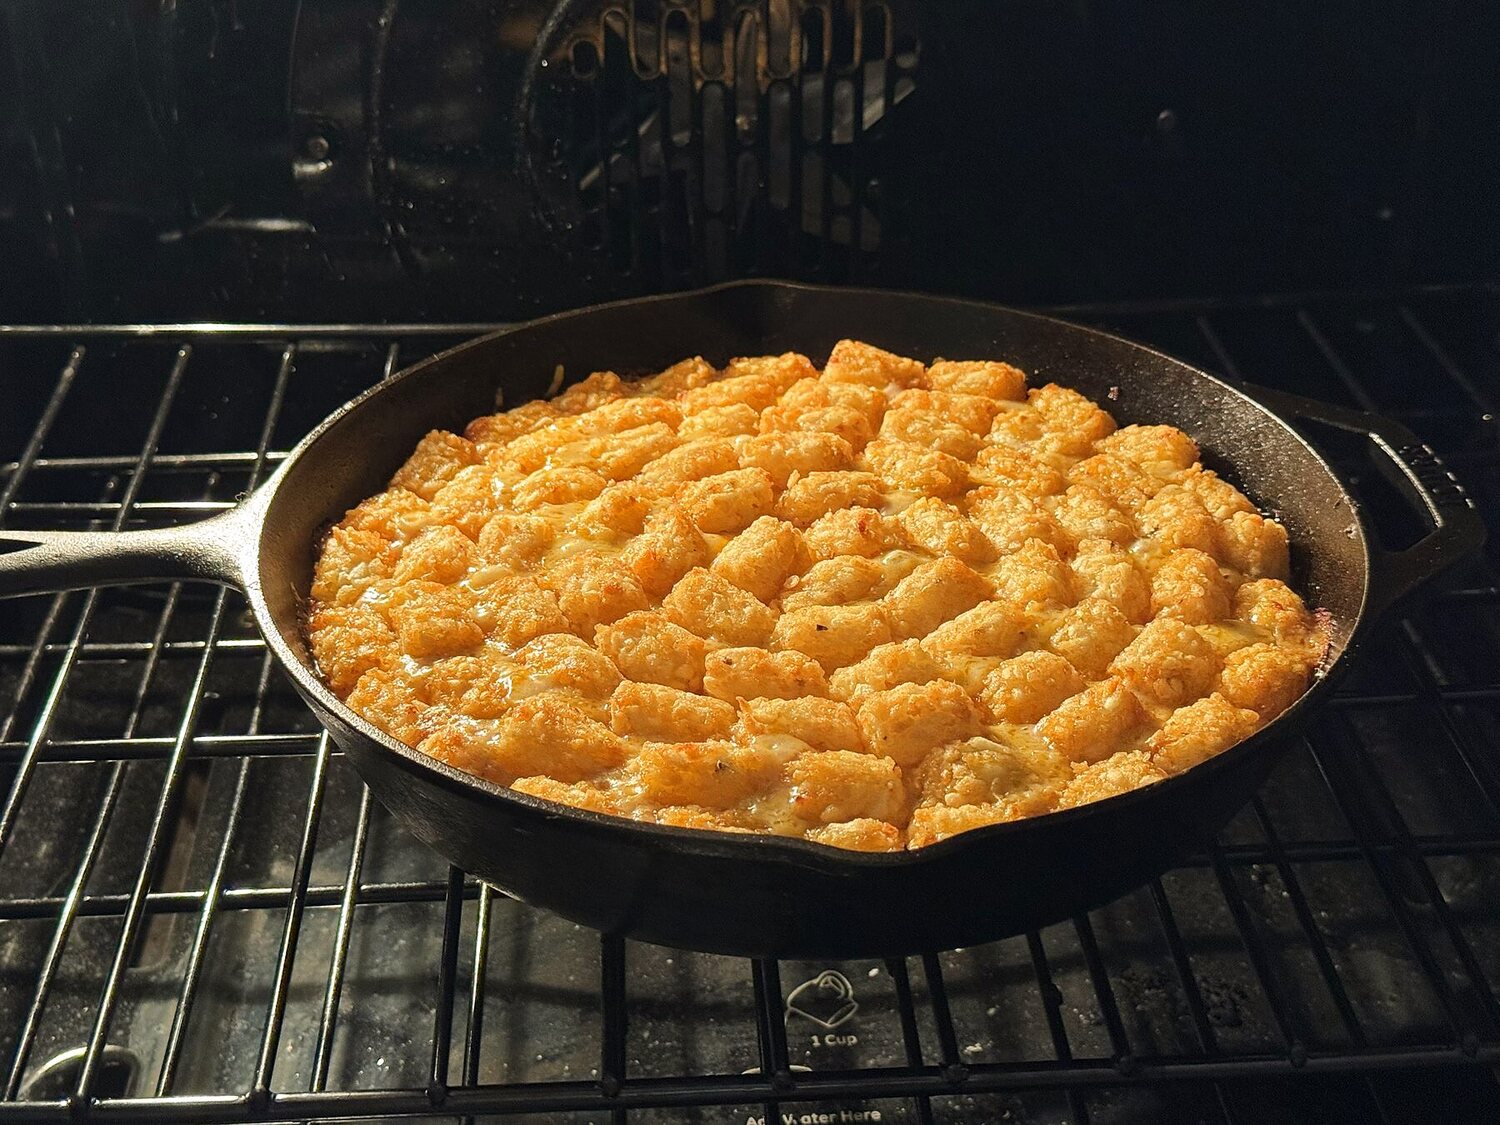
Let it rest 5 to 10 minutes before you serve it. Cast iron keeps cooking after it comes out, and the filling needs those few minutes to settle so a spoonful holds together on the way to the plate. One warning that’s worth repeating: that handle is 400 degrees and it does not look it. I keep a folded towel draped over mine the second the pan hits the counter, so nobody grabs it bare-handed.
Can I Make This in a 9×13 Pan Instead?
Yes, and it’s the version most people grew up with. Brown the beef and build the filling in a large skillet exactly the same way, then spread it into a greased 9×13 baking dish, sprinkle on the cheddar, and arrange the tots over the top. Bake at 400°F for 35 to 45 minutes.
The two pans hold almost the same amount, so you don’t need to change a single measurement. What you give up is the crust. Cast iron browns the bottom and the edges of the filling in a way a glass or ceramic dish just doesn’t, and you’ll notice those crispy caramelized edges where it meets the pan. What you gain is a lighter dish that’s easier to carry and easier to store, so if you’re taking this to a potluck, the 9×13 is the smarter choice.
How to Store and Reheat Leftovers
Move the leftovers out of the skillet into an airtight container once it’s cooled, and keep it in the fridge for up to 4 days. I do move it out rather than covering the pan and putting the whole thing in the fridge, because sitting wet overnight isn’t kind to a cast iron pan’s seasoning.
Reheat it in the oven if you possibly can. Spread your portion on a small sheet pan or in an oven-safe dish and warm it at 375°F for 15 to 20 minutes. This helps because the dry heat drives the moisture back out of the tots and they crisp up again, almost like the first night. The microwave works when you’re in a hurry, but it steams the tots soft, and softness is not what we came here for.
You can freeze it too. Cool it completely, then freeze in a covered dish for up to 3 months and thaw overnight in the fridge before reheating. Just know the tots come back softer after freezing than they were the first day.
Frequently Asked Questions
Can I assemble this ahead of time?
You can, with one adjustment. Build the filling, spread it in the pan, and refrigerate it covered for up to a day, but wait and add the frozen tots right before it goes in the oven. Tots sitting on cold filling overnight go soggy on the bottom. Add about 10 minutes to the bake since it’s starting cold.
Can I bake it from frozen?
Yes. Cover it loosely with foil and bake at 375°F for about 45 minutes, then take the foil off, raise the oven to 400°F, and give it another 25 to 35 minutes until the center is hot and the tots have browned.
Can I use Greek yogurt instead of sour cream?
Yes, plain full-fat Greek yogurt swaps in cup for cup. It’s tangier, so the filling tastes a little brighter and less rich, which some people like against all those potatoes. Be careful to keep the heat low when you stir it in, even lower than you would for sour cream… Greek yogurt has less fat and more protein, so it curdles more easily. Nonfat is the one most likely to split on you. It’s also thicker, so if the filling looks stiff instead of loose, an extra splash of milk brings it right back.
Why did my tater tots turn out soggy?
Nine times out of ten it came out of the oven too early. If the filling wasn’t bubbling around the edges yet, there was still steam moving up through the tots, and steam is what softens them. Give it another 5 minutes and finish under the broiler if you want insurance. The other two culprits are tots that were pressed down into the filling and tots that were thawed first.
Can I use ground turkey?
Sure. Ground turkey is much leaner, so add a tablespoon of oil to the pan before you brown it, and taste before you top it, since turkey usually wants a bit more salt and an extra shake of Worcestershire.
Do I have to use canned soup?
Not at all. Use 1 1/4 cups of prepared cream of anything soup mix in place of the can. It’s a from-scratch swap that takes about five minutes, and the sauce comes out a little fresher tasting.
What kind of cheese melts best?
Sharp cheddar is my pick for the layer under the tots. If you want visible melty cheese on top of the tots as well (which I did not add here), wait until the last 5 minutes of baking to add it, otherwise it browns past golden and turns leathery before the tots are done.
Tater Tot Casserole
Equipment
- 12-inch cast iron skillet (or a large skillet plus a greased 9×13 baking dish)
Ingredients
- 1 1/2 pounds ground beef (85/15)
- 1 small onion, diced
- 2 cloves garlic, minced
- 1 teaspoon Worcestershire sauce
- 1 teaspoon kosher salt
- 1/2 teaspoon black pepper
- 1/2 teaspoon garlic powder
- 1/2 teaspoon onion powder
- 1/2 teaspoon smoked paprika , optional
- 1 can (10.5 ounces) condensed cream of chicken soup
- 1/2 cup sour cream
- 1/2 cup milk
- 1 cup frozen peas (or corn)
- 1 1/2 cups shredded sharp cheddar cheese , divided
- About 28 ounces frozen tater tots , enough to cover the top in a single layer
- Chopped parsley or green onions , optional, for serving
Instructions
- Heat the oven to 400°F. If you are using a baking dish instead of cast iron, lightly grease a 9×13-inch dish.
- Add the ground beef and diced onion to a 12-inch oven-safe cast iron skillet over medium-high heat. Cook about 8 minutes, breaking the beef into crumbles, until the beef is browned and the onion is tender. Drain off the excess grease, leaving a little behind.
- Add the garlic and cook 30 seconds. Stir in the Worcestershire sauce, salt, pepper, garlic powder, onion powder, and smoked paprika.
- Reduce the heat to low. Stir in the condensed soup, sour cream, and milk until smooth. Fold in the peas or corn, if using, and 1 cup of the cheddar. The mixture will look loose, which is correct.
- Level the filling in the skillet (or spread it in the greased 9×13 dish). Sprinkle the remaining 1/2 cup cheddar evenly over the filling.
- Arrange the frozen tater tots over the top in a single layer, working from the edge inward. Do not thaw them and do not press them into the filling.
- Bake uncovered for 35 to 45 minutes, until the filling bubbles around the edges and the tots are crisp and golden brown. For a crisper top, broil 2 to 3 minutes at the end, watching closely.
- Rest 5 to 10 minutes before serving. Top with chopped parsley or green onions if you like.
Nutrition
Notes
If you like this kind of dinner, my hobo casserole is the sliced-potato cousin of this one, and the rest of what I do with a family pack of ground beef lives in my best ground beef dinner recipes guide.
Make it once in the skillet and I don’t think you’ll go back to washing two pans for it. Let me know how yours turns out, and whether your leftovers last as long as ours did.
Happy cooking!
Love,
Jennifer

Tried this recipe?
Tap the stars in the recipe card to leave a quick rating. Your rating helps other home cooks know this recipe works in a real kitchen, not just mine.
And as a thank-you for your feedback, you will receive a free printable copy of my Maker Home Companion Cookbook, featuring my most popular recipes, each one formatted on a SINGLE, easy-to-use page, a perfect kitchen companion for easy meal prep. Click here to learn more about this cookbook and how you can get your copy!


Meet Jennifer
Jennifer cooks and experiments in the kitchen at Maker Farm, where she focuses on simple pantry cooking, homemade staples, and practical recipes that make everyday meals easier. Over the years she has tested many ways to make cooking simpler and more dependable, and shares the methods that work best in her own kitchen, occasionally showing them on her Heart to Home at Maker Farm vlog.