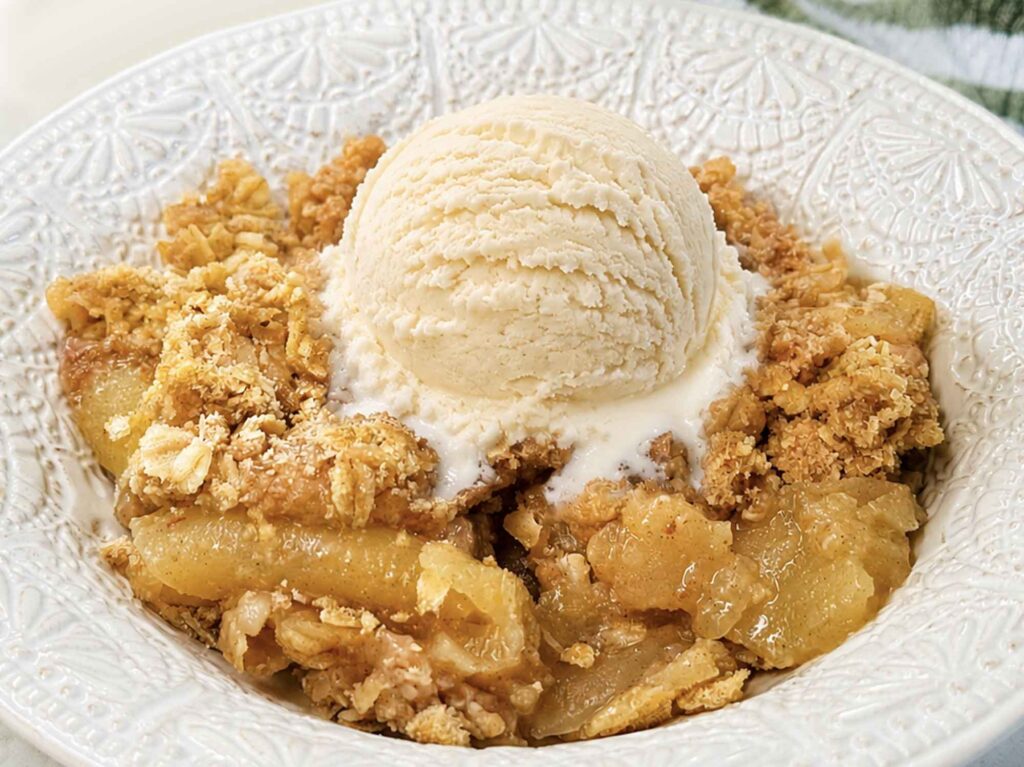
This easy apple crisp is made with juicy cinnamon apples tucked under a buttery oat topping that bakes up golden and crunchy. You toss the sliced apples with a little sugar and flour, pile on a crumbly mix of oats, brown sugar, and butter, and bake it for about 45 minutes until the whole thing is bubbling at the edges. It is ready in about an hour, and it tastes best warm with a scoop of vanilla ice cream melting over the top.
I have a serious sweet tooth, and apple crisp is the dessert I crave on chilly evenings. It is so much easier than apple pie (no fussy crust to roll out), it uses ingredients I already have in the pantry, and it fills the whole house with that warm cinnamon smell. I am picky about balance, and the thing I love here is that you control exactly how sweet it gets. If you have ever wanted a from-scratch dessert that forgives a little messiness, this is the one. Mine never come out looking perfect, and they still taste delicious.

Want to Save This Recipe?
Enter your email below and we’ll send it straight to your inbox! Plus you’ll get new recipes each week!
What Are the Best Apples for Apple Crisp?
The apples matter more than anything else here, so let’s start there. You’ll want firm baking apples that hold their shape in the oven instead of collapsing into mush. Honeycrisp, Granny Smith, Fuji, and Golden Delicious all work beautifully. My favorite trick is to use a mix of sweet and tart, like Honeycrisp paired with Granny Smith. This helps because the tart apples keep the filling from tasting flat, while the sweet ones round it out so you do not need to drown everything in sugar.
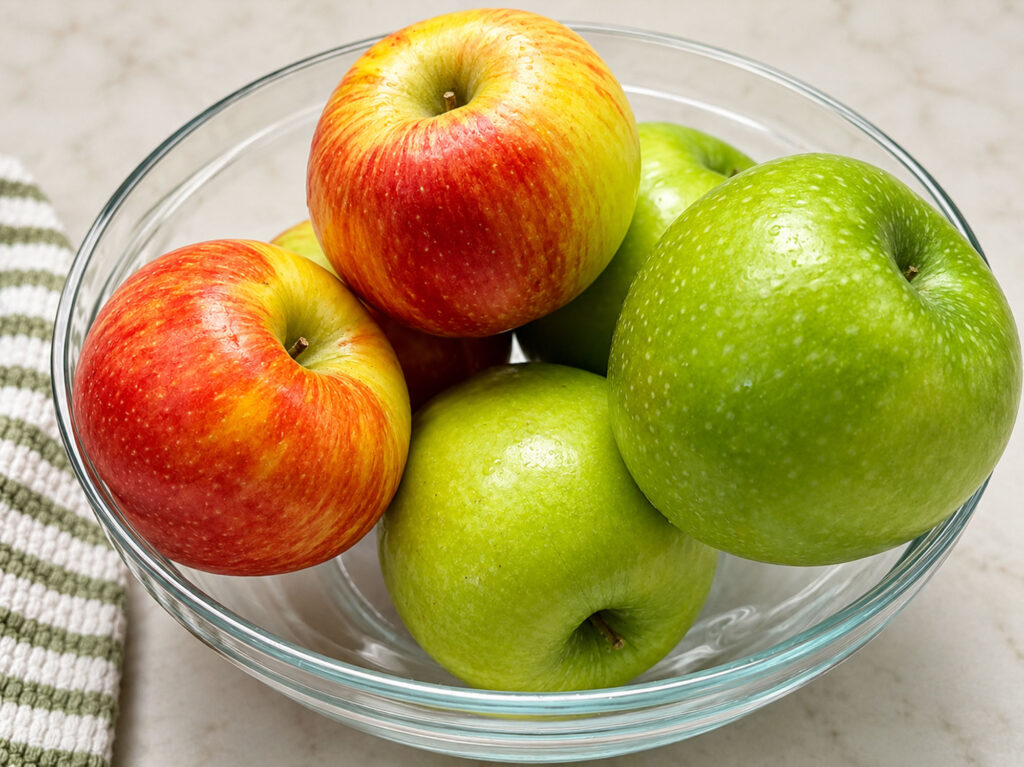
One common mistake is reaching for soft snacking apples like Red Delicious or Gala. They turn watery and lose their texture fast, and you’ll end up with applesauce under your topping instead of tender slices. Be careful not to grab whatever is loose in the bottom of the fruit drawer… a firm apple really is the difference between tender and sad.
Do I Have to Peel the Apples?
Peeling is totally optional. Leave the skins on for a more rustic crisp with a little extra chew, or peel them if you want a softer bite or you’re serving kids and picky eaters. I usually peel about half of mine, mostly because I get impatient standing at the counter with the peeler, but I will go all the way if I’m making it special. Either way works, so do whatever feels easiest for you.
How to Make Apple Crisp (Step-by-Step)
We’re really making this in two simple parts: the apple filling on the bottom and the oat topping on top. Here is how it comes together before you get to the full recipe card below. I’ll walk you through the sensory cues to watch for, because those matter more than the exact minute on the timer.
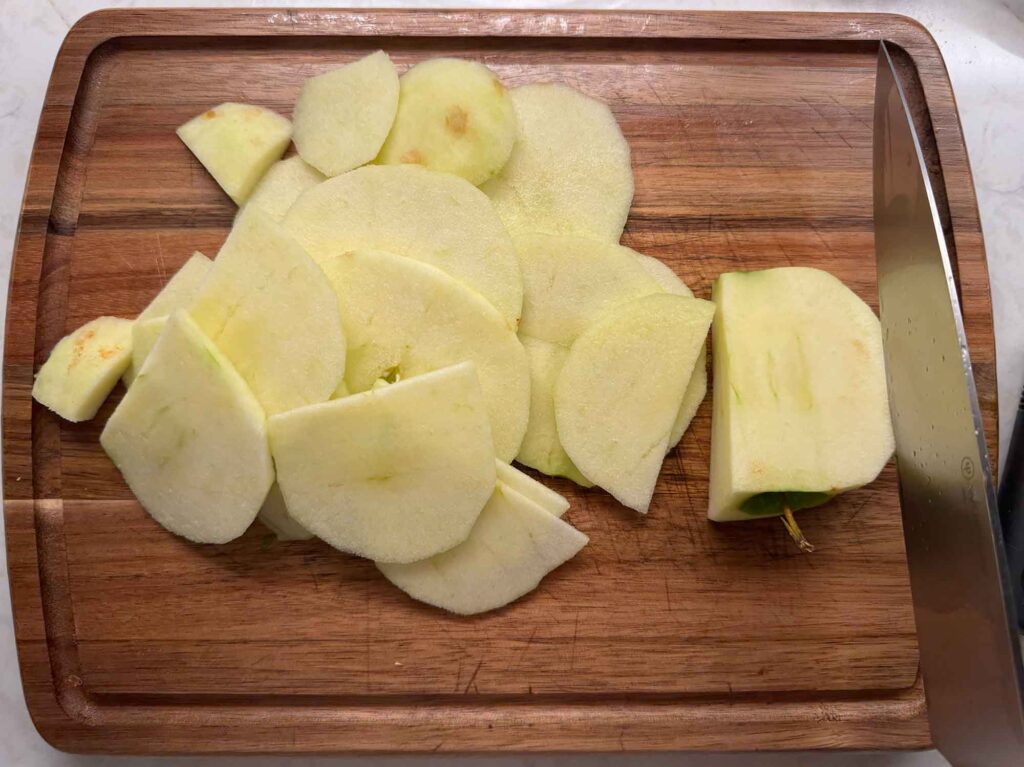
Step 1: Prep the Apples (Slice 1/4-inch)
Peel (if you like), core, and slice your apples about a quarter inch thick. Try to keep them roughly even so they bake at the same rate. This helps because thick chunks stay crunchy in the center while thin ones turn to mush, and even slices give you that tender, just-right bite all the way through.
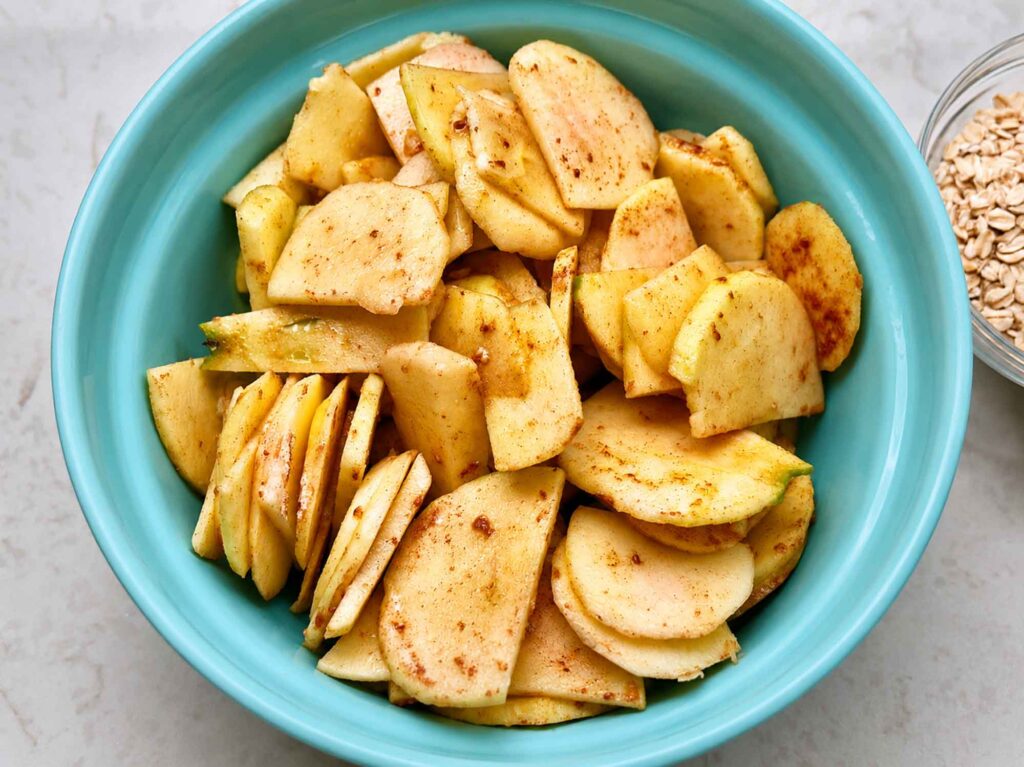
Step 2: Toss With Sugar + Cinnamon + Flour
Whisk together flour, sugar, and cinnamon in a big bowl, then toss the apple slices in along with lemon juice and mix together so the apples are mostly coated. The flour is doing the work here, soaking up the juices so the filling sets instead of swimming. Don’t worry if it looks a little dry in the bowl… the apples release plenty of liquid once they hit the heat.
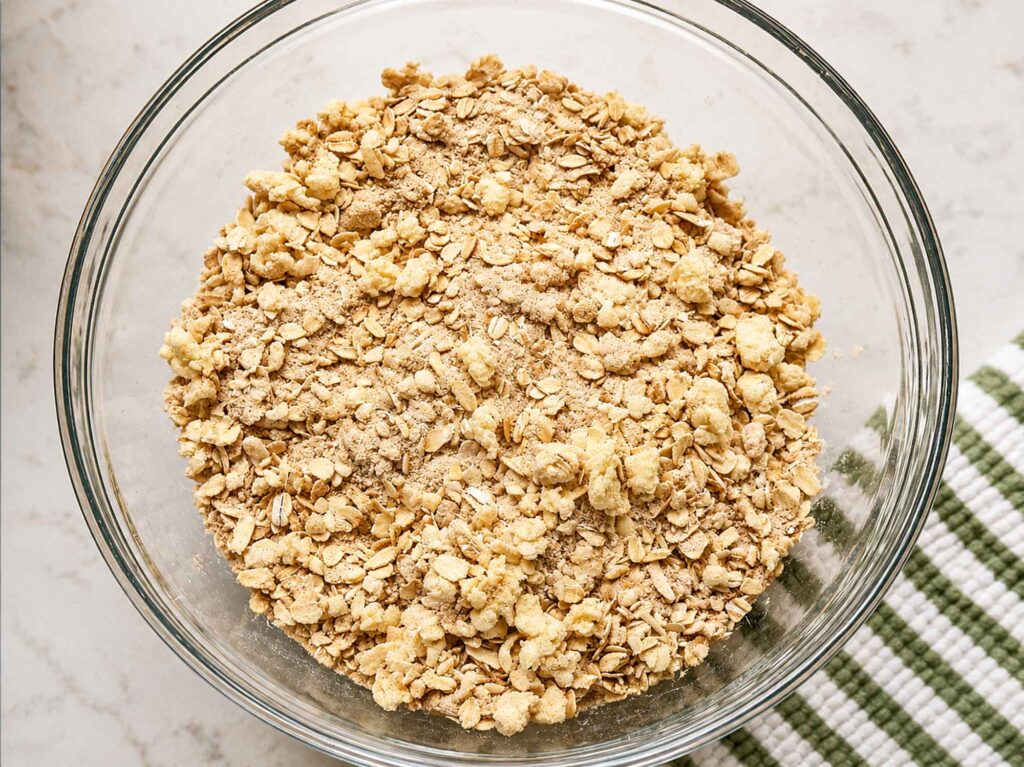
Step 3: Make the Oat Topping Until Clumpy
In another bowl, stir together oats, brown sugar, more flour, and a pinch of cinnamon, then work in cold butter with your fingers or a fork until it looks like clumpy, damp sand. You want actual clumps, not fine crumbs, because the clumps are what bake into those crisp, craggy bits everyone fights over. If you love a deeper caramel note in your topping, reach for homemade brown sugar... it is white sugar mixed with molasses, and it tastes wonderful here.
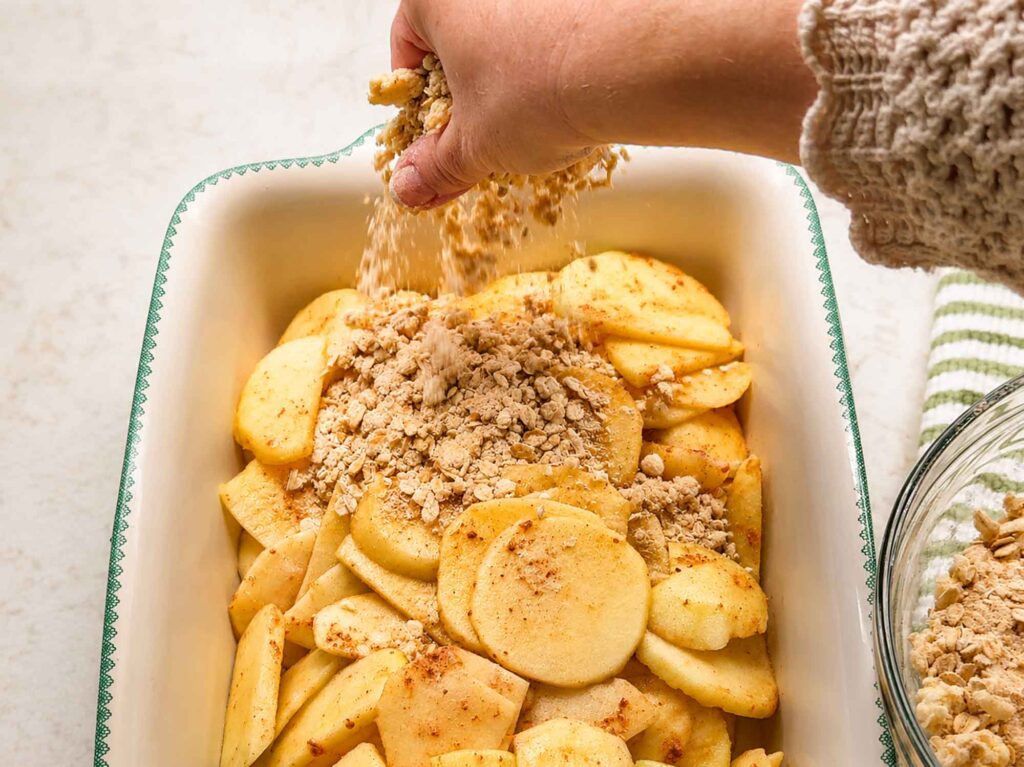
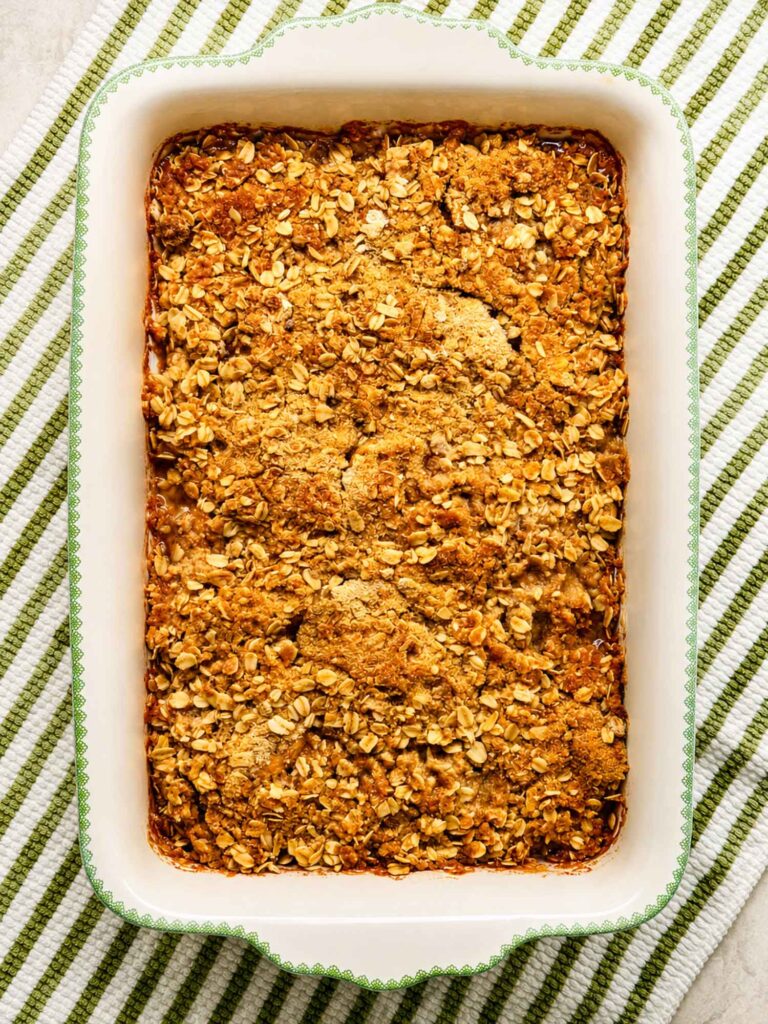
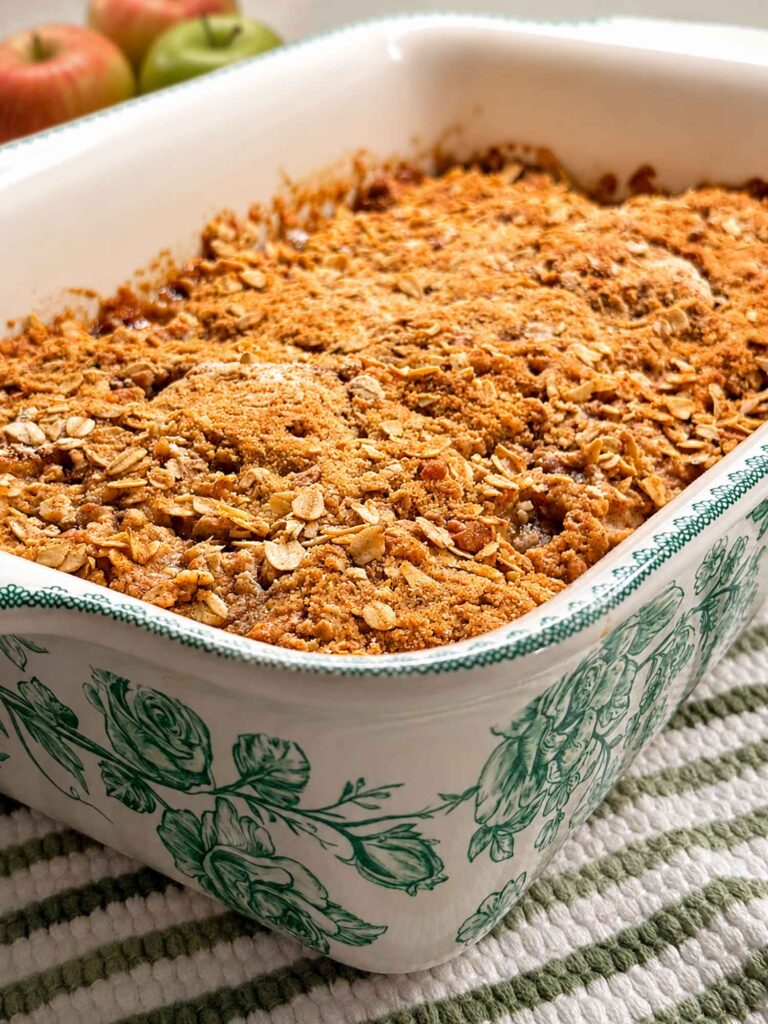
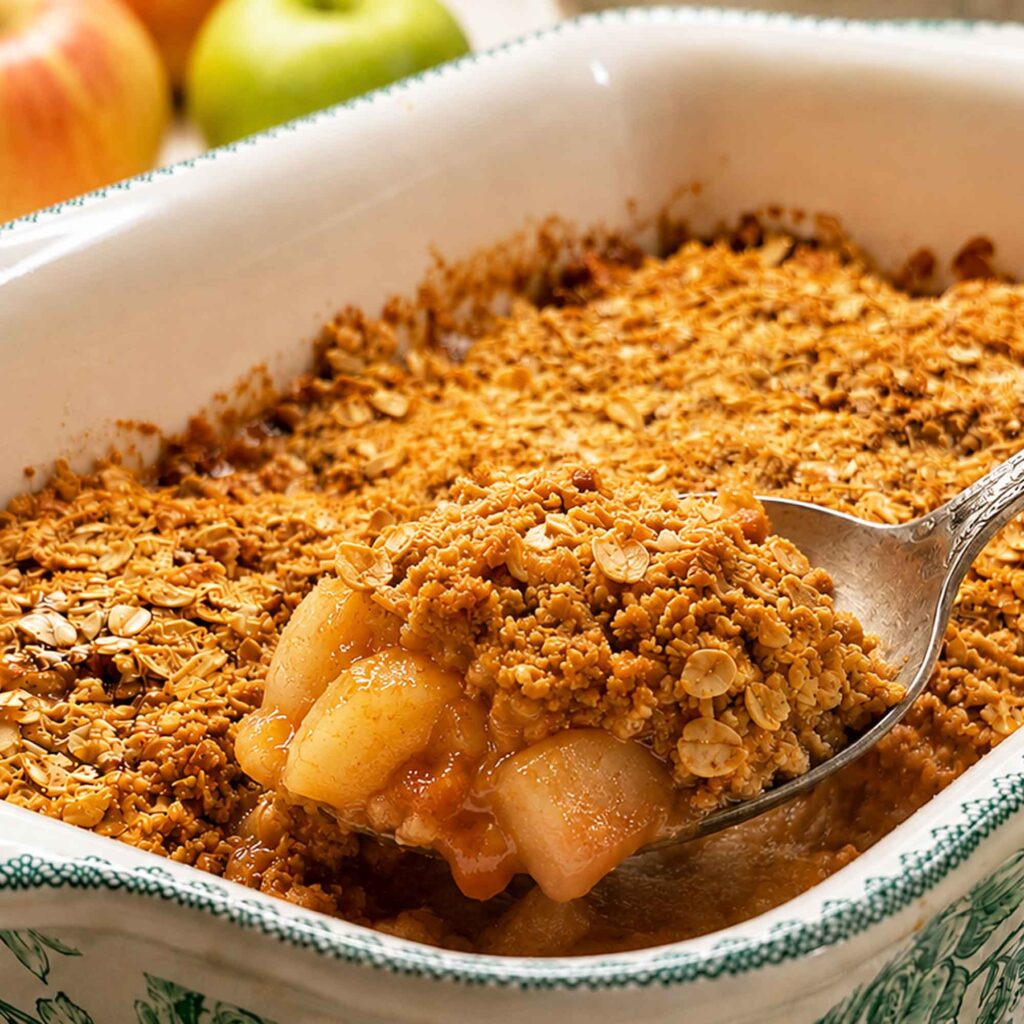
Step 4: Assemble and Bake Until Bubbly
Spread the apples in your buttered baking dish, scatter the oat topping evenly over the top, and bake until the filling bubbles up around the edges and the topping is deep golden brown. That bubbling is your real doneness signal. If the top looks set but you don’t see any bubbling yet, give it a few more minutes. Let it cool for at least 10 minutes before serving so the filling can settle and firm up (ask me how I know that a fresh-from-the-oven scoop turns into a runny puddle on the plate).
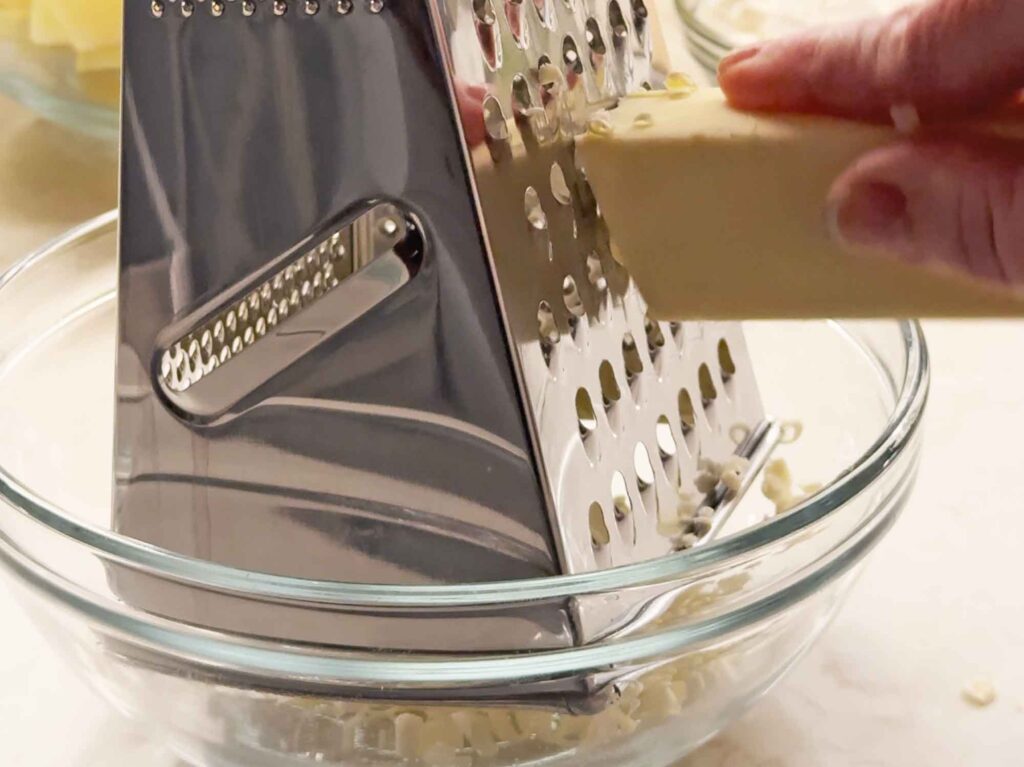
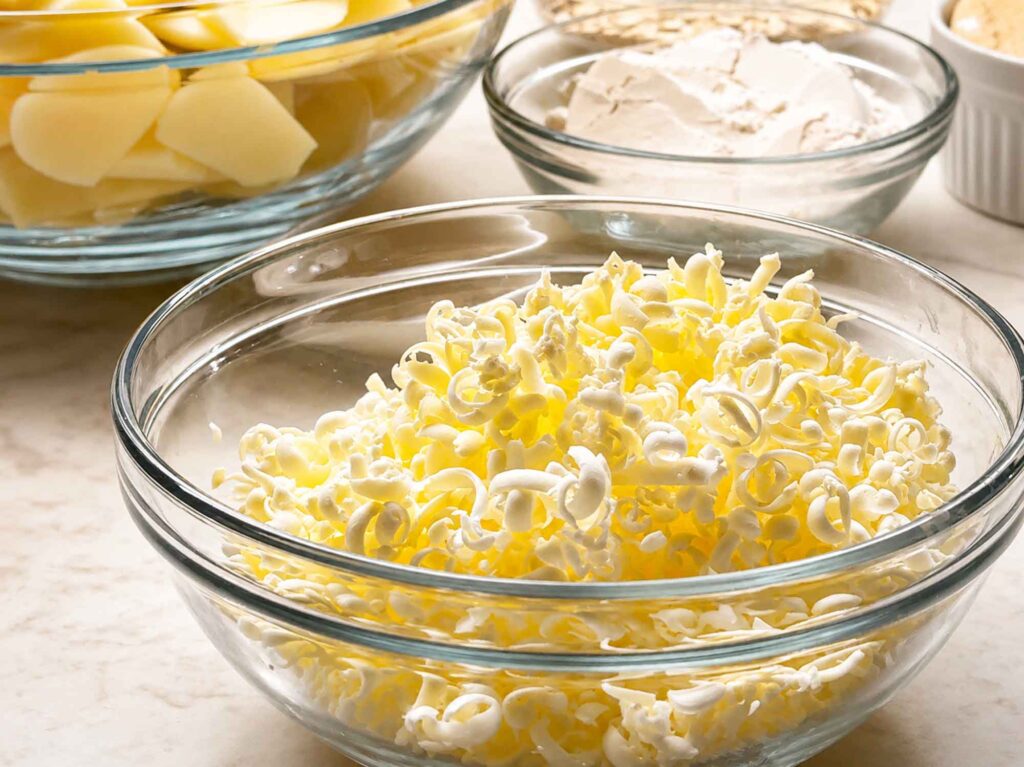
GRATED BUTTER TIP

To get the crispest topping, pop a stick of butter in the freezer while you slice your apples, then grate it on the large holes of a box grater right into the oat mixture. The cold shreds scatter evenly and clump up into the crispiest topping without any cutting-in. Just work it in quickly so it stays cold… warm hands are the enemy of a crisp topping (ask me how I know).
Serving Suggestions and Topping Ideas
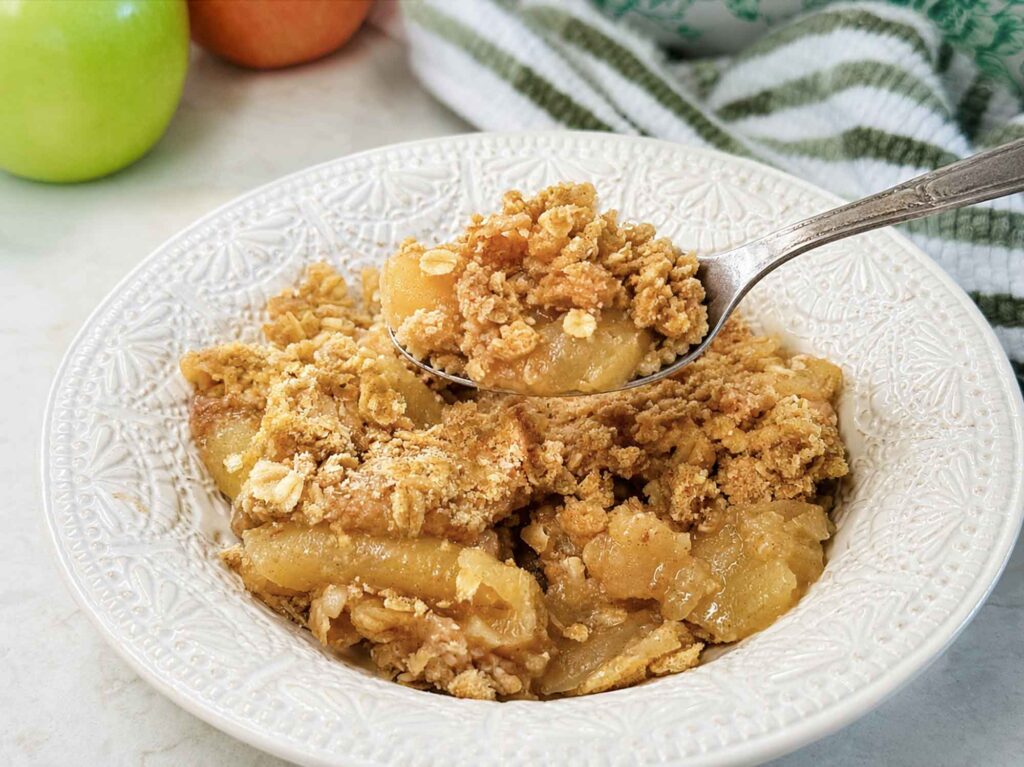
Warm apple crisp with a scoop of vanilla ice cream is the classic for a reason, and it is how we serve it most nights. The cold cream melting into the warm topping is SO good. If you want to take it over the top, drizzle on a little salted caramel sauce, or add a soft cloud of lightly sweetened whipped cream. A drizzle of heavy cream straight from the carton is lovely too if you like things less sweet. Leftovers are also a sneaky-good breakfast, a little like the oat topping in these oatmeal bars, so do not feel guilty about a morning bowl. I actually made these the night before Greg’s 40th birthday so he’d have a special breakfast the next morning!
Tips and Troubleshooting
The two questions I hear most are about runny filling and a topping that does not crisp up, so let’s head those off before they happen.
If your crisp turns out soupy, your apples were probably extra juicy. Next time, add an extra teaspoon or two of flour or cornstarch to the filling, and make sure you bake it long enough that the center is actually bubbling, not just warm. The filling thickens as it cools, so a little looseness right out of the oven is totally normal.
If your topping stays pale and soft, the usual culprit is butter that was too warm, which makes the mixture spread and melt instead of clumping. Be careful not to let the butter soften on the counter… cold butter is what gives you those crisp little clusters. You can also slide the dish under the broiler for a minute at the very end, but stay right there and watch it, because it goes from golden to burnt fast.
Make-Ahead, Storage, and Reheating
This is a wonderful dessert to get ahead of, especially around the holidays when the oven is already crowded. You can assemble the whole thing, cover it tightly, and keep it unbaked in the fridge for up to a day before baking as usual.
To store leftovers, cover the dish and keep it in the refrigerator for up to 4 days. To reheat, pop it in a 350°F oven for 10 to 15 minutes until warmed through, and loosely cover the top with foil if it starts browning too fast. You can microwave a single serving in a pinch, though the topping softens.
To freeze it unbaked, assemble the crisp, wrap it tightly, and freeze for up to 3 months. You can bake it straight from thawed, or bake from frozen and just add a little extra time until the center bubbles. Either way, you’ll have a from-scratch dessert ready with almost no effort.

Apple Crisp Recipe
Equipment
- 1 9×13 baking dish
Ingredients
brown sugar
- 8 cups peeled and sliced apples (about 6 to 8 medium, a mix of Honeycrisp and Granny Smith)
- 1/3 cup granulated sugar
- 2 tablespoons all-purpose flour (or cornstarch)
- 1 tablespoon lemon juice
- 1 teaspoon ground cinnamon
- pinch salt
For the oat topping
- 1 cup old-fashioned rolled oats quick oats can be used, but the topping will be soft and sandy rather than crisp and craggy
- 3/4 cup all-purpose flour
- 3/4 cup packed brown sugar
- 1 teaspoon ground cinnamon
- 1/4 teaspoon salt
- 1/2 cup COLD butter (1 stick), cut into small cubes or grated
Instructions
- Preheat the oven to 350°F. Butter a 9×13-inch baking dish.
- Peel (optional), core, and slice the apples about 1/4 inch thick. In a large bowl, whisk together the granulated sugar, flour, cinnamon, and salt, then toss the apples into it along with the lemon juice. Spread evenly in the baking dish.
- In another bowl, stir together the oats, flour, brown sugar, cinnamon, and salt. Cut in the cold butter with a fork until the mixture forms clumps like damp sand.
- Scatter the oat topping evenly over the apples.
- Bake for 40 to 45 minutes, until the filling is bubbling around the edges and the topping is deep golden brown.
- Let cool for at least 10 to 15 minutes so the filling can set. Serve warm with vanilla ice cream.
Nutrition
Notes
- Apple swaps: Fuji and Golden Delicious also work well. A mix of sweet and tart gives the best flavor.
- Thickener options: Flour and cornstarch both work; use cornstarch for a glossier filling.
- Sogginess fix: If your apples are extra juicy, add 1 to 2 teaspoons more cornstarch or flour to the filling, and bake until the center is bubbling.
Ready to Bake?
This is the dessert I hope you make on the first cool weekend of fall, when apples are everywhere and you want the house to smell like cinnamon. It is forgiving, it is frugal, and it is genuinely hard to mess up. If you give it a try, leave a star rating and a comment to tell me which apples you used… I love hearing your combinations.
Happy baking!
Love,
Jennifer
Tried this recipe?
Tap the stars in the recipe card to leave a quick rating. Your rating helps other home cooks know this recipe works in a real kitchen, not just mine.
")
")


Meet Jennifer
Jennifer cooks and experiments in the kitchen at Maker Farm, where she focuses on simple pantry cooking, homemade staples, and practical recipes that make everyday meals easier. Over the years she has tested many ways to make cooking simpler and more dependable, and shares the methods that work best in her own kitchen, occasionally showing them on her Heart to Home at Maker Farm vlog.