I wanted an oatmeal bar I could make without bananas, using ingredients I already had in my pantry. Something I could mix, bake, and slice without overthinking it … and this is it! If you’re looking for a simple, baked oat bar that actually holds together after cooling, tastes good, and feels worth making, my fruity oaty bars are exactly that. They’re soft, lightly sweet, and studded with tart dried cherries, with enough substance to work as breakfast, a snack, or something to keep on hand when you don’t feel like figuring out what to eat.

Want to Save This Recipe?
Enter your email below and we’ll send it straight to your inbox! Plus you’ll get new recipes each week!
What They Taste Like
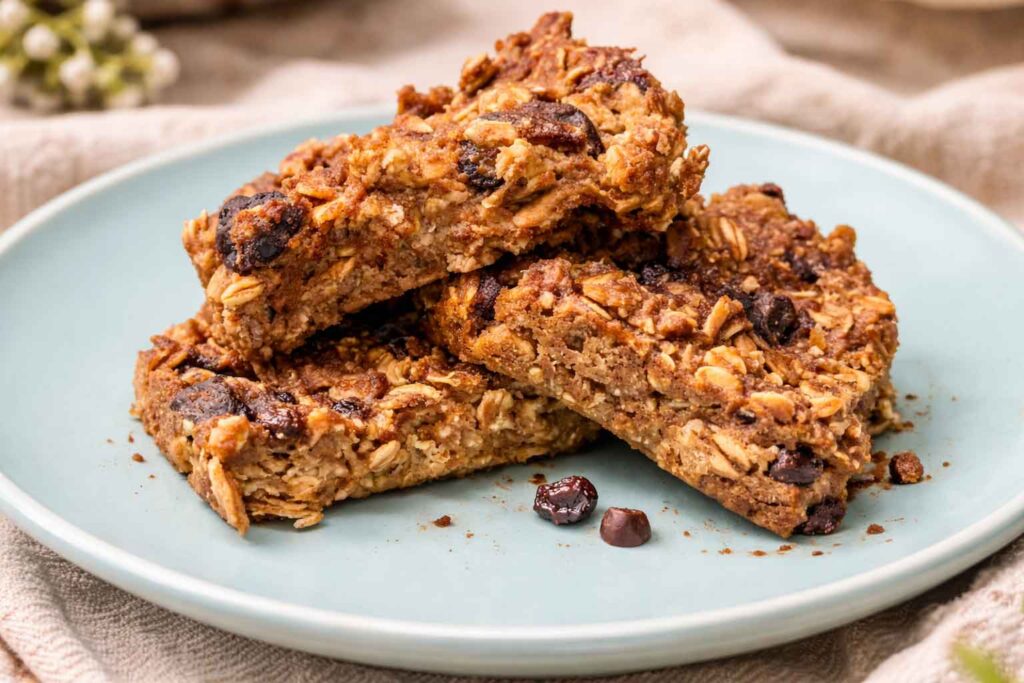
These are soft and lightly chewy, with a gentle sweetness and little bursts of tart cherry throughout. The chocolate protein powder and sprinkle of chocolate chips makes them feel like a little treat. They’re not dessert-sweet. These aren’t meant to be a hard bar nor a low-calorie food, but rather a balanced and moist bar made from real ingredients that will actually keep you satisfied. They’re more in that space between breakfast and snack, which is exactly what I wanted.
BACKSTORY

Greg gave these bars their name after my first batch. The name comes from one of our favorite movies, Serenity. There’s a scene in there with little commercial for “Fruity Oaty Bars,” with a jingle that’s hard to forget. It’s bright, cheerful, almost absurd… and completely at odds with what’s really going on underneath. These bars are obviously much simpler and far less sinister, but I like the idea of something that looks sweet and ordinary on the surface, yet is surprisingly deep.
Why This Recipe Works
There are a few things going on here that make these better than a typical “healthy oat bar”:
- Applesauce instead of banana
Keeps the bars soft and moist without relying on ripe bananas (which I rarely have at the right time). - Dried cherries
They add a tart contrast that keeps the bars from tasting flat or overly sweet. - Protein powder
Makes these more filling, but it also changes the texture, so the liquids are adjusted to keep them from turning dry. - A little fat (oil or nut butter)
This matters more than it seems, as it keeps the bars from feeling chalky or crumbly.
OOOh, this is really good. I LOVE IT! THANK YOU!
Greg

Fruity Oaty Bars
Ingredients
Dry
- 2 cups rolled oats
- 1/3 cup protein powder, unsweetened (I use chocolate)
- 1/2 tsp salt
- 1/2 tsp cinnamon (optional but recommended)
Wet
- 1 1/3 cups unsweetened applesauce
- 1/3 cup milk or water
- 1/4 cup maple syrup or honey
- 3 tbsp oil or nut butter
- 1 tsp vanilla
Mix-ins
- 1/2 to 2/3 cup dried cherries (chopped if large)
- 2 tbsp chocolate chips (optional, if you want it a little sweeter)
Instructions
- Preheat oven to 350°F
- Line an 8×8 pan with parchment (if you don't have this, be sure to coat your pan with a non-stick spray first)
- Mix all wet ingredients
- Stir in dry ingredients → batter should be thick but spreadable. If stiff: add 1–2 tbsp milk.
- Fold in cherries and chocolate chips.
- Spread evenly in pan
- Bake 20–25 minutes
- Turn off oven, let sit inside 5 minutes (this helps set structure)
- Cool at least 20 minutes before slicing. If you have any difficulties as these are quite moist, put them in refrigerator first, then slice.
Nutrition
Notes
- No banana needed, the applesauce keeps these soft and moist
- Lightly sweet (not dessert-sweet)
- Can be made with pantry substitutions (see variations below)
- Holds together well once cooled, but will remain moist

How “Healthy” These Really Are
These bars are best thought of as a balanced, everyday food, not a low-calorie diet snack and not a dessert. They include:
- Oats → fiber and slow-digesting carbs
- Applesauce → moisture with minimal added fat
- Protein powder → helps you feel full, plus we all just need that protein!
- A small amount of fat → improves texture and keeps you full
- A modest amount of sweetener + chocolate chips → makes them enjoyable to eat
Why the Fat and Chocolate Chips Aren’t a Problem
- The fat (oil or nut butter) is intentional and without it, the bars tend to be dry and less satisfying
- A small amount of chocolate chips adds flavor and richness, which often helps prevent overeating later
- Neither is present in excessive amounts relative to the whole recipe
What Makes These “Healthier” Than Many Oat Bars
- No refined flour
- Controlled sweetness (not overly sugary)
- Higher protein than typical baked oatmeal
- Ingredients you recognize and can adjust

Rolled Oats vs Quick Oats
For the best texture, I recommend using rolled oats (old-fashioned oats) in these bars. They hold their shape as they bake, giving the bars a soft but slightly chewy structure that slices cleanly and feels substantial. Quick oats will work if that’s what you have, but they absorb liquid more quickly and break down more, which results in a softer, more uniform, slightly “cakier” bar. Either option is fine, but if you want that classic oat bar texture with a bit of chew, rolled oats are the better choice.
No Applesauce?
If you don’t have applesauce or banana, you can still make these bars using simple pantry swaps—just choose one of the options below:
- Mashed banana: 1 1/3 cups (use as a 1:1 replacement) and reduce syrup/honey to 2-3 Tbsp
- Yogurt or sour cream: 1 1/3 cups (use as a 1:1 replacement) + 1-2 tablespoons syrup/honey
- Pumpkin puree: 1 1/3 cups (add 1–2 tbsp extra sweetener if you like) + 1-2 tablespoons syrup/honey
- Extra liquid + fat: 1 1/2 cups milk or water + 3 tbsp additional oil or nut butter + 1-2 tablespoons syrup/honey
Each option will give you slightly different texture and flavor, but all will still produce a soft, sliceable oat bar.
Substitutions & Variations
- Fresh or frozen fruit:
You can use it, but reduce the applesauce slightly to compensate for the extra moisture. - Different dried fruit:
Cranberries or raisins work, but cherries give the best contrast. - No protein powder:
Replace it with 1/4 cup oat flour and reduce liquid slightly.
Storage
- Room temperature: up to 2 days (I like to cut them and wrap them in wax paper for easier eating)
- Refrigerator: up to 5 days
- Freezer: freezes well, but be sure to slice first for easy grab-and-go
Ready to Make This?
These oatmeal bars are the kind of thing I love to have on hand in my kitchen: simple, flexible, and made from ingredients I already keep around. Not perfect, not fancy, just reliable.
And if you’re in the mood for another simple treat with oatmeal, I think you’ll love my easy apple crisp with a buttery oat topping. It’s so simple and delicious, and tastes great as dessert or breakfast!
And that’s really the goal here: fewer decisions, more food that’s ready when you need it.
Tried this recipe?
Tap the stars in the recipe card to leave a quick rating. Your rating helps other home cooks know this recipe works in a real kitchen, not just mine.
And as a thank-you for your feedback, you will receive a free printable copy of my Maker Home Companion Cookbook, featuring my most popular recipes, each one formatted on a SINGLE, easy-to-use page, a perfect kitchen companion for easy meal prep. Click here to learn more about this cookbook and how you can get your copy!

")


Meet Jennifer
Jennifer cooks and experiments in the kitchen at Maker Farm, where she focuses on simple pantry cooking, homemade staples, and practical recipes that make everyday meals easier. Over the years she has tested many ways to make cooking simpler and more dependable, and shares the methods that work best in her own kitchen, occasionally showing them on her Heart to Home at Maker Farm vlog.
made these- came out ultra moist. Used parchment lining- bottoms of the bars look undercooked. My oven temp was spot on. I did use a glass dish to cook these.
I am wondering how cooked is this recipe supposed to be. Mine remind me of super moist oats.
Really like the flavors-there is just the right amount of chocolate chips. My protein powder was unflavored. I also chopped up dried apricots in place of the cherries.
Will make them again but increase the baking time.
Thank you for the recipe.
These are indeed supposed to be pretty moist. If you wrap them up and put them in the refrigerator, they will become more firm and feel just about perfect. I will add a note about this to the recipe — thank you!
I will be making these for sure as I have been buying Energy Bites from the health food store… they are pricey and not always fresh, so I am going to make my own, thanks for the Greg approved recipe!
Im cooking delicious recipes with Jennifer.
I made your Fruity Oat Bars today. They are delicious.
Oh wonderful!! Thank you for letting me know!