This old-fashioned baked beans recipe starts with dried navy beans, smoky diced bacon, and a sweet molasses and brown sugar sauce, all baked in the oven for a thick, glossy sauce clings to every bean. It does take some patience (the beans soak overnight and bake for a few hours), but the hands-on time is small. The end result is a pot of tender, from-scratch beans that taste nothing like the can.
BAKED BEANS At A Glance
SOAK
8+ hours
BAKE
4 hours
TOTAL
13 hours
Serves
8
Pan
Large Dutch oven or 9×13 baking dish
Tastes like: Sweet, saucy, and smoky with creamy tender navy beans and bits of bacon
I adore baked beans, and the recipe you’re getting is actually my better second version. My first baked beans recipe was SO GOOD warm… but whenever I ate the leftovers cold, the flavor was just a little too intense for me. (I’m a supertaster, so very strong flavors hit me harder than they hit most people.) So I pulled the molasses back a bit and bumped up the brown sugar, and now they taste just as good cold from the fridge as they do warm from the oven. That second version is the one I’m sharing with you here, and I think you’re going to love it!

Want to Save This Recipe?
Enter your email below and we’ll send it straight to your inbox! Plus you’ll get new recipes each week!
Why We Bake These Low and Slow
We’re really building these baked beans in stages, and the oven does the heavy lifting. First we soak and simmer the beans so they get a head start. Then they go into a baking dish covered in foil or a Dutch oven at a gentle 300°F for a few hours, where they turn tender and soak up all that sweet, smoky sauce. The cover stays on for most of that time because it keeps everything moist while the flavors meld together.
Then, near the end, we take the cover off. The reason is simple. An uncovered oven drives off the extra liquid, deepens the color, and gives you that thick, clingy, old-fashioned baked bean sauce. So the covered time is what makes them tender, and the uncovered time is what makes them glossy. (Short on a free afternoon? There’s a slow cooker version further down.)
Ingredients You’ll Need
Most of this is pantry stuff, and there’s nothing fancy or expensive in the list. Here’s what each piece is doing, so you can adjust with confidence.
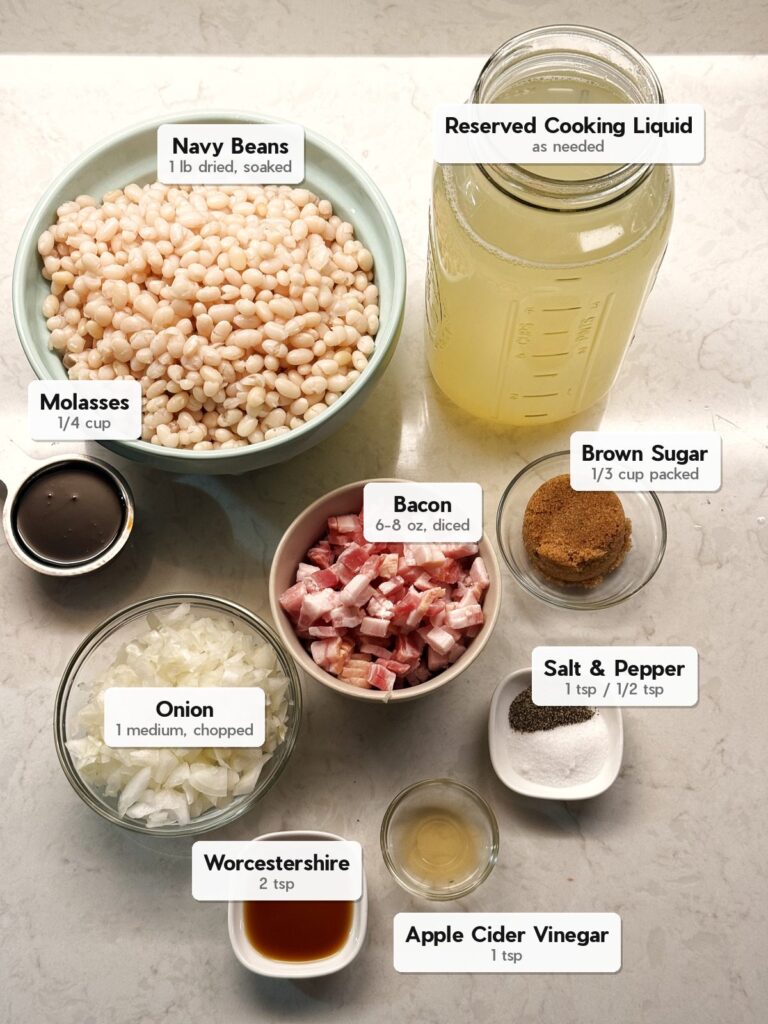
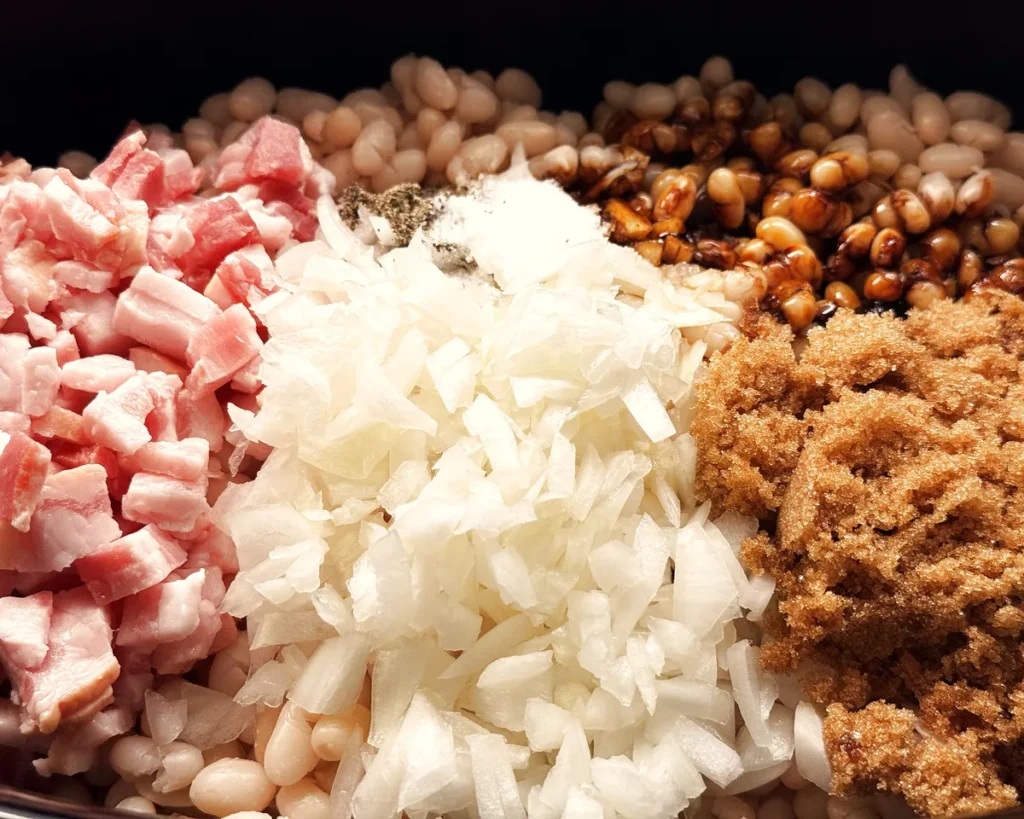
- Dried navy beans: These small white beans are the classic choice because they cook up creamy and soak up sauce beautifully. Great northern beans work too if that’s what you have.
- Reserved cooking liquid: You’ll save and use the liquid from cooking the beans instead of plain water because it has bean starch and flavor, which helps the sauce thicken and cling better.
- Bacon: This is where most of the smoky, savory backbone comes from. You want enough that it actually tastes like more than just sweet beans.
- Onion: This gives you the gentle savory depth underneath all the sweetness.
- Molasses: Reach for regular (mild or full) molasses, not blackstrap… blackstrap is much more bitter, and a little goes a long, long way. This is exactly what I dialed back in my better baked beans recipe.
- Brown sugar: This gives it that old fashioned sweetness
- Worcestershire sauce: I use this for a savory, slightly tangy note that keeps the beans from tasting one-dimensional.
- Apple cider vinegar: A little acid brightens all that sweetness. I almost always add it.
Easy Swaps

If you want to make these meatless, you can leave out the bacon and add a half teaspoon of smoked paprika so you don’t lose all that smoky flavor. No molasses in the cupboard? You can use a little extra brown sugar, though you’ll miss some of that deep, old-fashioned taste.
How to Make Baked Beans from Scratch
I’ll walk you through it step by step, with the little notes that took me a couple of batches to learn. Don’t let the timeline scare you. Almost all of it is hands-off.
1. Soak the beans
Rinse and sort the dried beans first, picking out any little stones or shriveled ones. Then cover them with plenty of water (they’ll swell a lot) and let them soak overnight, anywhere from 8 to 18 hours. Soaking matters because it softens the beans for more even cooking and helps them be a bit easier to digest. If you forget and only have a few hours, that’s okay… they’ll just need a little longer in the next step.
2. Simmer the beans
Drain and rinse the soaked beans, then cover with fresh water by about 2 inches, bring to a gentle simmer, and cook 45 to 60 minutes. You’re not cooking them all the way through here. You just want them starting to soften. Then drain into a jar or bowl to reserve the cooking liquid for later. The reason we do this first is that it gives the beans a head start so they finish tender and creamy in the oven. One thing to be careful of: hold off on adding salt or anything acidic to this water, because both can keep beans firm and make them take forever to soften.
3. Cook the bacon and onion
Heat a skillet over medium heat, add the diced bacon, and cook just until some of the fat has rendered out, but stop before it gets crisp. Then add the chopped onion and cook 3 to 5 minutes more, until it softens. We only partially cook the bacon on purpose, because it’s going to keep cooking for hours in the oven, and crisp bacon would just go soft again anyway. Letting the onion soften here takes away that raw, sharp bite.
4. Mix everything together
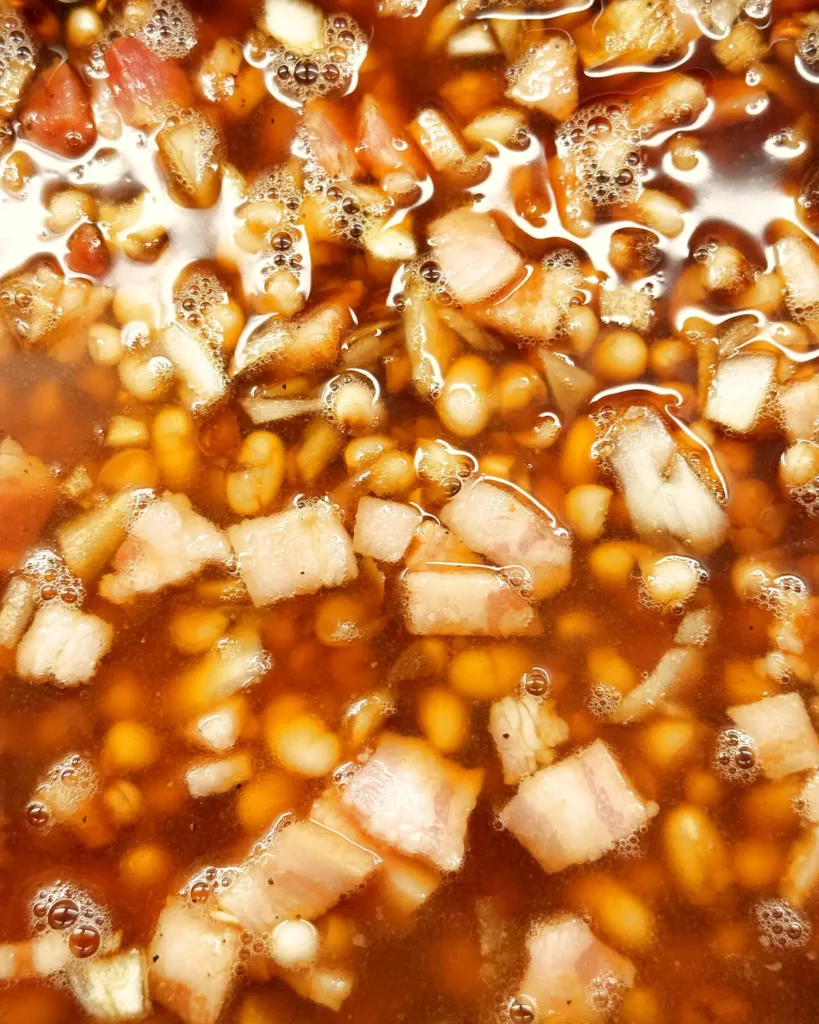
Heat your oven to 300°F. Add the drained beans, bacon, onion, molasses, brown sugar, Worcestershire, apple cider vinegar, salt, and pepper to a Dutch oven or other covered baking dish. Now pour in just enough of your reserved cooking liquid to barely cover the beans, and stir gently so everything is mixed. Be careful not to drown them. Too much liquid and the sauce will take forever to thicken later.
5. Bake covered
Cover and bake for 3 to 4 hours, stirring about once an hour. If the beans ever look dry on top, just add a splash of hot water and stir it in. Don’t worry if it looks a little soupy early on… that’s totally normal, and it slowly cooks down. The low 300°F heat is gentle on purpose, so the beans turn tender and creamy without scorching on the bottom.
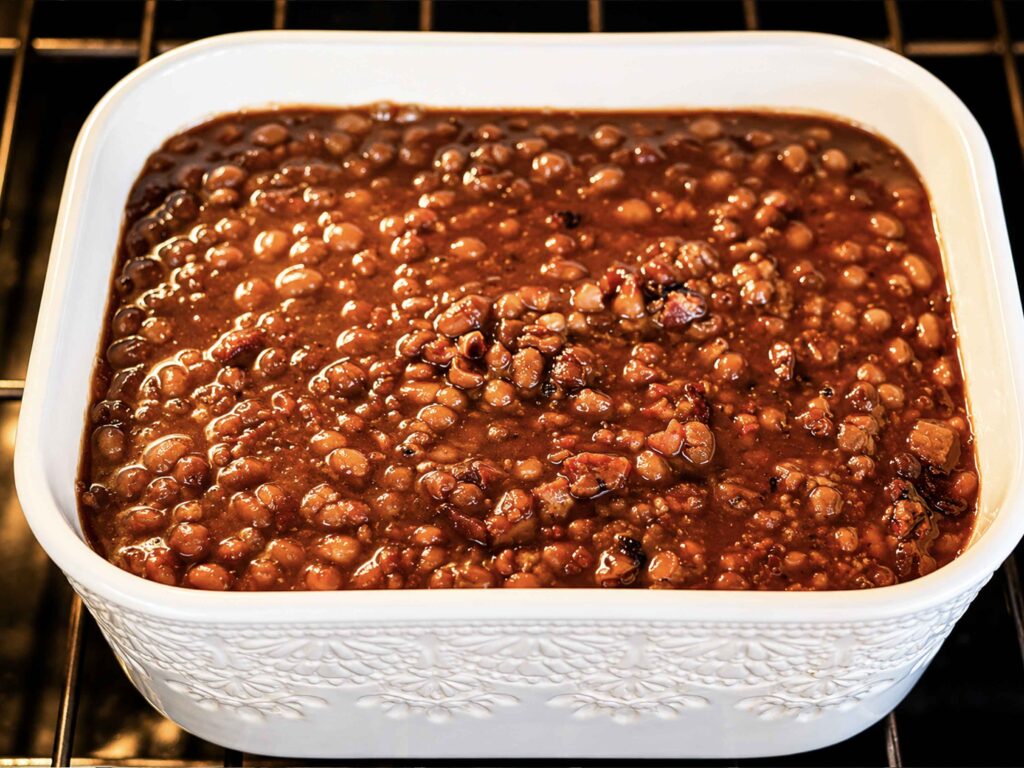
6. Bake uncovered
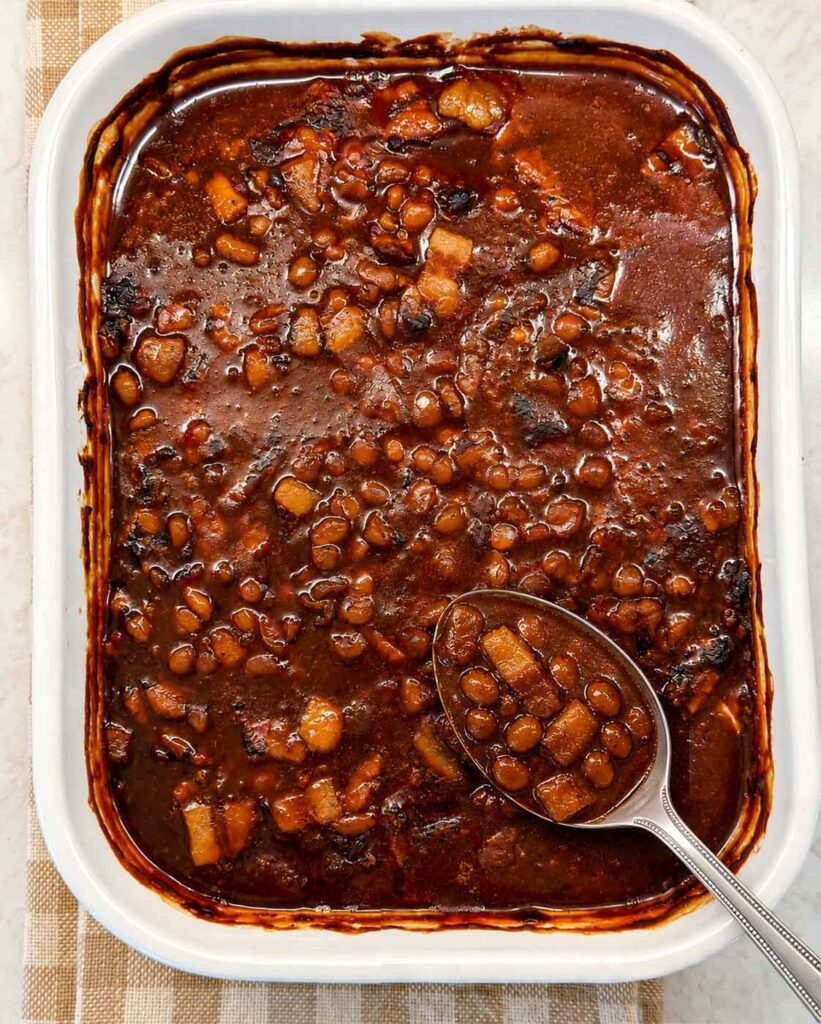
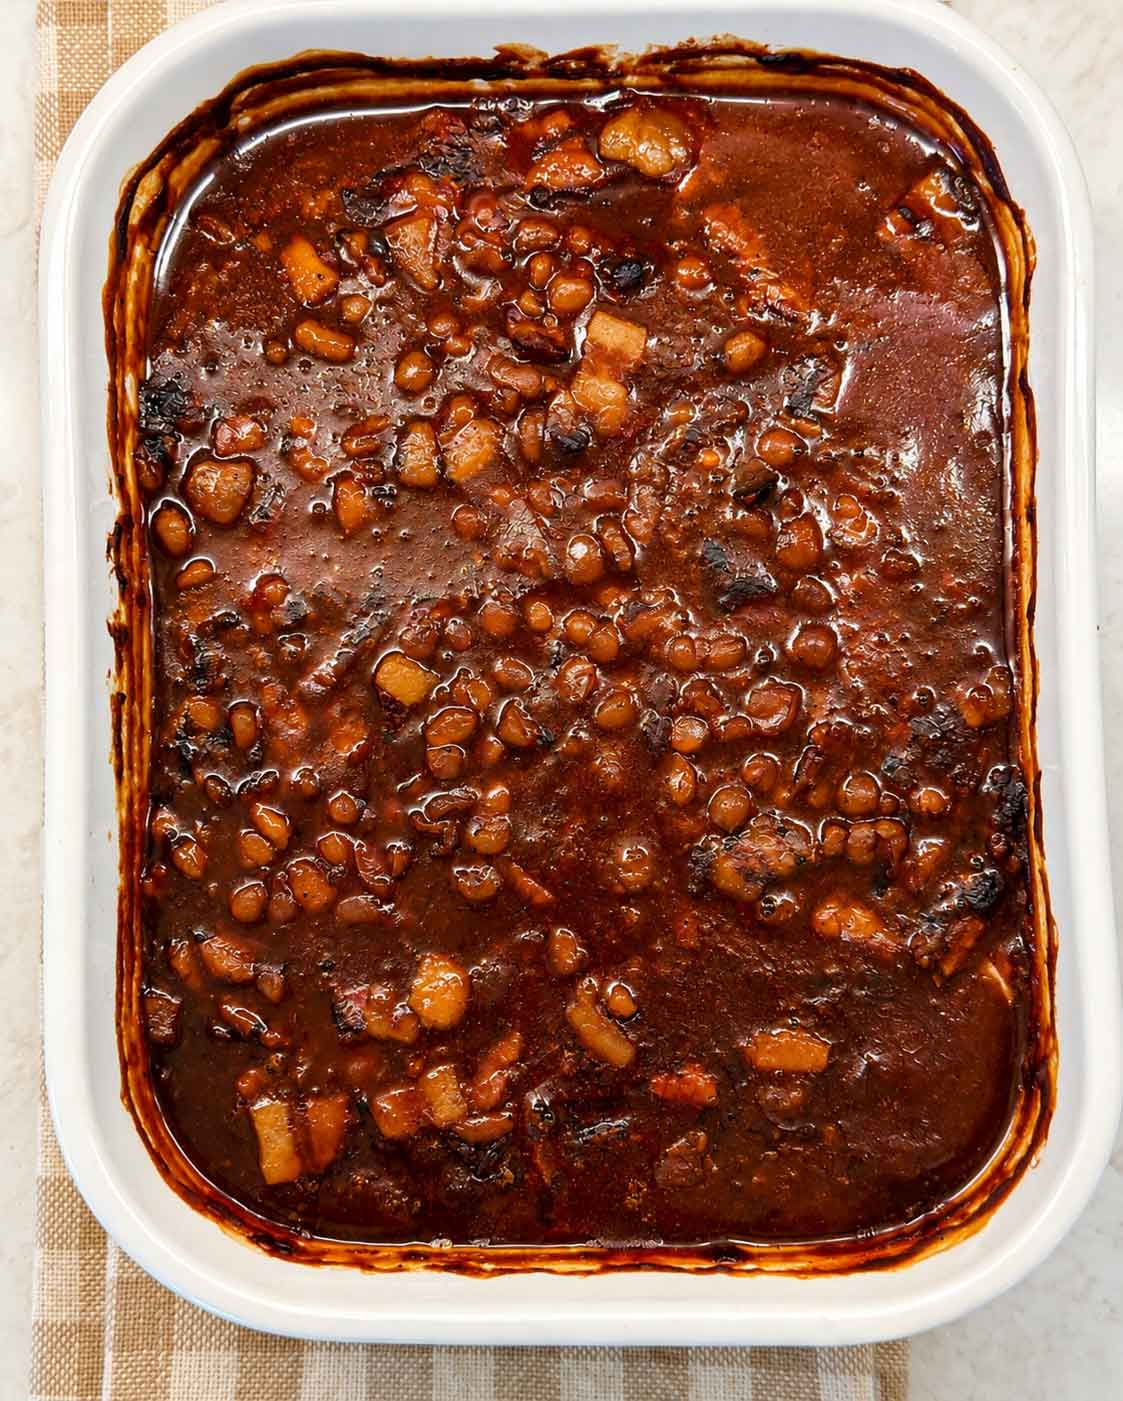
Take the lid or foil off and bake another 30 to 60 minutes, until the beans are very tender and the sauce is dark, glossy, and clings to the beans. This is the step that turns a pot of beans into real baked beans, so try not to cut it short. Keep an eye on it toward the end, and pull them when the sauce looks thick and shiny rather than watery.
7. Finish in the oven
Transfer the beans to an oven-safe baking dish and bake uncovered at 350°F for about 30 minutes, until the sauce looks glossy, a shade darker, and clings to the beans. This is the step that turns slow cooker beans into real baked beans, so don’t skip it if you can help it. (I learned the hard way that the slow cooker alone just won’t get the sauce there.)
8. Rest before serving
Let the beans cool for a few minutes before you dig in. The sauce keeps thickening as it sits, so they’ll look a touch thin right out of the oven and then settle into exactly the right consistency. I promise it’s worth the short wait.
Homemade Baked Beans
Equipment
- 1 large baking dish or Dutch oven
Ingredients
- 1 pound dried navy beans
- 6 to 8 ounces bacon diced
- 1 medium onion finely chopped
- ¼ cup molasses regular, not blackstrap
- ⅓ cup brown sugar packed
- 2 teaspoons Worcestershire sauce
- 1 teaspoon apple cider vinegar optional, for balance
- 1 teaspoon salt plus more to taste
- ½ teaspoon black pepper
Instructions
- Soak the beans. Rinse and sort the dried beans. Cover with plenty of water and soak overnight, about 8 to 18 hours. Drain and rinse.
- Simmer the beans. Add the soaked beans to a large pot and cover with fresh water by about 2 inches. Bring to a simmer and cook 45 to 60 minutes, until the beans are starting to soften but are not fully tender. Drain into a jar or bowl to reserve the cooking liquid.
- Cook the bacon and onion. Heat a skillet over medium heat. Cook the diced bacon until some of the fat has rendered but it is not fully crisp. Add the onion and cook 3 to 5 minutes, until softened.
- Mix the beans. Heat the oven to 300°F. Add the drained beans, bacon, onion, molasses, brown sugar, Worcestershire, vinegar, salt, and pepper to a Dutch oven or covered baking dish. Add enough of the reserved cooking liquid to barely cover the beans and stir gently.
- Bake covered. Cover and bake 3 to 4 hours, stirring about once an hour. If the beans look dry, add a splash of hot water.
- Bake uncovered. Remove the lid and bake another 30 to 60 minutes, until the beans are very tender and the sauce is dark, glossy, and clings to the beans.
- Rest. Let the beans rest 10 to 15 minutes before serving. The sauce will thicken a little more as it cools.
Nutrition
Notes
Can I Make Baked Beans in a Slow Cooker?
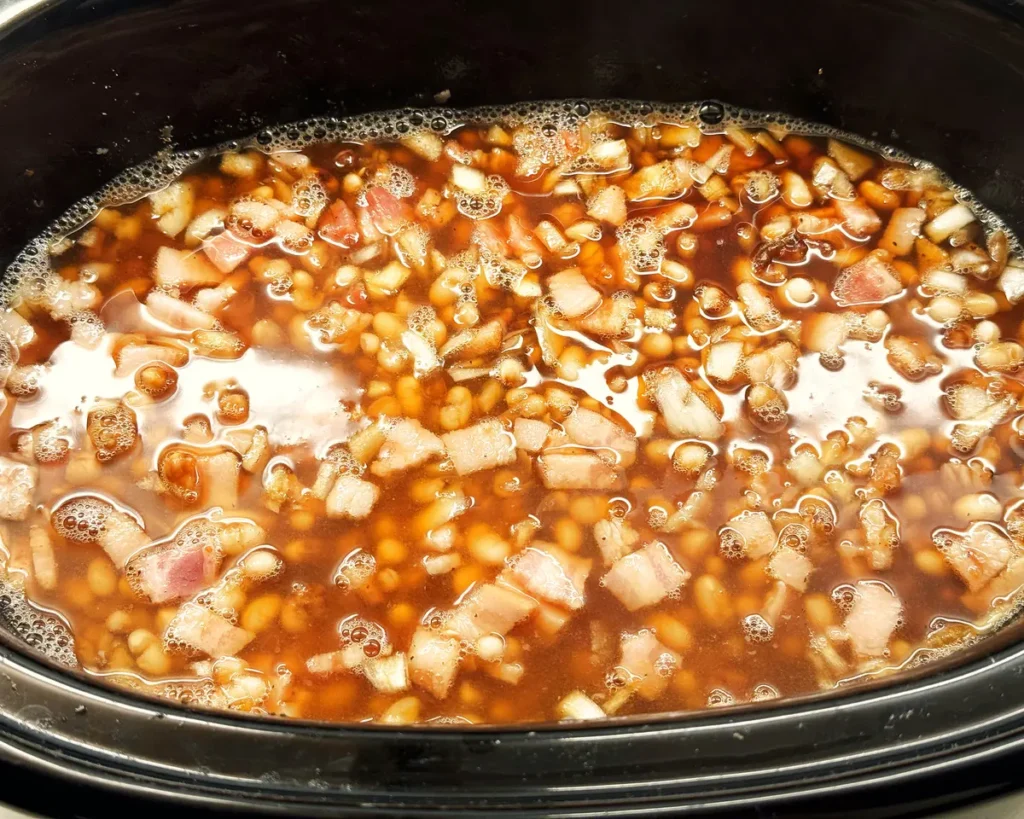
You sure can, and this is what I reach for when I don’t want to keep an eye on the oven all afternoon. Soak and simmer the beans just like above, then add everything to the slow cooker with just enough of the reserved cooking liquid to barely cover. Cook on LOW for 8 to 10 hours, until the beans are very tender.
Slow cookers hold in a lot of moisture, so don’t worry if the sauce looks thin at the end… that’s totally normal. If it does, take the lid off and cook on HIGH for 30 to 90 minutes to thicken it up. Or, to get that same thick, oven-baked finish, transfer the beans to a baking dish and bake uncovered at 350°F for about 30 minutes.
Tips for the Best Baked Beans
A few small things make a real difference here, and most of them I figured out by getting them a little wrong first (I make the mistakes so you don’t have to!)
Why are my beans still hard after cooking?
Usually it’s one of three things: old dried beans (they can sit on a shelf for ages), hard water, or salt and acid added too early. That’s why we wait to add the salt, vinegar, and molasses until after the simmer. If a batch is being stubborn, just give it more time in the oven… beans soften eventually, they sometimes just take longer than the clock says.
How do I keep them from being too sweet?
Start a little low and build up. I add most of the brown sugar at the beginning and save that last tablespoon for the very end, after tasting. The optional teaspoon of apple cider vinegar helps too, because a bit of acid balances the sweetness and keeps the beans from tasting like dessert.
Storing and Reheating
These keep beautifully, and honestly I think the flavor settles and gets even better the next day. Store leftovers in an airtight container in the fridge for up to 4 days. One thing to remember: cold baked beans taste more intense than warm ones, so warm them before you judge the flavor. Reheat gently on the stove or in the microwave with a small splash of water, since the sauce thickens up as it chills. They also freeze well for up to 3 months. Just thaw overnight in the fridge before reheating.
What to Serve with Baked Beans
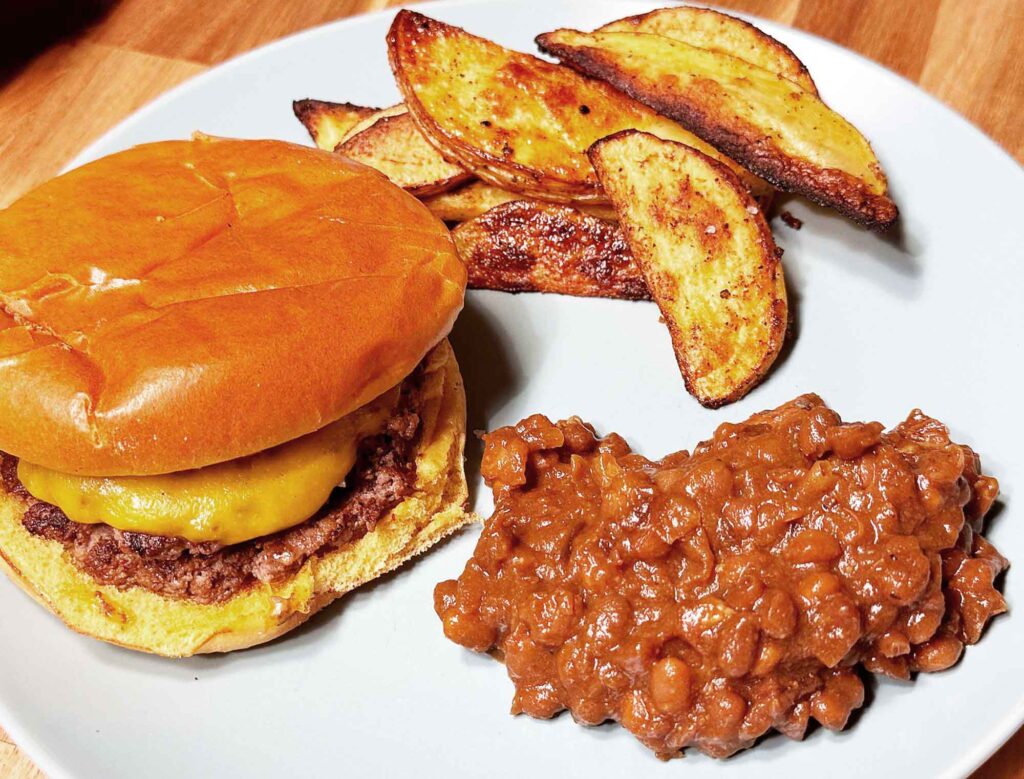
Baked beans are a cookout classic for a reason. We love them next to oven-baked BBQ ribs, alongside burgers and hot dogs, or with a wedge of cornbread to mop up that sauce. They’re hearty enough to anchor a simple supper too, with not much more than a salad on the side.
More Cozy, From-Scratch Favorites
If you love a pot of beans cooked slow, you might also like my brown beans recipe. And for another comfort-food dinner that tastes like it cooked all day (but is actually really fast), try my Salisbury steak.
Give these beans a try the next time you’ve got time to prep them, and let me know how they turn out for you. There’s something so satisfying about a pot of beans you made yourself, start to finish.
Love,
Jennifer
Tried this recipe?
Tap the stars in the recipe card to leave a quick rating. Your rating helps other home cooks know this recipe works in a real kitchen, not just mine.
")
")


Meet Jennifer
Jennifer cooks and experiments in the kitchen at Maker Farm, where she focuses on simple pantry cooking, homemade staples, and practical recipes that make everyday meals easier. Over the years she has tested many ways to make cooking simpler and more dependable, and shares the methods that work best in her own kitchen, occasionally showing them on her Heart to Home at Maker Farm vlog.